Inspections
Record and track quality inspections, from a receiving check through measurements and visual checks to a final pass or fail and stock disposition.
Last updated on June 29, 2026
An inspection is the record of a quality check on parts or materials. You open one to write down what you inspected, what you measured, whether it passed or failed, and what to do with the goods afterward (accept them, reject them, send them back, and so on). Inspections keep the whole story in one place, so anyone can later see who checked what, when, and with what result. This guide walks you through the things you do most often: finding an inspection, creating one, reading it, recording its results, building a reusable inspection plan, and exporting your list.
You reach the module from the left sidebar under Quality Management, then Inspections.
Before you start
An inspection can stand on its own, so there is little to set up first. Two things are worth knowing:
- Every inspection needs an inspector, which is one of your team members (a user). You pick this person when you create the inspection.
- An inspection can link to other records in Qualis, all optional but useful: the product being inspected, the supplier it came from, the client it is for, a Non-Conformance Report (NCR) if something went wrong, and an inspection plan (a reusable checklist of what to measure). Inspection plans are covered near the end of this guide.
Find and browse your inspections
Start here to see everything you have and zero in on the one you need.
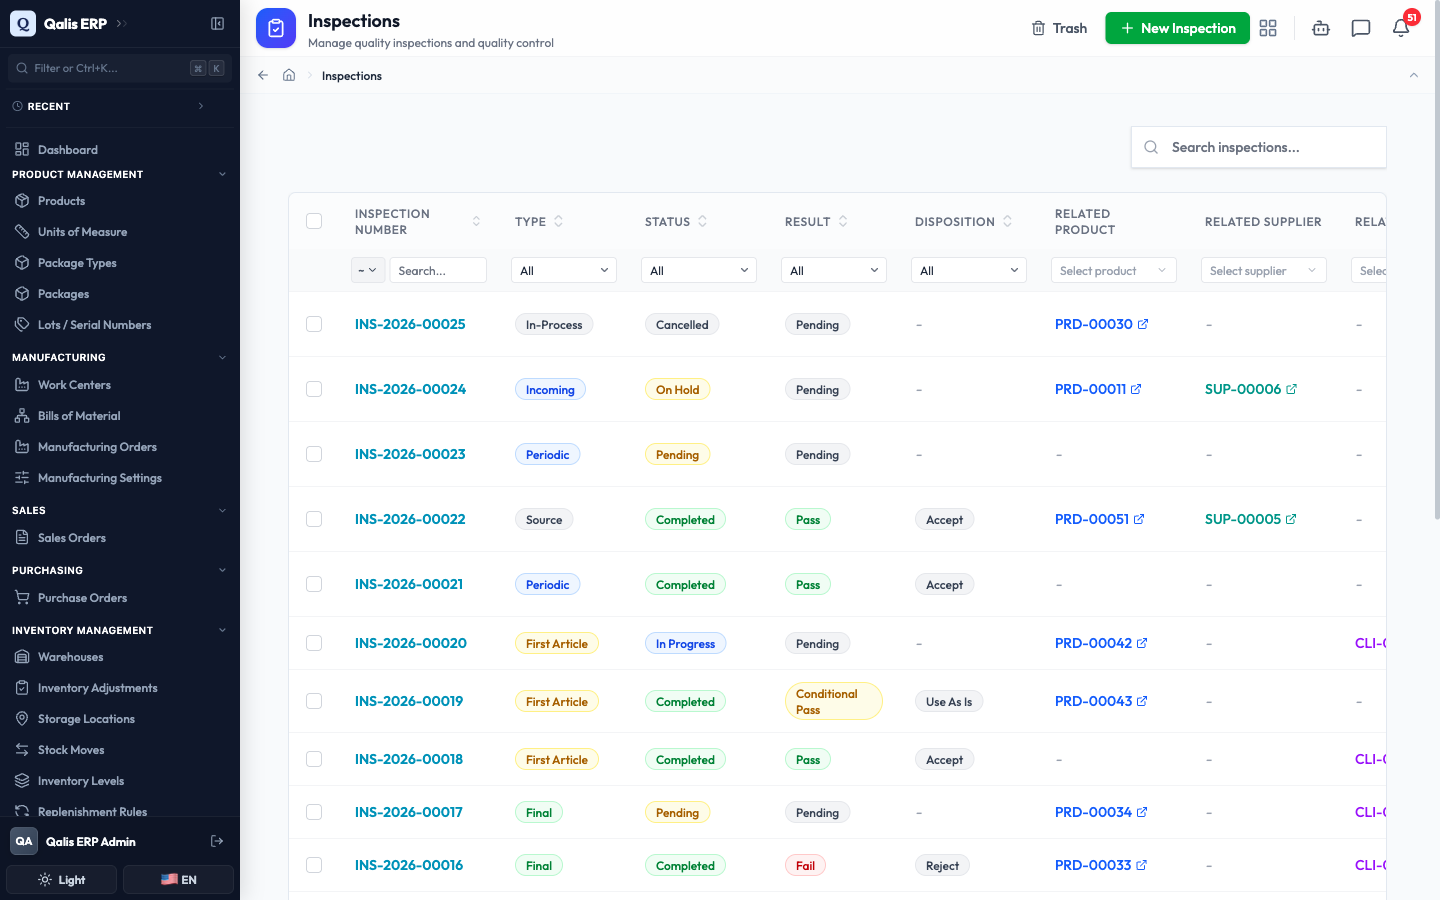
- Open Inspections from the sidebar. The page is titled Inspections. The table shows one row per inspection, with its Inspection Number, Type, Status, Result, Disposition, the related Product, Supplier, and Client, the Inspector, the Inspection Date, and more. The top right has a New Inspection button and a Trash button for deleted records.
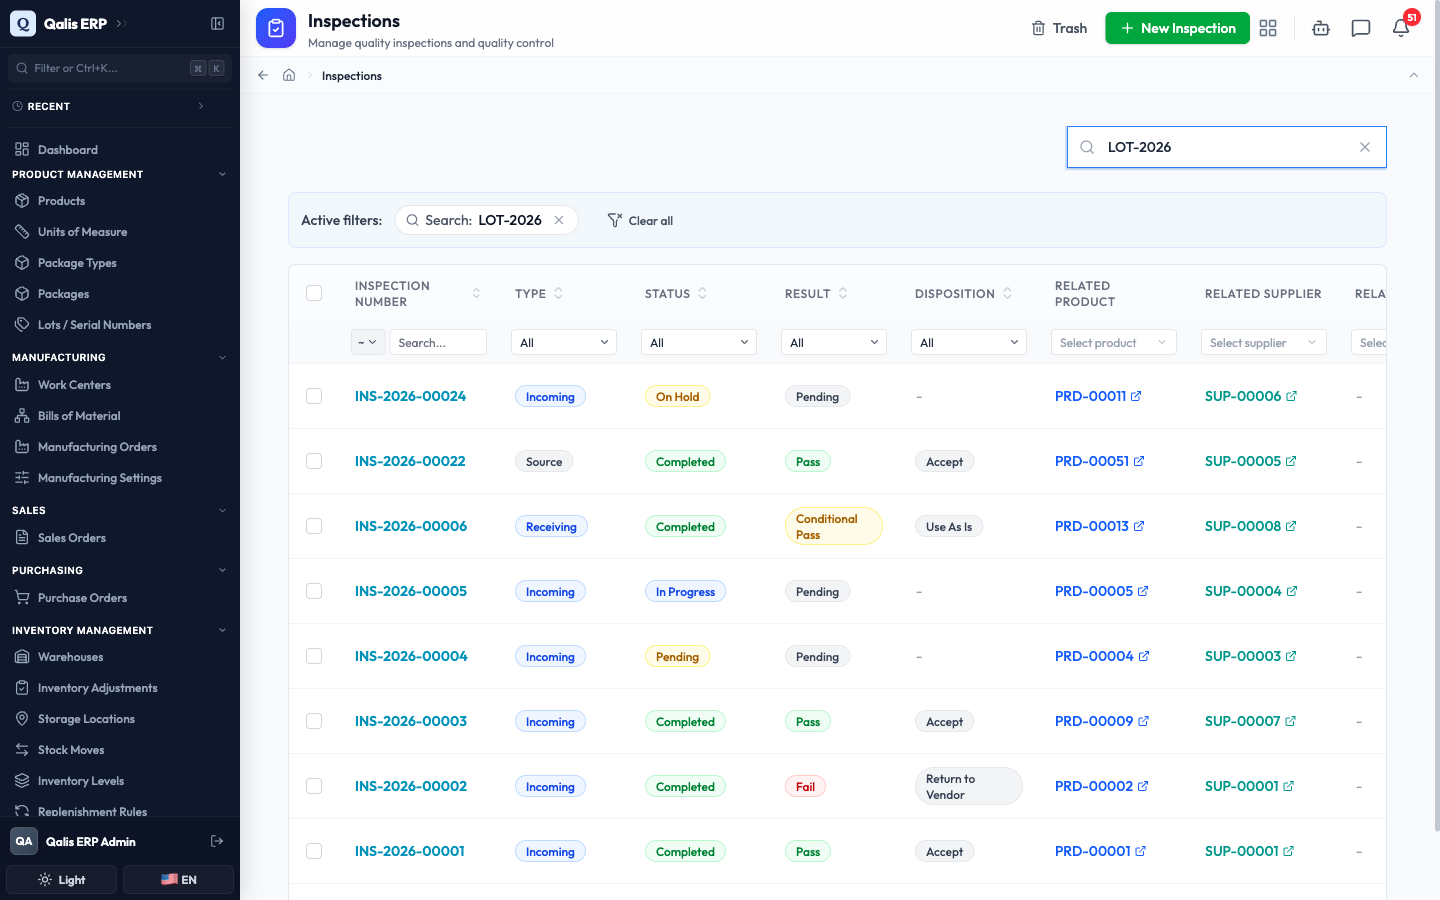
- To find one fast, type in the Search inspections... box. The list filters as you type, so there is no need to press Enter. Search looks at the inspection number, lot number, batch number, and notes.
- To see only inspections in a certain state, open the Status dropdown under the column heading and pick one, for example Completed. You can filter the same way by Type, Result, and Disposition, or by a Product, Supplier, Client, Inspector, or a date range.
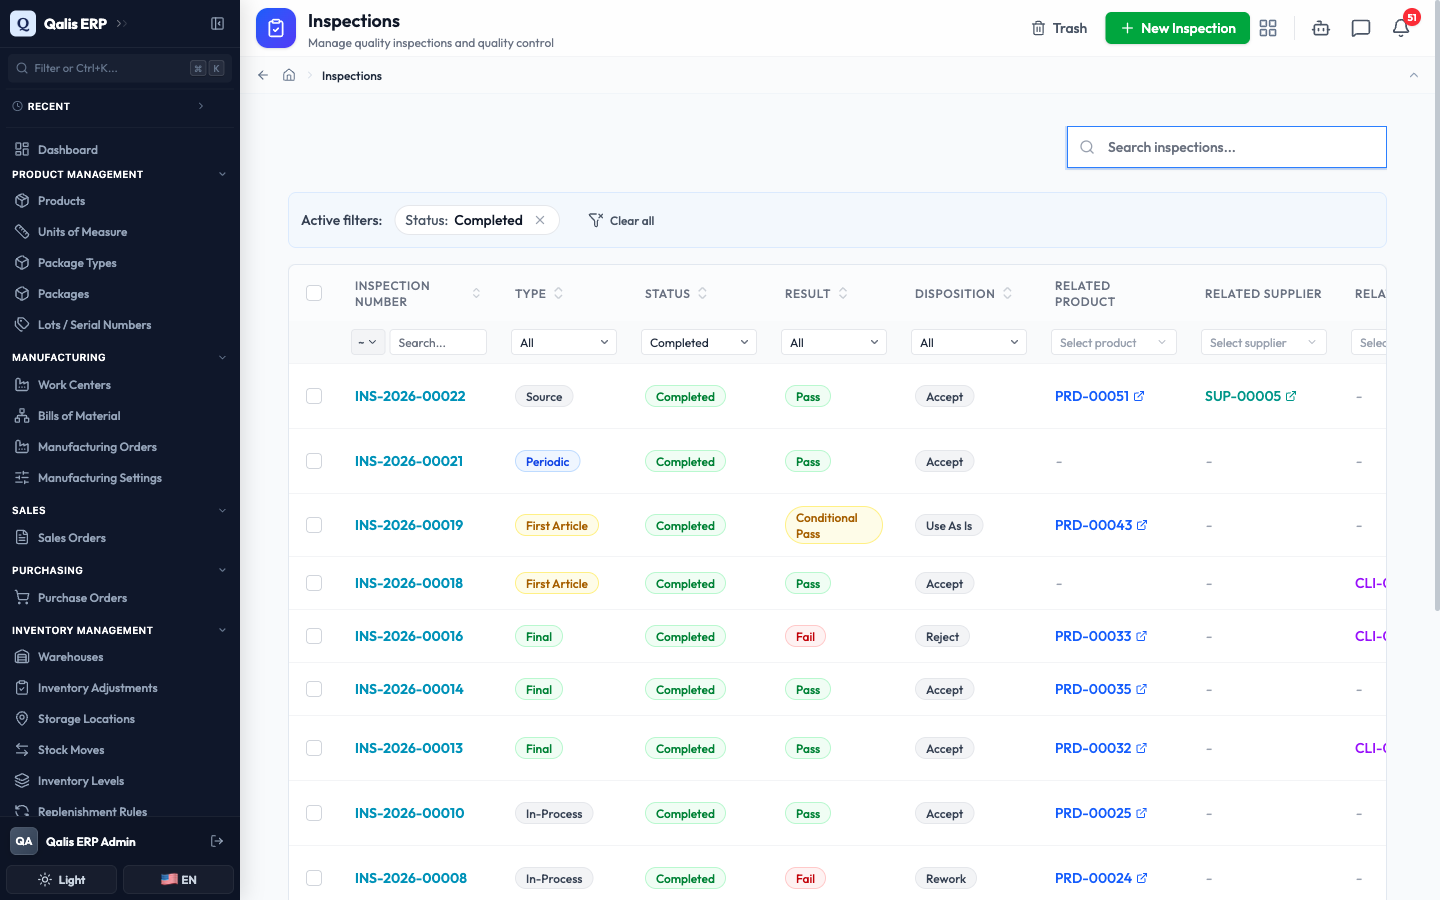
Whenever a filter is on, an Active filters banner appears showing what is applied. Click the small x on a filter to drop it, or Clear all to reset everything. The web address updates too, so you can bookmark or share a filtered view.
Create an inspection
This is the main task: opening a new record for a check you are about to perform or have just performed. The form is split into five tabs so you can fill it in one section at a time. You can save once the required fields (marked with a red asterisk) are filled, even if you complete the later tabs another day.
Basic Information
- On the list, click New Inspection at the top right.
- On the Basic Information tab, choose an Inspection Type. This says when in the process the check happens, for example Incoming (goods received from a supplier), In-Process, Final, First Article, Periodic, Receiving, or Source. This is required.
- Leave Status on Pending for now. You move it forward as the work progresses. Result can stay on Pending until you have a verdict.
- Pick an Inspector, the person doing the check. This is required. You can also name a Reviewer.
- Set the Inspection Date (required) using the calendar, which has a handy Today button. Add a Lot Number or Batch Number if the goods have one.
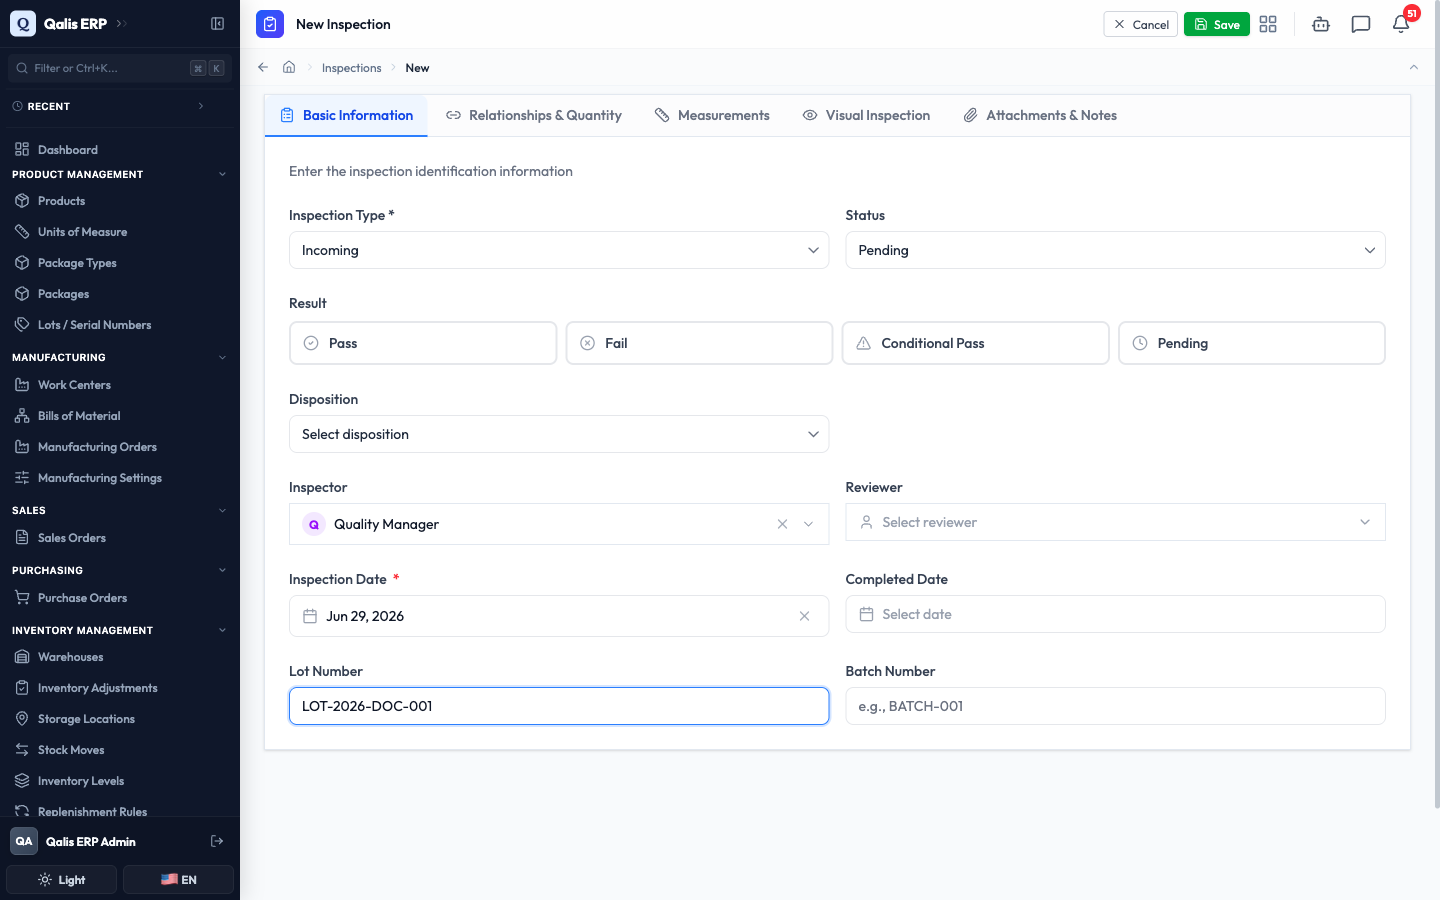
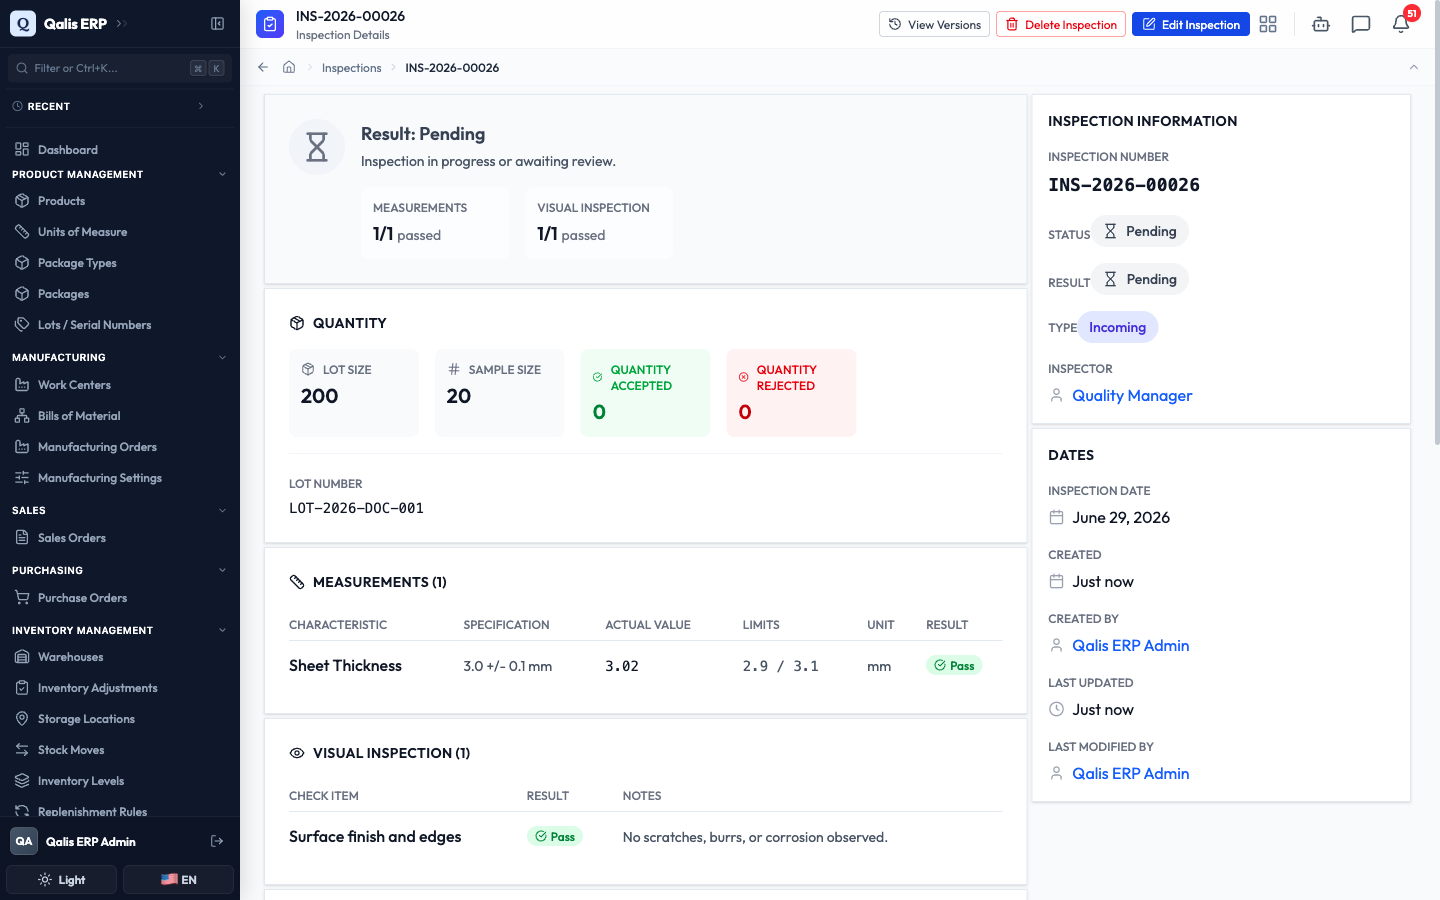
You do not type an inspection number. Qualis assigns one automatically (like INS-2026-00026) when you save.
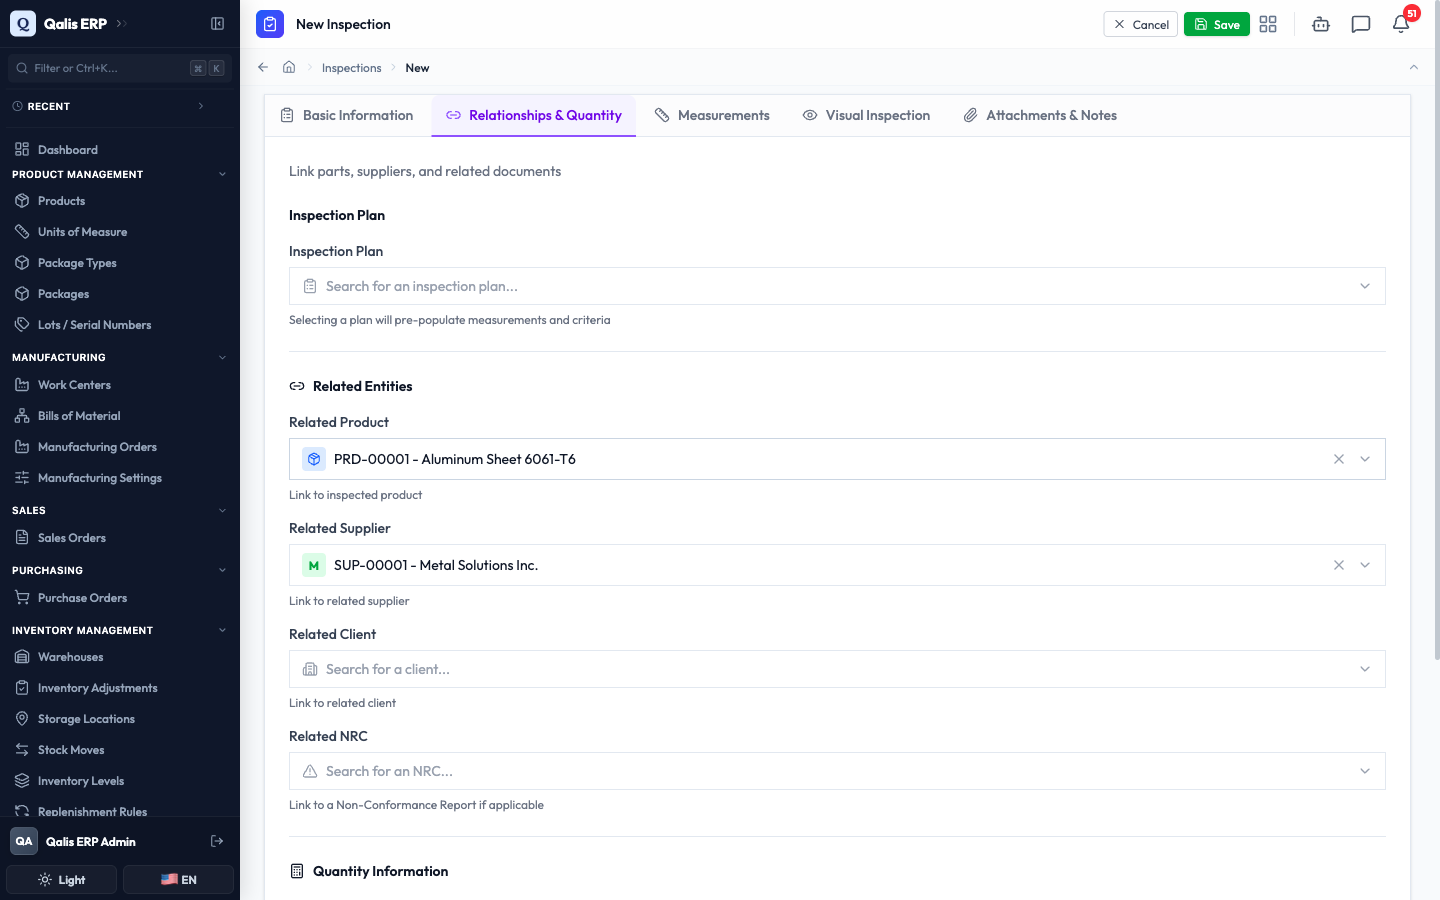
Relationships & Quantity
- Open the Relationships & Quantity tab. Link the records this inspection relates to: the Related Product, Related Supplier, Related Client, and a Related NRC if applicable. Each is a searchable picker.
- If you use a checklist for this kind of check, choose an Inspection Plan. Picking a plan pre-fills the measurements and checks for you, which saves a lot of typing.
- Fill in the Quantity Information: the Lot Size (how many are in the batch), the Sample Size (how many you will check), and, once you have inspected them, how many were inspected, accepted, and rejected.
Measurements
- Open the Measurements tab and click Add Measurement. For each thing you measure, type the Characteristic (what you measured, like Sheet Thickness), the Specification, the Actual Value you read, the Lower Limit and Upper Limit it must stay between, and the Unit. Then mark its Result as Pass, Fail, or N/A.
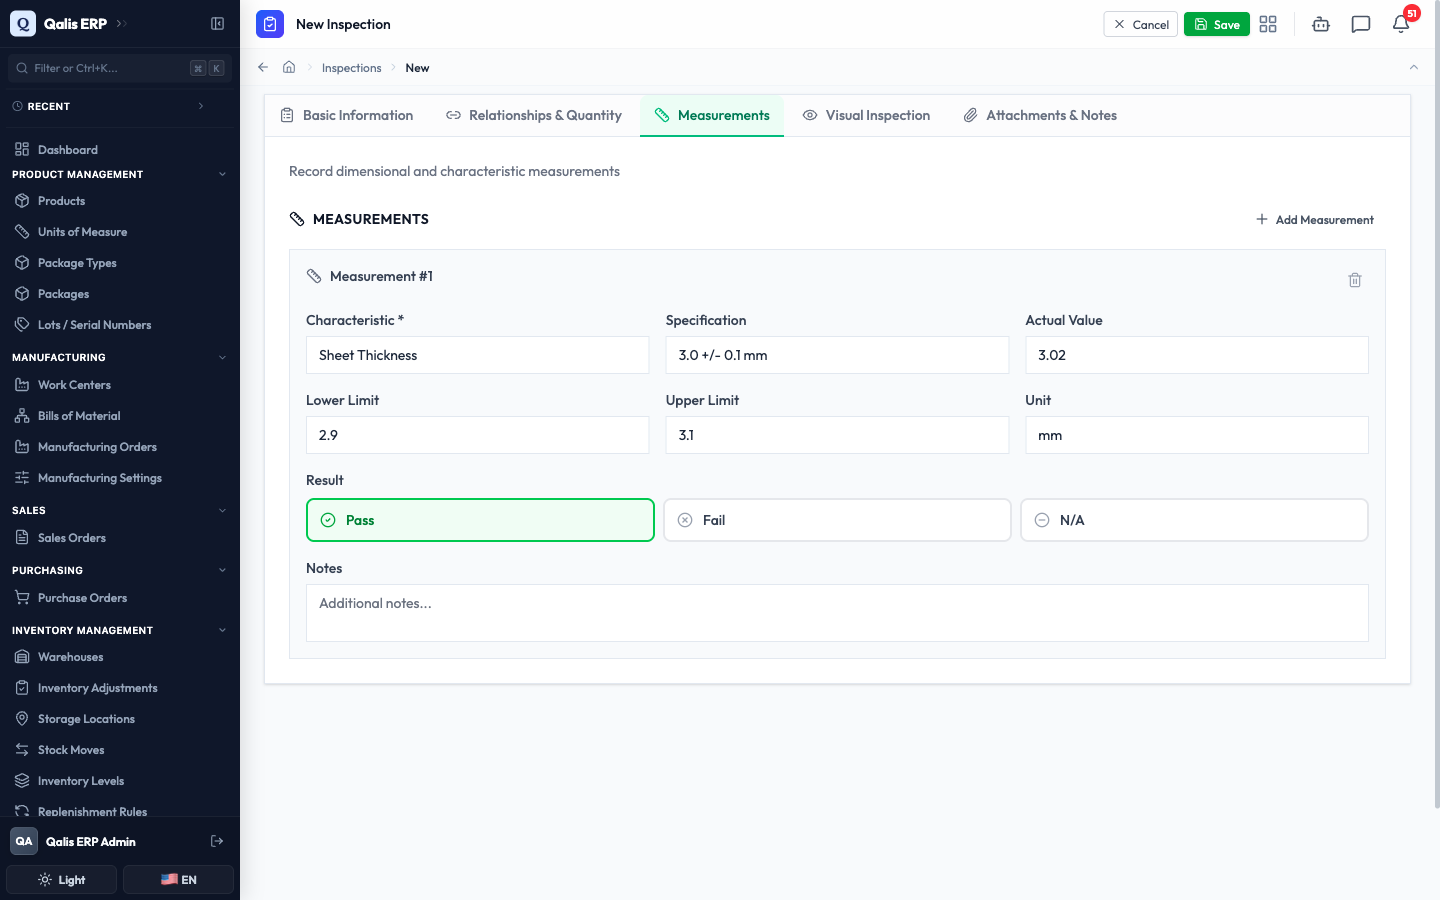
- Click Add Measurement again for as many characteristics as you need.
Visual Inspection
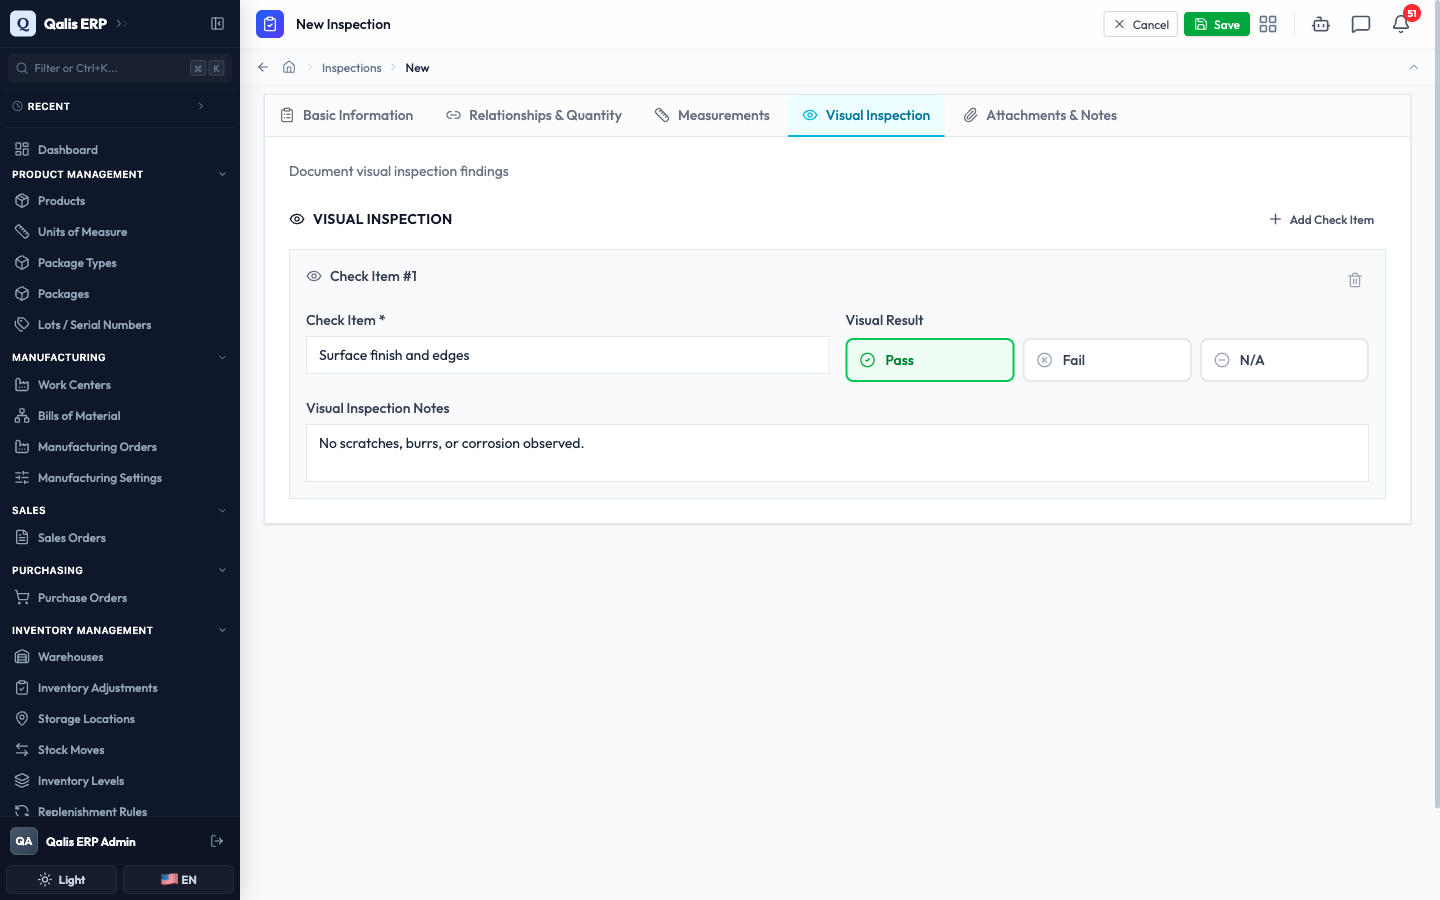
- Open the Visual Inspection tab and click Add Check Item for each thing you look at by eye, such as surface finish or color match. Write the Check Item, mark its Visual Result as Pass, Fail, or N/A, and add any Notes.
Attachments & Notes
- Open the Attachments & Notes tab. Drag photos or documents onto the Upload Documents area, or click Link Existing to point to a file already in your library. Add any overall Notes at the bottom.
- When you are ready, click Save at the top right.
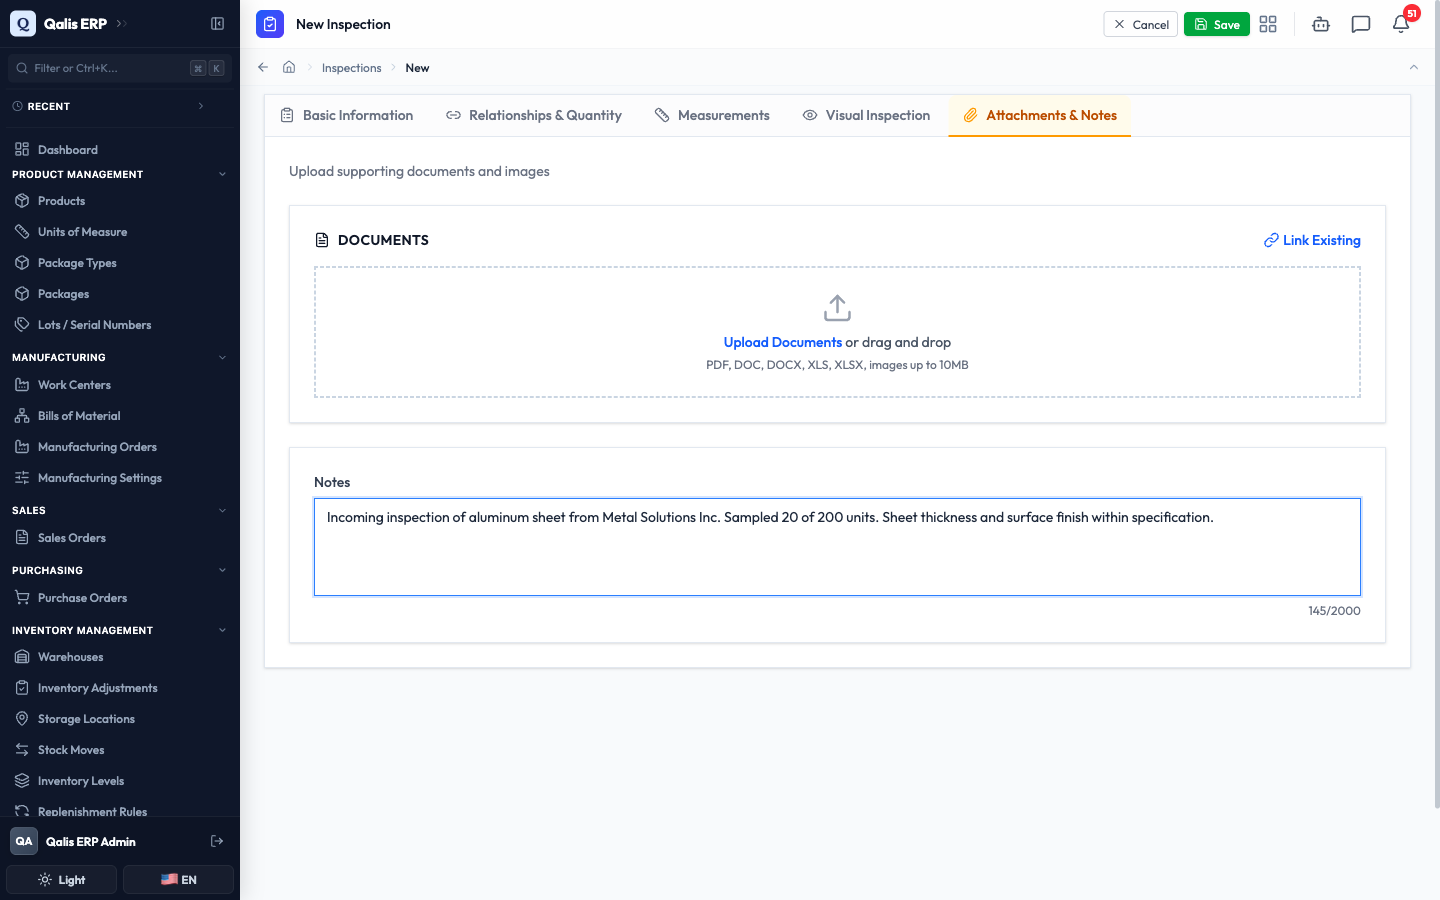
Qualis saves the inspection, gives it a number, and takes you straight to its detail page. The new inspection starts in Pending status.
Read an inspection's details
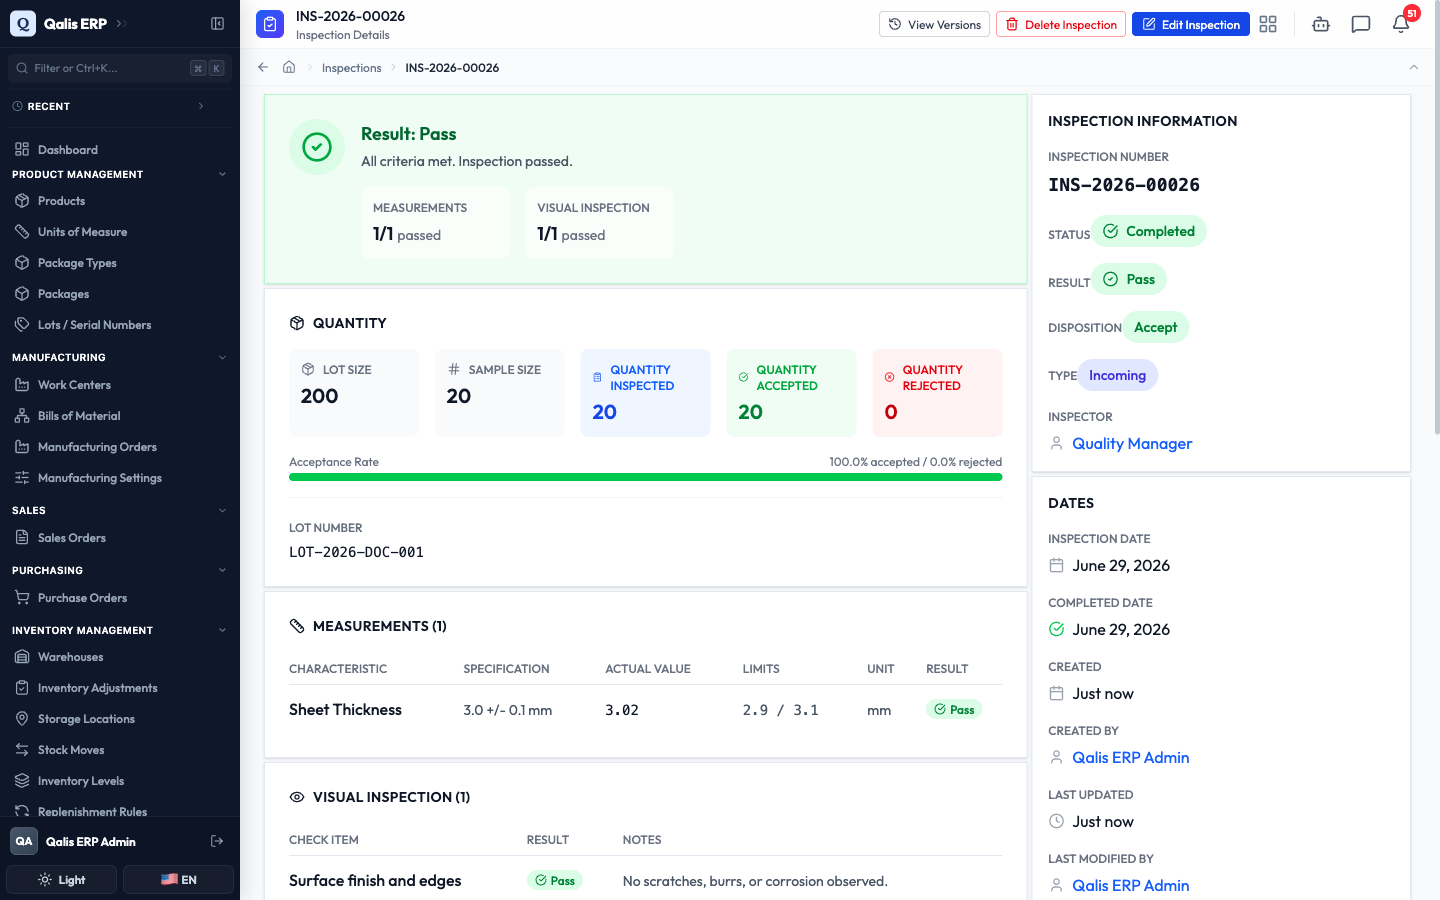
Open any inspection to see the full picture at a glance. Click its Inspection Number in the list. The top of the page shows the number with View Versions, Delete Inspection, and Edit Inspection buttons. A banner shows the overall Result and how many measurements and visual checks passed. The right sidebar gives you the quick facts: the Inspection Information (status, result, type, inspector) and the key Dates.
- Scroll down to the Measurements and Visual Inspection sections. Each shows a table of what was checked, the values against their limits, and a green or red result for every line.
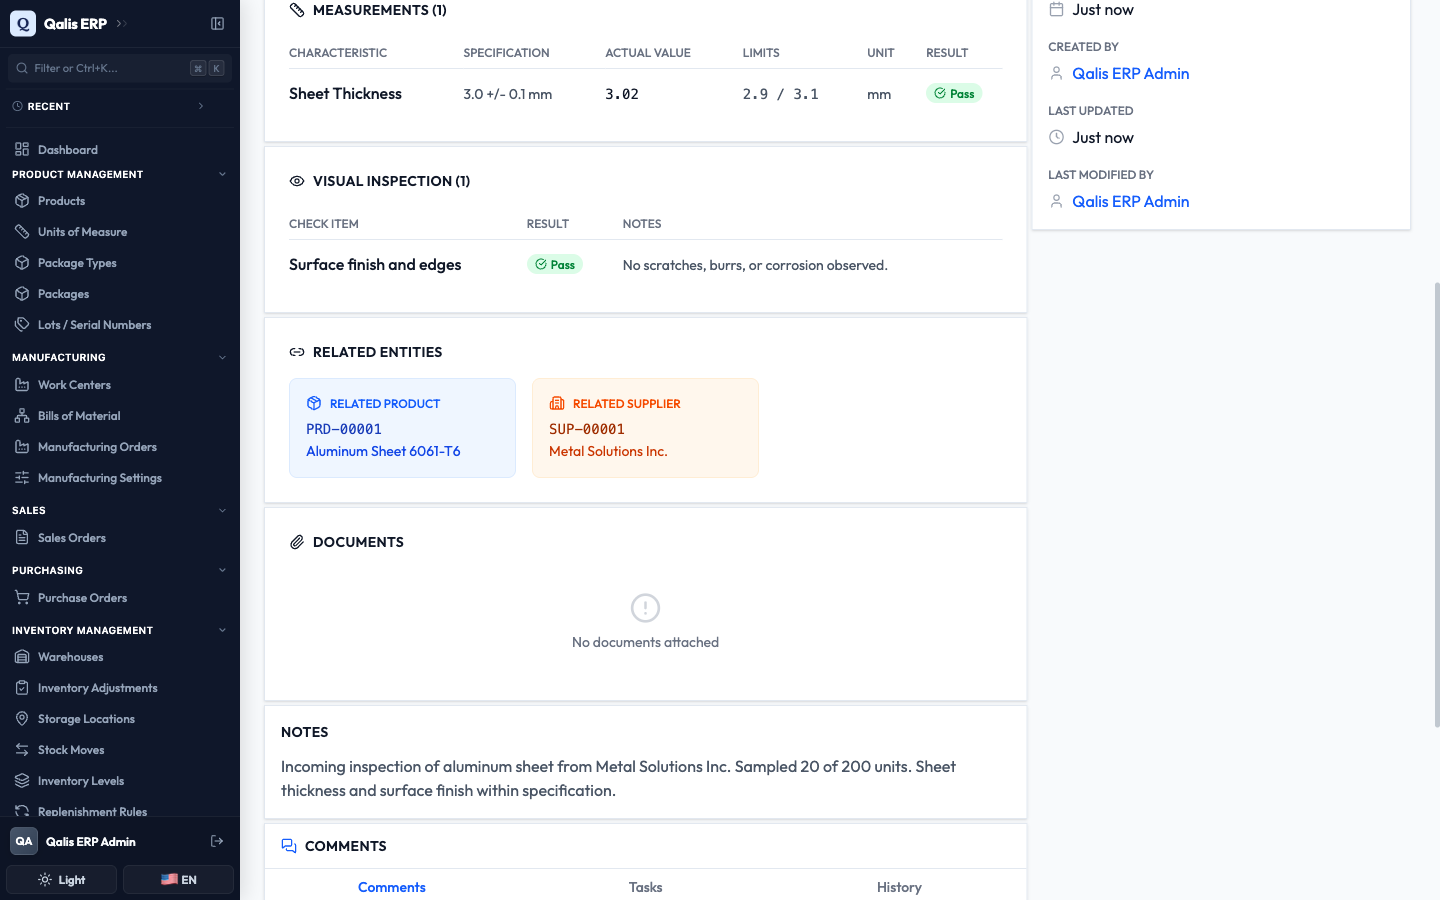
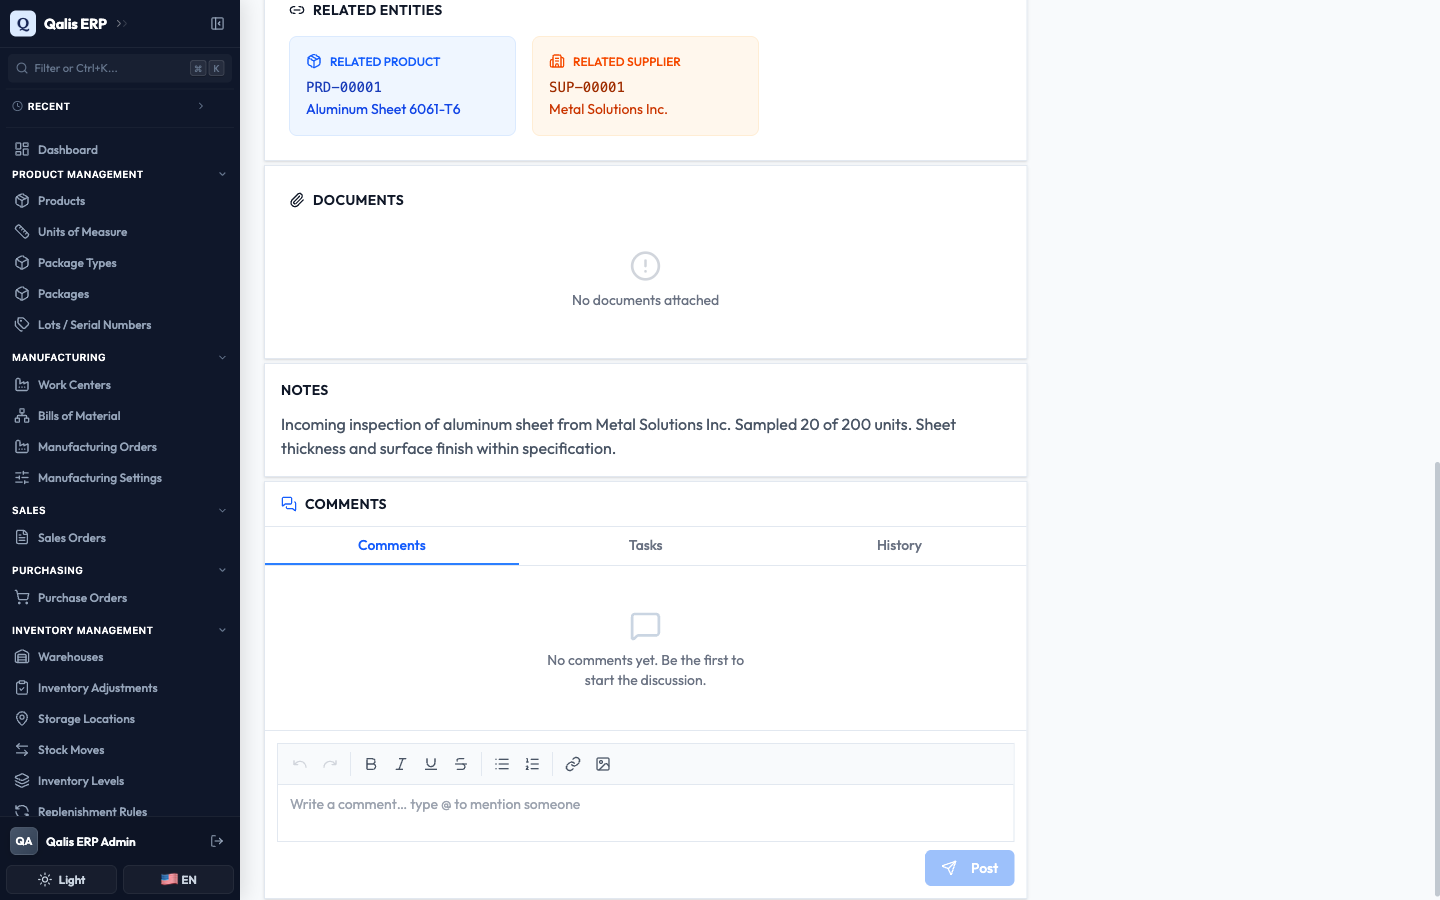
- Keep scrolling to the Related Entities section, where the linked product, supplier, client, and any NCR appear as clickable cards so you can jump straight to them. Below that are the Documents and your overall Notes.
Record results and complete an inspection
As you carry out the check, you edit the inspection to record what you found and to move it through its life, from Pending to In Progress to Completed (or On Hold and Cancelled). You do this from the same five tabs you used to create it.
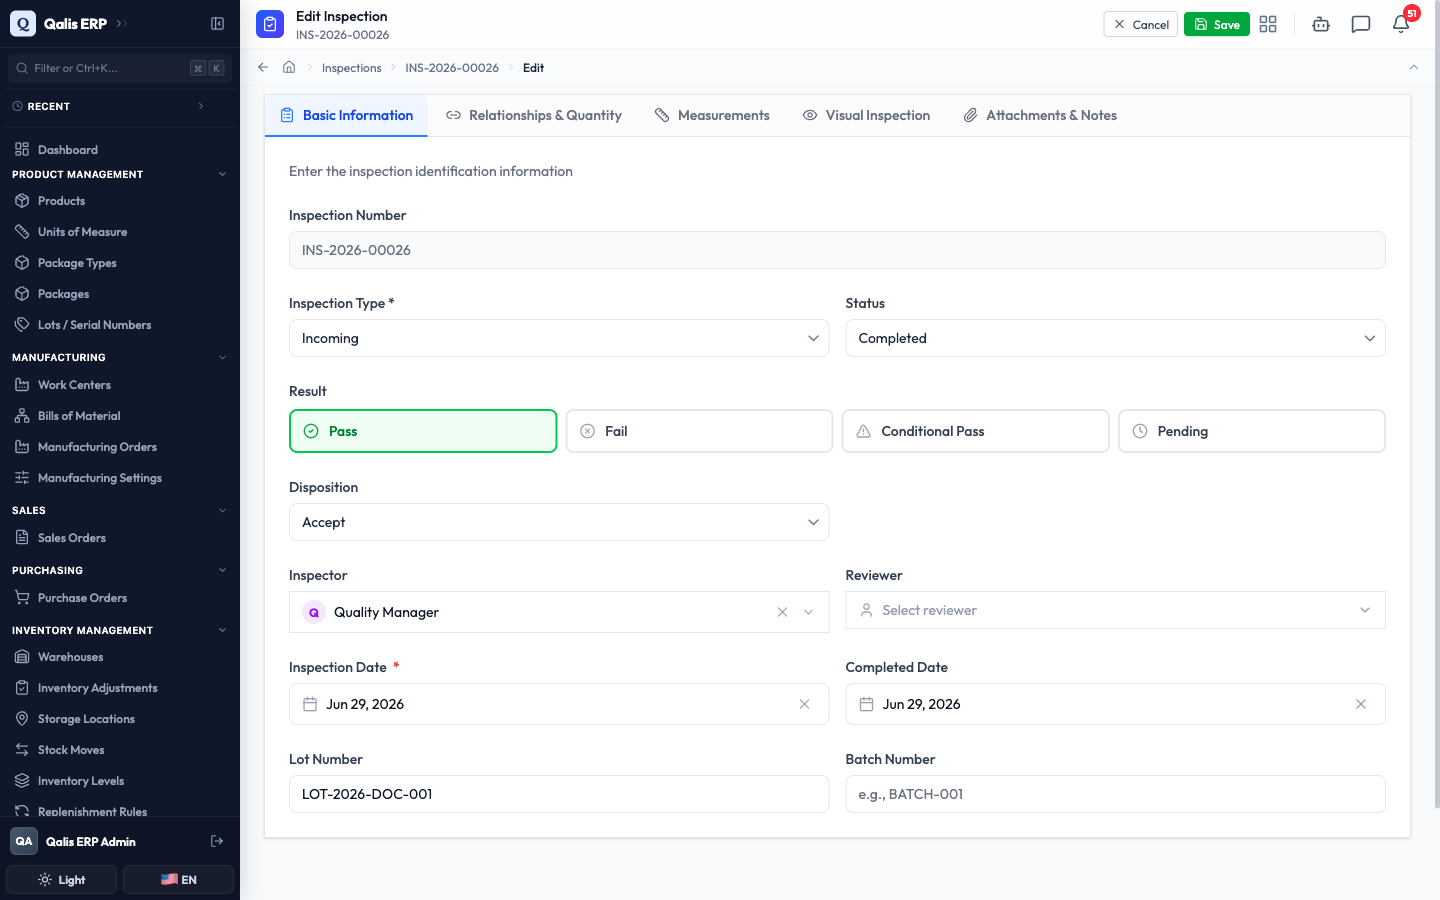
- On the detail page, click Edit Inspection at the top right.
- On the Basic Information tab, change the Status to Completed once the check is done. Set the overall Result to Pass, Fail, or Conditional Pass. For incoming or receiving goods, choose a Disposition to say what happens to them: Accept, Reject, Rework, Use As Is, Return to Vendor, or Scrap. Set the Completed Date with the calendar.
- On the Relationships & Quantity tab, fill in how many items you inspected, accepted, and rejected. Add or update measurements and visual checks on their tabs if you have new readings.
- Click Save at the top right. You return to the detail page, where the banner now shows the final result and the status badge reads Completed.
The Status dropdown is how you move an inspection along: Pending, In Progress, Completed, On Hold, and Cancelled. Set it to On Hold if you are waiting on something, then back to In Progress when you resume.
Set up an inspection plan
An inspection plan is a reusable template that lists what to measure and check for a given part or process. Build it once, then attach it to new inspections so the measurements and checks are filled in for you.
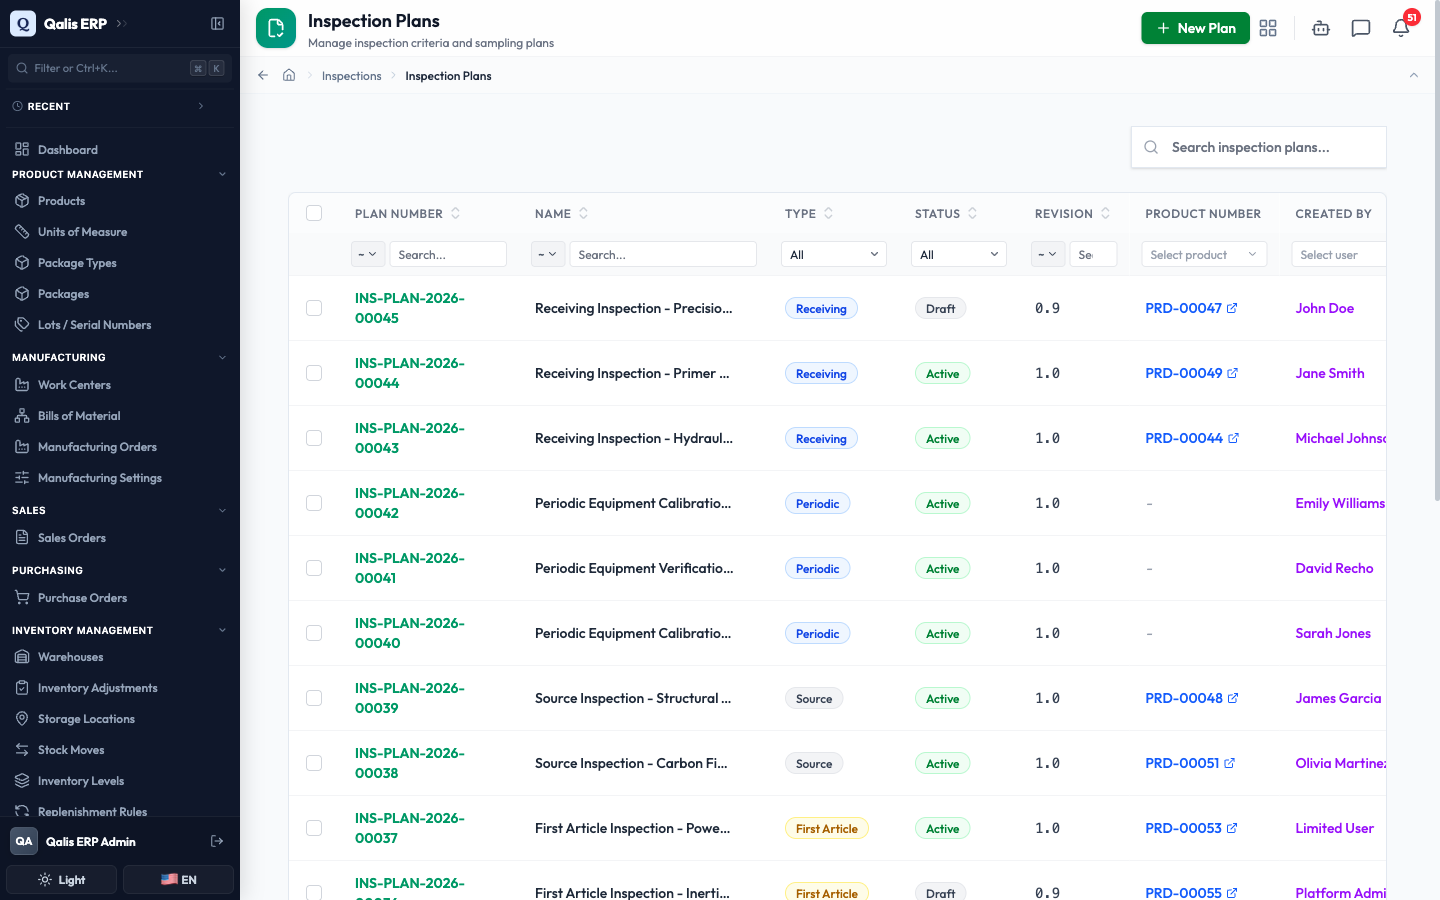
- From the inspections area, go to Inspection Plans. The page lists your plans with their Plan Number, Name, Type, Status, and Revision. A plan's status is Draft while you build it, Active once it is ready to use, and Obsolete when it is retired.
- Click New Plan. The form is a five-step wizard. On Basic Information, give the plan a Name and an Inspection Type (both required), an optional Description, a Revision label like 1.0, and the Related Product if it applies. Leave Status on Draft while you work.
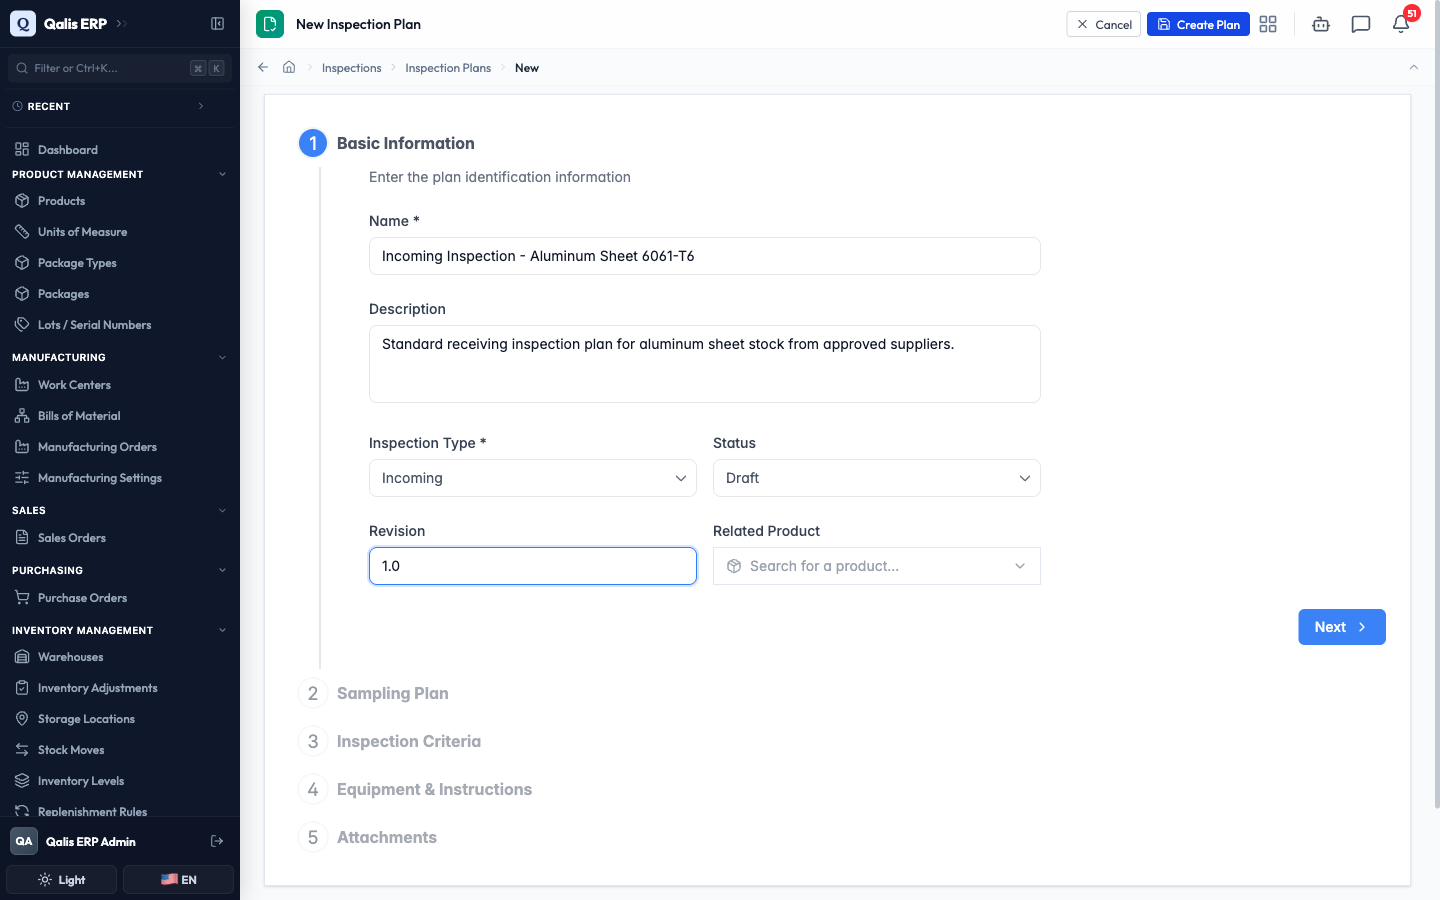
- Step through the rest: Sampling Plan (how many to sample and the AQL level), Inspection Criteria (the characteristics to measure, with their limits and which are critical), Equipment & Instructions (the tools needed and how to do the check), and Attachments. Click Save when done.
- Open any plan to read it. The detail page lays out the sampling plan, the criteria, the required equipment, and the work instructions, with Edit Plan and Delete Plan buttons at the top.
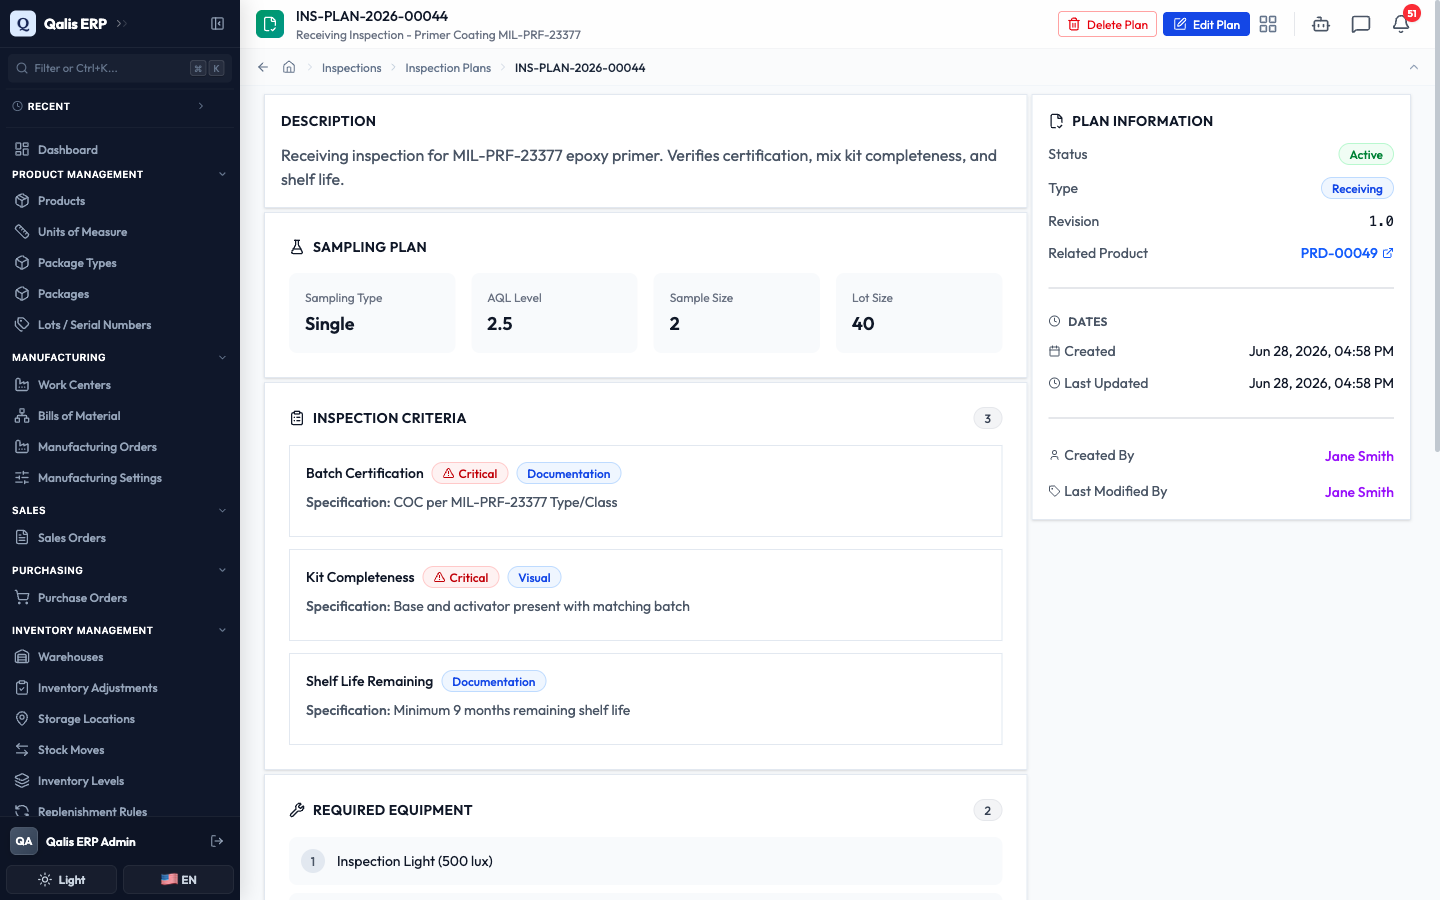
A plan only pre-fills inspections once it is ready. To make a draft usable, click Edit Plan and set its Status to Active.
Export your inspections
When you need your inspections outside Qualis, for a report or an audit, you can export them.
- On the list, tick the checkbox at the start of each row you want. A bar appears showing how many are selected.
- Click Export CSV or Export Excel. Your file downloads with the selected records and their details.
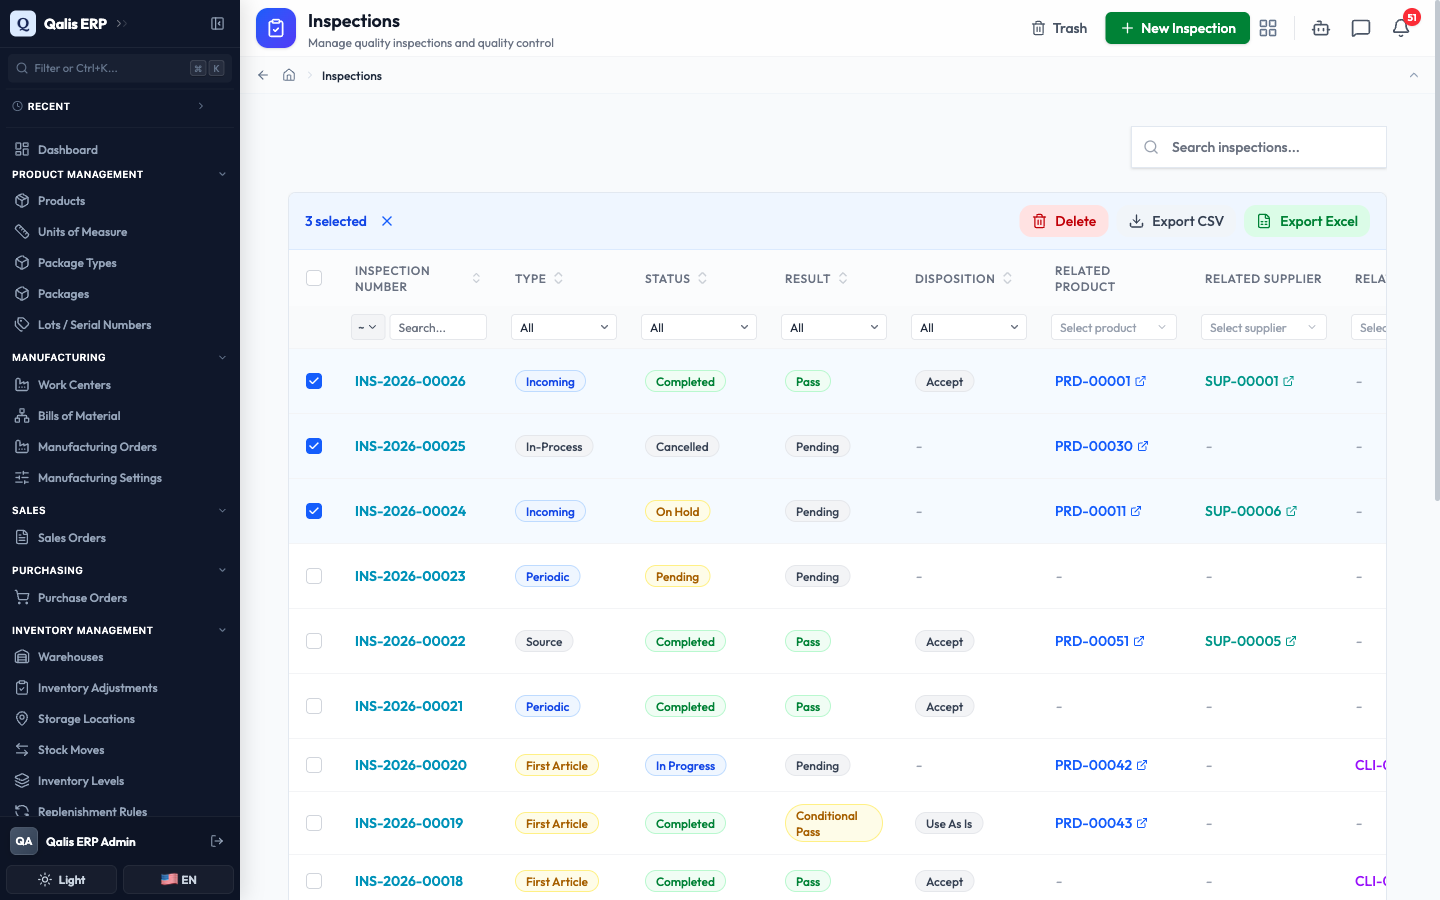
To export many records at once, use the checkbox in the table header to select the whole page first.
Good to know
A few terms show up throughout the module:
- Inspection type: when the check happens. Incoming and Receiving are for goods arriving from a supplier, In-Process is during production, Final is before shipping, First Article is the first piece off a new setup, Periodic is a routine recurring check, and Source is a check at the supplier's site.
- Result: the overall verdict. Pass means everything met spec, Fail means something did not, and Conditional Pass means it passed with noted exceptions.
- Disposition: what happens to the goods after the check, such as Accept, Reject, Rework, Use As Is, Return to Vendor, or Scrap.
- Lot and sample size: the lot size is how many items are in the batch; the sample size is how many of them you actually check.
- Inspection plan: a reusable template of measurements and checks you attach to an inspection so you do not have to type them each time.
- AQL (Acceptable Quality Level): a standard setting on a plan that decides how big a sample to take and how many defects are tolerable.