Replenishment Rules
Tell Qualis when a product is running low at a location and how to refill it, so the system flags what needs reordering and can draft the purchase orders and transfers for you.
Last updated on June 30, 2026
A replenishment rule is a standing instruction that watches the stock of one product in one place and reacts when it gets low. You set the level at which it should reorder, the amount to bring it back up to, and where the new stock should come from (a supplier, another warehouse, or your own production). Once a rule is in place, Qualis keeps an eye on the stock for you, tells you what needs reordering, and can even draft the purchase orders and transfers automatically. This guide covers the things you do most often: browsing your rules, creating one, reading it, editing it, checking what needs reordering right now, and running the engine that turns rules into orders.
Before you start
A rule connects things you set up elsewhere in Qualis, so have these ready first:
- A product to monitor, set up in Products. Every rule watches one product.
- A storage location where you keep the stock, set up in Storage Locations. Every rule watches one location, such as a shelf or a bin.
- For a Buy rule, a supplier to order from, set up in Suppliers.
- For a Transfer rule, a source location to pull stock from (another warehouse or bin).
You reach the module from the left sidebar under Inventory Management, then Replenishment Rules.
You can have only one rule per product and location pair. If a rule already exists for that combination, Qualis blocks the save and shows a message that a rule already exists for that product and location.
Find and browse your rules
Start here to see every rule and zero in on the one you need. The module opens on the Reordering Rules tab, which lists one row per rule with its Code, Product, Location, Status, Strategy, Route, Reorder Pt., Target Qty, Supplier and more. Many cells are links, so you can jump straight to the product, location or supplier.
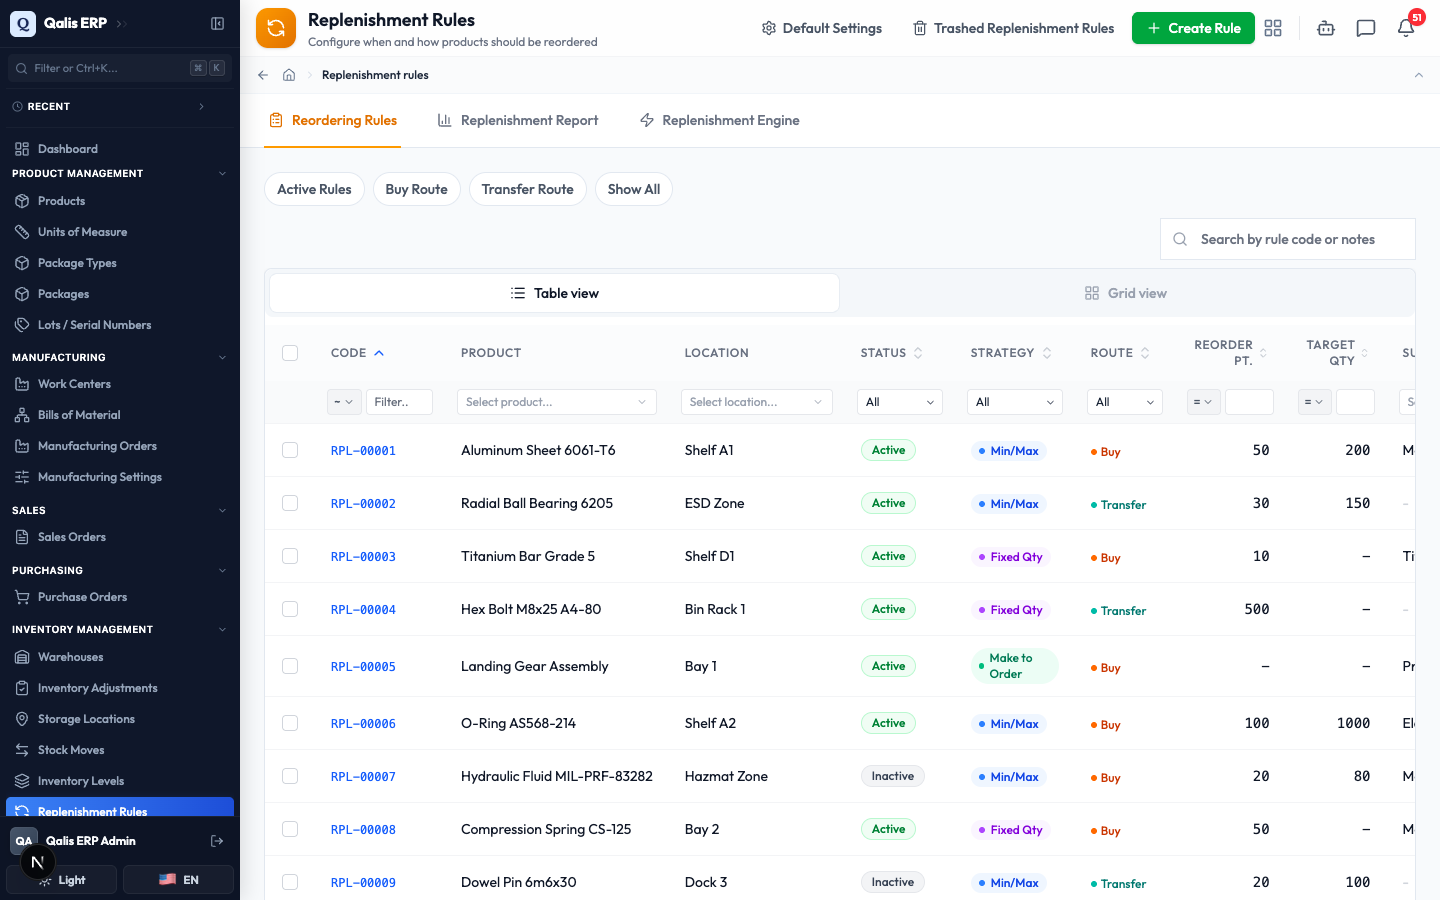
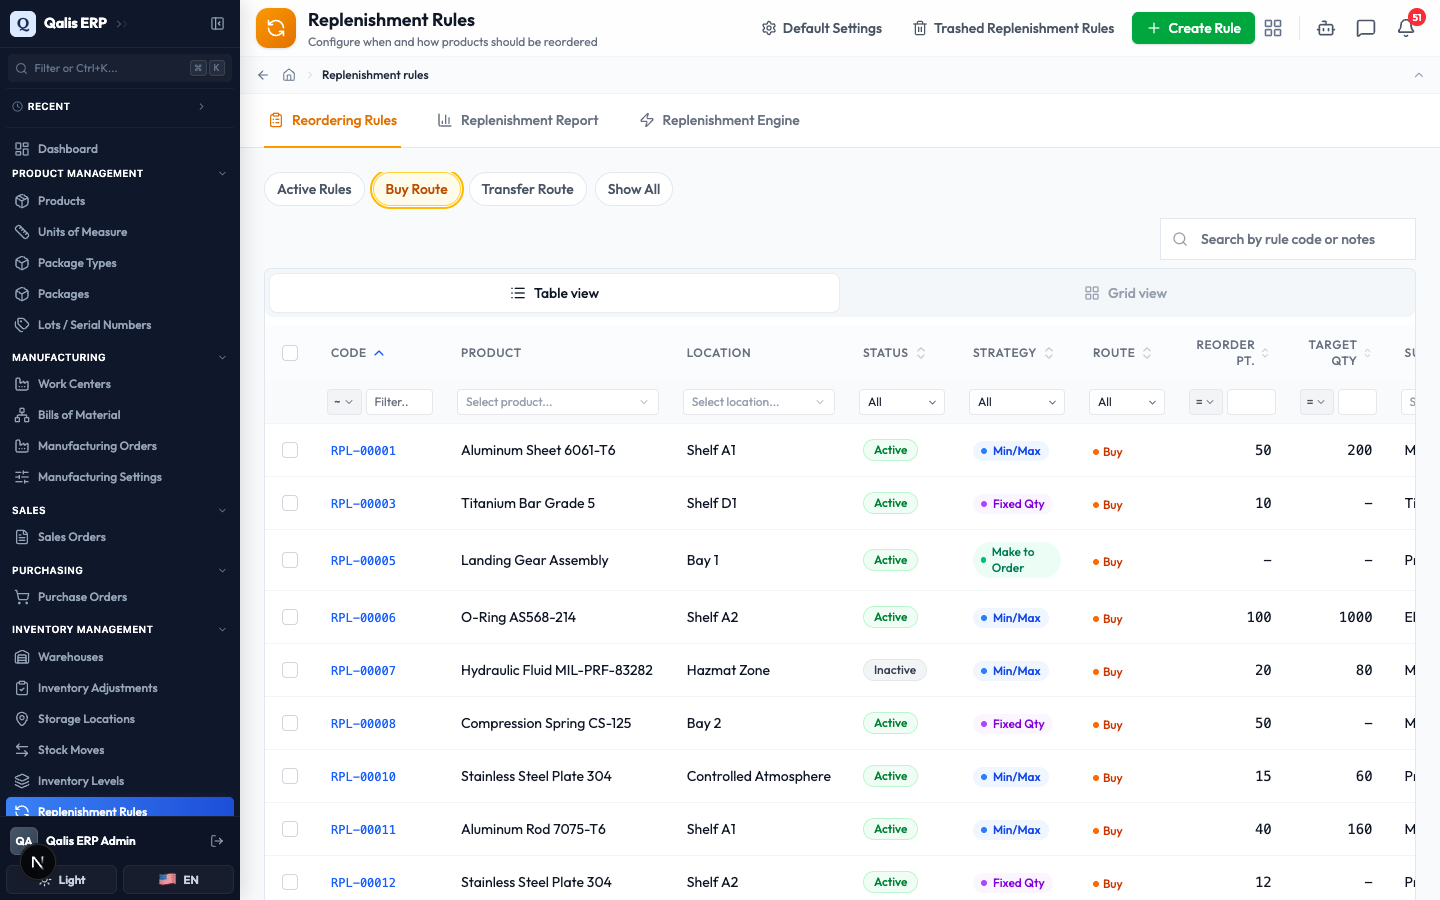
- Use the quick filters above the table for the most common views: Active Rules, Buy Route, Transfer Route or Show All. For example, click Buy Route to see only the rules that reorder by purchasing from a supplier. The pill highlights to show it is on.
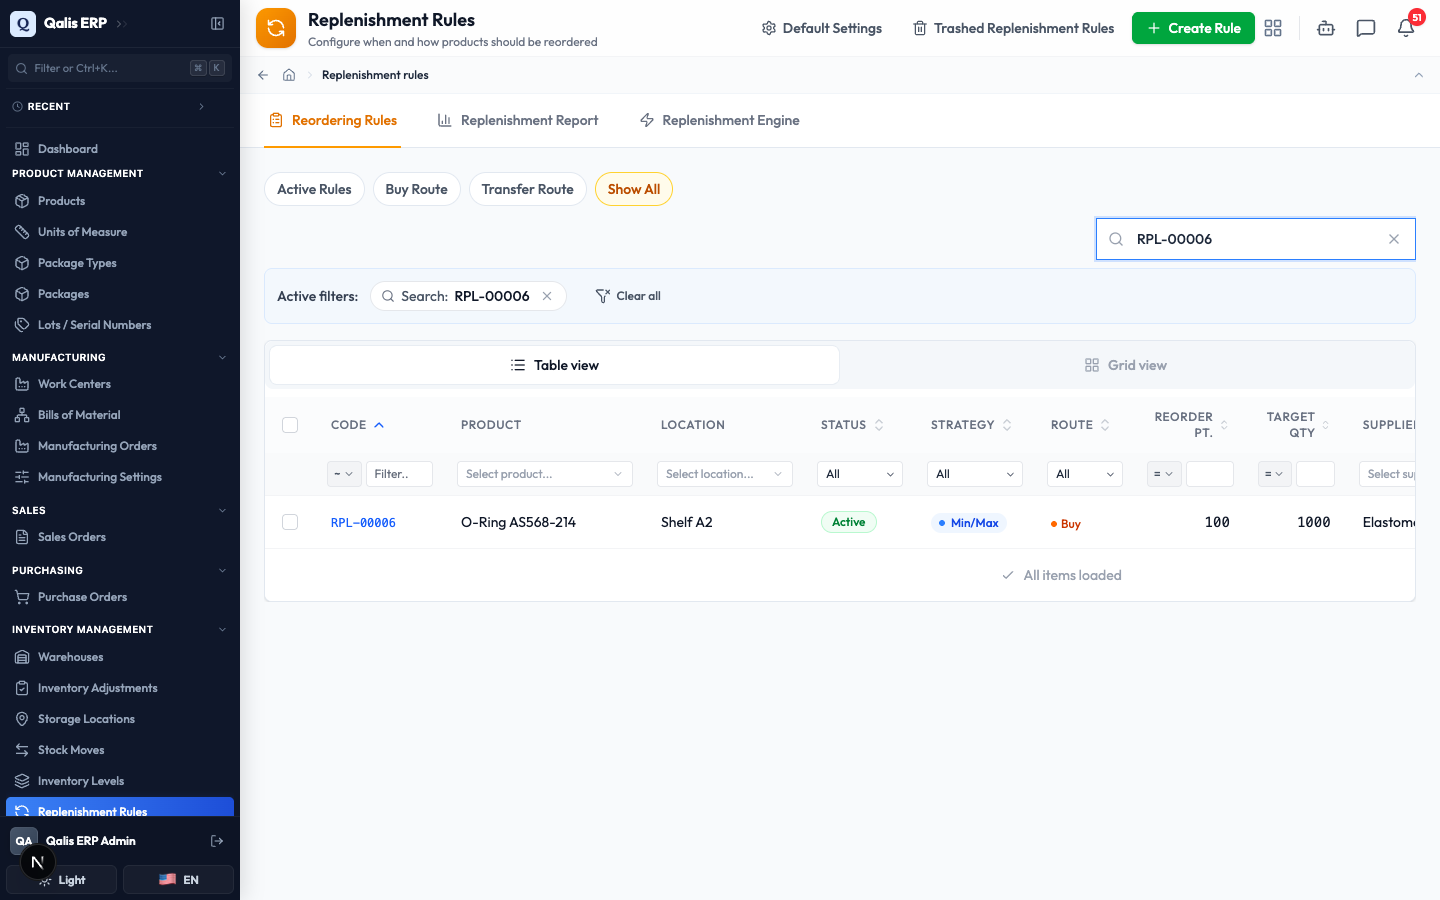
- To find one rule fast, type in the Search by rule code or notes... box on the right. The list filters as you type, so there is no need to press Enter.
- To narrow by a single attribute, use the small filter box under any column heading. For example, open the Strategy filter and pick Make to Order to see only those rules. You can filter the same way by Status, Route, Product, Location, Supplier, a quantity, or an updated-date range.
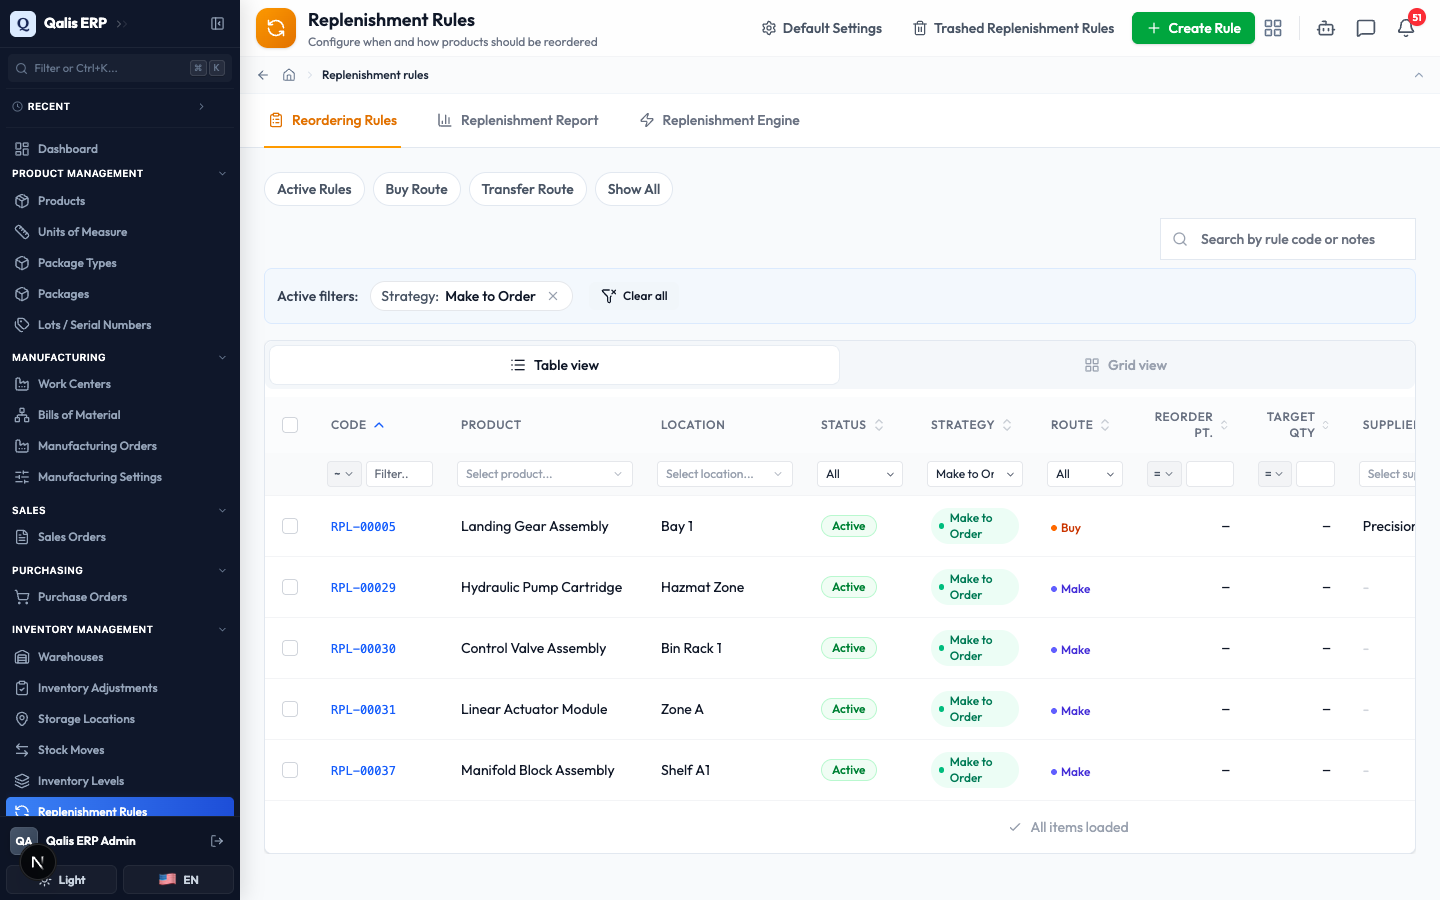
Whenever a filter is on, an Active filters banner appears above the list showing what is applied. Click the small x on a chip to drop that filter, or Clear all to reset everything. The web address updates too, so you can bookmark or share a filtered view.
Create a replenishment rule
This is the main task: setting up a rule so a product is reordered automatically. The form is split into four short tabs, Setup, Sources, Thresholds and Notes, and nothing is saved until you click Create Rule.
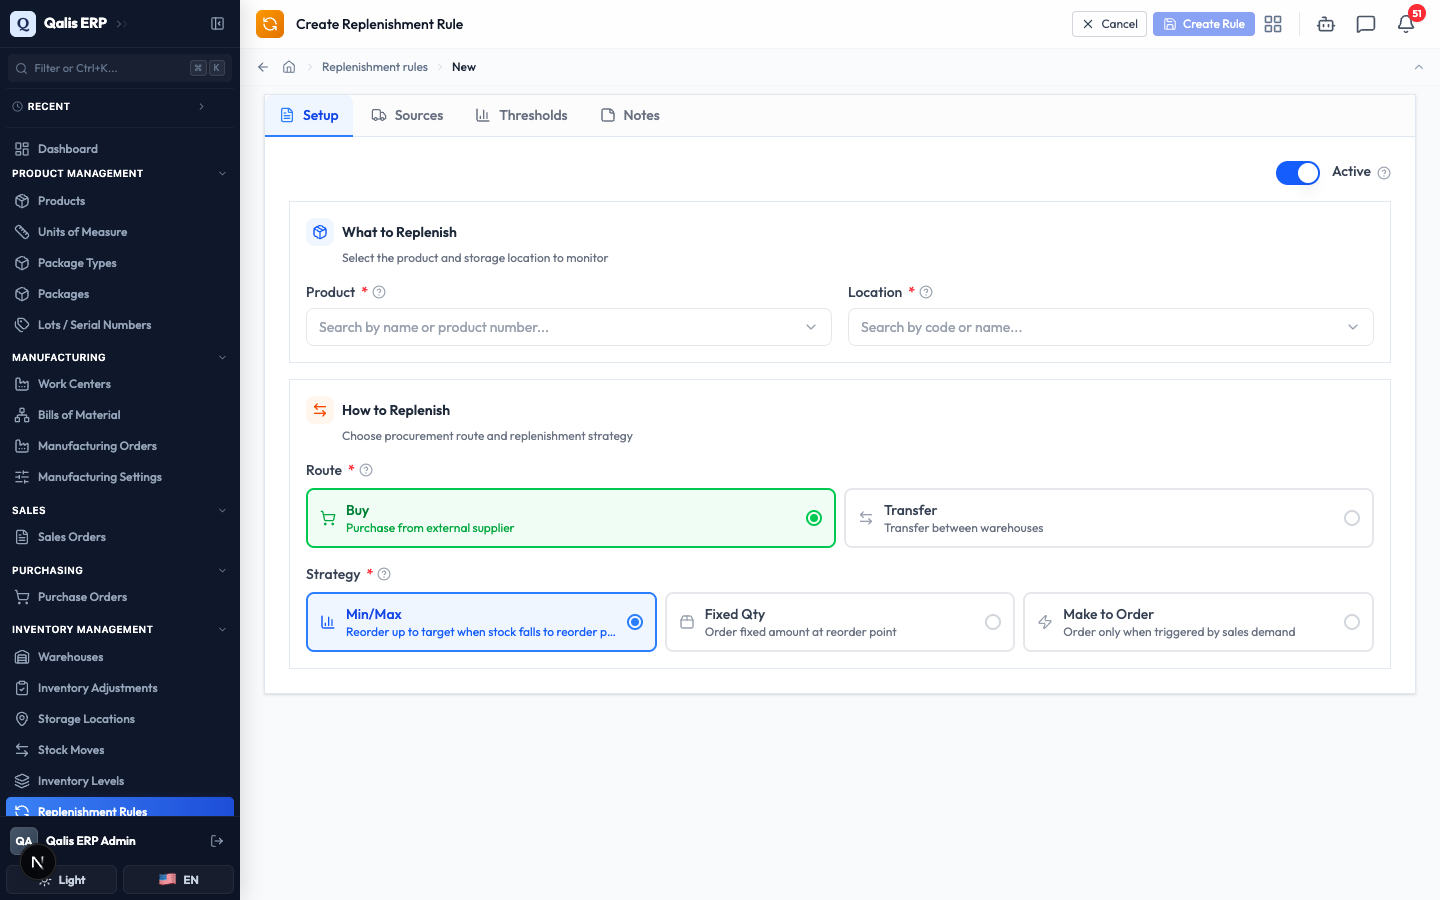
- On the list, click Create Rule at the top right. The blank form opens on the Setup tab.
-
Under What to Replenish, click Product and choose the product to monitor, then click Location and choose where the stock sits. Both are required.
-
Under How to Replenish, pick a Route, which is where new stock comes from:
- Buy orders from an outside supplier.
- Transfer moves stock in from another warehouse.
Products you make in-house can also be replenished by a third route, Make, which the system applies to manufactured items. You will not pick it here when you set up a Buy or Transfer rule.
-
Pick a Strategy, which is how the order size is worked out:
- Min/Max reorders up to a target level when stock falls to the reorder point. This is the most common choice.
- Fixed Qty orders the same set amount every time the reorder point is reached.
- Make to Order orders only when there is real demand, so it needs no stock levels.
-
Leave the Active switch on (top right) so the rule starts working straight away.
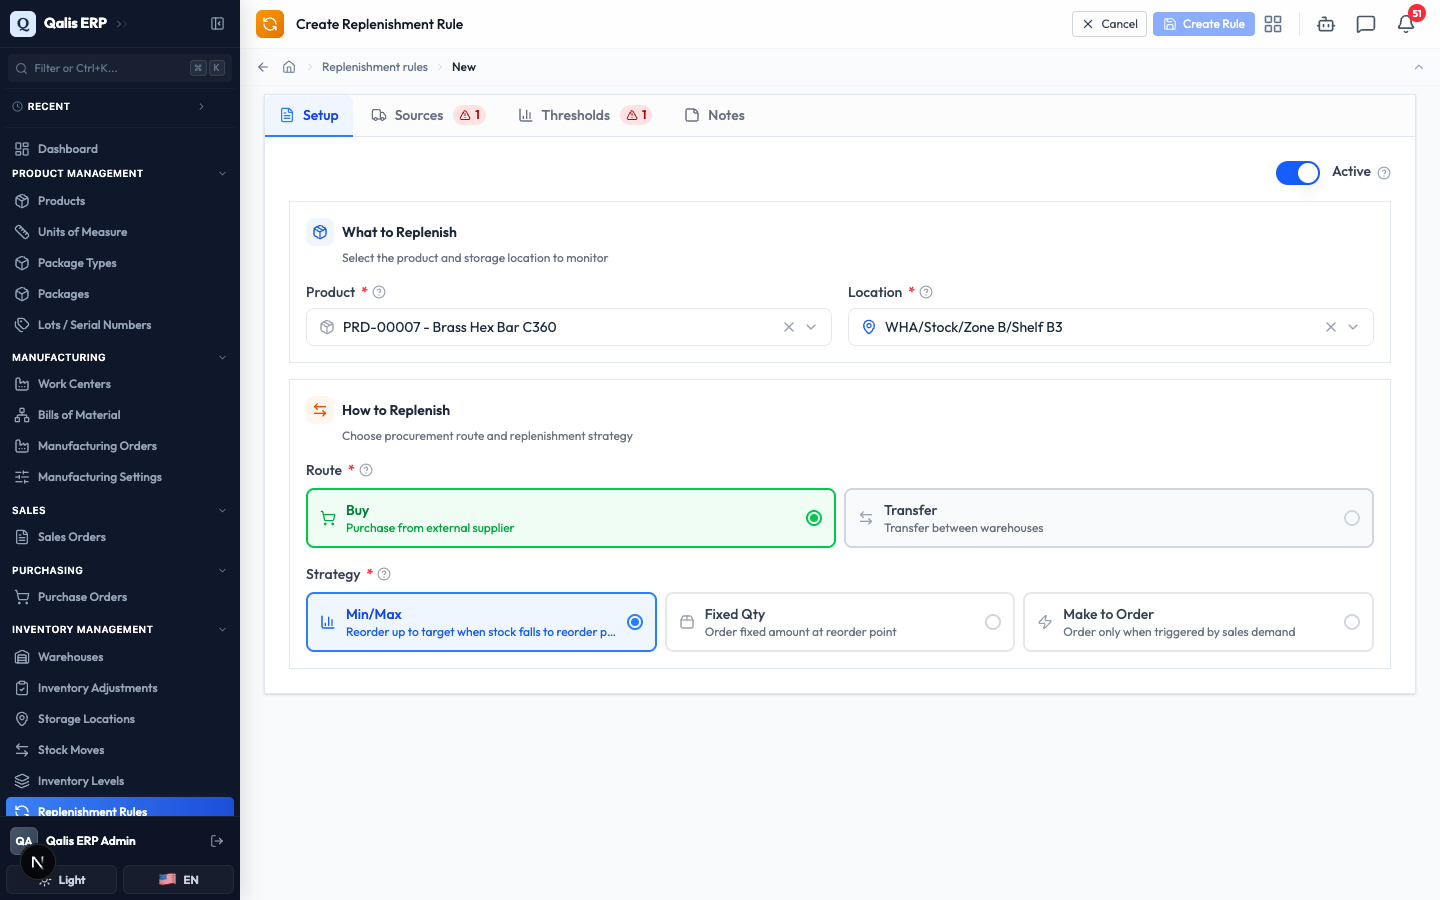
Notice the small red badges that appear on the Sources and Thresholds tabs. They tell you those tabs still need something, so you always know what is left to fill in.
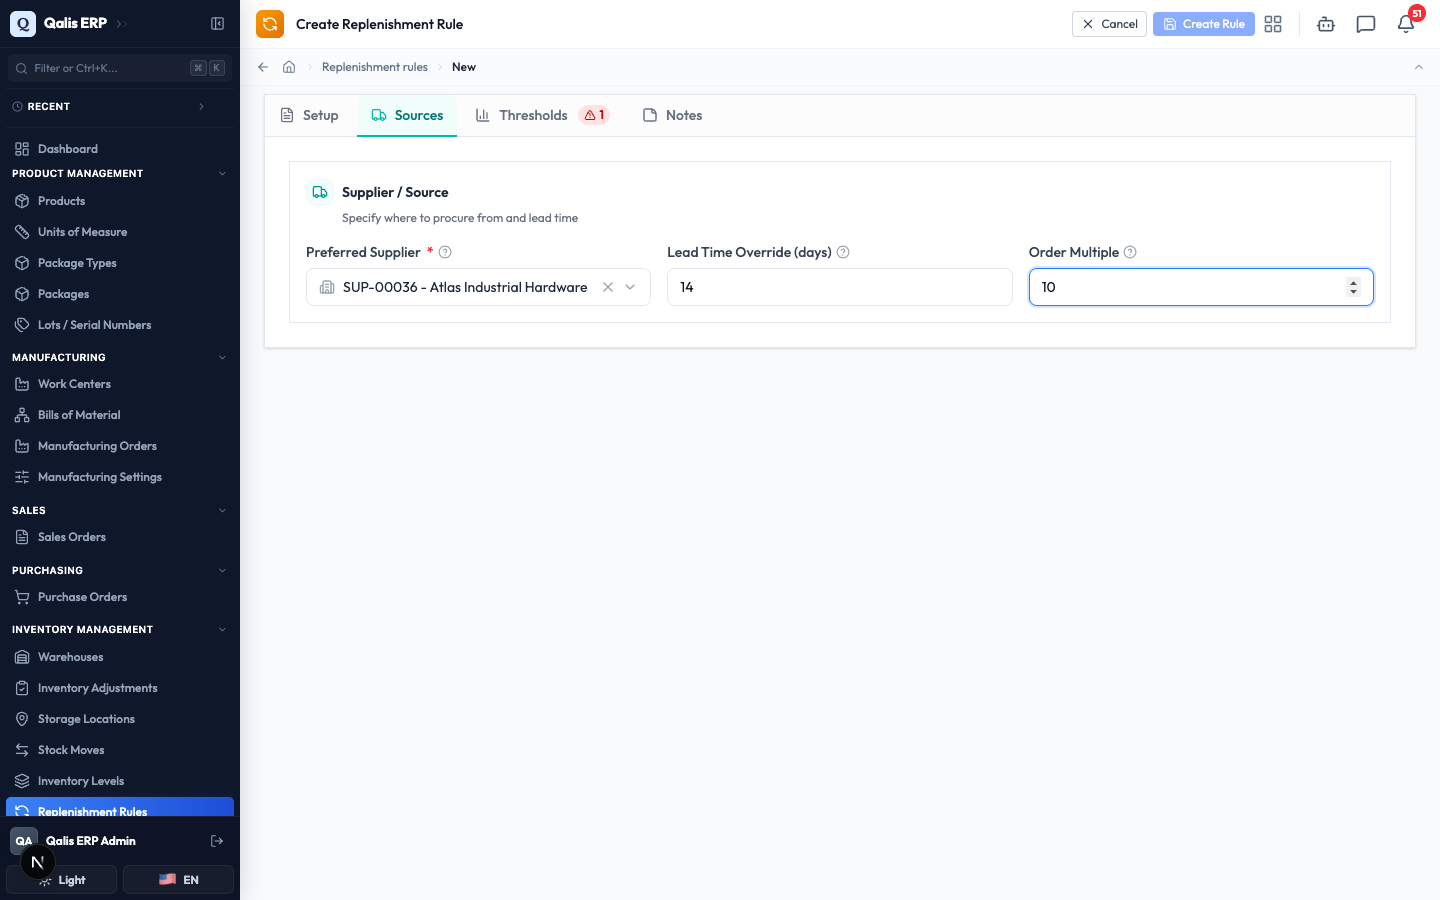
- Open the Sources tab. For a Buy rule, choose the Preferred Supplier to order from. For a Transfer rule, choose the Source Location to pull stock from instead of a supplier. Either way, you can also set a Lead Time Override (days) (how long delivery takes) and an Order Multiple (round every order up to this pack size, such as 10).
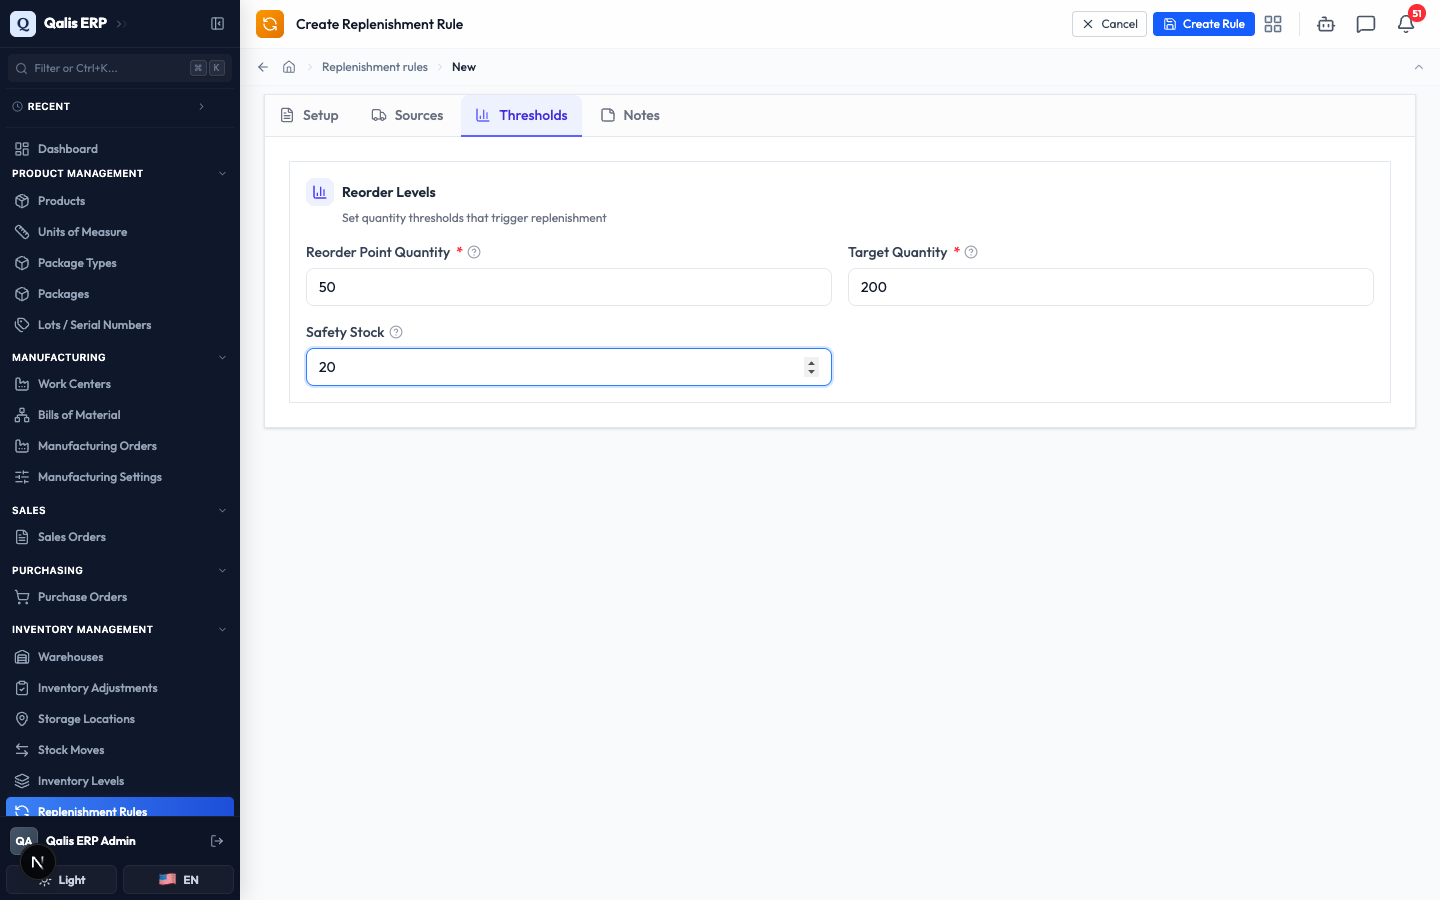
- Open the Thresholds tab and set your stock levels, which depend on the strategy you chose:
- For a Min/Max rule, fill in the Reorder Point Quantity (reorder when stock drops to this), the Target Quantity (bring stock back up to this), and an optional Safety Stock buffer.
- For a Fixed Qty rule, fill in the Reorder Point Quantity and the Fixed Order Quantity (the set amount to order each time), plus optional Safety Stock.
- For a Make to Order rule, there is nothing to set here, as it reorders only when there is real demand.
- Add anything useful on the Notes tab, then click Create Rule at the top right.
Qualis gives the rule its own reference (like RPL-00046) and takes you to its detail page, where you can see everything at a glance.
Read a rule
Open any rule to see exactly how it is set up.
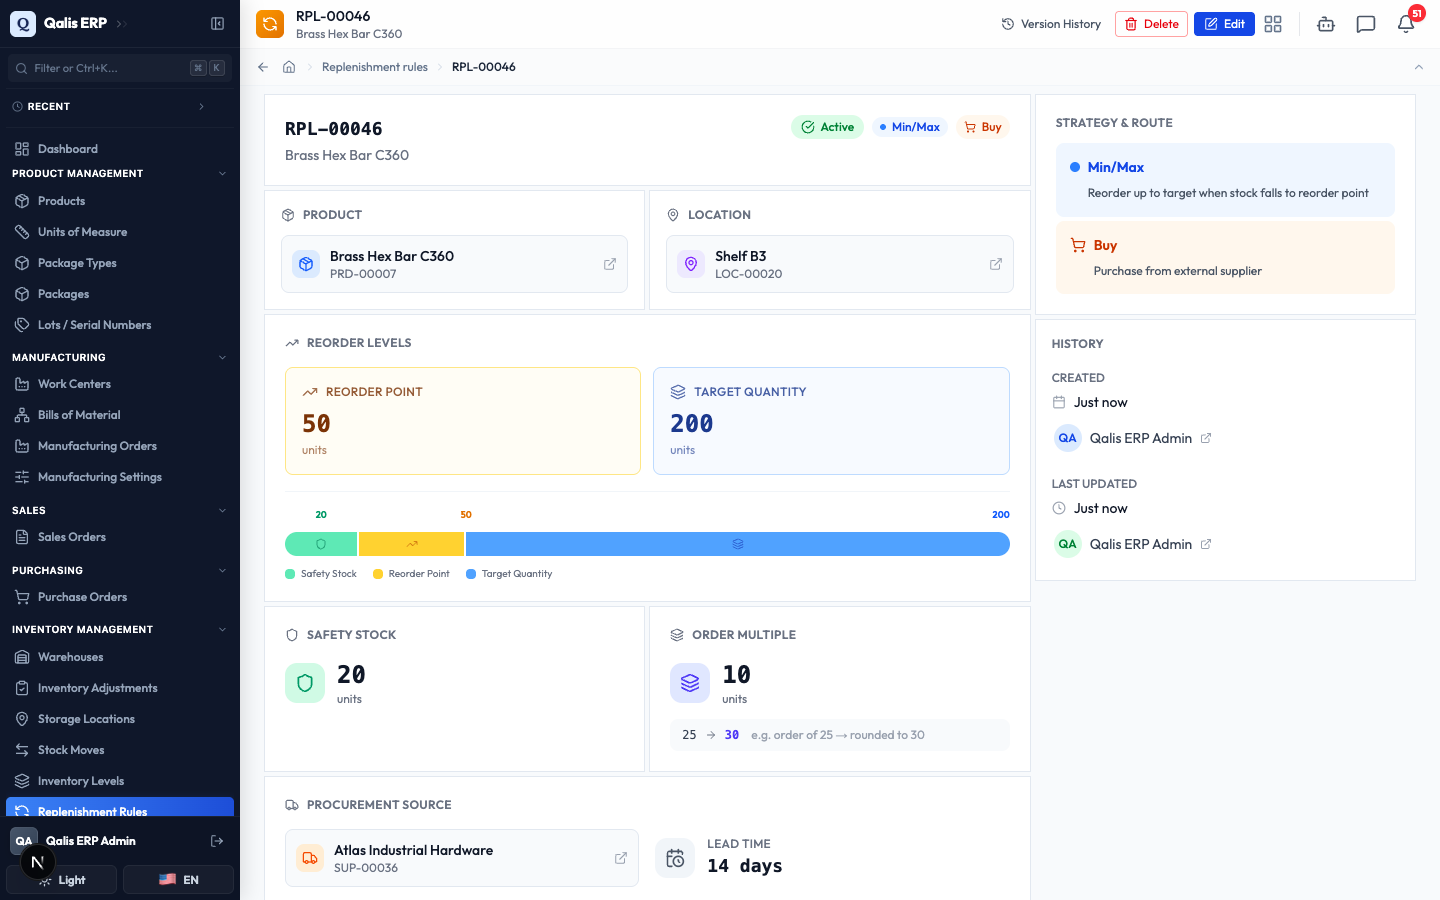
- Click a Code link in the list (or the rule's code anywhere in Qualis). The detail page opens (shown above).
- The top of the page shows the rule's code with its Status, Strategy and Route badges, plus buttons for Version History, Delete and Edit.
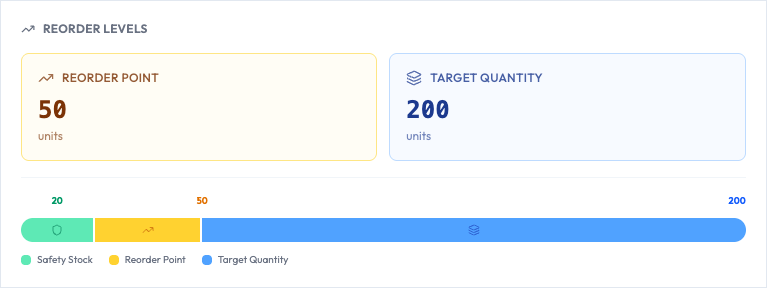
- The Reorder Levels card shows the Reorder Point and Target Quantity, with a coloured bar that maps out your safety stock, reorder point and target so you can picture the levels at a glance.
- Lower down, the Safety Stock and Order Multiple cards explain the buffer and rounding, the Procurement Source card names the supplier (or source location) and the lead time, and the side panel describes the strategy and route and records who created and last changed the rule.
Clicking Delete does not remove the rule straight away. It moves the rule to the Trash, where you can restore it later or remove it for good. To open the Trash, click Trashed Replenishment Rules in the top bar.
Edit a rule
Use this to change how a rule behaves, for example to raise the target level or switch supplier.
- Open the rule and click Edit at the top right. The same four-tab form opens, already filled in.
- Change whatever you need across the tabs, then click Save Changes.
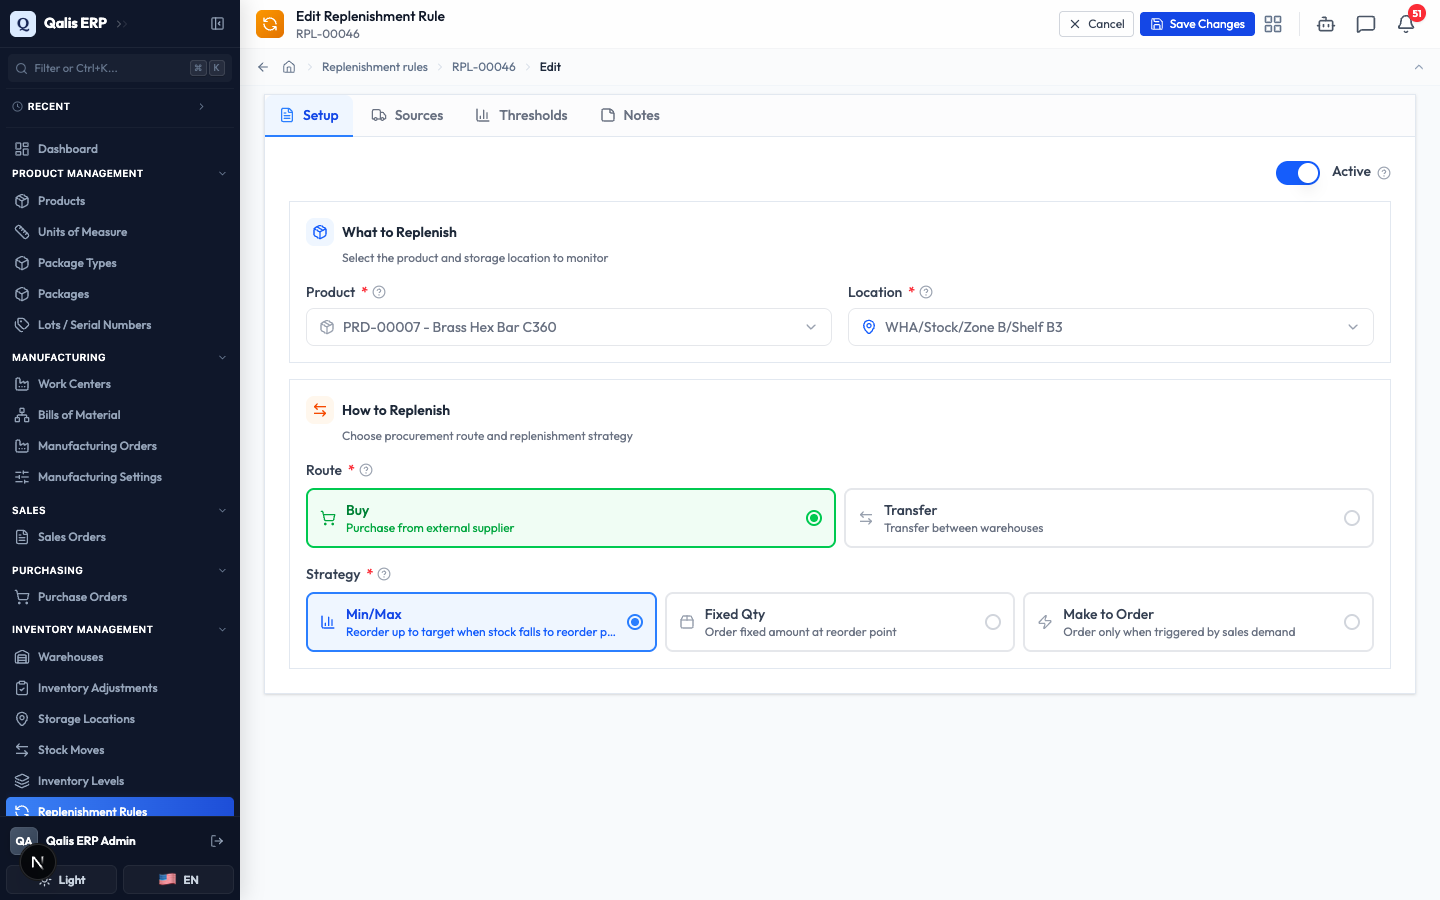
The Product and Location cannot be changed once a rule exists. They keep their values and lose the small clear button, so you cannot swap them out. To watch a different product or place, create a new rule instead. Everything else (route, strategy, levels, supplier and notes) stays editable.
See what needs reordering
The Replenishment Report is a live snapshot that compares current stock against every active rule and tells you what to order, without changing anything.
- Open the Replenishment Report tab. Four cards at the top give you the headline numbers: Total Active Rules, Needs Reorder, Critical and Healthy.
- Below them, each active rule has a row showing its Product, Location and Supplier, comparing its Current Stock and any Incoming supply against its Reorder Pt. and Target, then a Suggested Order quantity and an Urgency flag (Critical, Warning or Healthy). Rules already covered by incoming stock stay healthy, so you only chase what really needs attention.
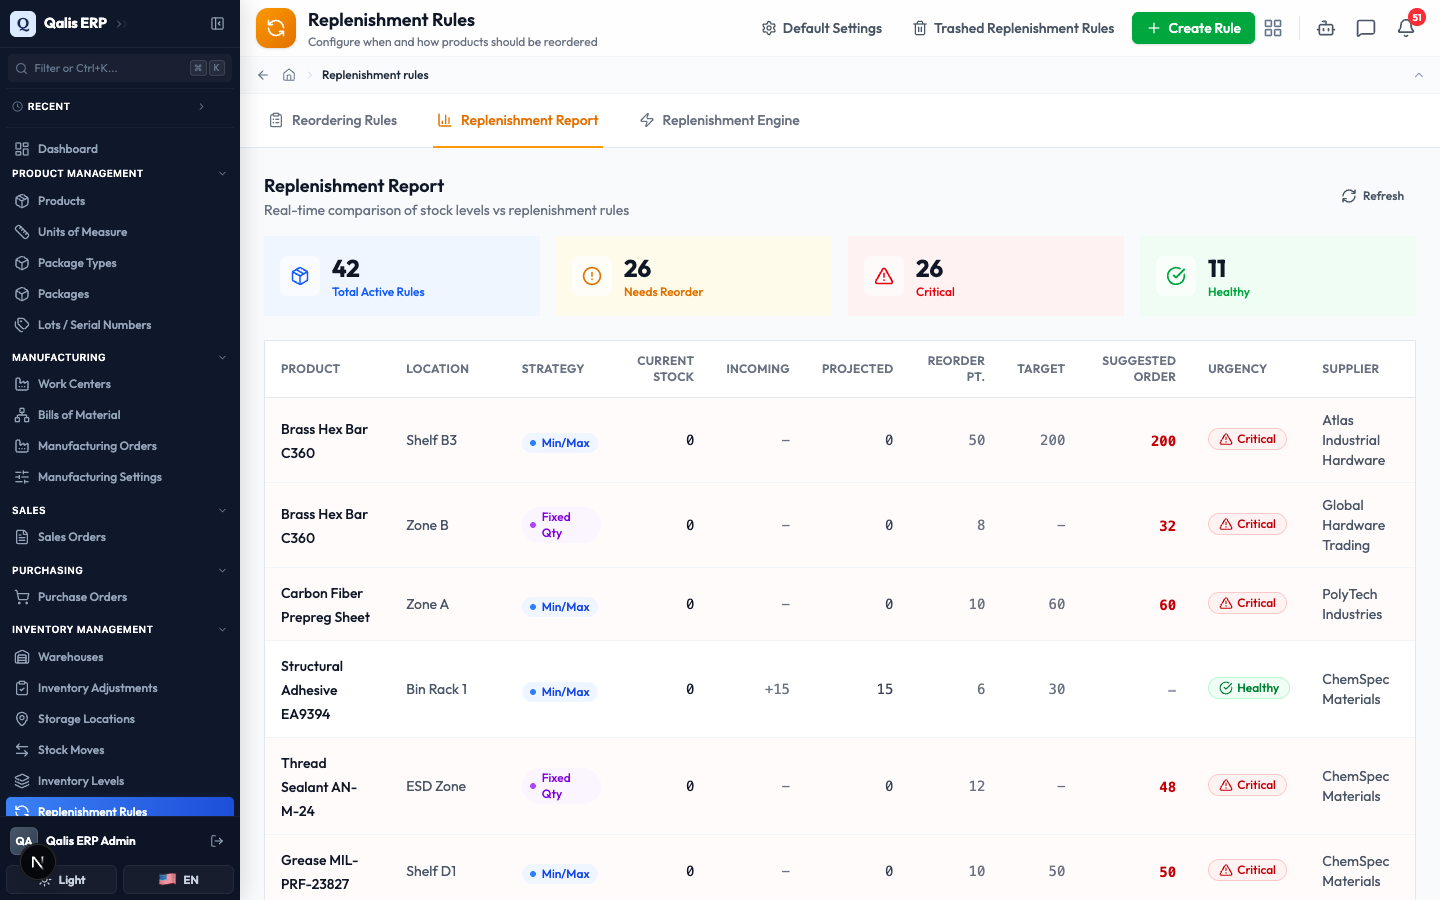
Click Refresh at the top right to recalculate the report with the latest stock figures. This view never creates an order, it only shows you what it recommends.
Run the replenishment engine
The engine is what turns rules into action. It checks every active rule and, when you have switched on automatic ordering, drafts the purchase orders and carries out the transfers for you.
- Open the Replenishment Engine tab. The status row shows its Last run time, the Evaluation frequency (how often it runs on its own), and whether Auto-create purchase orders is on. Below that, Last run results counts how many rules were Evaluated and Triggered, and how many Purchase Orders and Transfers were made.
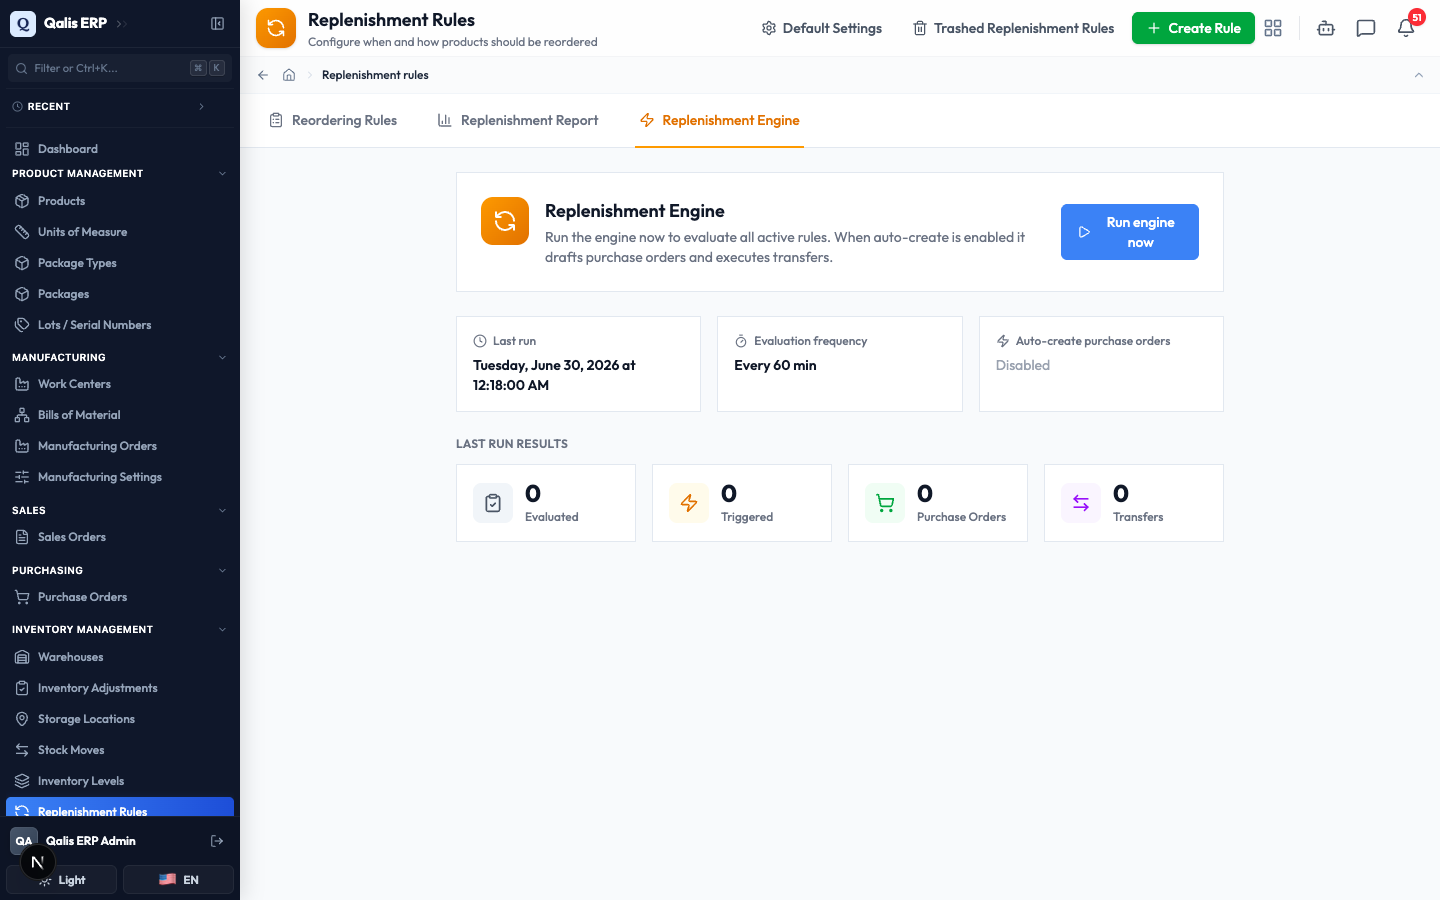
- Click Run engine now to check every active rule straight away. When it finishes, the results update and a message tells you how many rules were triggered and how many orders and transfers were created.
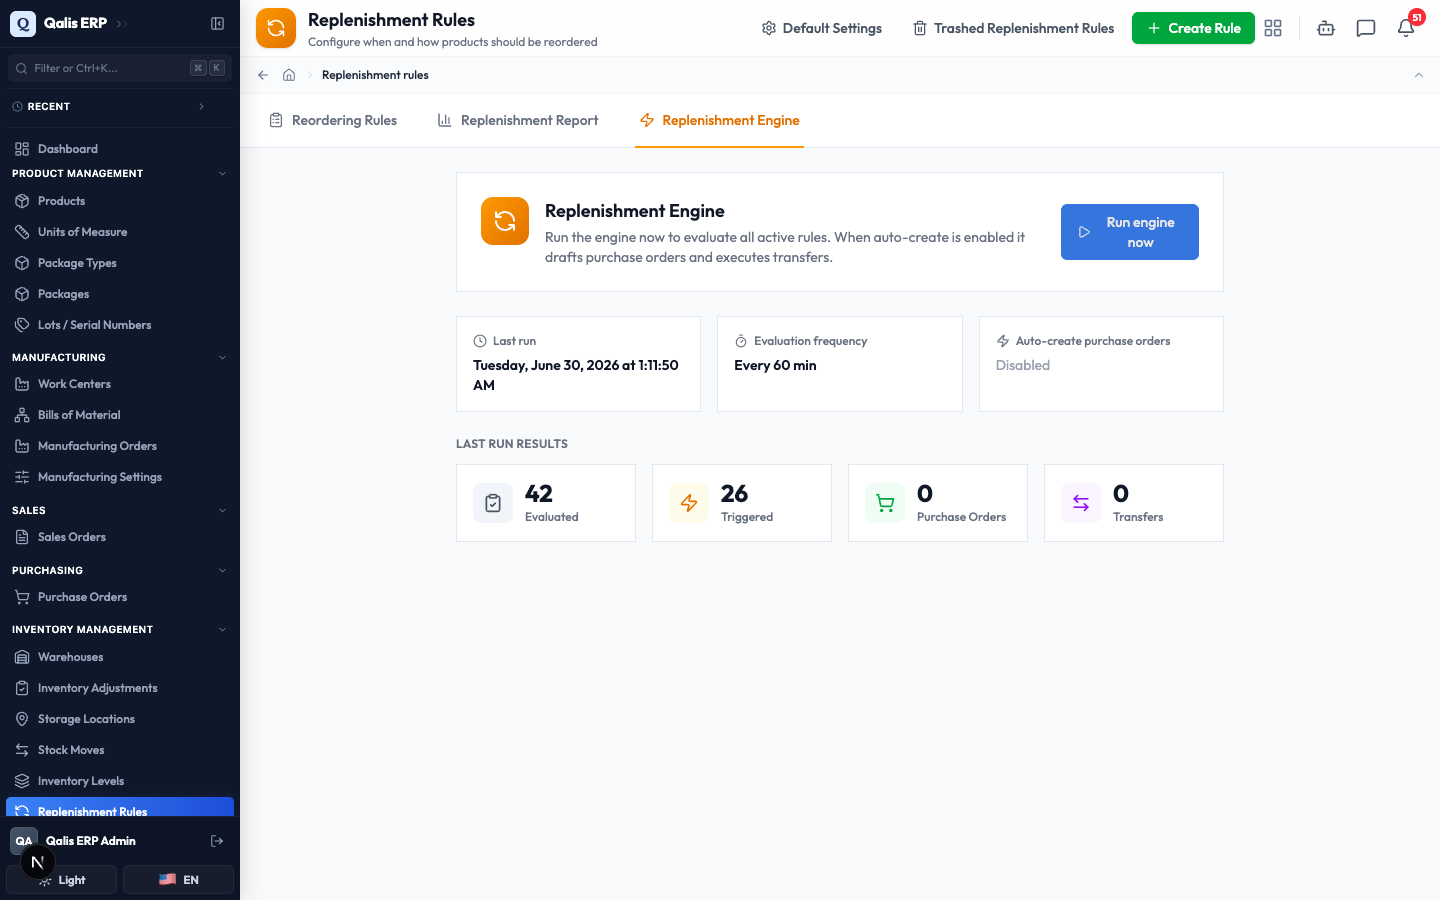
The engine only drafts purchase orders and runs transfers when Auto-Create Purchase Orders is switched on. With it off, a run still checks the rules and reports what is triggered, but creates nothing, so it is safe to run any time just to see where you stand.
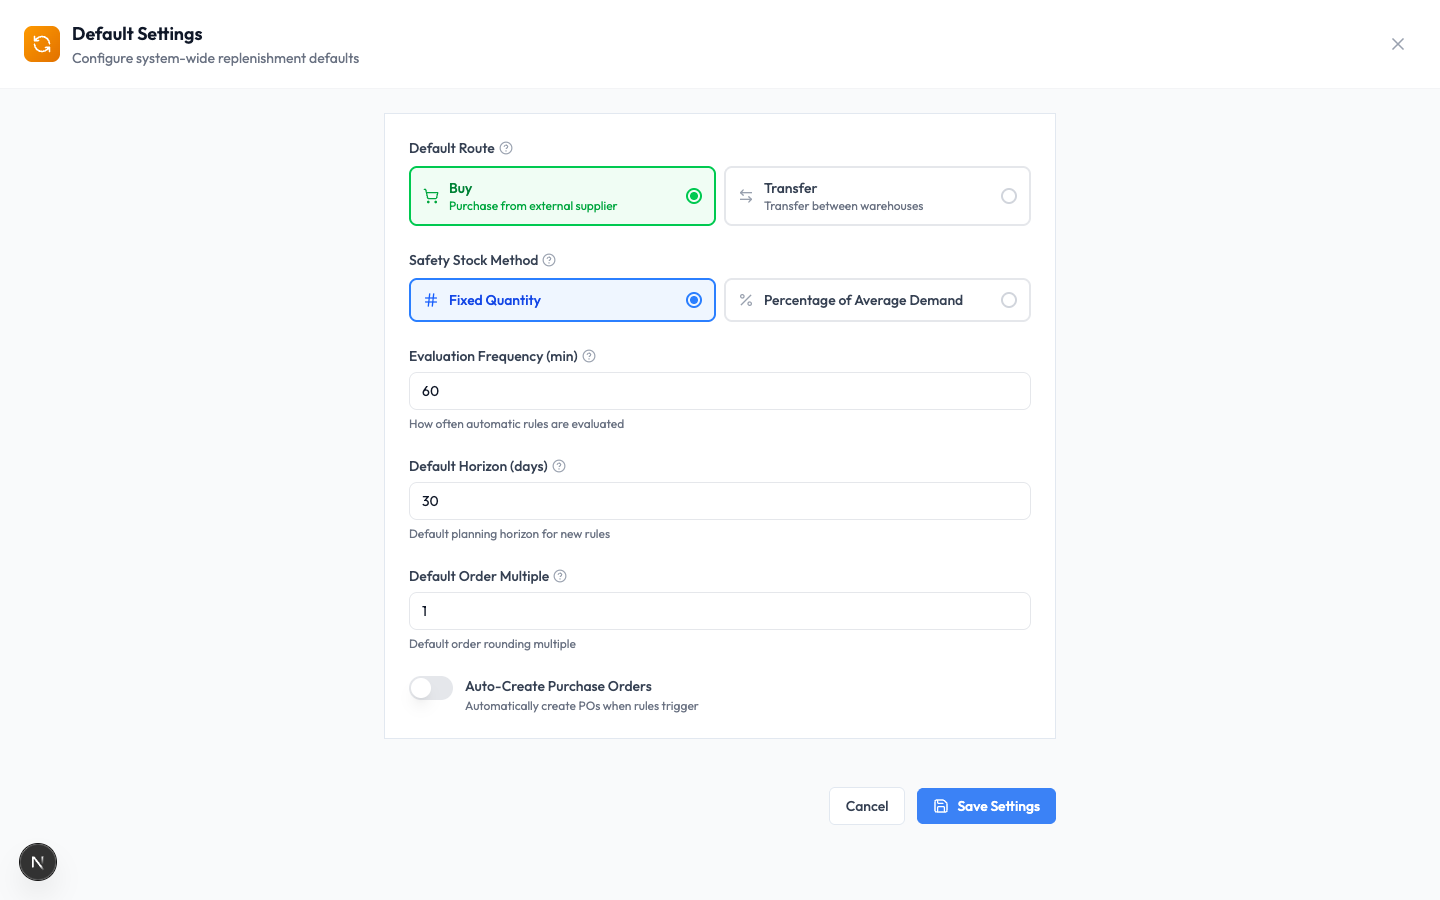
- To change how the engine behaves, click Default Settings in the top bar. Here you set the Default Route and Safety Stock Method for new rules, the Evaluation Frequency (min), the Default Horizon (days), the Default Order Multiple, and the Auto-Create Purchase Orders switch. Click Save Settings to apply.
Good to know
- Replenishment rule: a standing instruction that watches one product at one location and reorders it when stock runs low.
- Strategy: how the order size is decided. Min/Max refills up to a target, Fixed Qty orders a set amount each time, and Make to Order orders only when there is demand.
- Route: where new stock comes from. Buy purchases from a supplier, Transfer moves it from another warehouse, and Make produces it in-house (used on rules for manufactured items).
- Reorder point: the stock level that triggers a reorder. When the on-hand quantity falls to this, the rule needs attention.
- Target quantity: the level a Min/Max rule refills back up to.
- Safety stock: an extra buffer below the reorder point. If stock drops to here, the rule is treated as Critical.
- Order multiple: a pack size that orders round up to, for example case or pallet quantities.
- Active and Inactive: an Active rule is checked by the engine, an Inactive rule is paused and never reorders. Turn a rule Inactive when you want to stop it reordering without deleting it.
- Lead time: how long stock takes to arrive after you order it. The engine uses it to order early enough.