User Management
Add the people on your team to Qualis, control what each of them can see and do, and keep their accounts and access up to date.
Last updated on July 1, 2026
The User Management module is where you look after the people who work in your organization. Every colleague who needs to sign in has an account here, with their name, contact details, and the exact set of things they are allowed to do. You add people in one of two ways, by sending them an email invitation or by creating the account yourself, and from then on you can review their profile, adjust their permissions, and remove or restore their access as your team changes. This guide covers the tasks you do most often: finding people, inviting someone, creating an account, reading and editing a profile, removing and restoring access, and importing or exporting your list.
You reach the module from the left sidebar under Administration, then Users. The page opens on three tabs near the top: Members (everyone who currently has access to this organization), Invitations (people you have invited who have not joined yet), and Deactivated (accounts that have been switched off).
Before you start
- You need permission to view users to open the module. If you cannot see it in the sidebar, ask an administrator to grant you access.
- To add people you need permission to invite or create members. If a button is greyed out, hover over it to see why.
- Permissions you give someone apply only to the organization you are currently working in.
Find and browse the people in your organization
Start here to see everyone who has access and quickly find the person you need.
- Open Users from the sidebar. You land on the Members tab. At the top you get a quick count of your Total Users, and how many are Active, Inactive, or Archived. Below that, the list shows one row per person with their Email, First Name, Last Name, Status, whether they are an Org admin or a Member, how many Permissions they have, their Department, and when they were Created and last logged in.
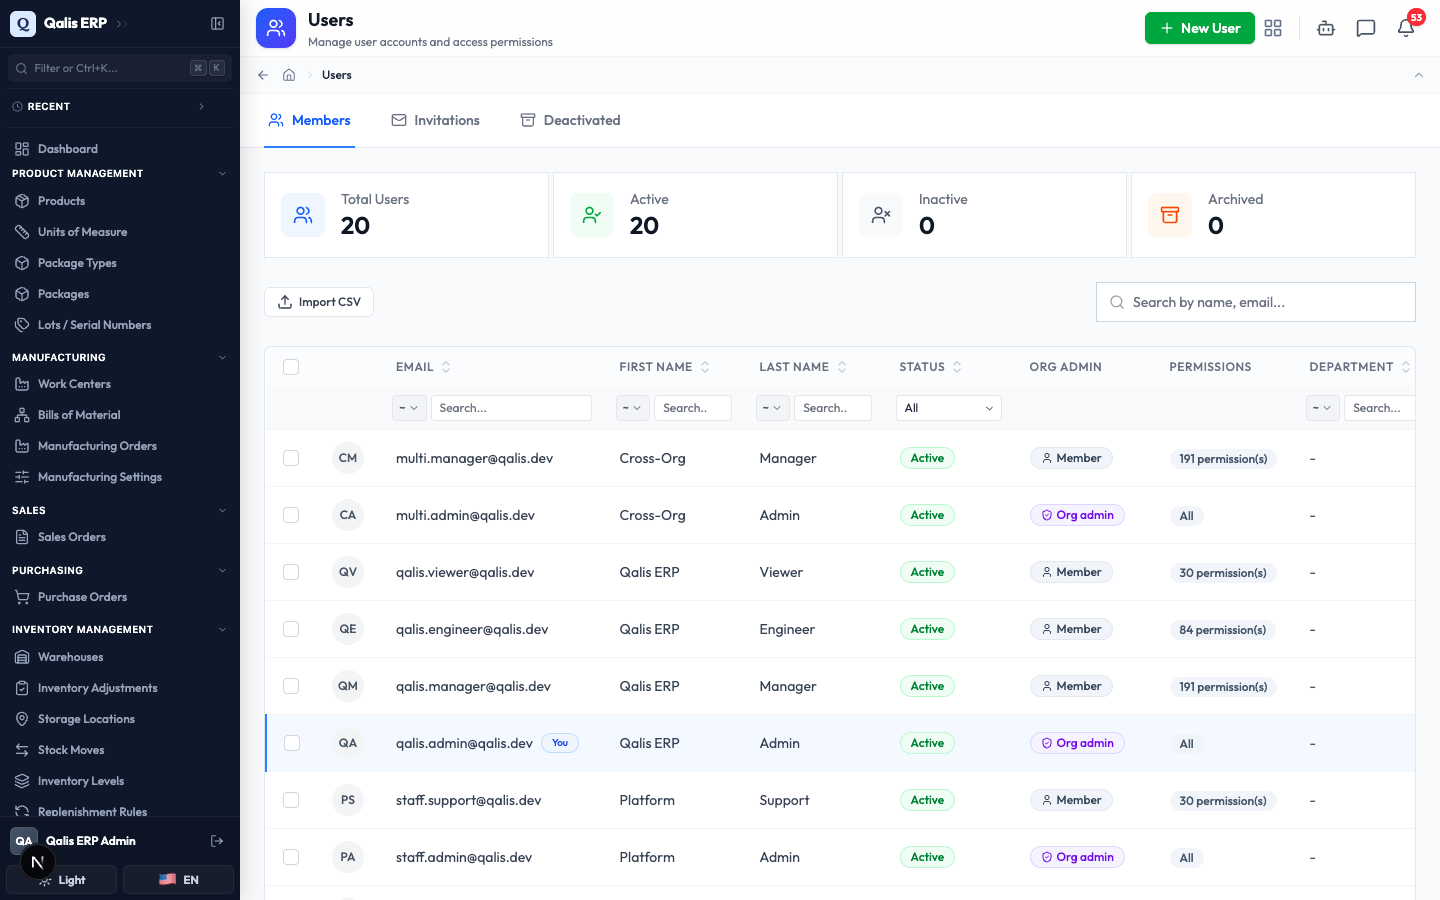
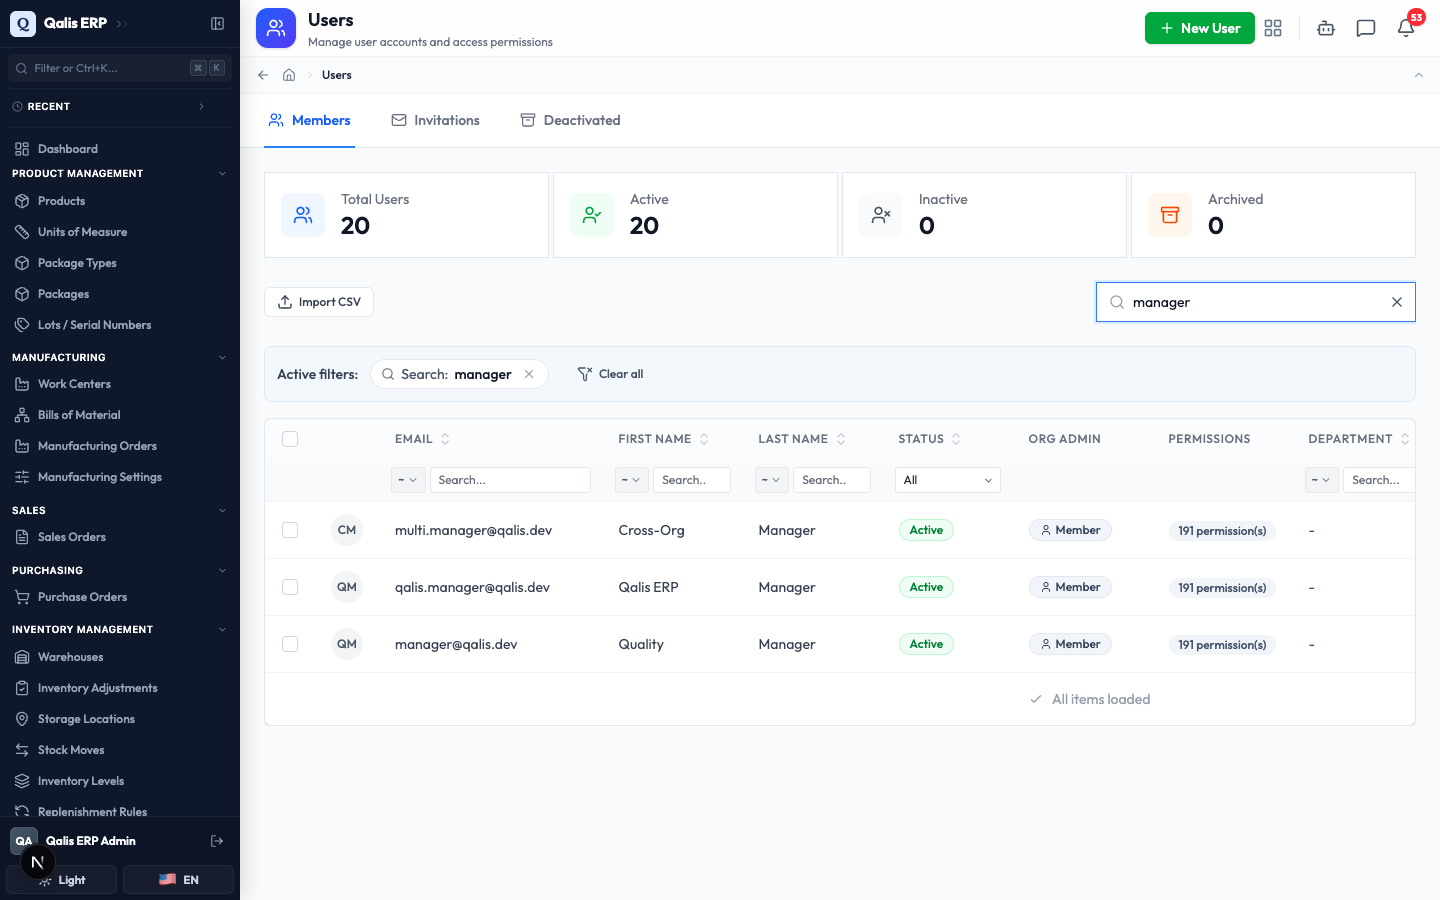
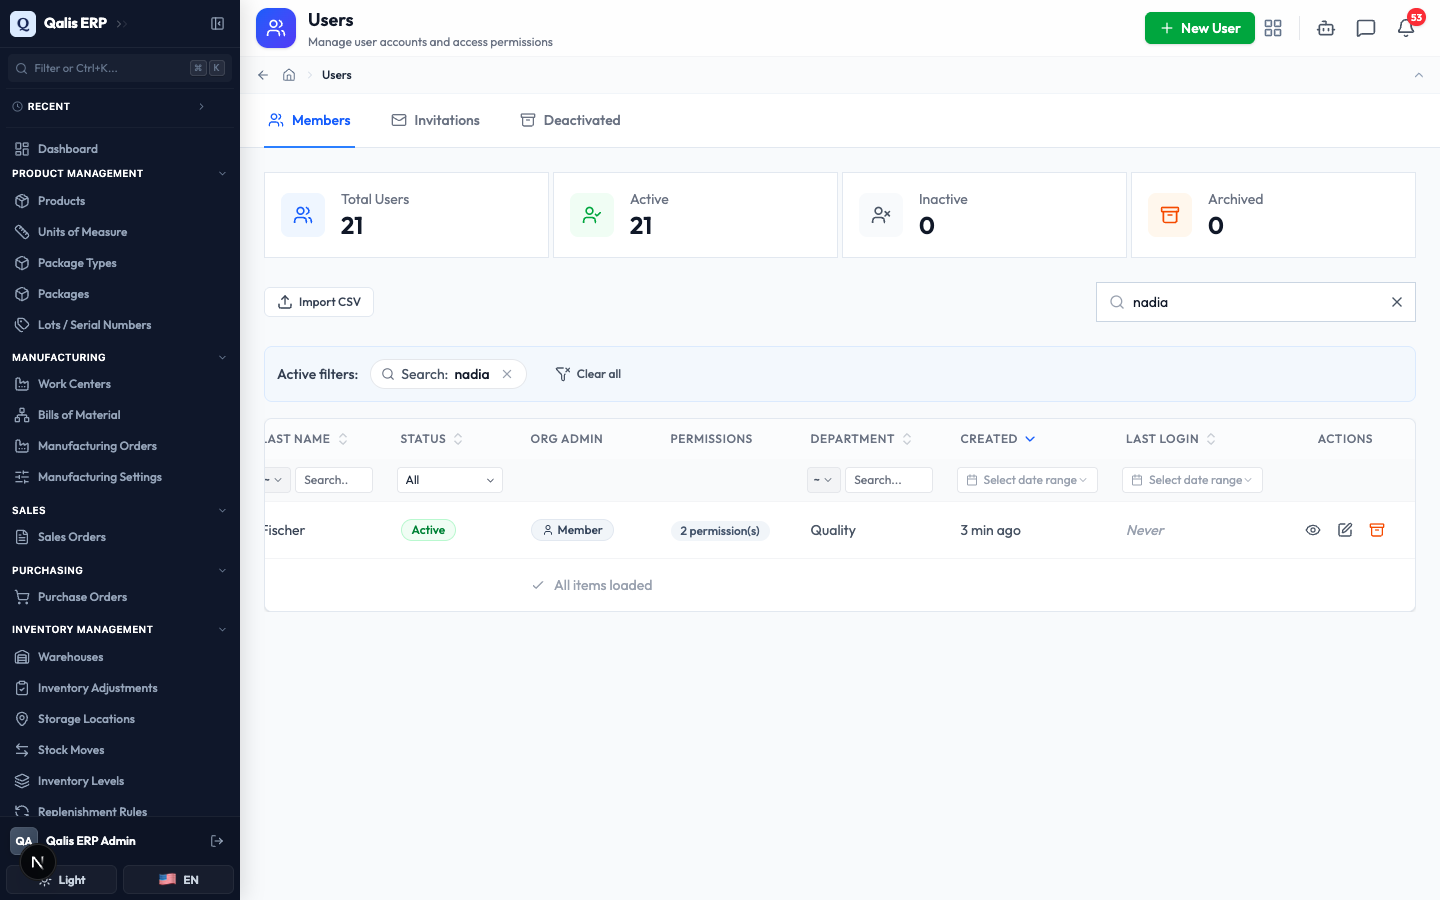
- To find someone fast, type in the Search by name, email... box at the top right. The list filters as you type, so there is no need to press Enter.
- To narrow by account state, open the Status dropdown under the column heading and choose, for example, Active. You can filter the same way on other columns, such as First Name, Department, or a date range on when accounts were created.
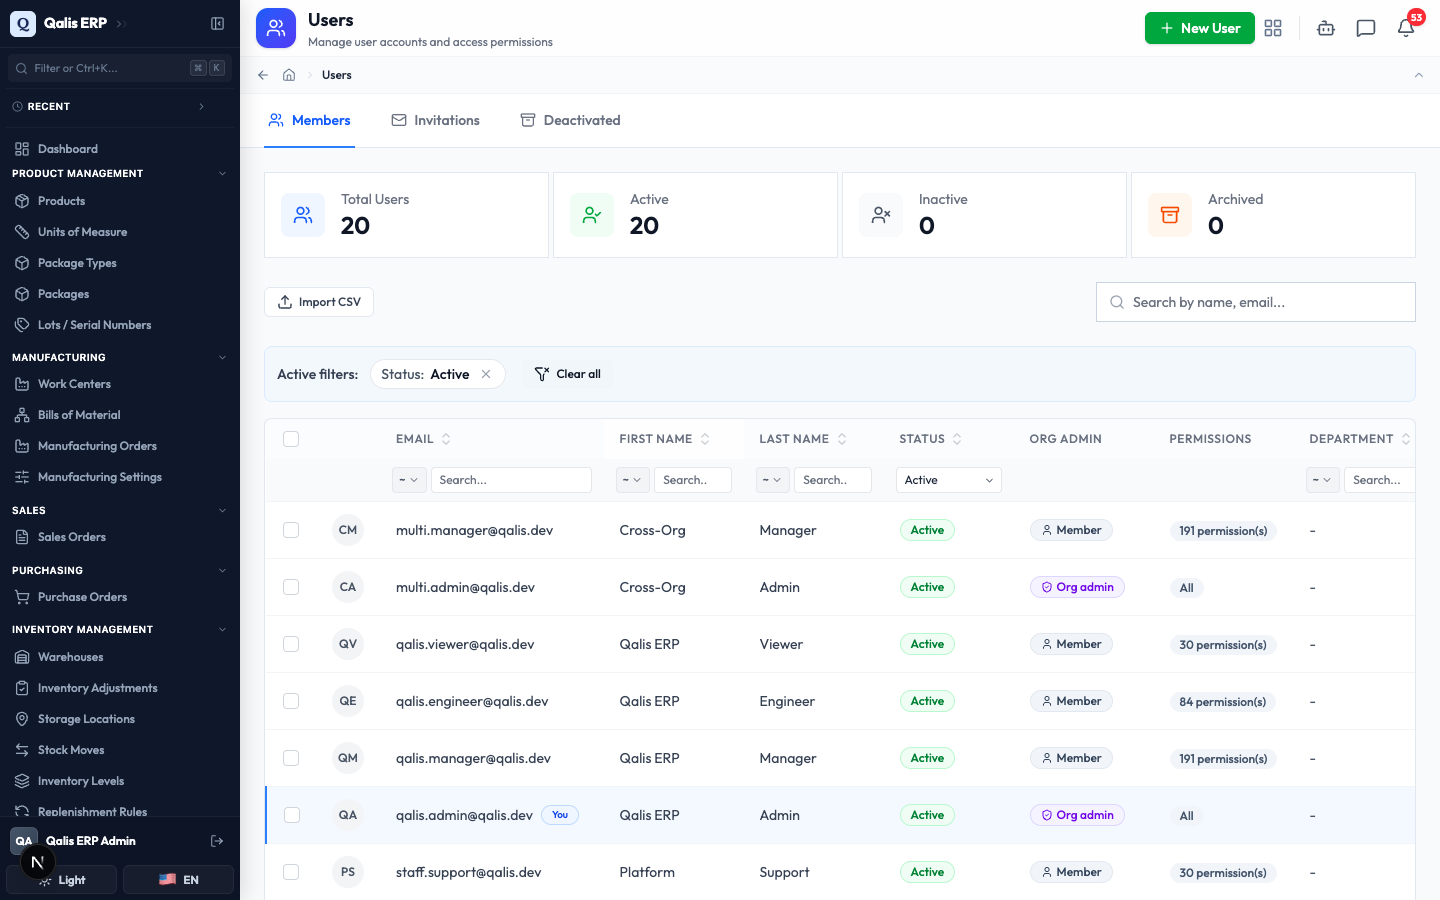
Whenever a filter is on, an Active filters banner appears showing what is applied. Click the small x on a filter to drop it, or Clear all to reset everything. The web address updates too, so you can bookmark or share a filtered view.
Invite someone by email
This is the easiest way to add a colleague. You send them an email, and they set their own password when they accept, so you never handle their credentials.
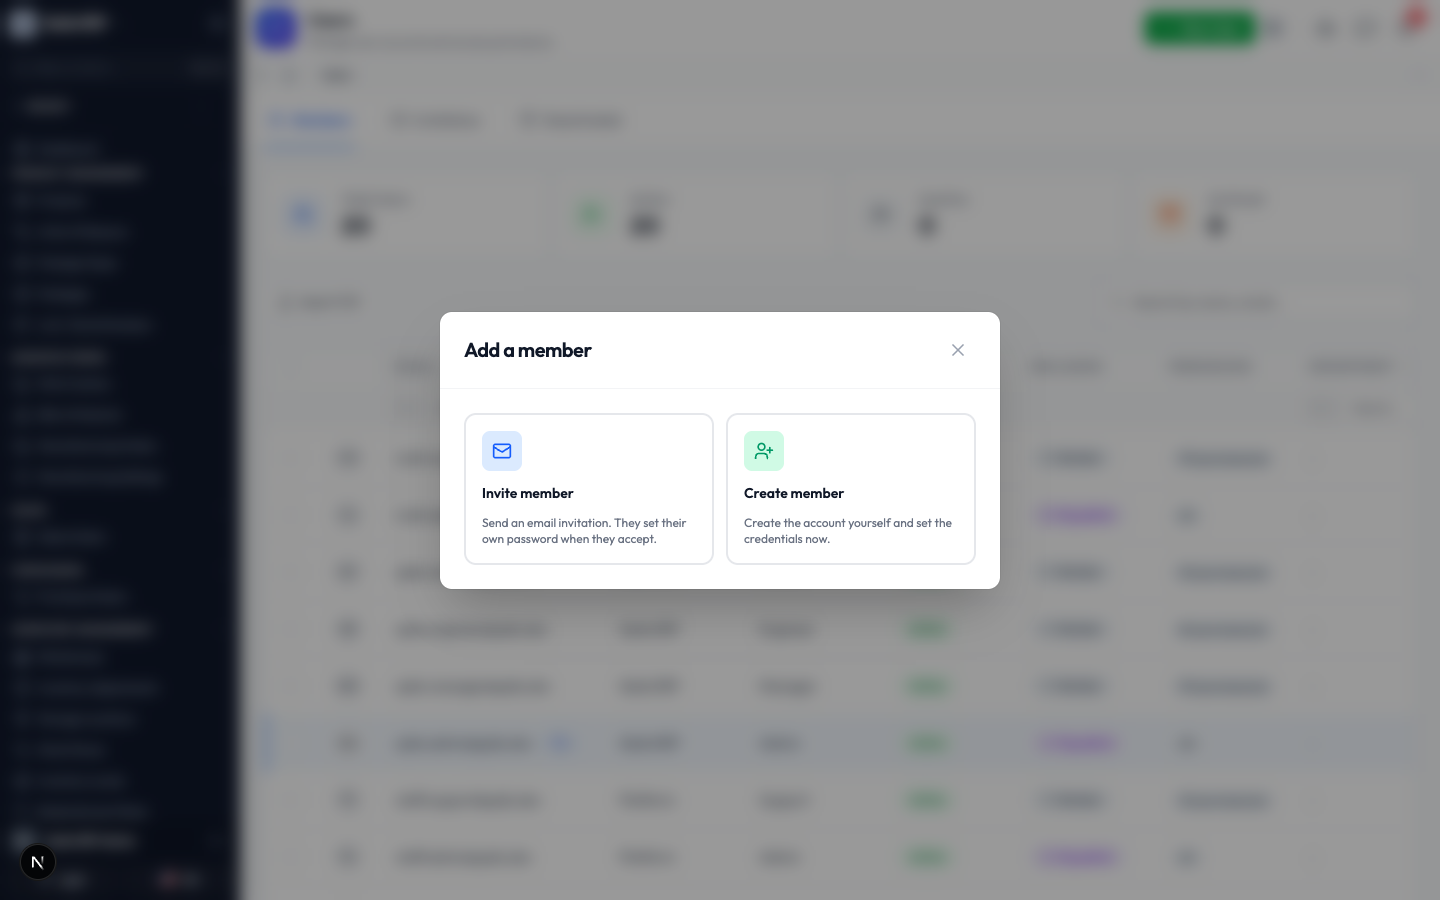
- Click New User (top right). A small window asks how you want to add the person. Choose Invite member.
- Type the person's Email. Then choose their Role. Pick Member to give them a specific set of permissions, or Organization admin to give them full access to everything in this organization. For a member, tick the Permissions they should have (they start with read-only access, which you can adjust). You can also add them to one or more Teams.
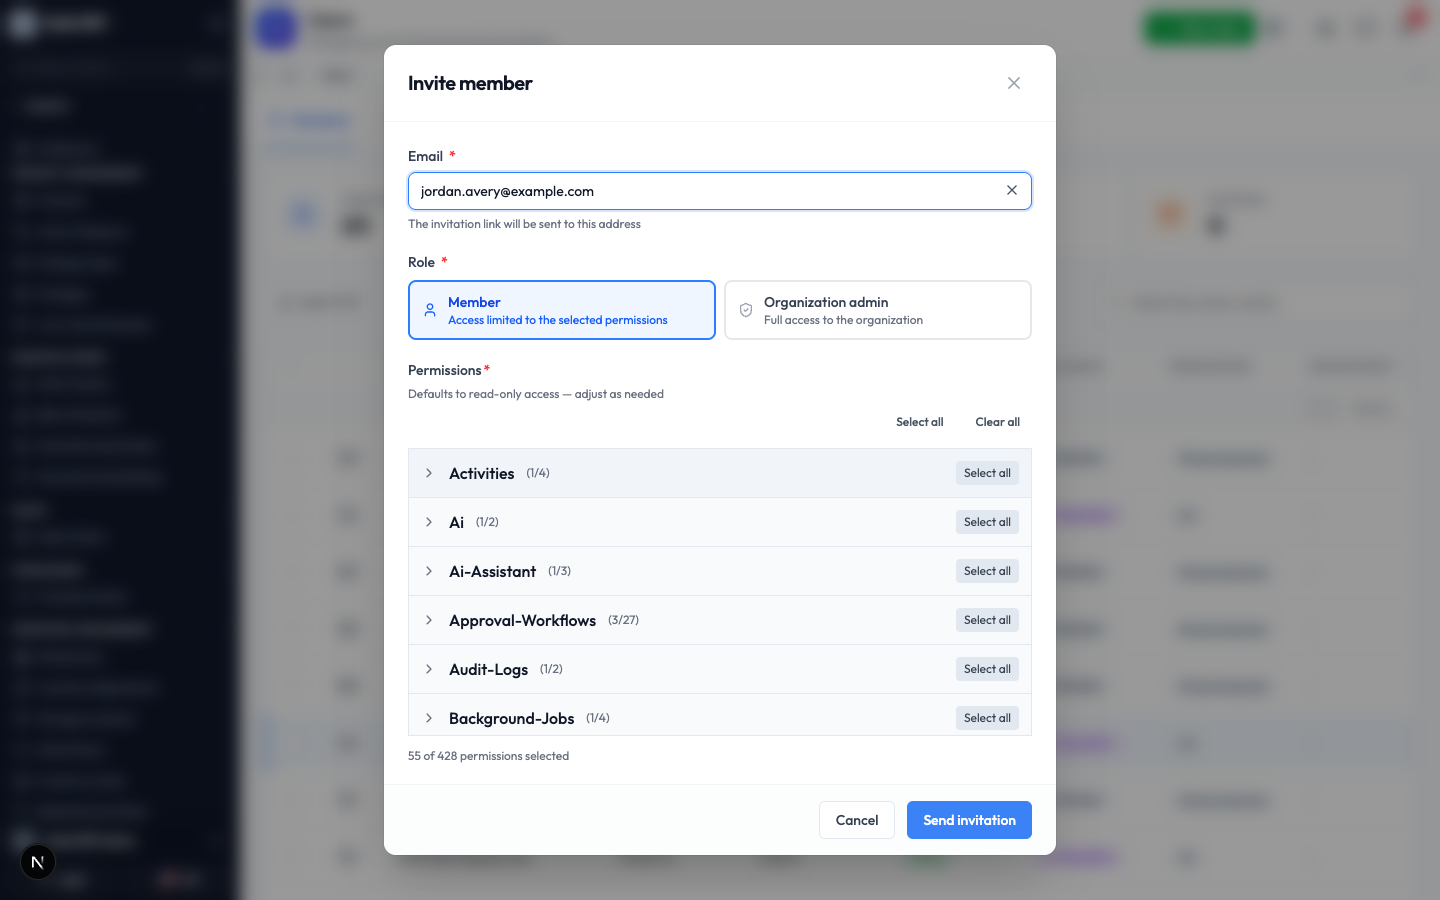
- Click Send invitation. Qualis emails the person a link to join. The window then shows the same link on screen so you can copy and share it directly if you prefer.
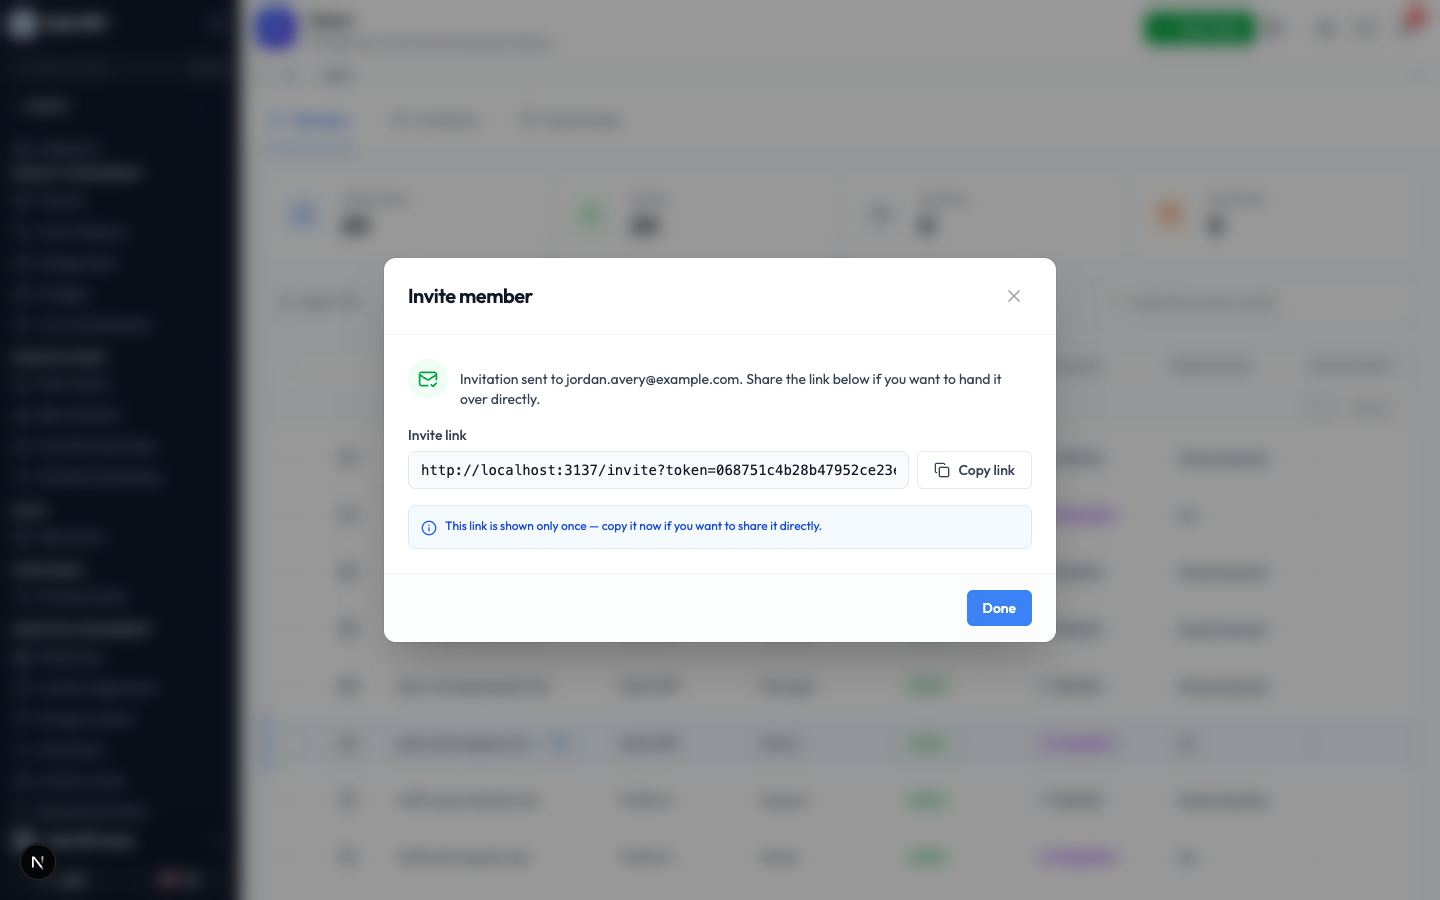
The invite link is shown only once. If you want to hand it over yourself, copy it now with the Copy link button before you close the window.
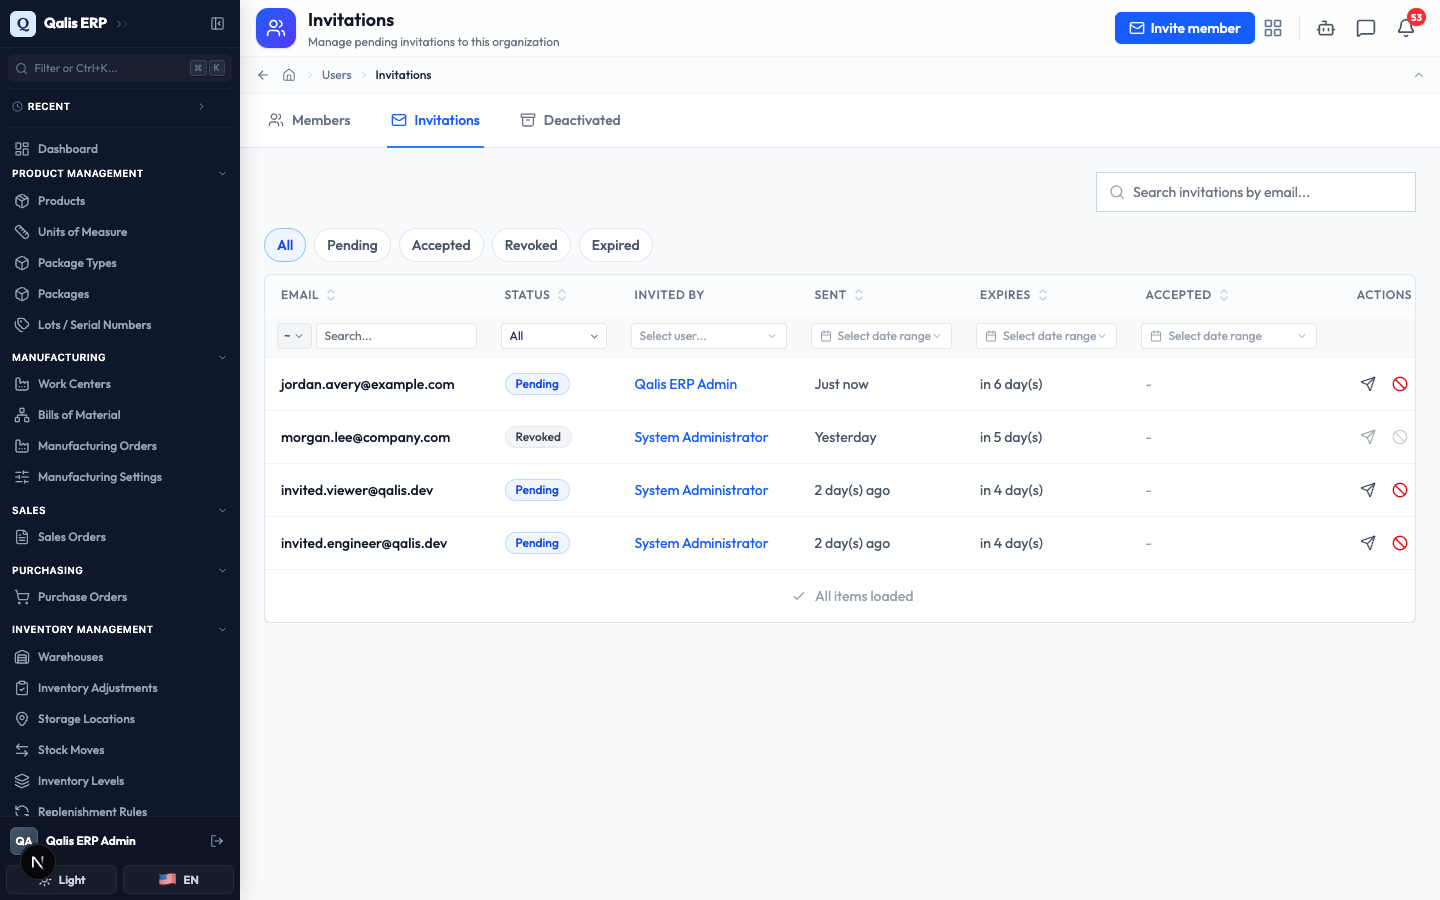
- Click Done. Your invitation now appears on the Invitations tab, marked Pending, until the person accepts. From here you can resend or revoke any invitation, and use the quick filters (Pending, Accepted, Revoked, Expired) to find the one you need.
Create an account yourself
Use this when you want to set someone up straight away and choose their password for them. The form is split into three tabs, so you fill it in one part at a time.
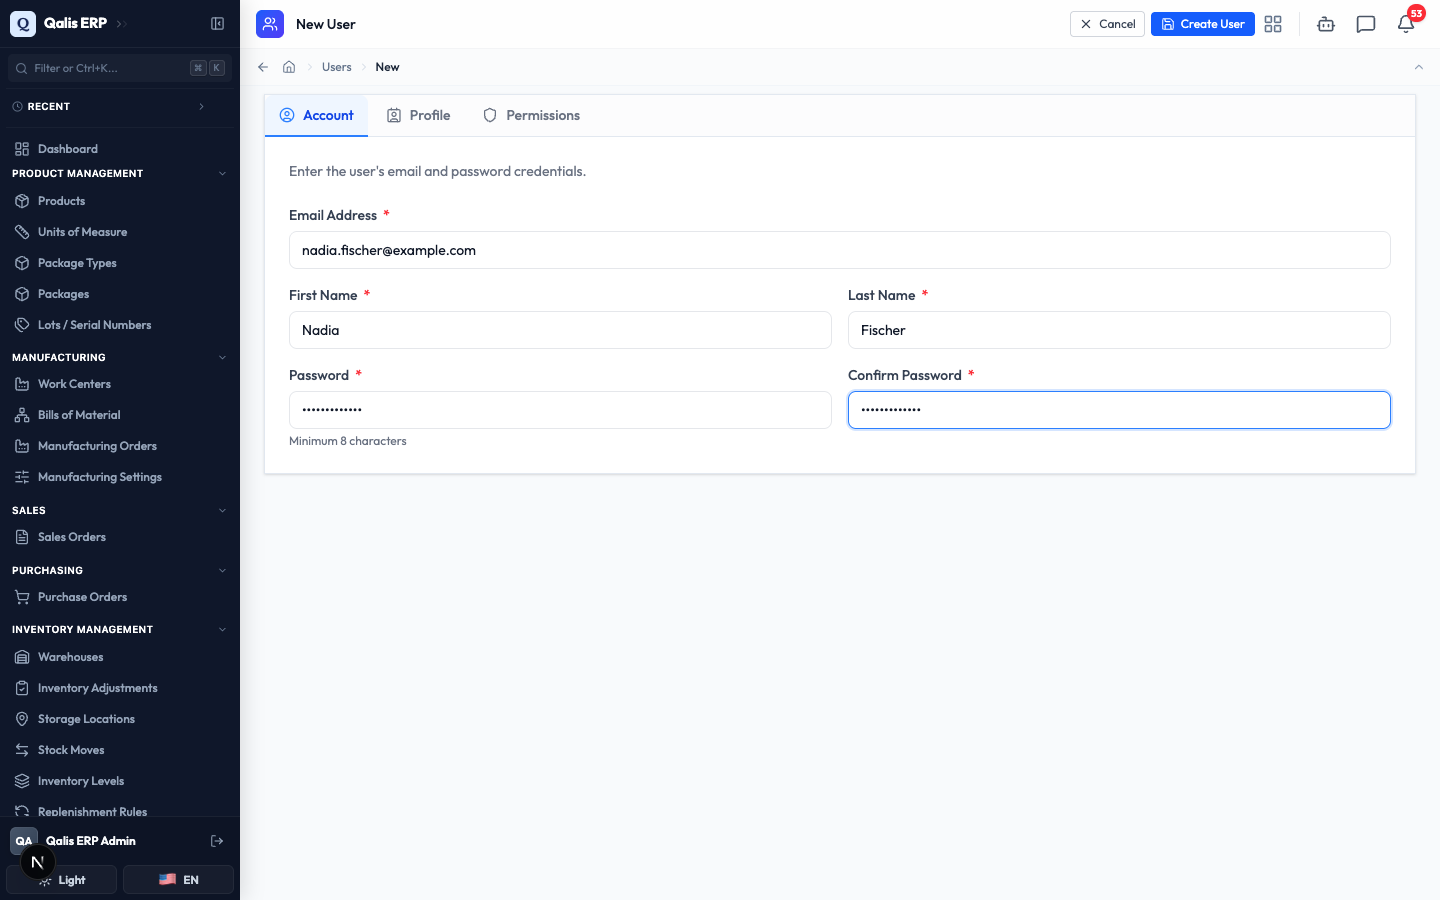
- Click New User, then choose Create member. You start on the Account tab. Fill in the Email Address, First Name, Last Name, and a Password (at least 8 characters), then repeat it in Confirm Password.
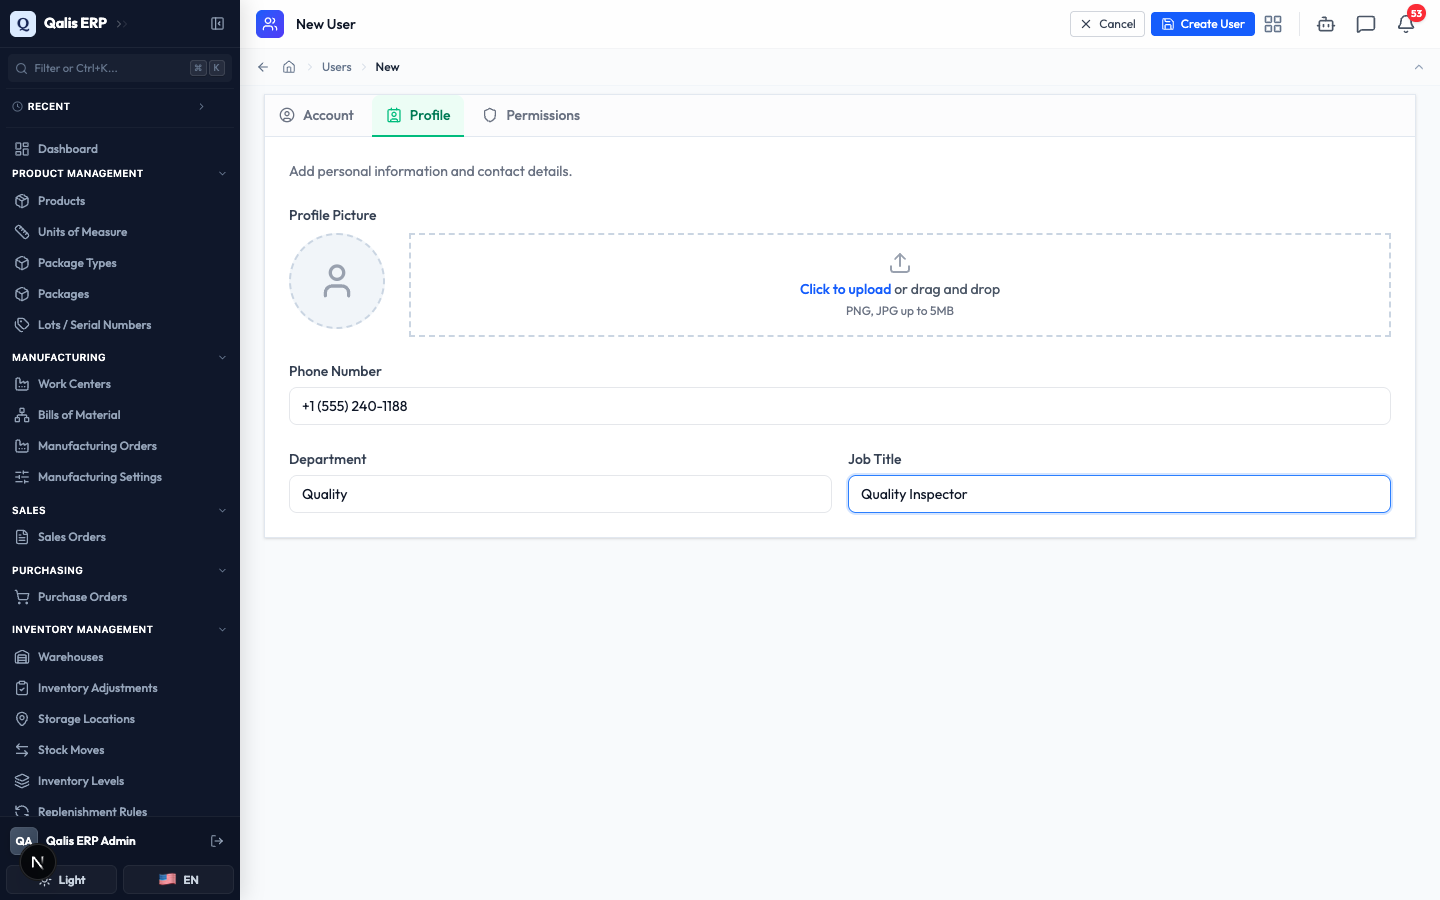
- Open the Profile tab to add a Profile Picture (click to upload or drag an image in), a Phone Number, a Department, and a Job Title. These are all optional.
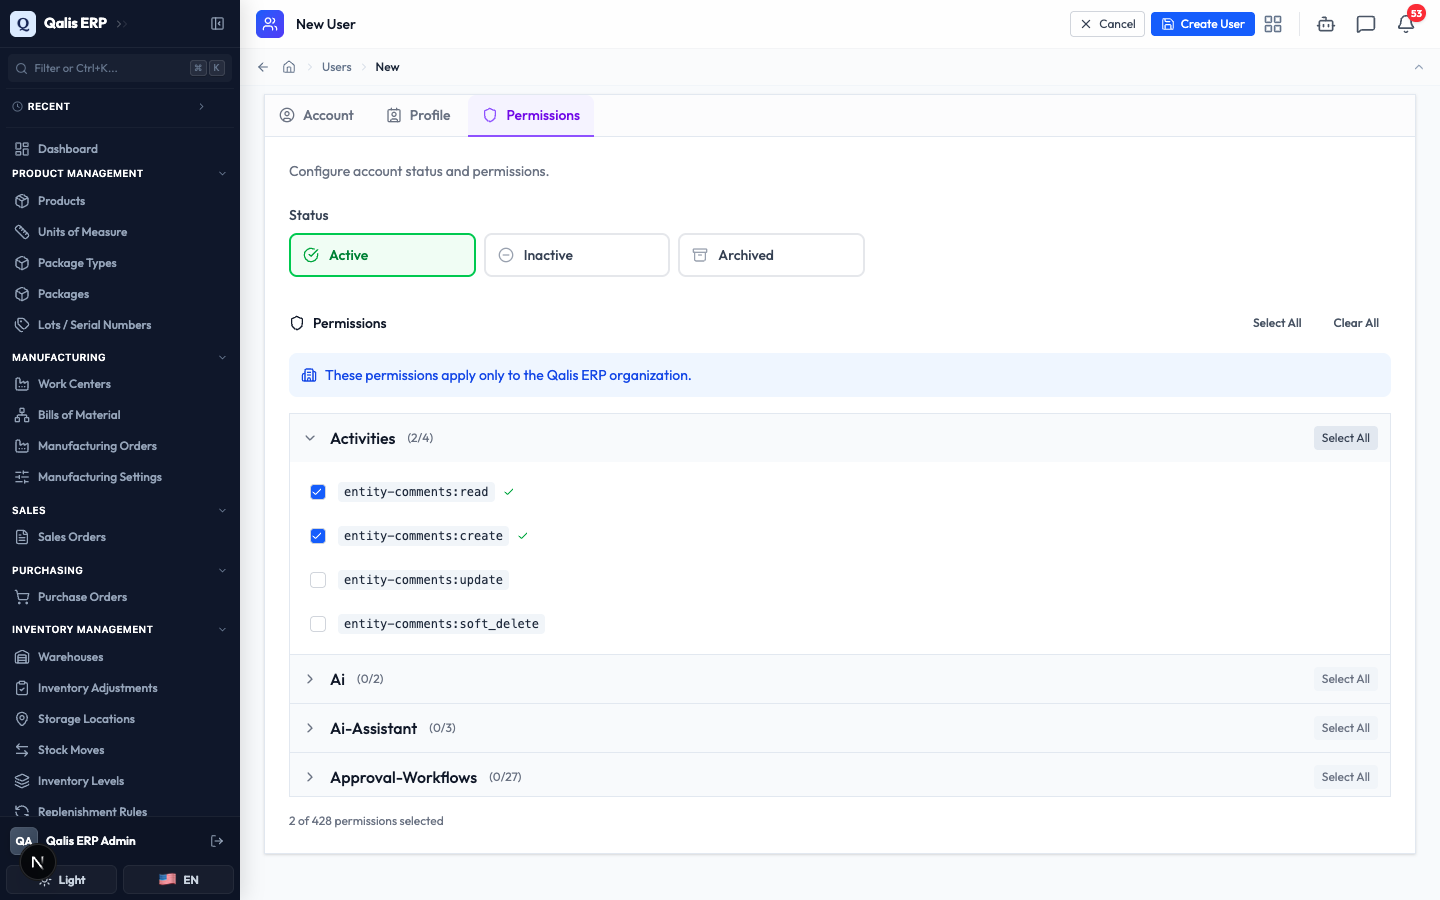
- Open the Permissions tab. Set the account Status (usually Active), then choose what this person is allowed to do. Permissions are grouped by area, for example Products or Sales Orders. Click a group to open it and tick the actions the person needs, or use Select All on a group to grant everything in it. The running total at the bottom shows how many you have selected.
- When you are happy, click Create User at the top right.
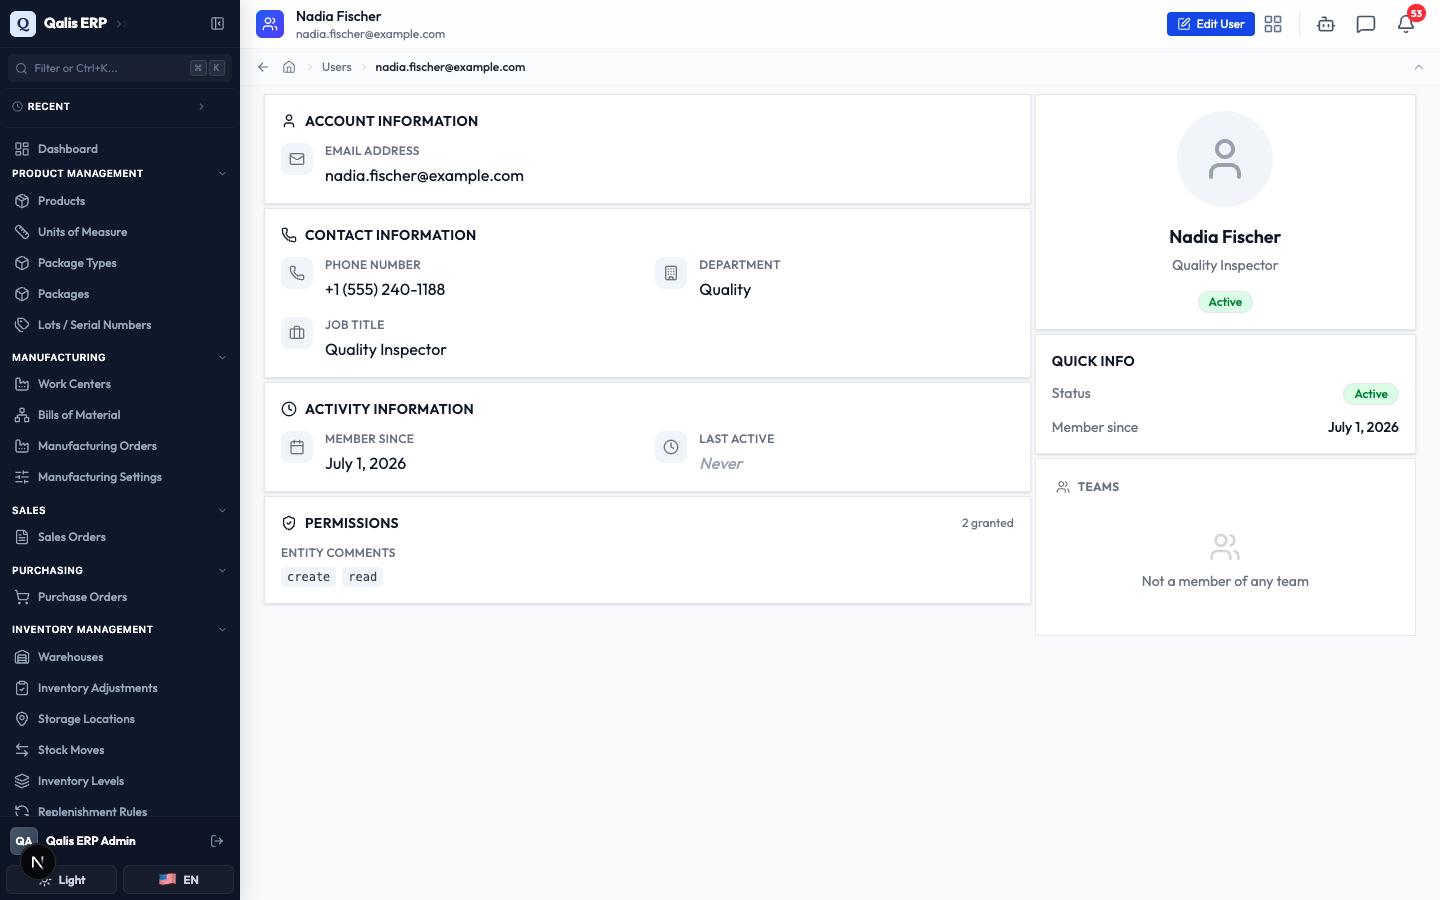
What happens next: Qualis creates the account and opens the person's details page so you can review everything you entered.
The permissions you set here apply only to the organization you are working in, as the blue note on the form reminds you.
Open and read someone's profile
Open any person to see everything about them on one page.
- From the Members list, click the eye icon on a row (or click the person) to open their details page.
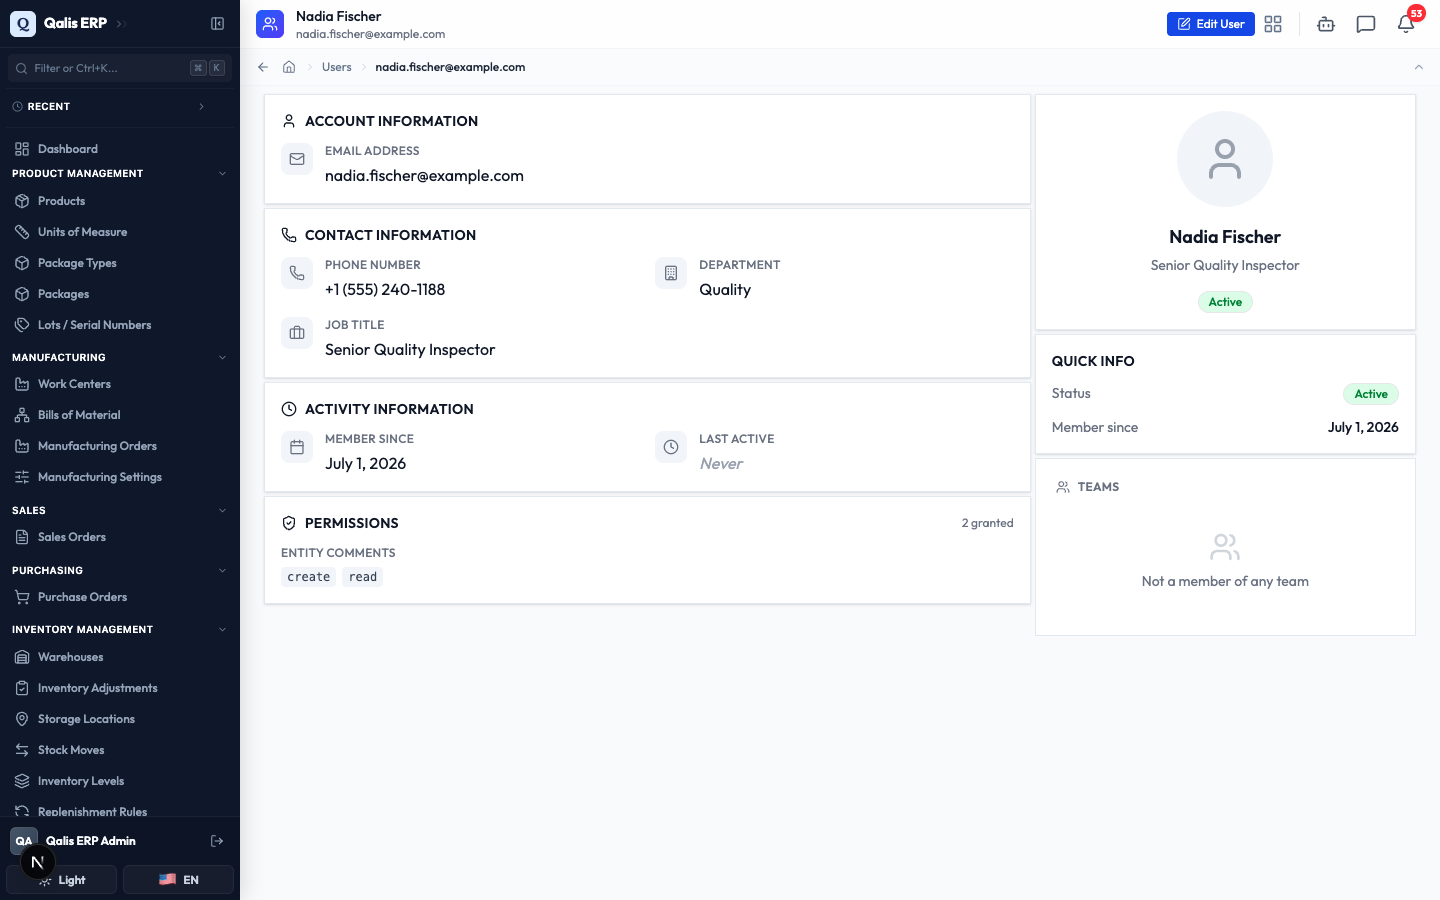
- The main area is split into clear sections: Account Information (their email), Contact Information (phone, department, job title), Activity Information (when they joined and when they last signed in), and Permissions (exactly what they can do in this organization).
- The panel on the right gives you the key facts at a glance: their photo, name, job title, and status, plus Quick Info and the Teams they belong to. The buttons at the top right let you Edit User.
Edit a user and adjust permissions
Update someone's details whenever something changes, for example a new job title, or when they need access to more (or fewer) parts of the system.
- Open the person and click Edit User at the top right (or use the pencil icon on their row in the list). The form opens with everything already filled in, across the same three tabs. Notice the Email Address is shown but cannot be changed, and the password fields are optional (leave them blank to keep the current password).
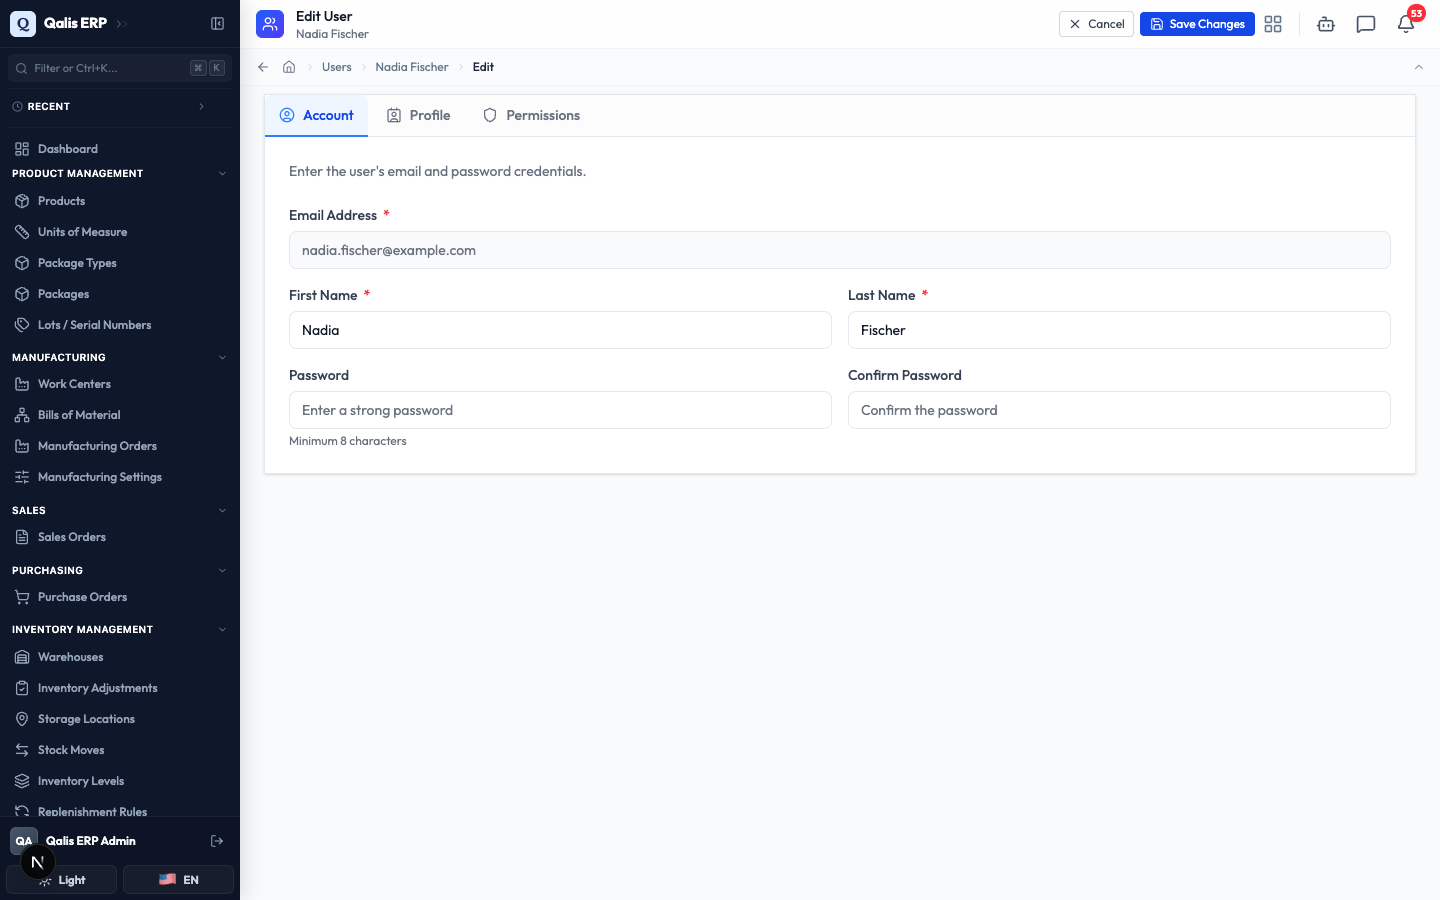
- Go to the tab with the field you want to change. To update their role, open the Profile tab and edit the Job Title; to change what they can do, open the Permissions tab and tick or untick actions.
- Click Save Changes at the top right.
What happens next: Qualis saves your change, shows a short confirmation, and returns you to the details page with the new value in place. Here the Job Title now reads Senior Quality Inspector.
Remove a member from your organization (and restore them)
When someone leaves your team or no longer needs access, you can remove them from this organization. They keep their account and any access to other organizations, and you can bring them back at any time.
- On the Members list, find the person's row and look at the Actions column on the right. You will see icons to view (eye), edit (pencil), and remove from organization (the orange box). Click the remove icon.
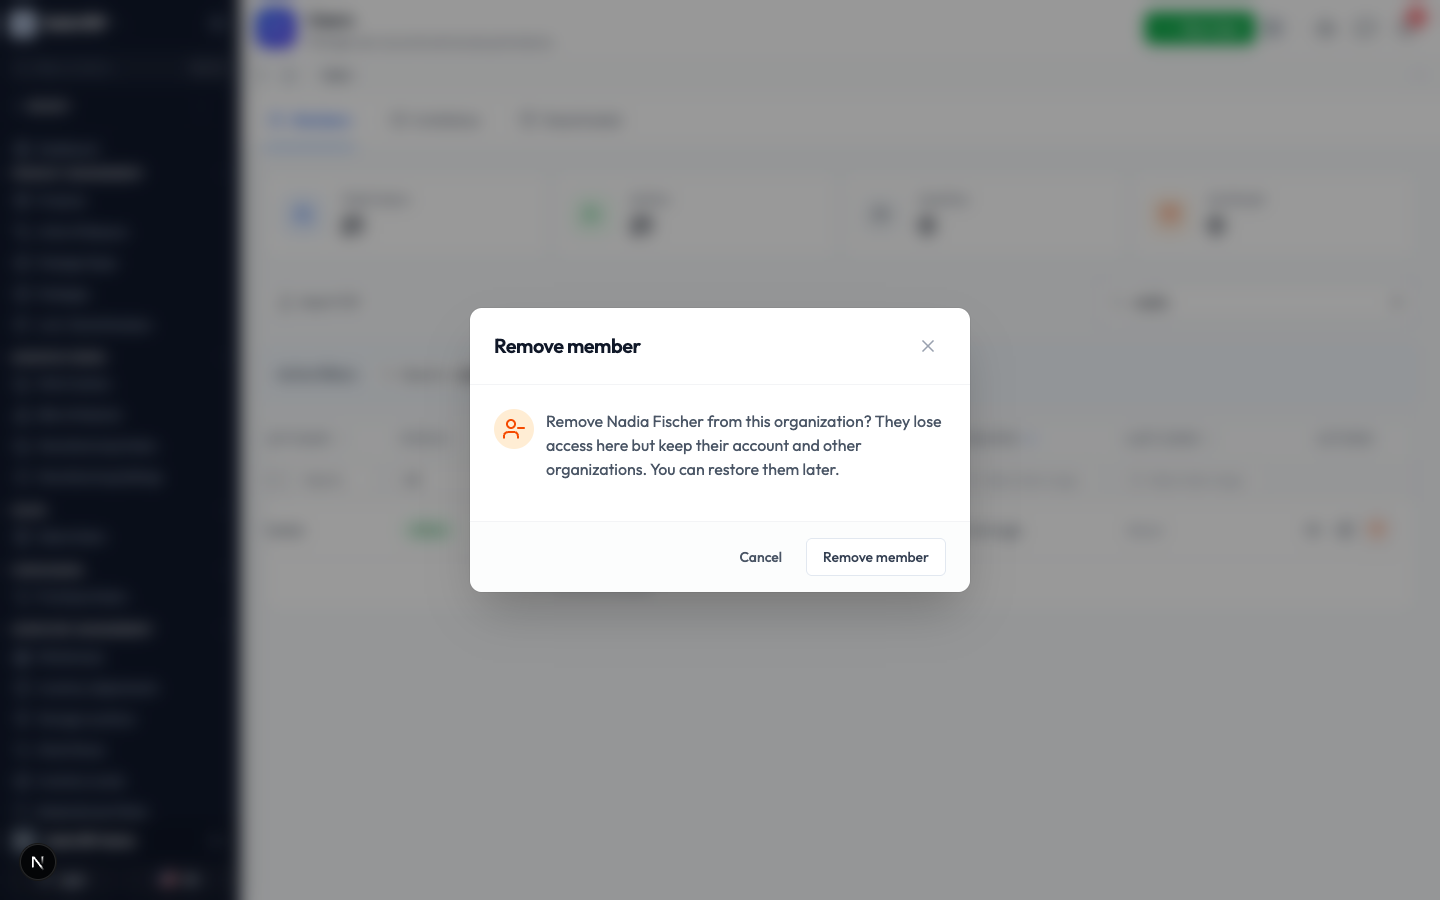
- A confirmation window explains exactly what will happen. Click Remove member to confirm.
What happens next: the person stays in your list with an Archived badge next to their email, so you can always see who has been removed. They can no longer sign in to this organization.
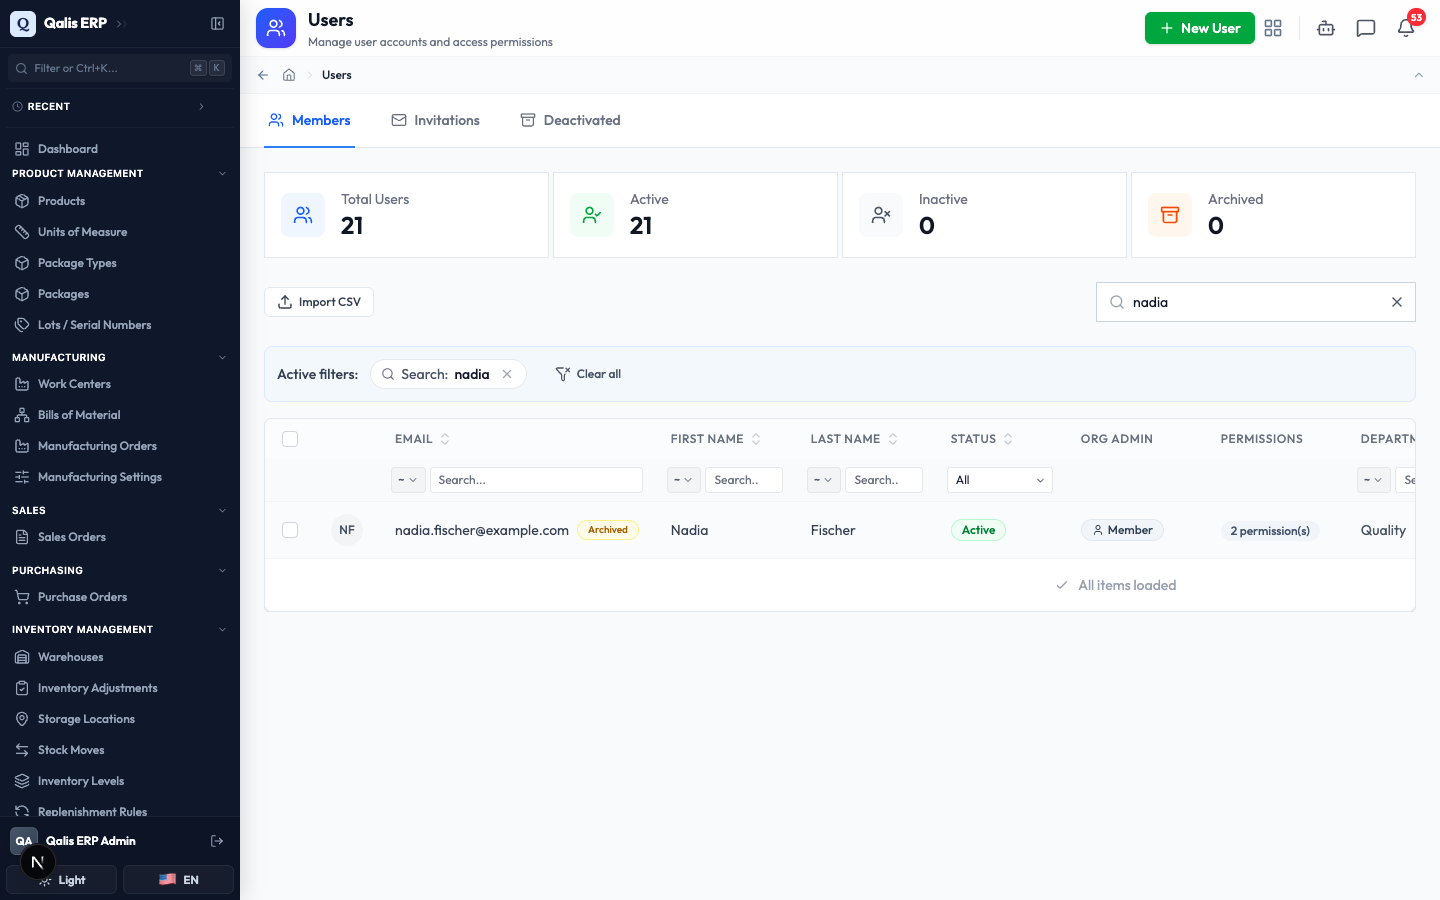
To bring someone back, click the green restore icon that now appears on their row. Their access to this organization is restored right away, with no further steps.
Import and export your user list
When you are setting up the system, or need your list of people outside Qualis, you can move it in and out as a spreadsheet.
Export
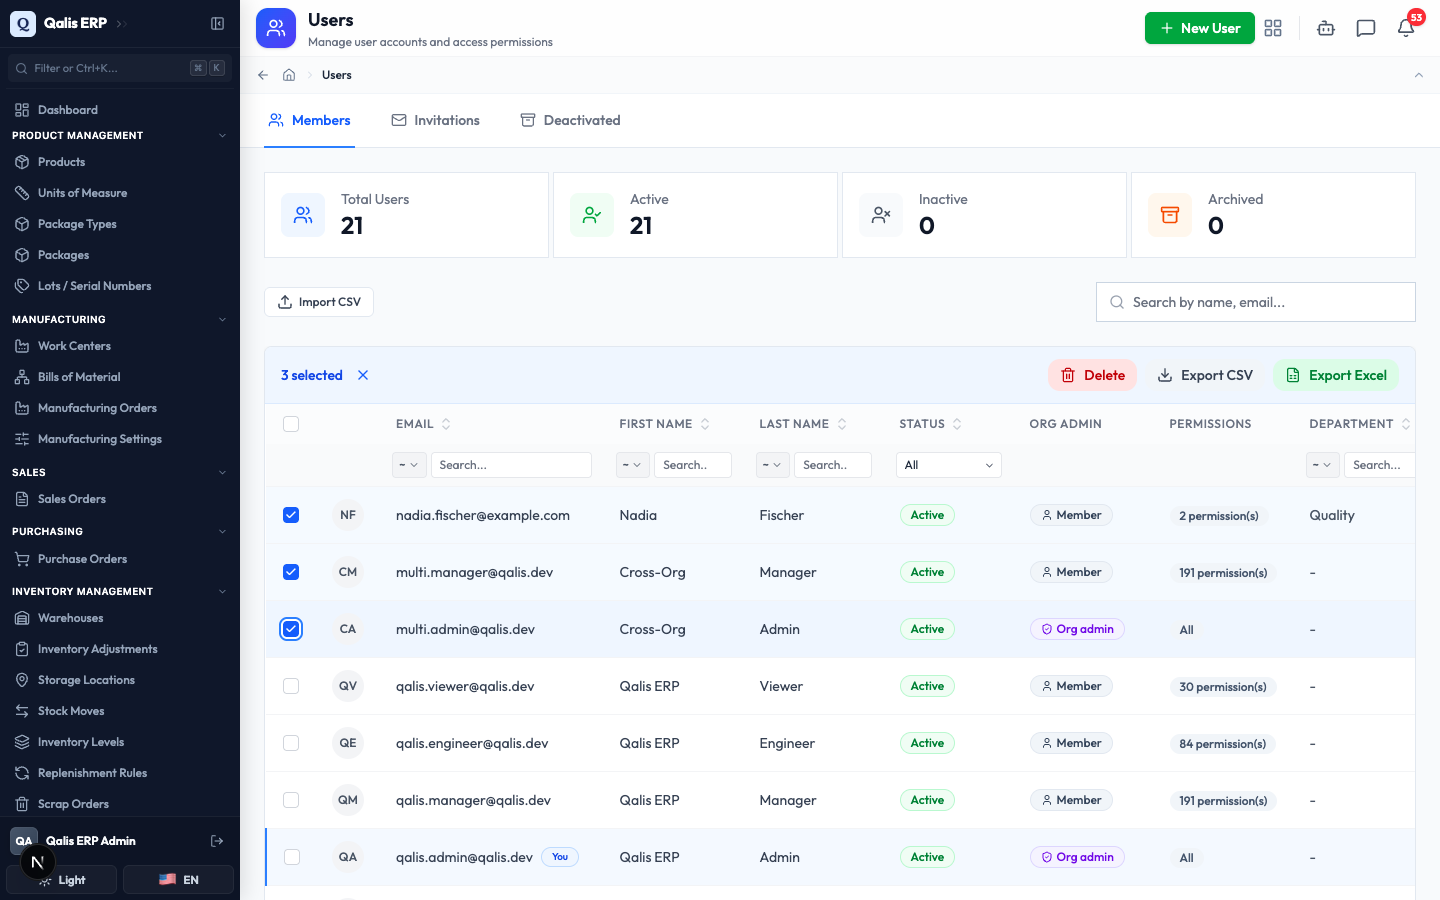
- On the Members list, tick the checkbox at the far left of each person you want, or tick the checkbox in the header to select everyone on screen.
- A toolbar appears showing how many are selected, with Export CSV and Export Excel buttons. Click the format you want, and the file downloads.
Import
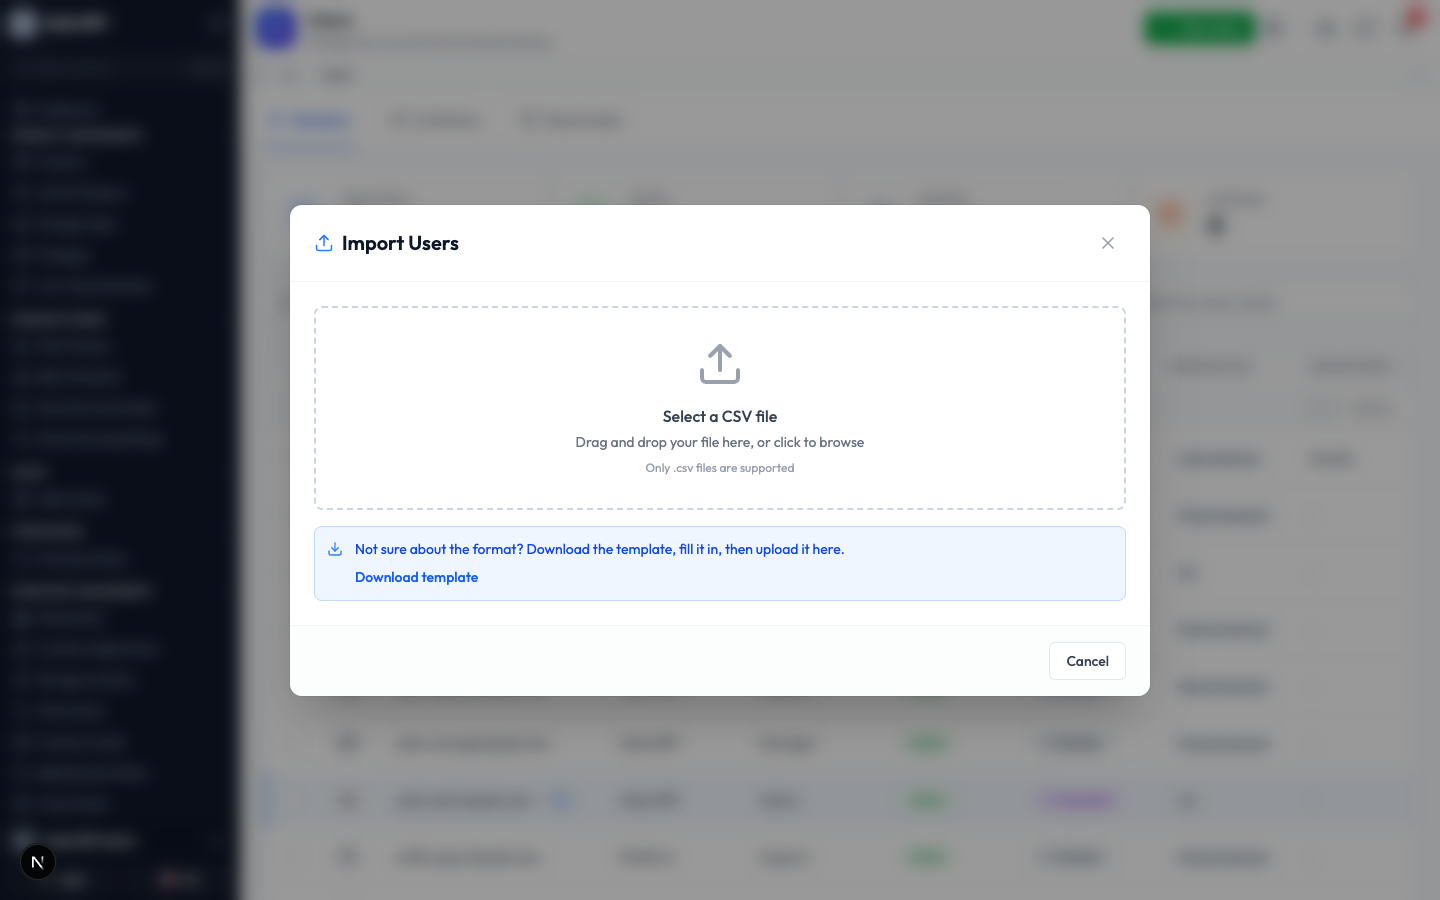
- On the Members list, click Import CSV (top left). The Import Users window opens.
- Drag your CSV file onto the upload area, or click it to browse for the file. If you are not sure of the format, click Download template, fill it in, then upload it. Each person needs at least an Email, a Password, a First Name, and a Last Name; everything else (permissions, status, phone, department, job title) is optional.
- Qualis checks every row and shows you a preview with a green tick for each valid row and a count of how many are ready. Review it, then click Import to confirm. Large imports run in the background, so you can keep working while they finish, and you can follow their progress on the Background Jobs page.
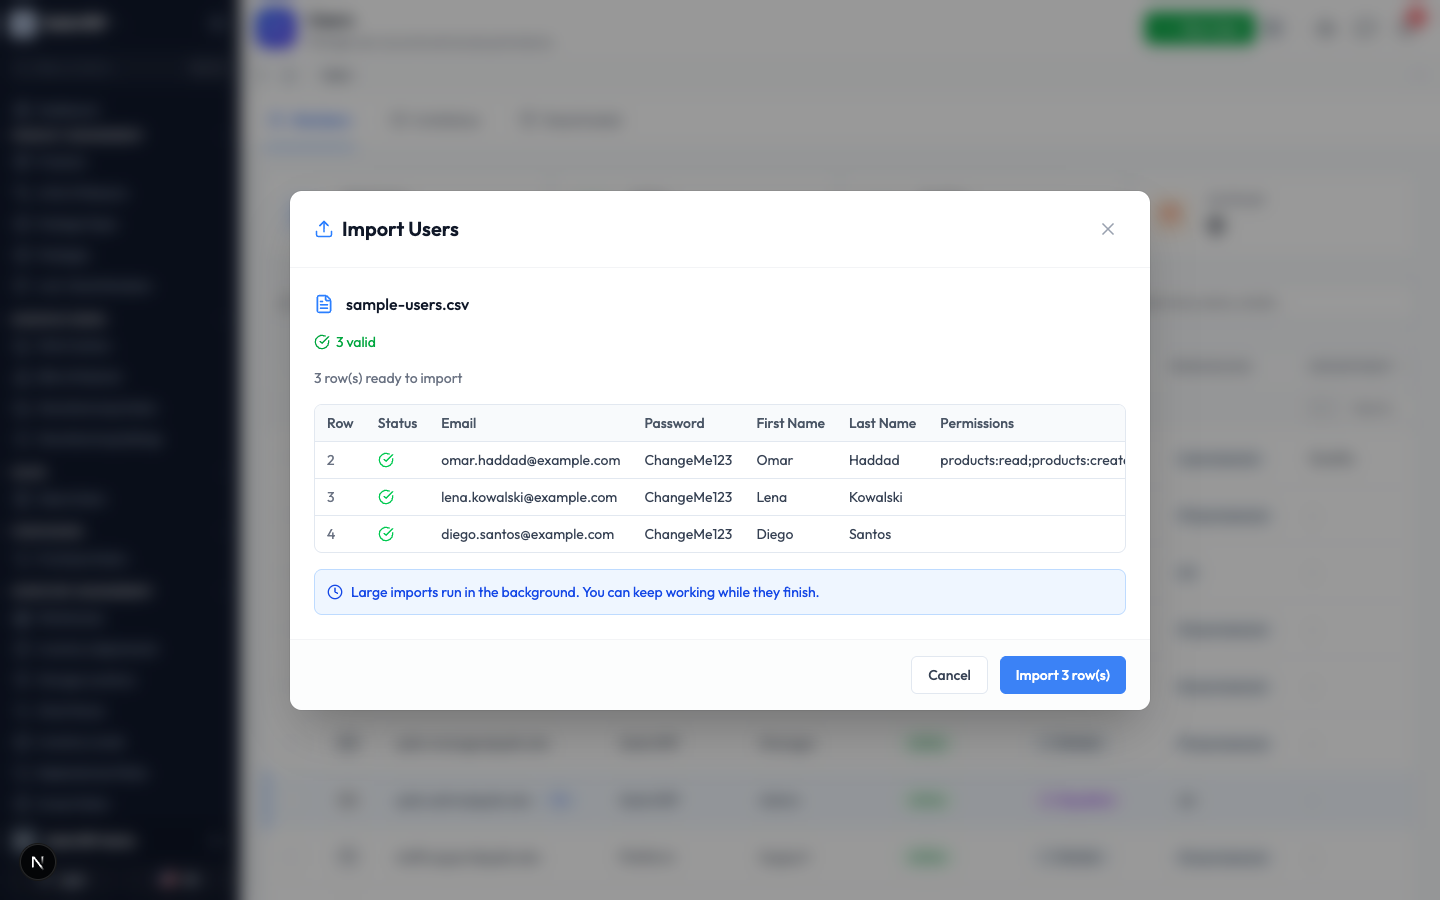
If a row has a problem, for example a missing name or an email that already exists, it is flagged in the preview so you can fix your file and try again before anything is saved.
Good to know
- Member or Org admin: a Member can do only the specific things you tick in their permissions. An Org admin has full access to everything in the organization. You can see which is which in the Org admin column of the Members list.
- Permissions: these are the individual actions a person can take, grouped by area (for example view, create, or edit within Products). Someone's total permissions are everything you give them directly, plus everything that comes from the Teams they belong to.
- Status: an account can be Active (can sign in), Inactive (temporarily switched off), or Archived (removed). New accounts start as Active.
- Removing from an organization is not the same as deleting: removing someone (the orange icon on their row) only takes away their access to this organization. They keep their account and any other organizations, and you can restore them at any time. Accounts are never permanently deleted, because so many records across Qualis (who created an order, who ran an inspection, and so on) point back to them.
- Fully deactivated accounts: switching an account off everywhere, so the person cannot sign in to any organization, is a super-admin task. Those accounts appear on the Deactivated tab, where they can be reactivated later.
- Email is the login: a person's email address is how they sign in, so it cannot be changed once the account exists.
- Invitations expire: a pending invitation is valid for a limited time. If it lapses, it shows as Expired on the Invitations tab, and you can simply send a new one.