Members
Invite people into your organization, choose exactly what they can access, and keep track of every invitation you have sent.
Last updated on June 29, 2026
The Members area is where you bring new people into your organization and manage the invitations you send them. When someone should have access, you send them an email with a secure link. They click it, set up their account (or sign in if they already have one), and become a member with exactly the access you chose. This guide covers the everyday tasks: finding your members and invitations, inviting someone new, tracking an invitation, resending or revoking it, and what your invitee sees when they accept.
You will find everything under Users in the left sidebar, in the Administration group. You can also press Ctrl+K (or Cmd+K) and search for "Users" or "Invitations". The page opens with three tabs: Members (everyone who has joined), Invitations (people you have invited), and Deactivated (members whose access has been turned off).
Before you start
- To send invitations you need permission to invite members. If the Invite member button is greyed out, ask an administrator to grant it.
- Adding a new person to specific teams as they join is optional. If you want to do that, set the team up first.
Find members and invitations
See who is in your organization and which invitations are still outstanding.
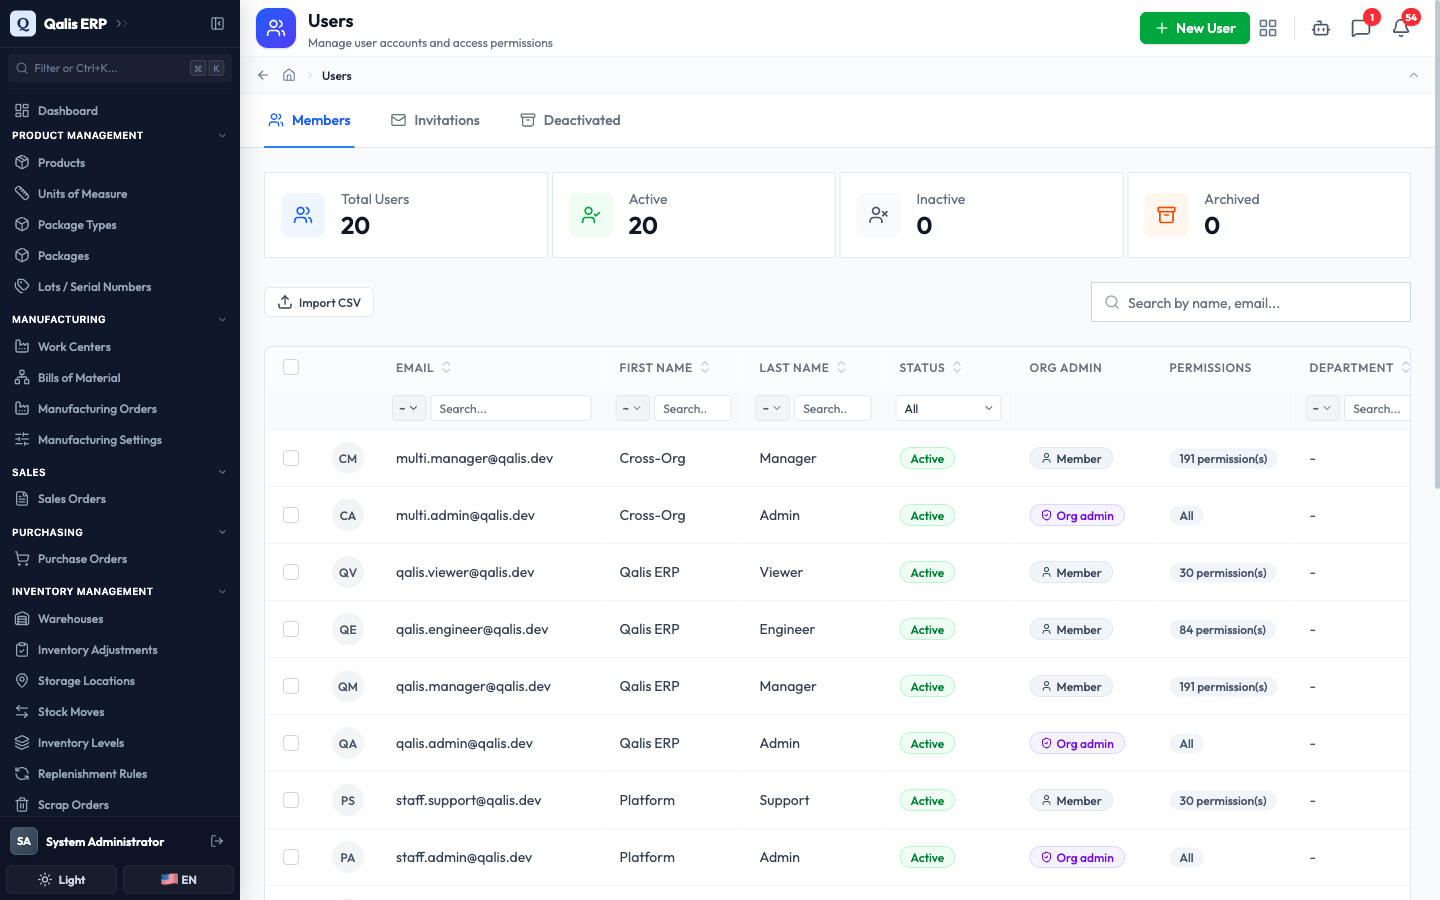
- Open Users from the left sidebar. The Members tab opens first and lists everyone who has joined, with their email, name, status, whether they are an organization admin, and how many permissions they hold.
- Click the Invitations tab to switch to the people you have invited. Each row shows the email, the invitation status, who sent it, when it was sent, and when it expires.
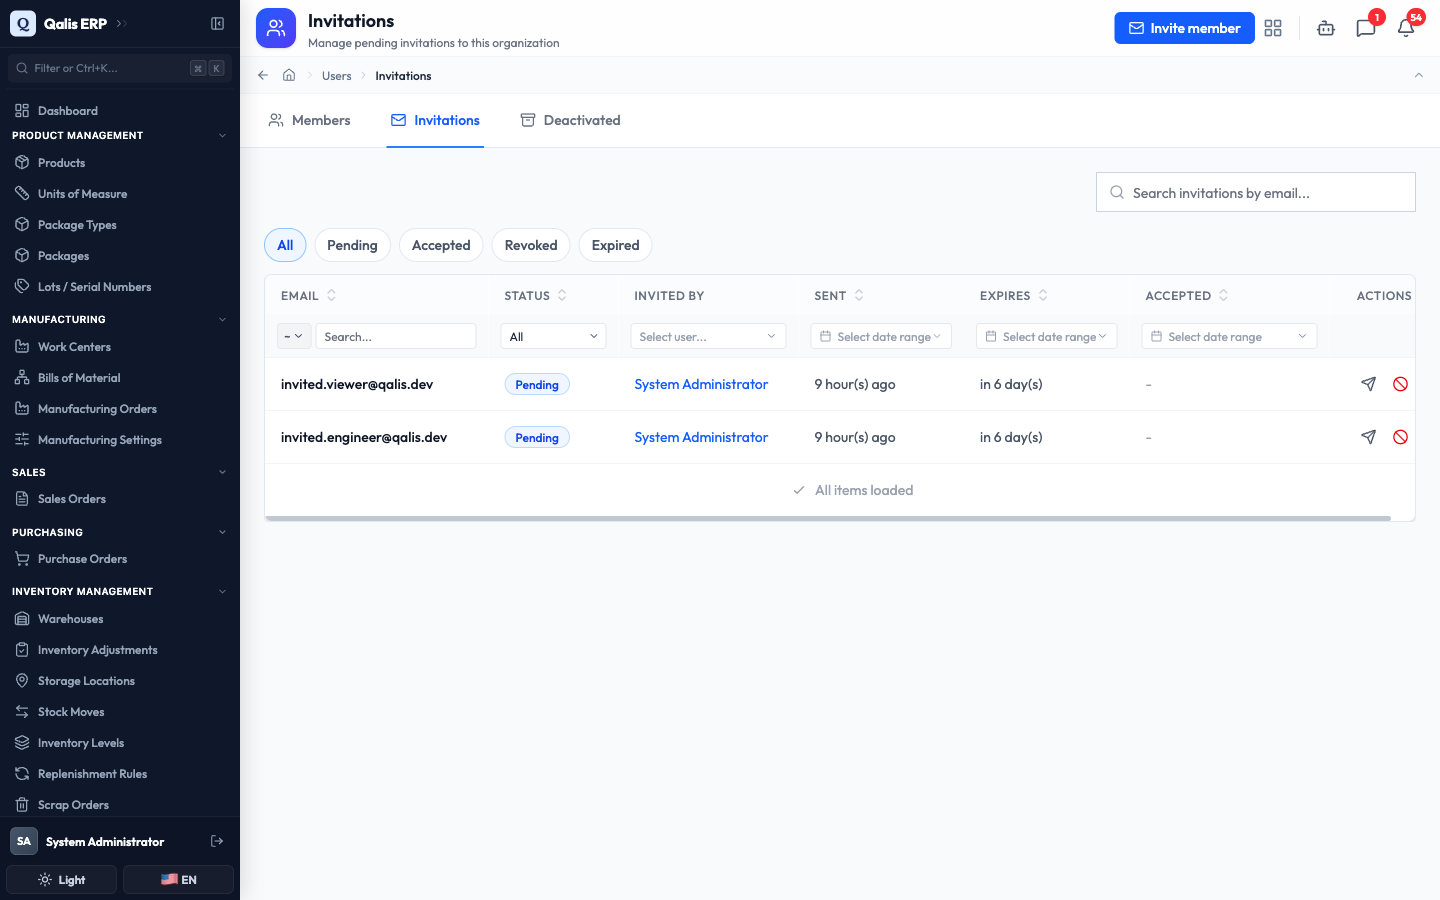
- To narrow the list, use the quick filter chips above the table (All, Pending, Accepted, Revoked, Expired), type in the Search invitations by email box, or use the column filters. Your filters are saved in the page address, so you can bookmark or share a filtered view.
Tip: the quick filters are the fastest way to answer "who still has not accepted?" Click Pending to see only the invitations that are still waiting.
Invite a new member
Send someone a secure link that lets them join your organization with the access you choose. This is the main thing you do here, so we will take it slowly.
- On the Invitations tab, click Invite member in the top right. (You can also start from the Members tab with the New User button and choose to invite.)
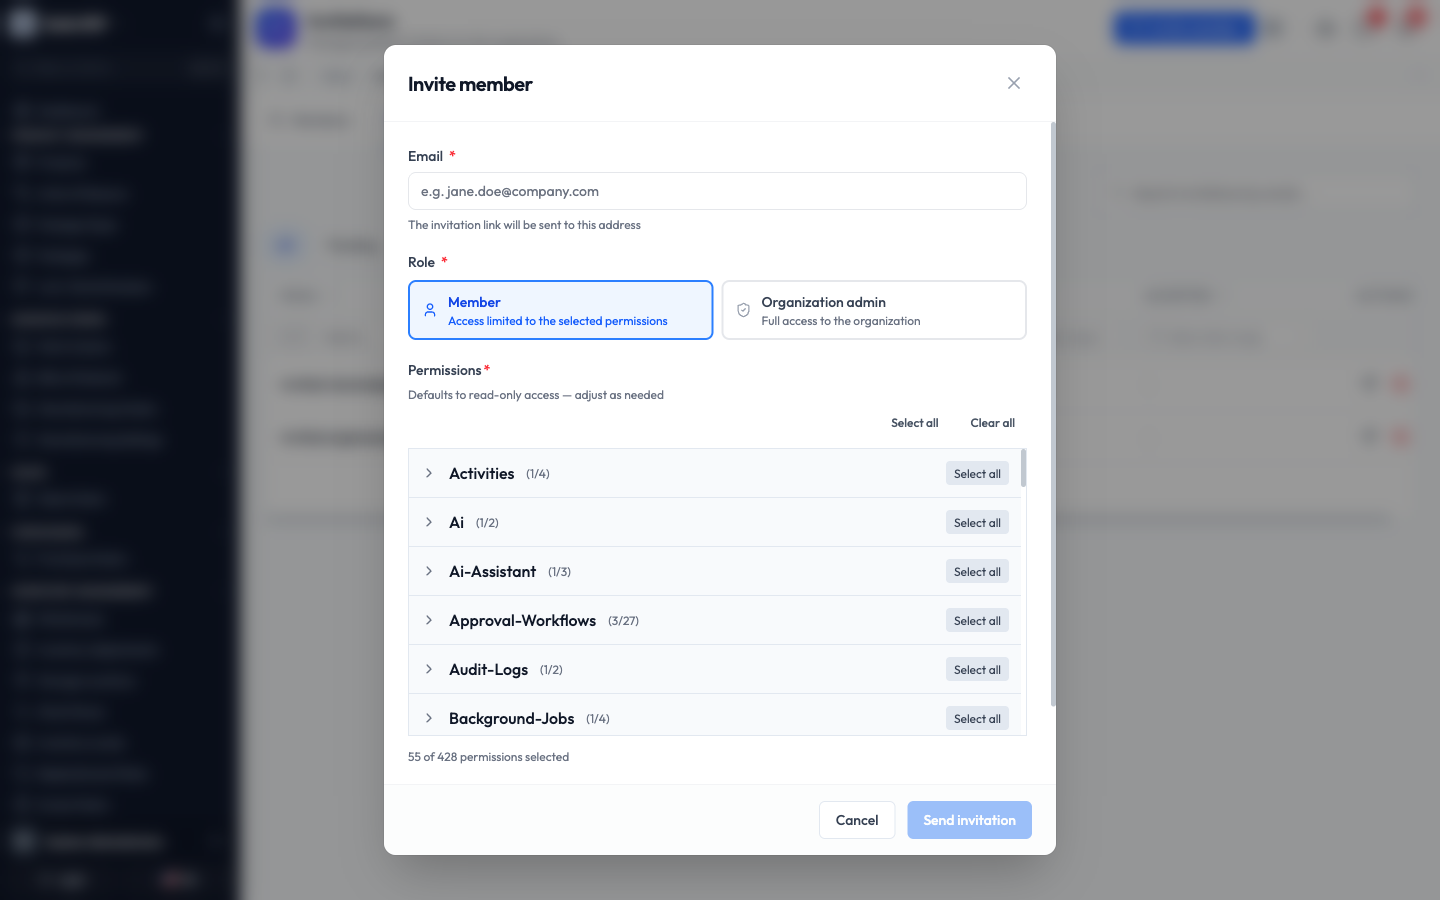
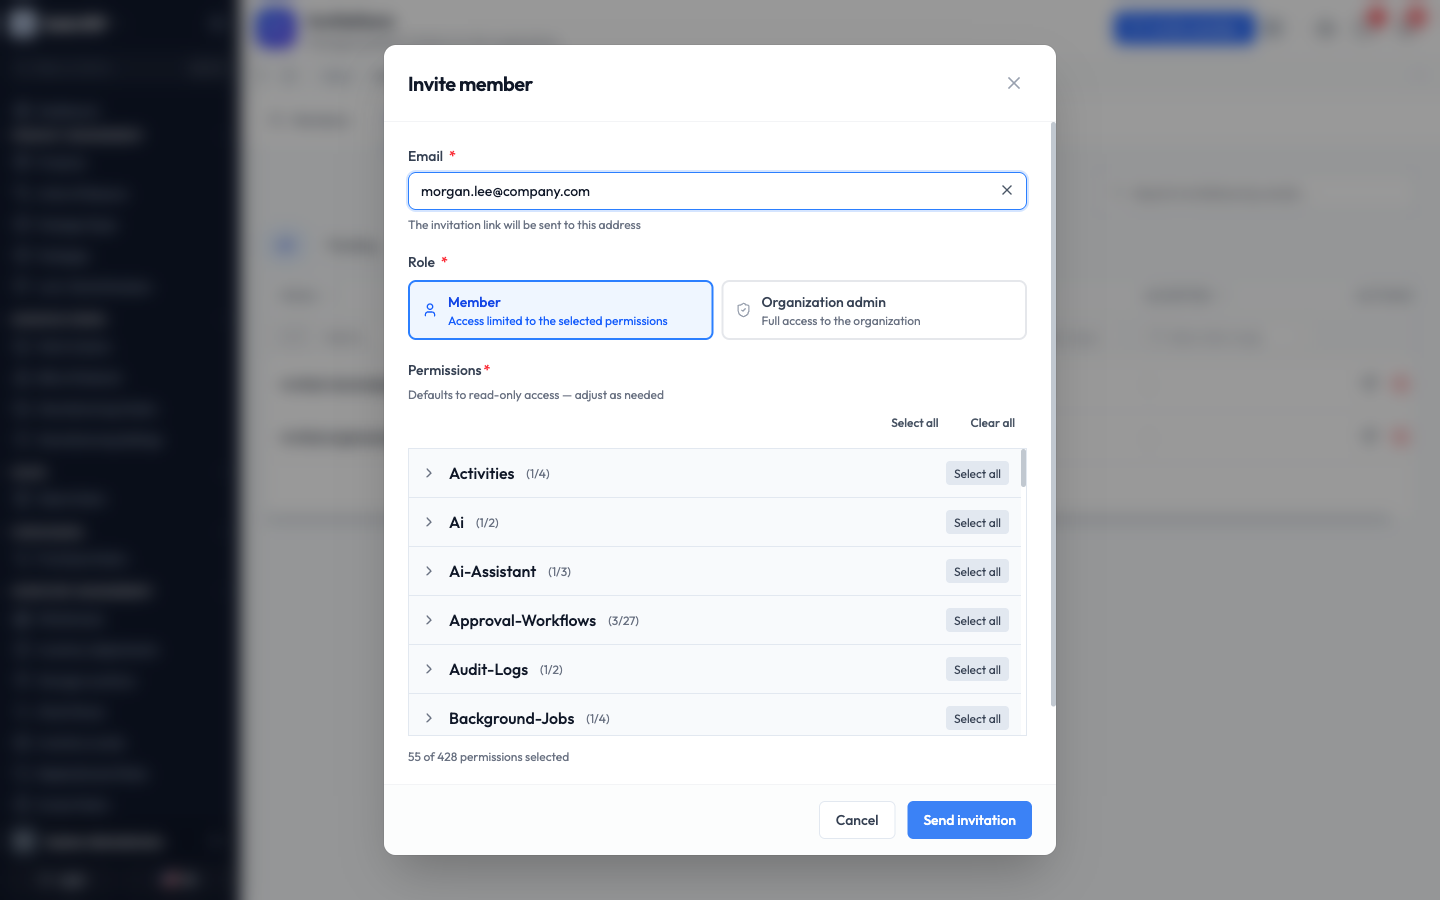
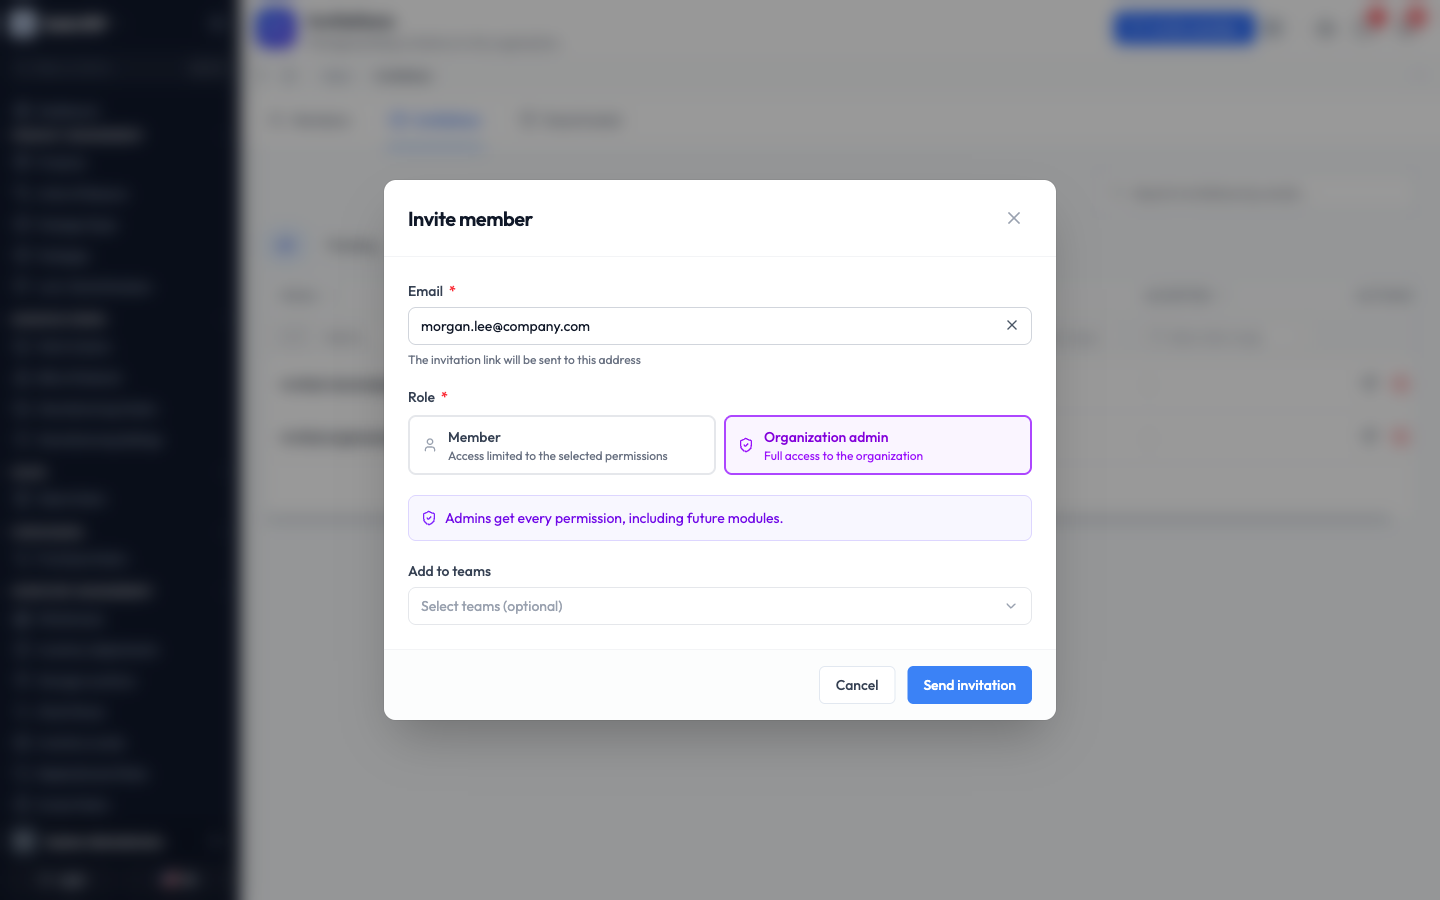
- Type the person's work email in the Email field. The invitation link is sent to this address, so check that it is correct.
-
Choose a Role:
- Member gives access only to the permissions you select below. New members default to read-only access, and you widen it by ticking more boxes. Use Select all on any module group to grant everything in that group.
- Organization admin gives full access to everything, including modules you add in the future. Pick this only for people who should run the whole organization.
-
(Optional) Use Add to teams to drop the new person straight into one or more teams the moment they join.
-
Click Send invitation. The button shows "Sending..." while the email goes out.
What happens next: the invitation is created, an email is sent to the address, and a one-time invite link appears. If you would rather hand the link over directly (for example in a chat message), click Copy link and share it yourself.
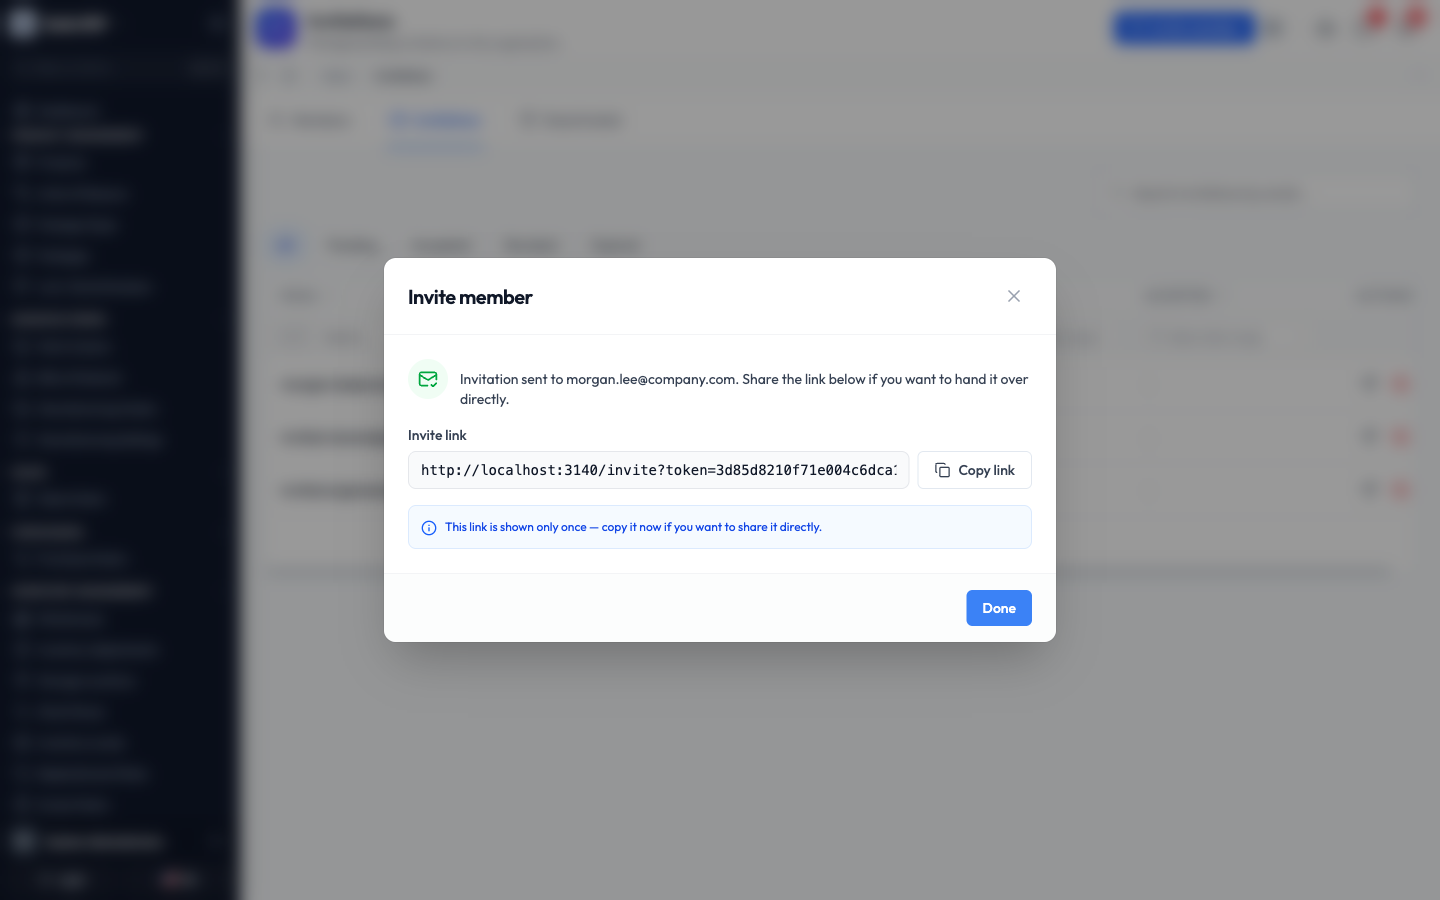
Important: the invite link is shown only once. If you lose it, you can resend the invitation to create a fresh link. Click Done to close.
Track your invitations
Follow each invitation from the moment it is sent until someone accepts.
After you send an invitation it appears at the top of the Invitations tab with a status badge.
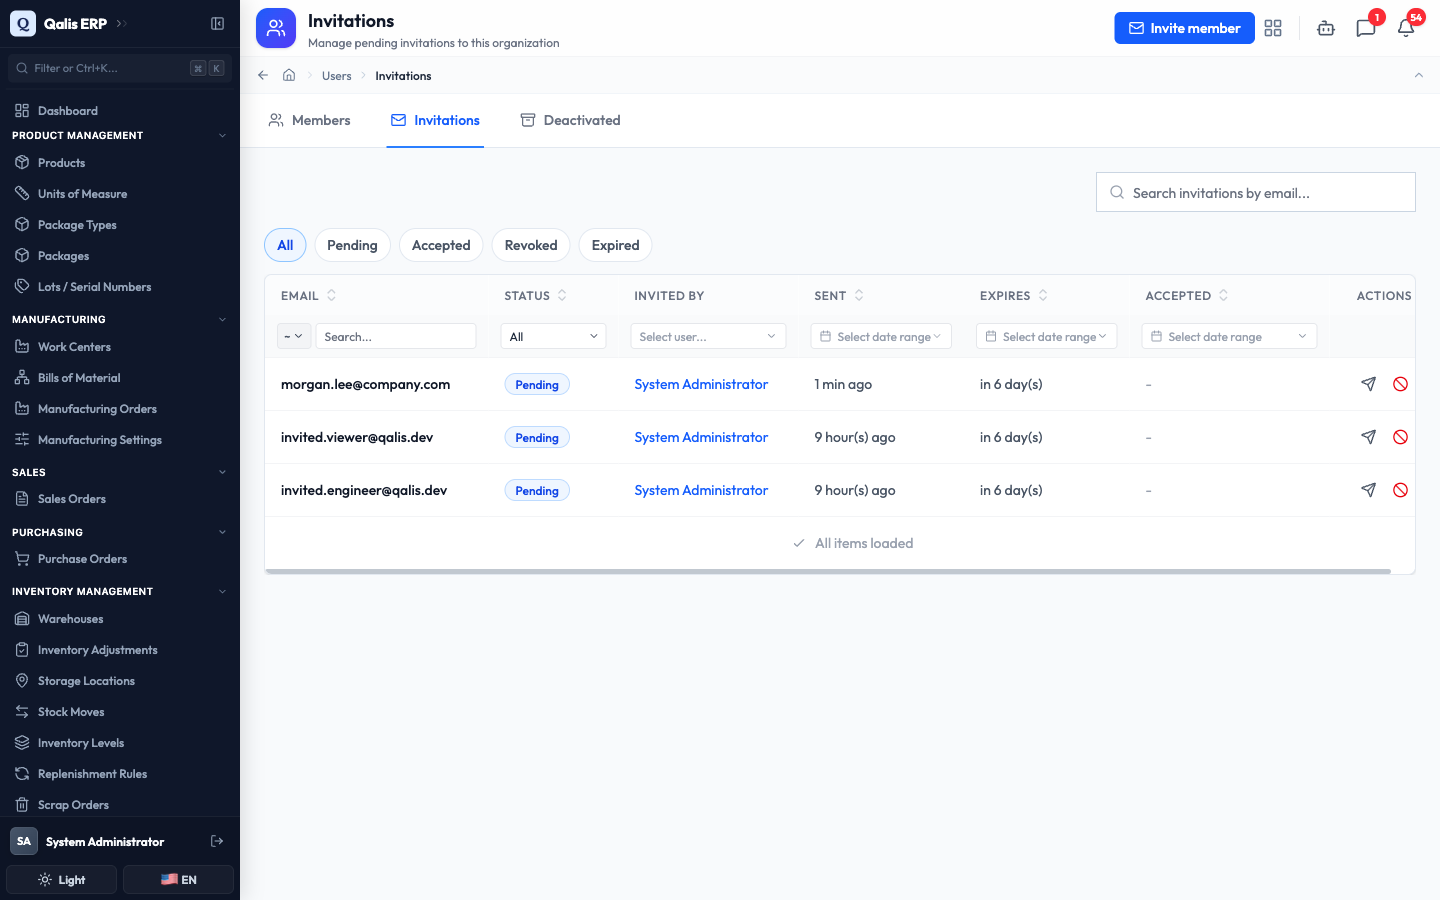
The columns tell you everything at a glance:
- Status is the current state: Pending, Accepted, Revoked, or Expired.
- Invited by is the person who sent it, with a link to their profile.
- Sent is when the invitation (or its most recent resend) went out.
- Expires is when the link stops working. Invitations are valid for 7 days.
- Accepted fills in with the date and the new member's name once they join.
Resend an invitation
Send the invitation again with a brand-new link, for example if the first email was missed or the link has expired.
- On the Invitations tab, find the row you want and look at the actions on the right. The paper-plane icon is Resend invitation (hover over it to see the label).
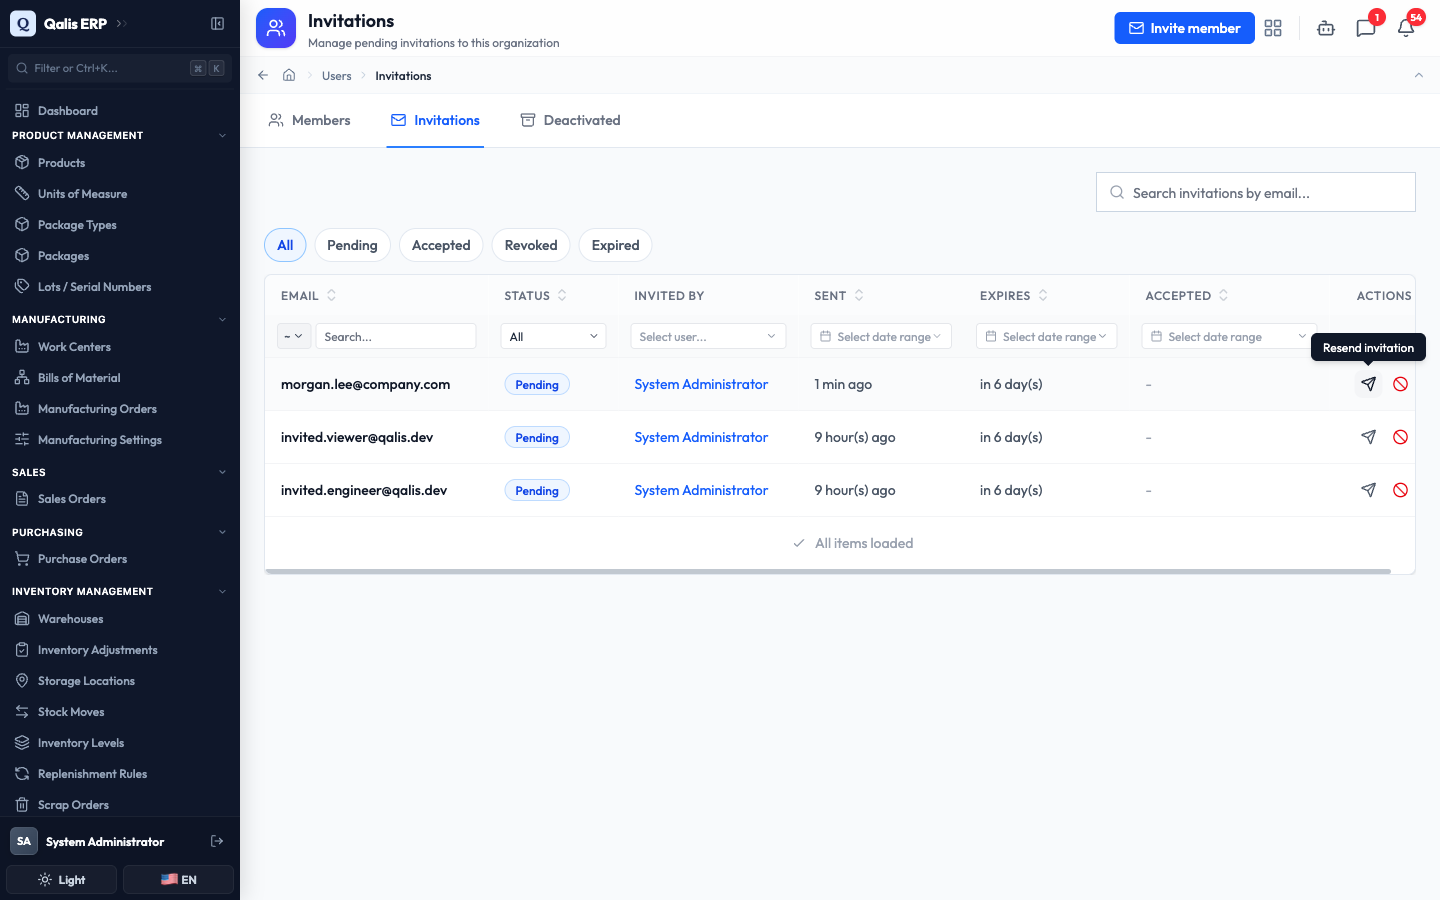
- Click the paper-plane icon. A fresh email is sent and a new one-time link appears, just like when you first invited the person.
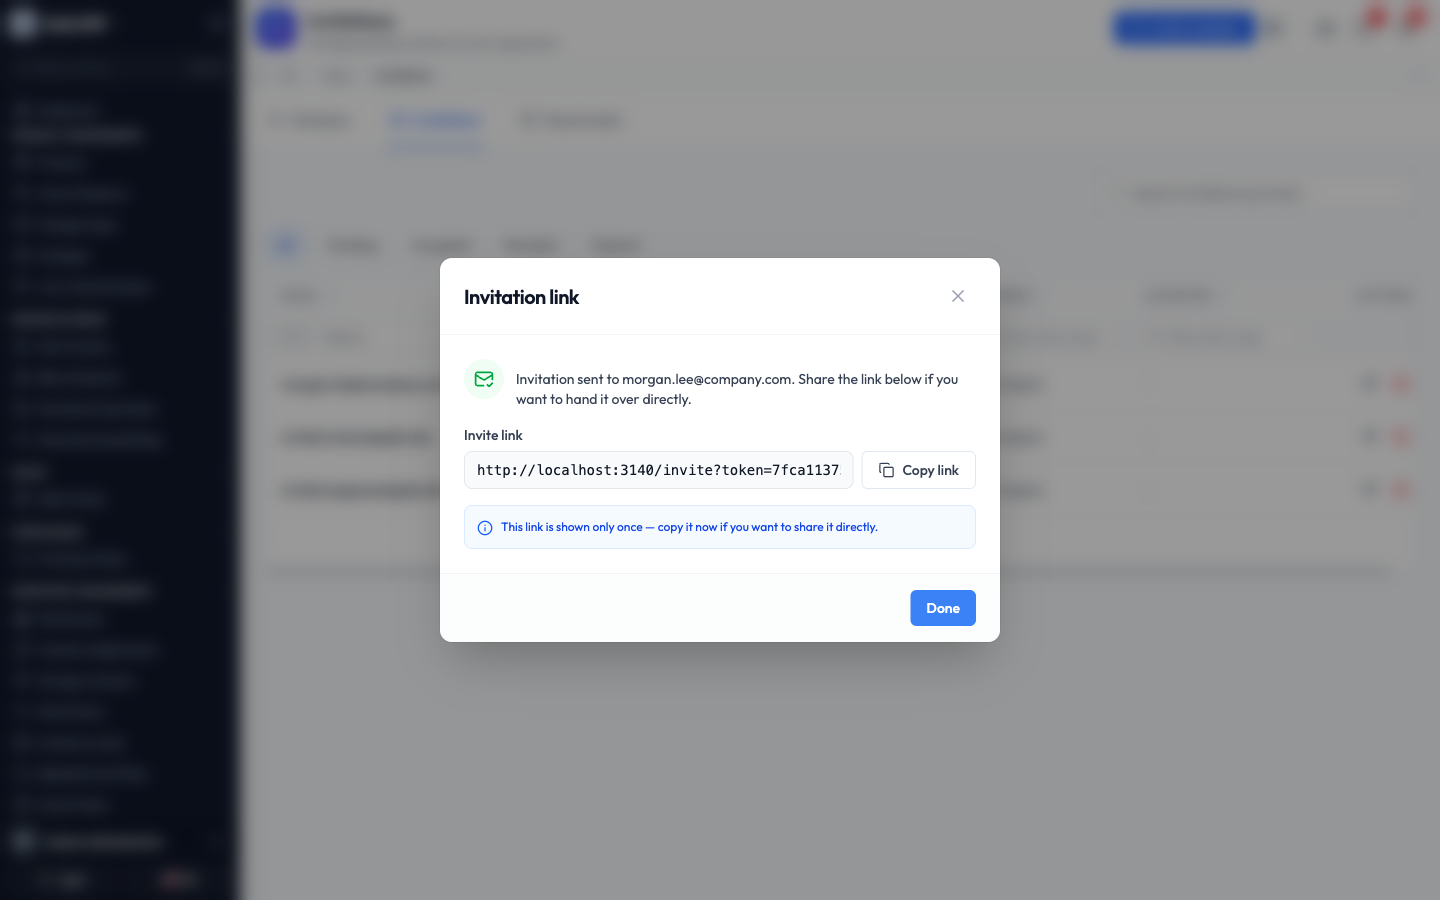
Good to know: resending generates a new link and resets the 7-day clock. The previous link stops working immediately, so always share the newest one.
Revoke an invitation
Cancel an invitation that is still pending so its link can no longer be used.
-
On the Invitations tab, find the pending invitation and click the red Revoke invitation icon (the circle with a line through it) on the right.
-
A confirmation appears. Read it, then click Revoke invitation to confirm, or Cancel to keep it.
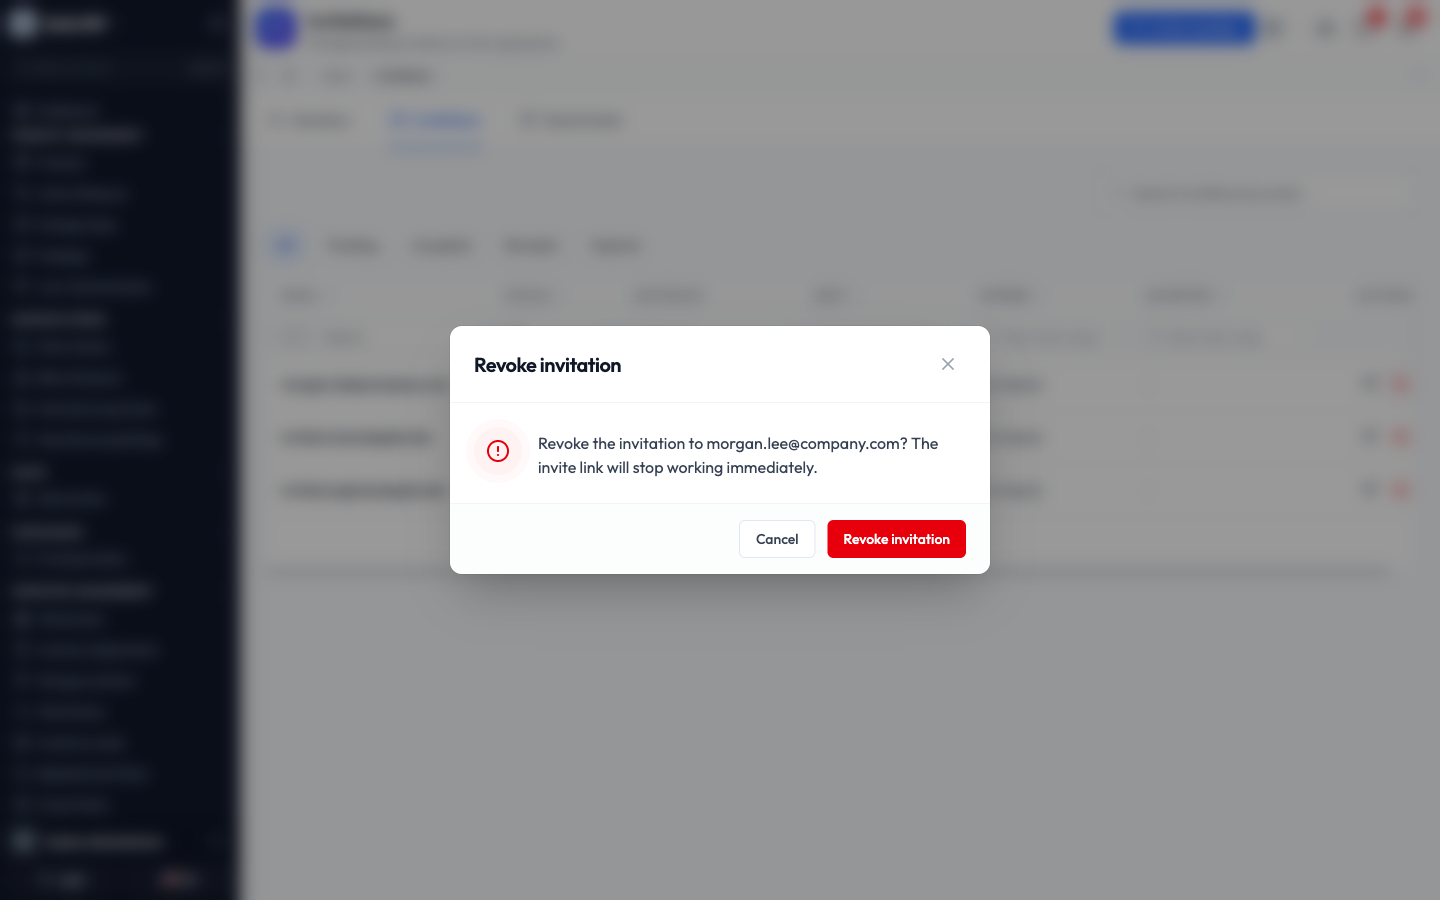
What happens next: the invitation's status changes to Revoked and its link stops working straight away. The record stays in the list for your reference.
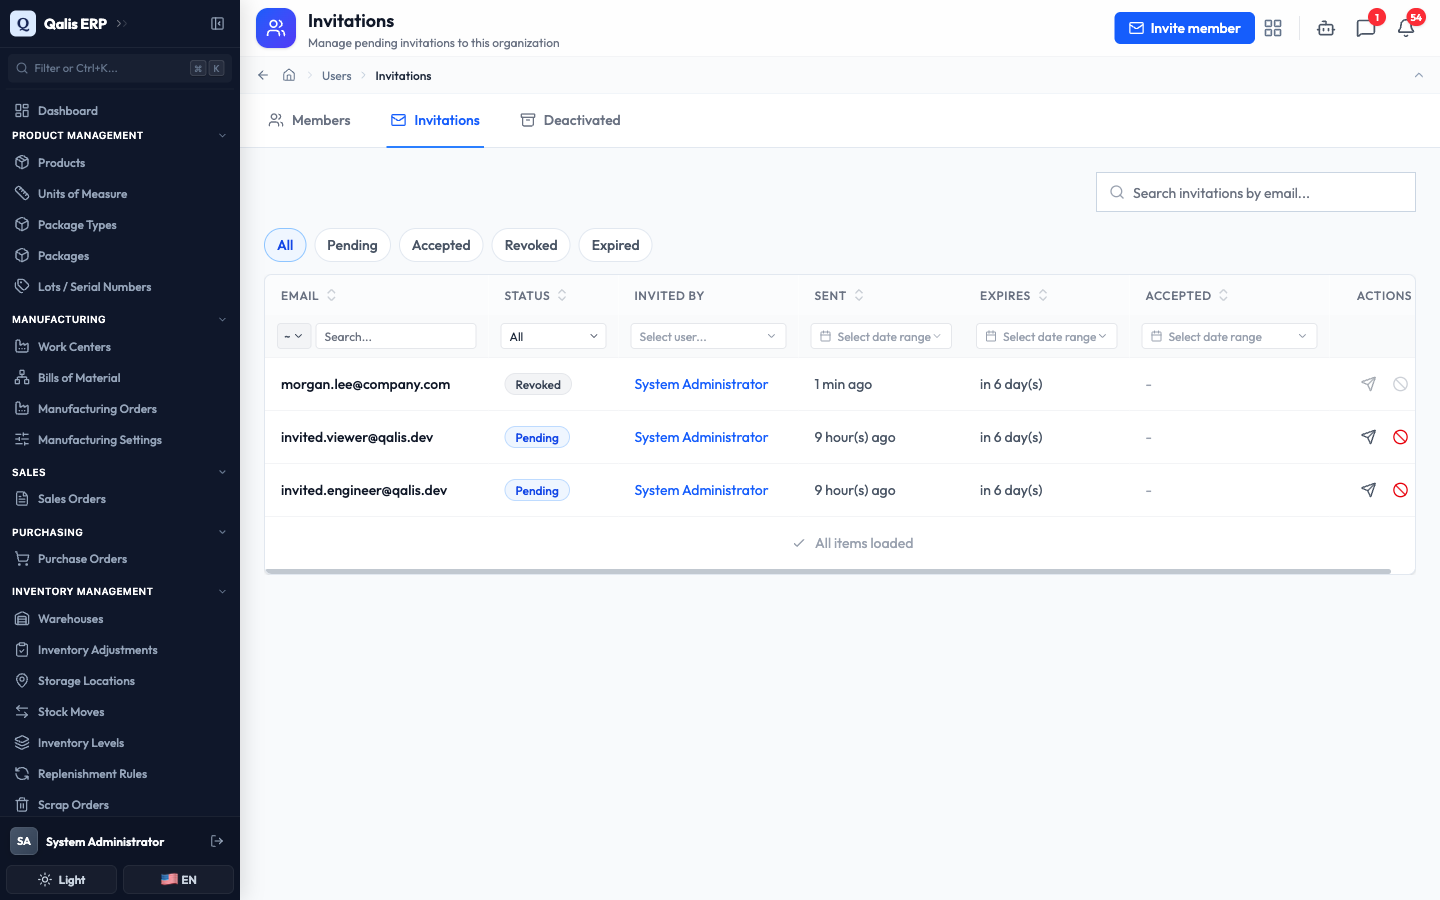
Note: you can only revoke an invitation that is still Pending. Once someone has accepted, you manage their access from the Members tab instead.
What the person you invited sees
A quick look at the experience on the other end, so you can help if someone gets stuck.
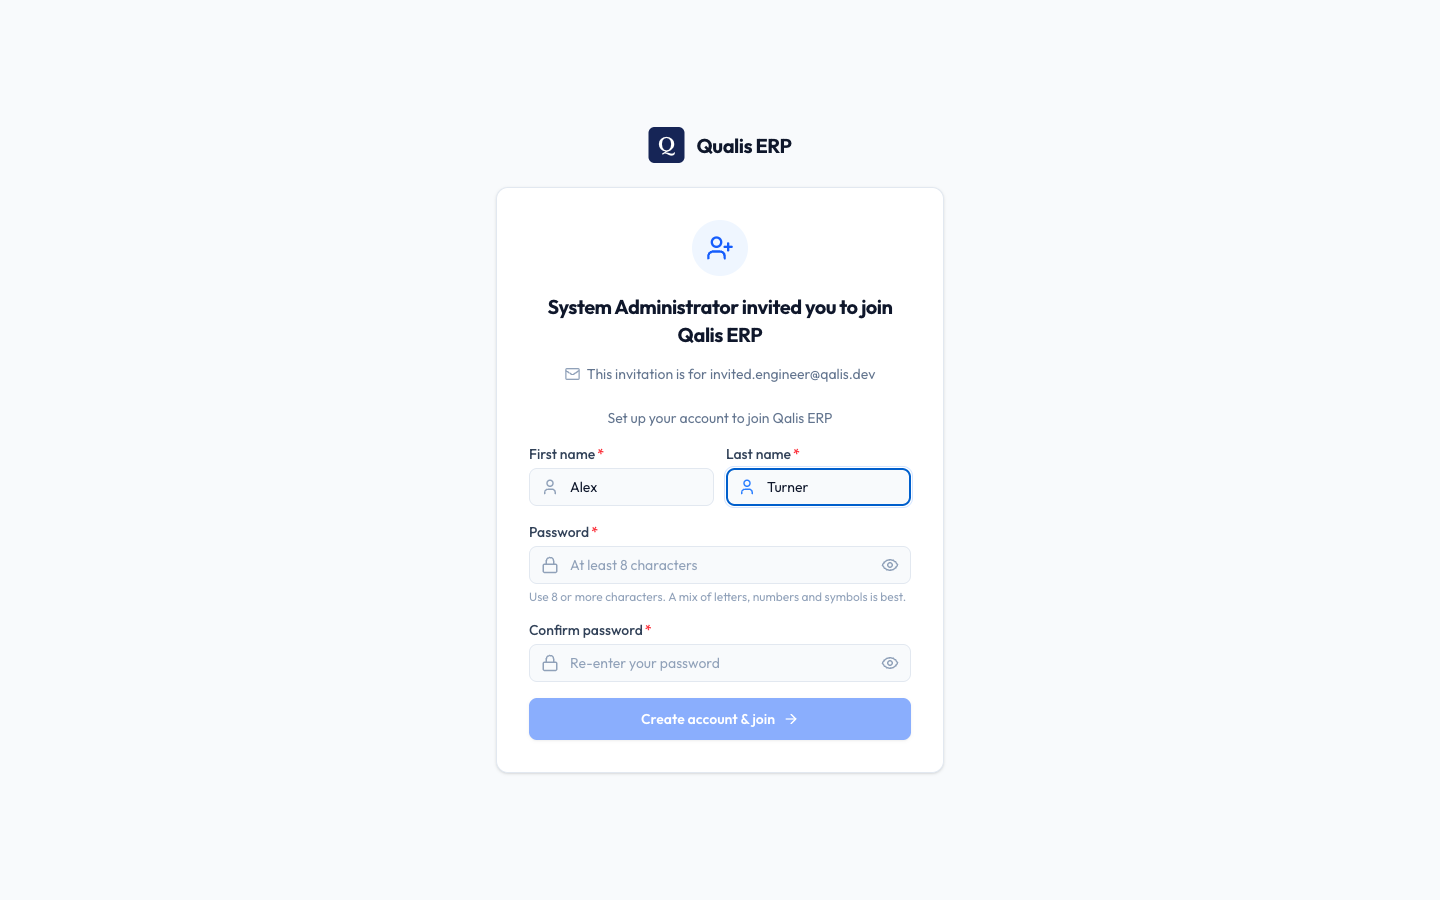
When your invitee opens the link, they see a welcome page that names who invited them and the email the invitation was sent to.
- If they do not have an account yet, they fill in their first name, last name, and a password (at least 8 characters), then click Create account & join. They are signed in and land in the app right away.
- If they already have an account, they simply click Accept invitation to add your organization to their account.
If the link has expired or was revoked, your invitee sees a friendly message asking them to request a new invitation. Just resend the invitation to give them a working link.
Good to know
- Pending: the invitation has been sent and the link still works, but no one has accepted yet.
- Accepted: the person joined. The Accepted column shows when, and they now appear on the Members tab.
- Revoked: you cancelled the invitation. Its link no longer works.
- Expired: no one accepted within 7 days, so the link stopped working. Resend it to issue a new one.
- Member vs Organization admin: a Member can do only what their permissions allow, while an Organization admin can do everything. When in doubt, invite as a Member and widen permissions later.
- The invite link is private: anyone who has it can join as that person, so share it only with the intended recipient. It is shown only once and expires after 7 days.