Teams and Permissions
Control who can see and do what, using per-action permissions and shared team membership.
Last updated on June 25, 2026
Permissions decide what each person is allowed to do in your organization. You can grant access to someone directly, or bundle a set of access into a team and add people to it. This guide shows you how to add people, give them exactly the access they need, group them into teams, and remove access when someone moves on.
How access works
In Qualis there are no fixed roles like "Manager" or "Viewer". Instead, access is built from small, specific permissions. Each permission is one action on one kind of record, for example "read products" or "create inspections". You switch on only the actions a person should be able to perform.
A person's access can come from two places:
- Directly, when you grant permissions to that person on their own profile.
- Through a team, when you add the person to a team that already carries a set of permissions.
The two add together. Someone's real access is everything granted to them directly, plus everything granted by every team they belong to. Access is always additive, so being on more teams can only ever give more access, never less.
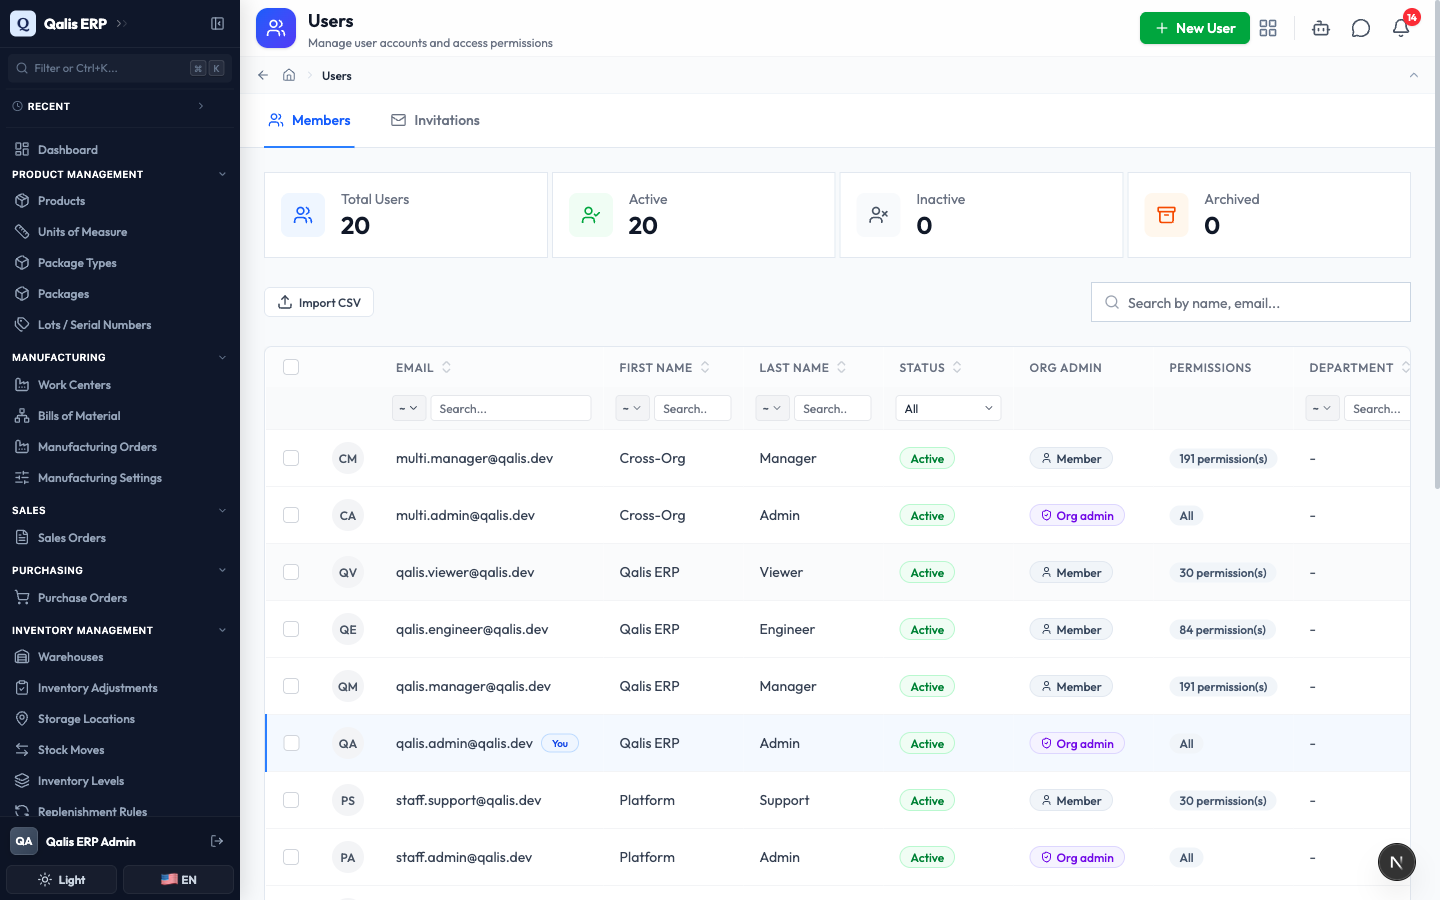
In the Members list above, the Org admin column flags people who can do everything, and the Permissions column shows how many permissions each person holds (or All for an org admin).
An org admin holds every permission in the organization, including for modules you install later. Give this level only to people you fully trust.
Before you start
- Make sure the correct organization is active. The top bar shows which organization you are in, and permissions you grant apply only to that organization.
- To add people you need the "create users" permission. To create teams you need the "create teams" permission. Org admins already have both.
- You can always edit and manage records you created yourself, even without the matching permission.
Add a member to your organization
This adds a new person so you can then give them access.
- Open the sidebar, scroll to the Administration group, and click Users.
- Click New User at the top right. A small Add a member window opens with two choices.
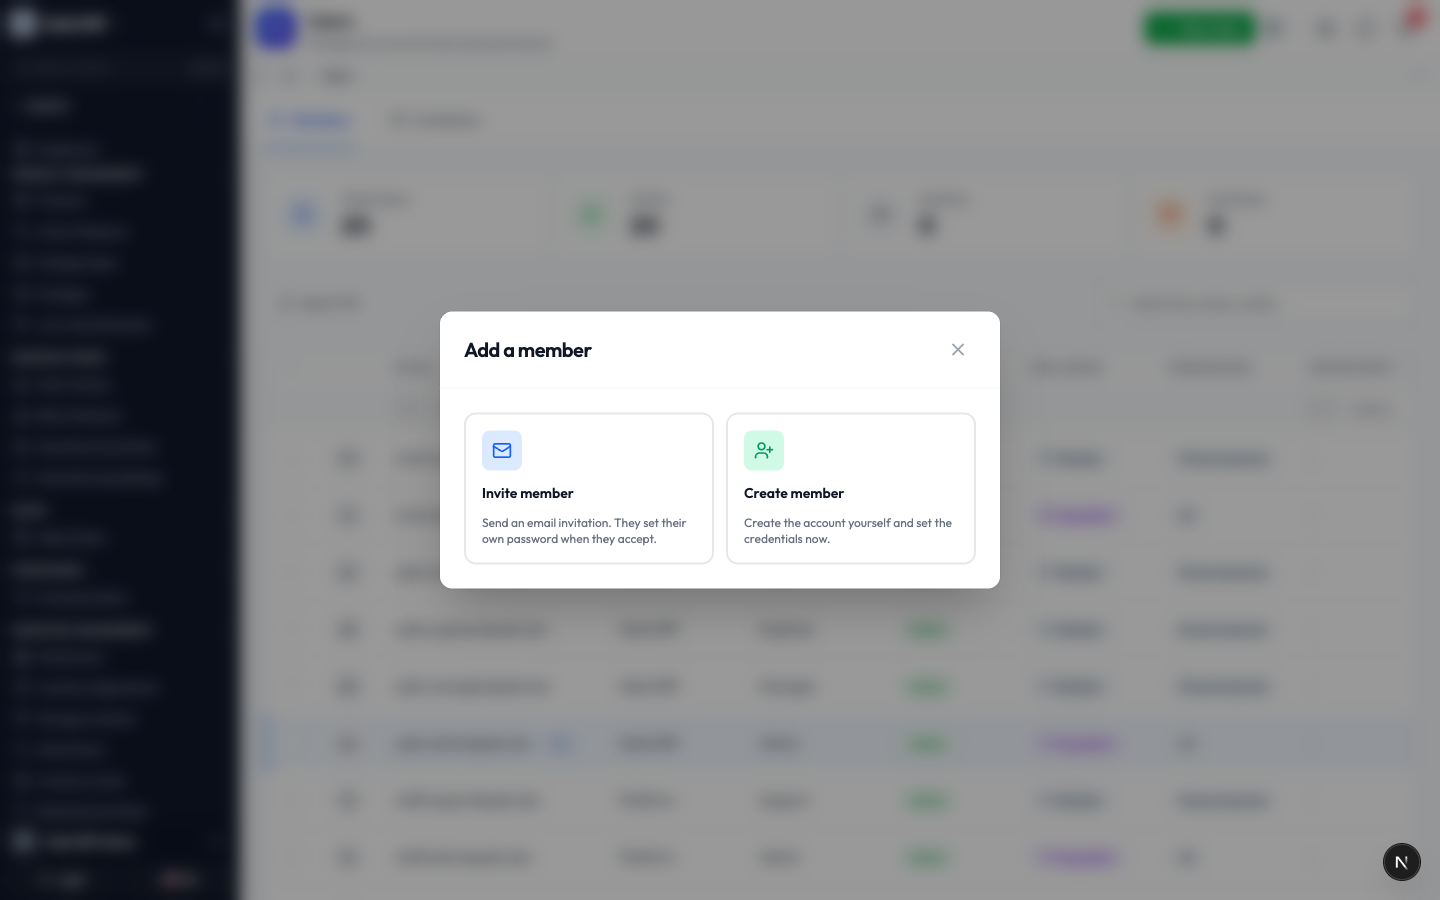
- Choose how to add the person:
- Invite member sends an email invitation. The person sets their own password when they accept. Pending invitations appear under the Invitations tab.
- Create member lets you set up the account yourself right now. Choose this when you want the person ready immediately.
- For this example, click Create member. The new member form opens on the Account tab.
- Fill in the Email Address, First Name, Last Name, and a Password (at least 8 characters), then confirm the password. Fields marked with a red asterisk are required.
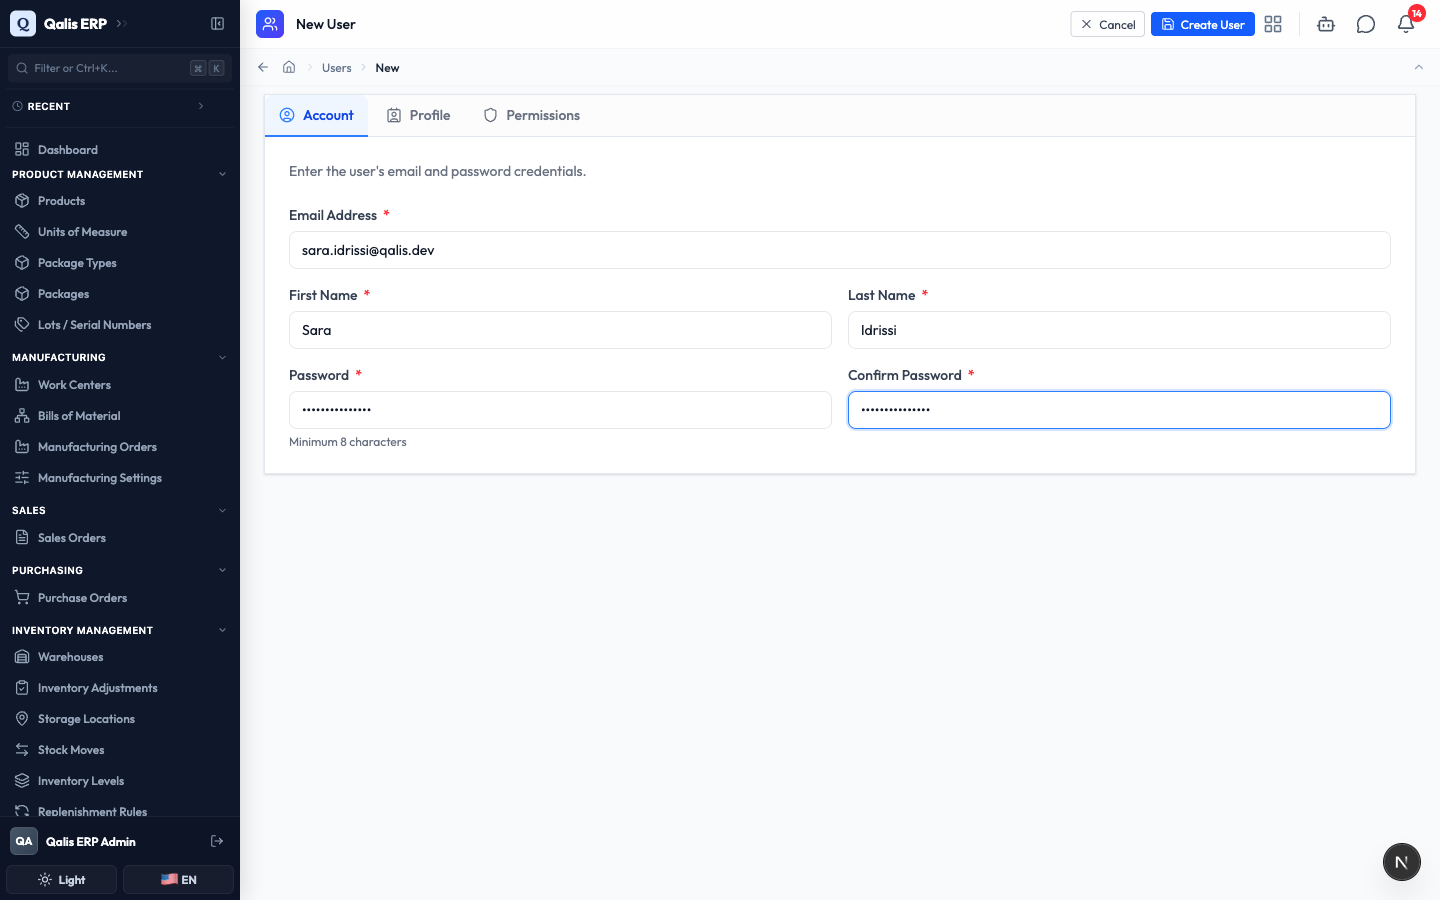
- Open the Profile tab if you want to add a phone number, department, or job title. These are optional but make the directory easier to read.
Nothing is saved yet. You set this person's access on the next tab before creating the account.
Give a member permissions
Now choose exactly what this person can do. You do this on the Permissions tab of the same form.
- Click the Permissions tab.
- Leave Status on Active so the person can sign in.
- Below that, permissions are grouped by area (Products, Inspections, and so on). Each group shows how many of its actions you have selected, like (0/11).
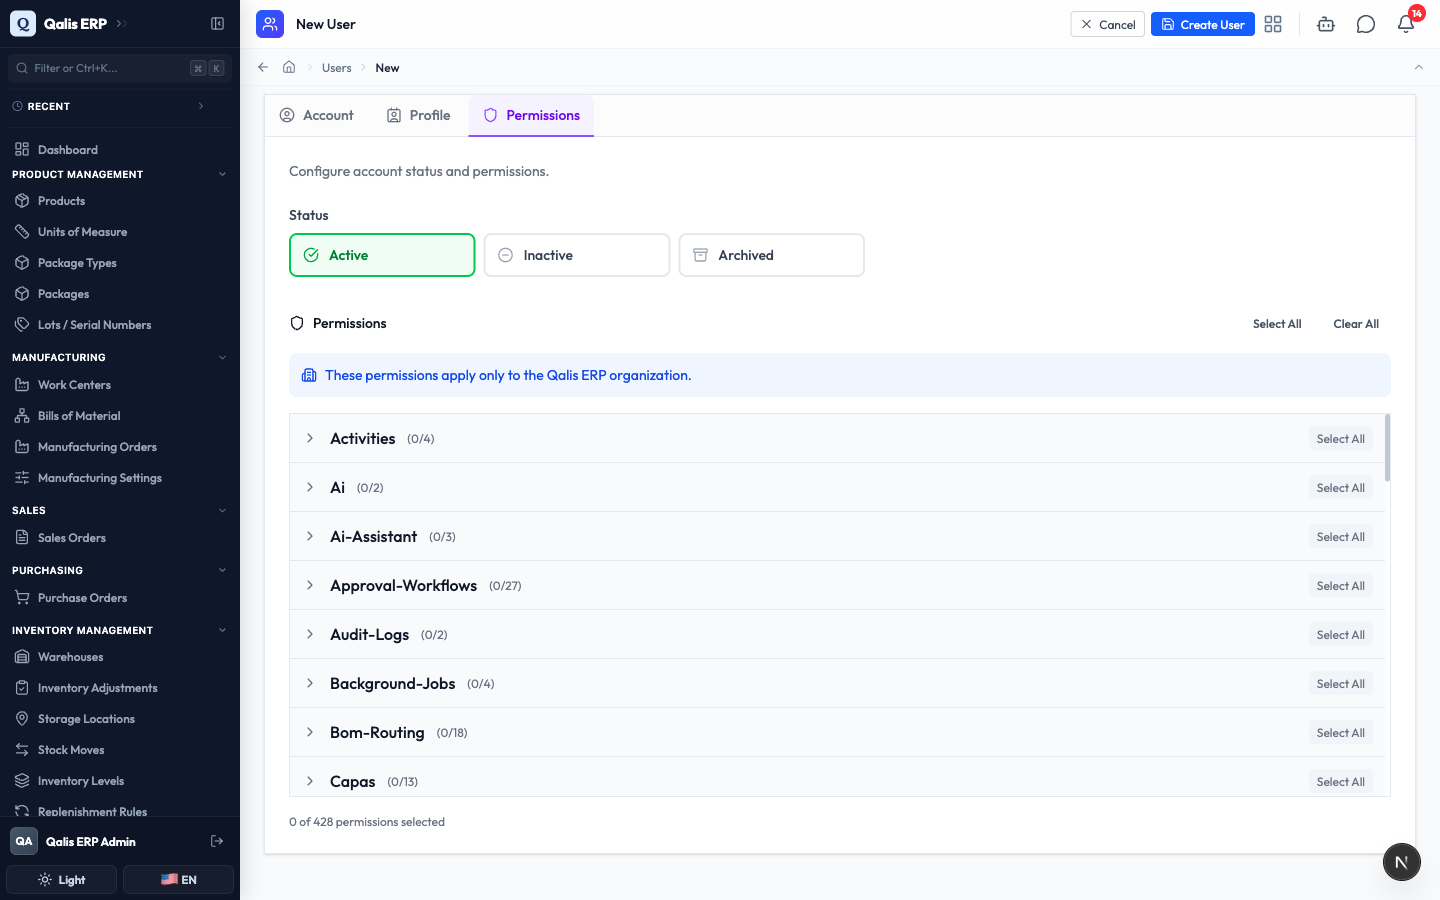
- To grant a whole area at once, click Select All on that group. To pick individual actions, click a group to expand it and tick the exact actions you want, such as read, create, or update.
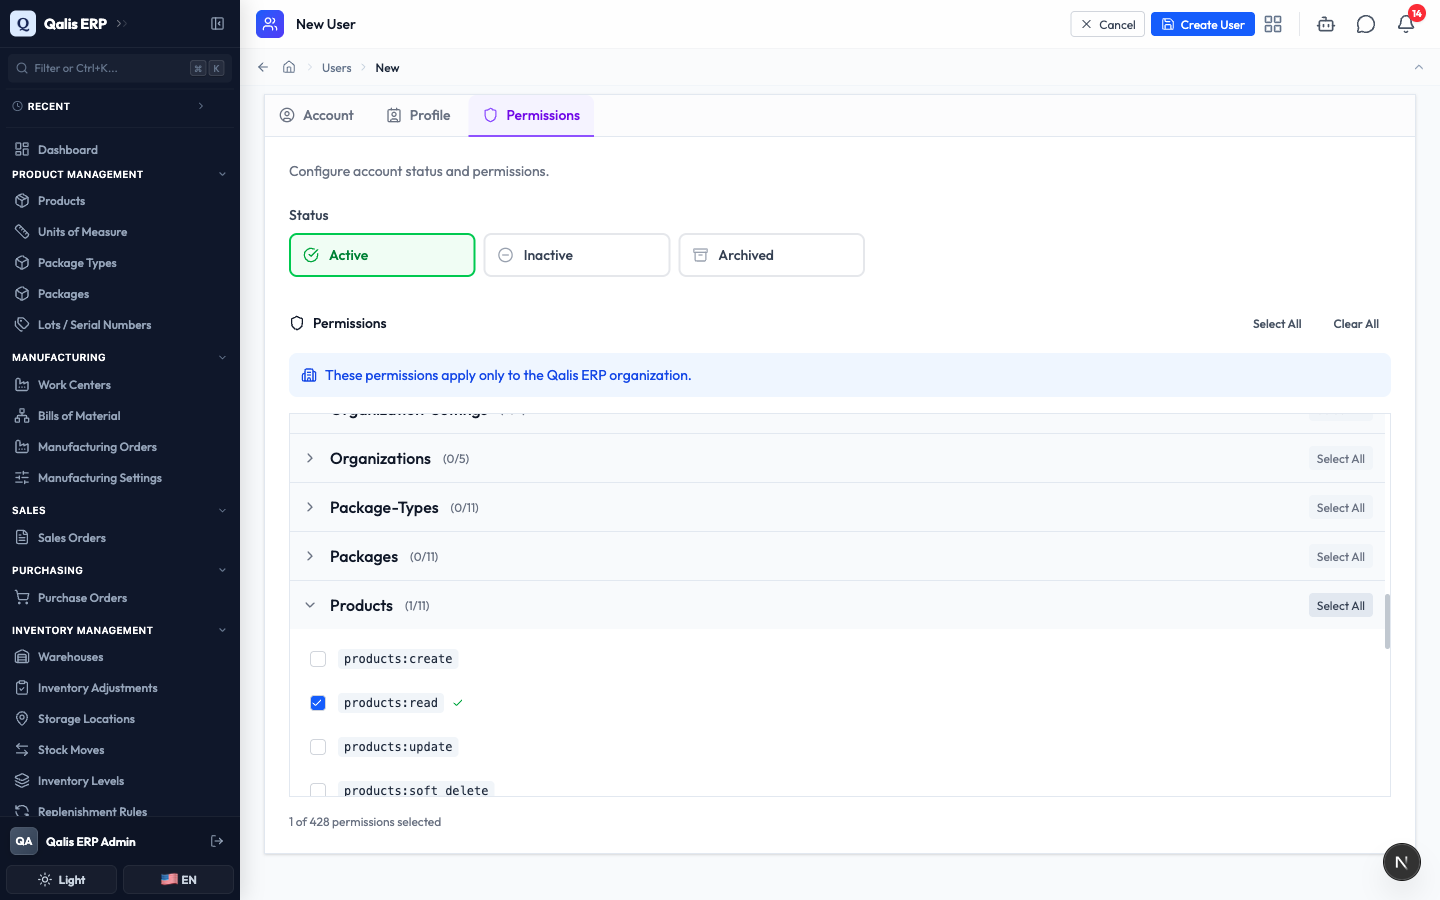
- Watch the running count at the bottom ("X of ... permissions selected") so you know how much access you are giving.
- When you are happy, click Create User at the top right.
After saving, you land on the member's detail page. The Permissions card lists everything they can do, grouped by record type, and the sidebar shows their status and teams.
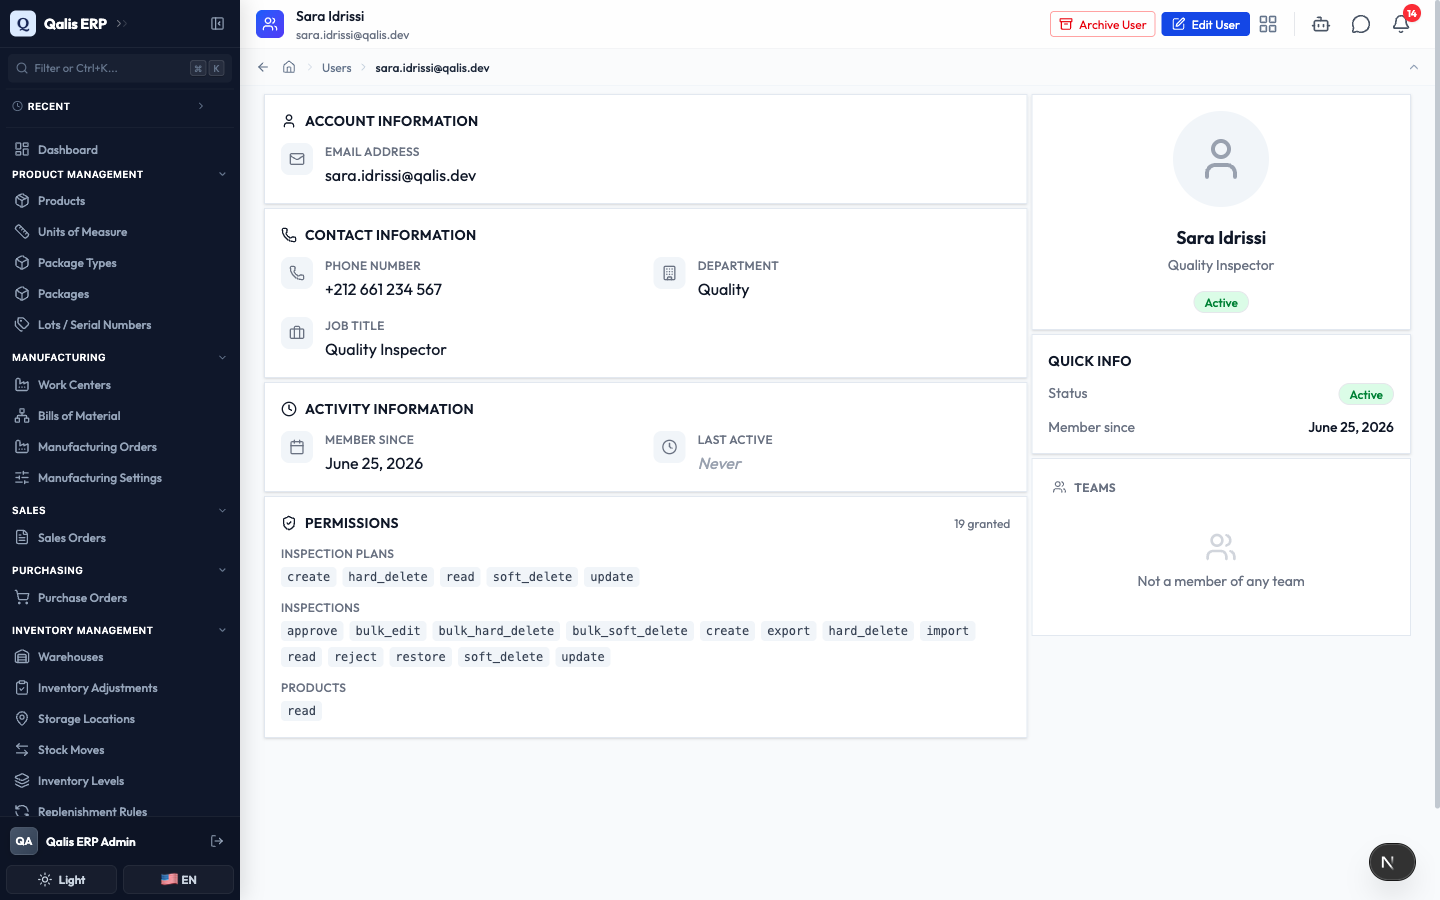
You cannot change your own permissions. Ask another administrator if your access needs to change. This protects you from accidentally locking yourself out.
Group people with a team
A team is a reusable bundle of permissions plus a list of people. Instead of granting the same access to ten people one by one, you grant it once to a team and add the ten people. When the team's permissions change, everyone on it updates automatically.
- Open the sidebar, scroll to the Administration group, and click Teams. The list shows your existing teams, how many members each has, and whether it is active.
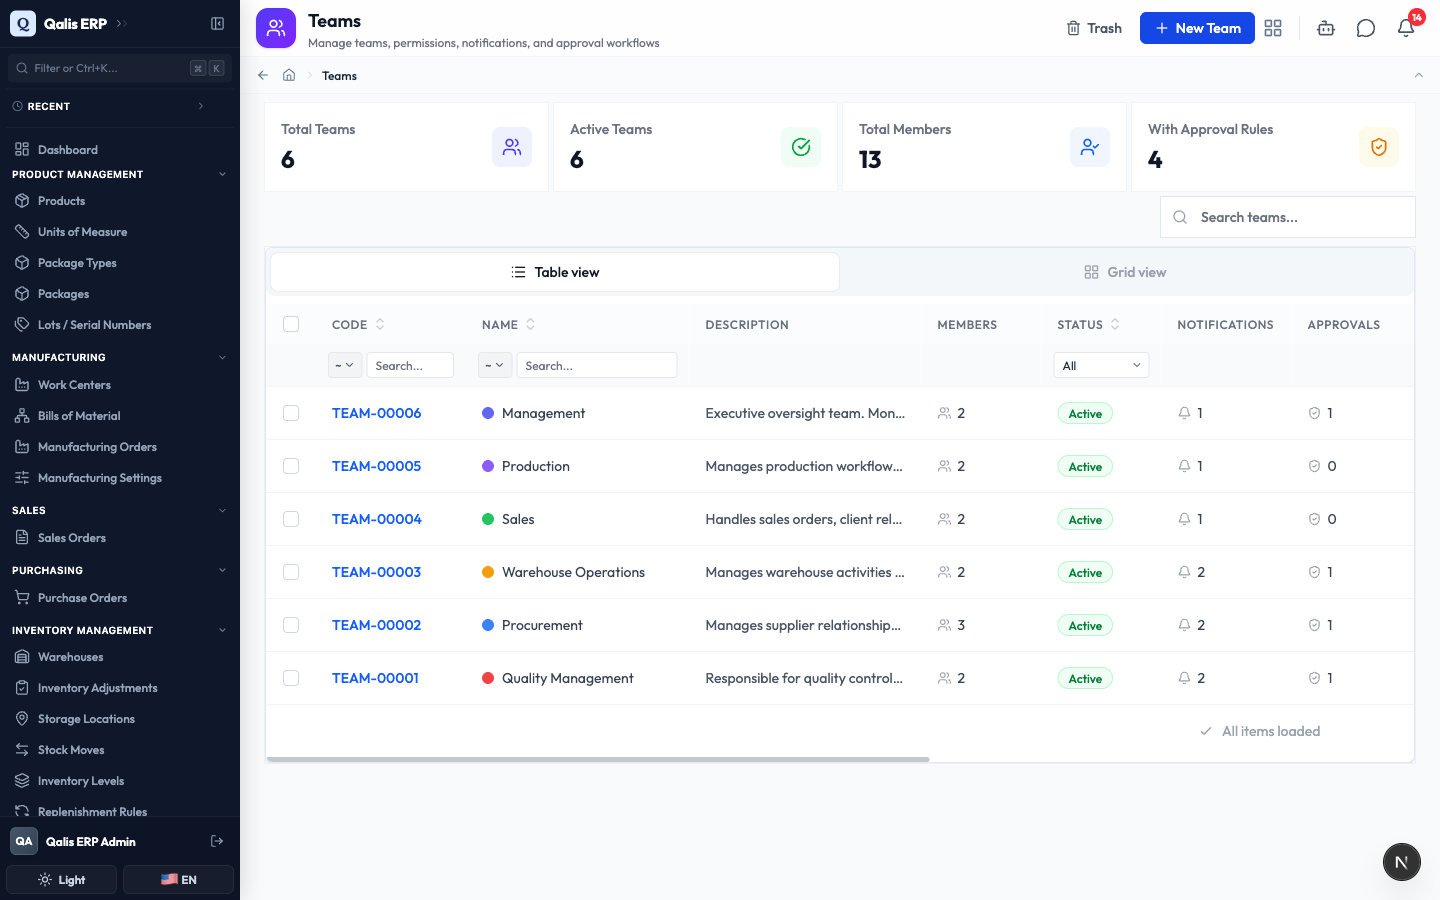
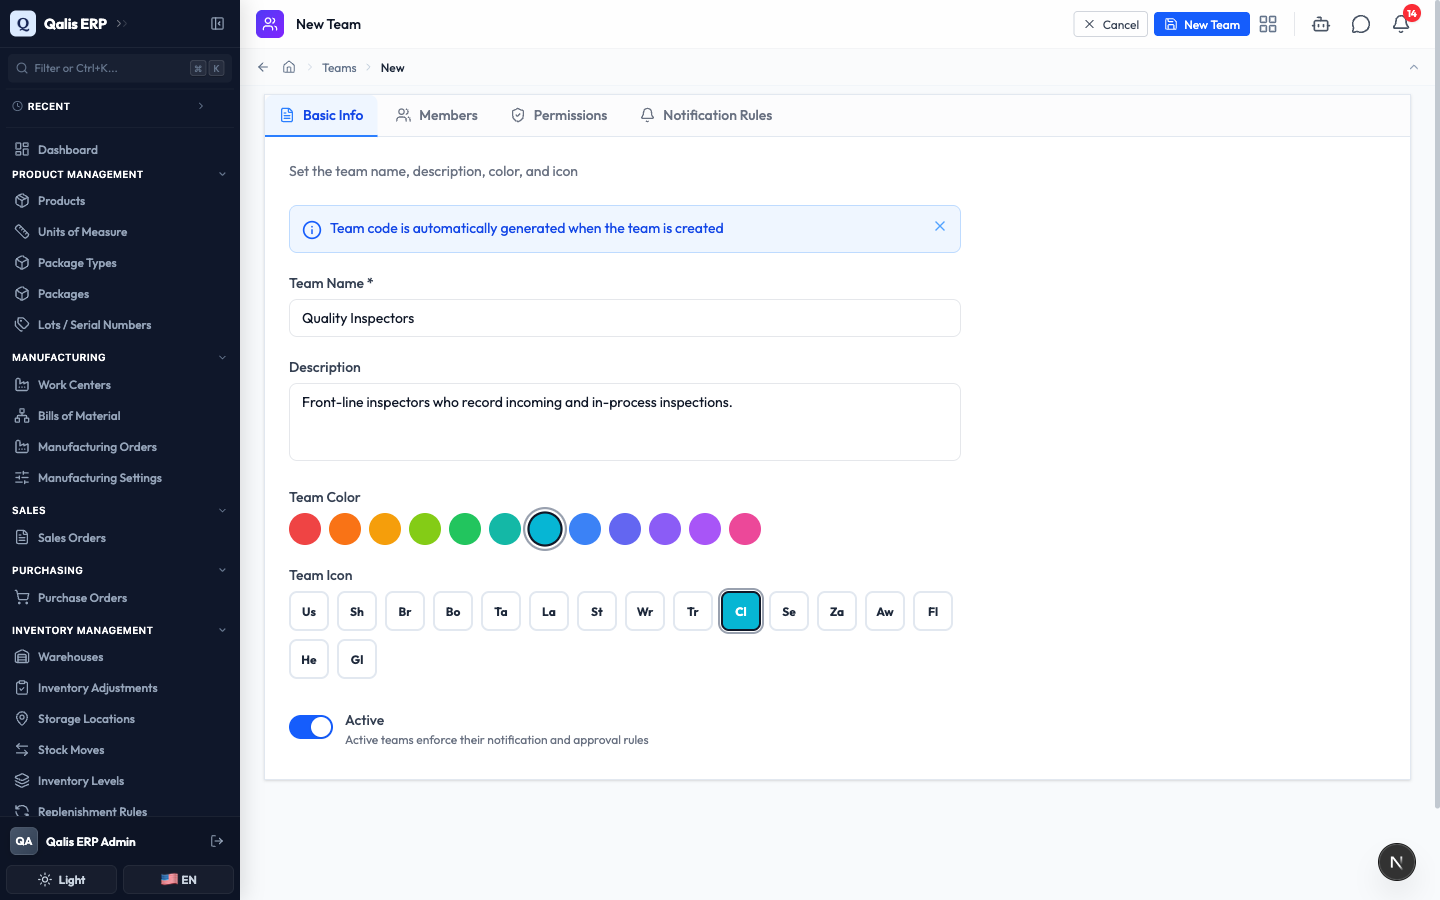
- Click New Team at the top right. The form opens on the Basic Info step.
- Enter a Team Name and a short Description. Optionally pick a Team Color and Team Icon so the team is easy to spot. Leave Active switched on. The team code is created for you automatically.
-
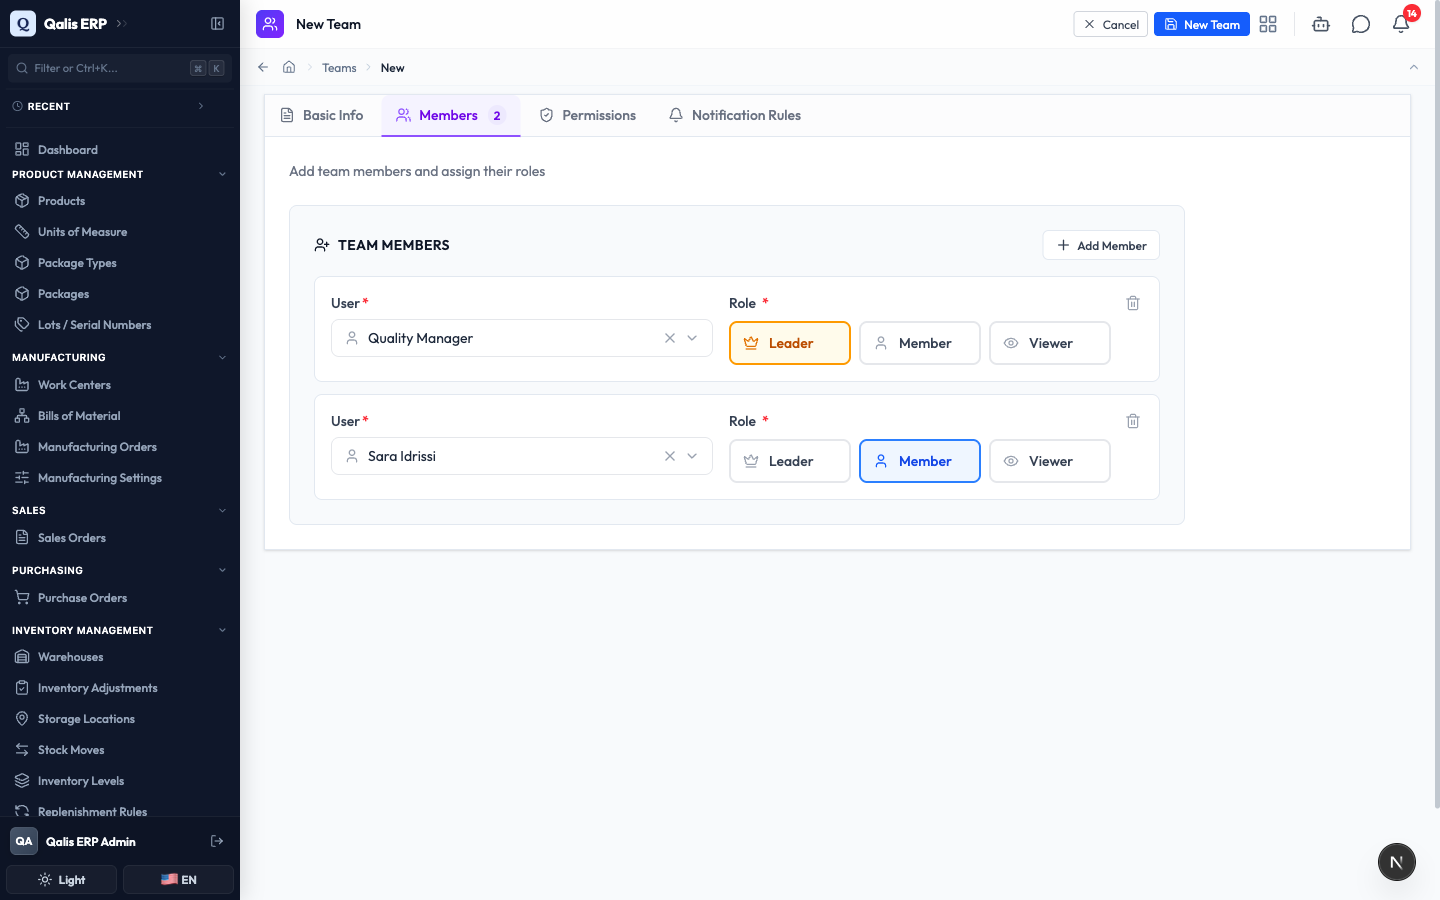
Click the Members step. Click Add Member, pick a person, and choose their role:
- Leader can act as an approver and receives leader-only notifications.
- Member is a regular team member.
- Viewer is a lighter membership that is left out of approval steps.
A role decides whether someone takes part in approvals and which notifications they receive. It does not change what they can do with your data: everyone on the team gets the team's permissions, whatever their role. It is a good idea to give each team at least one Leader, so approvals and leader notices have someone to reach. Click Add Member again to add more people.
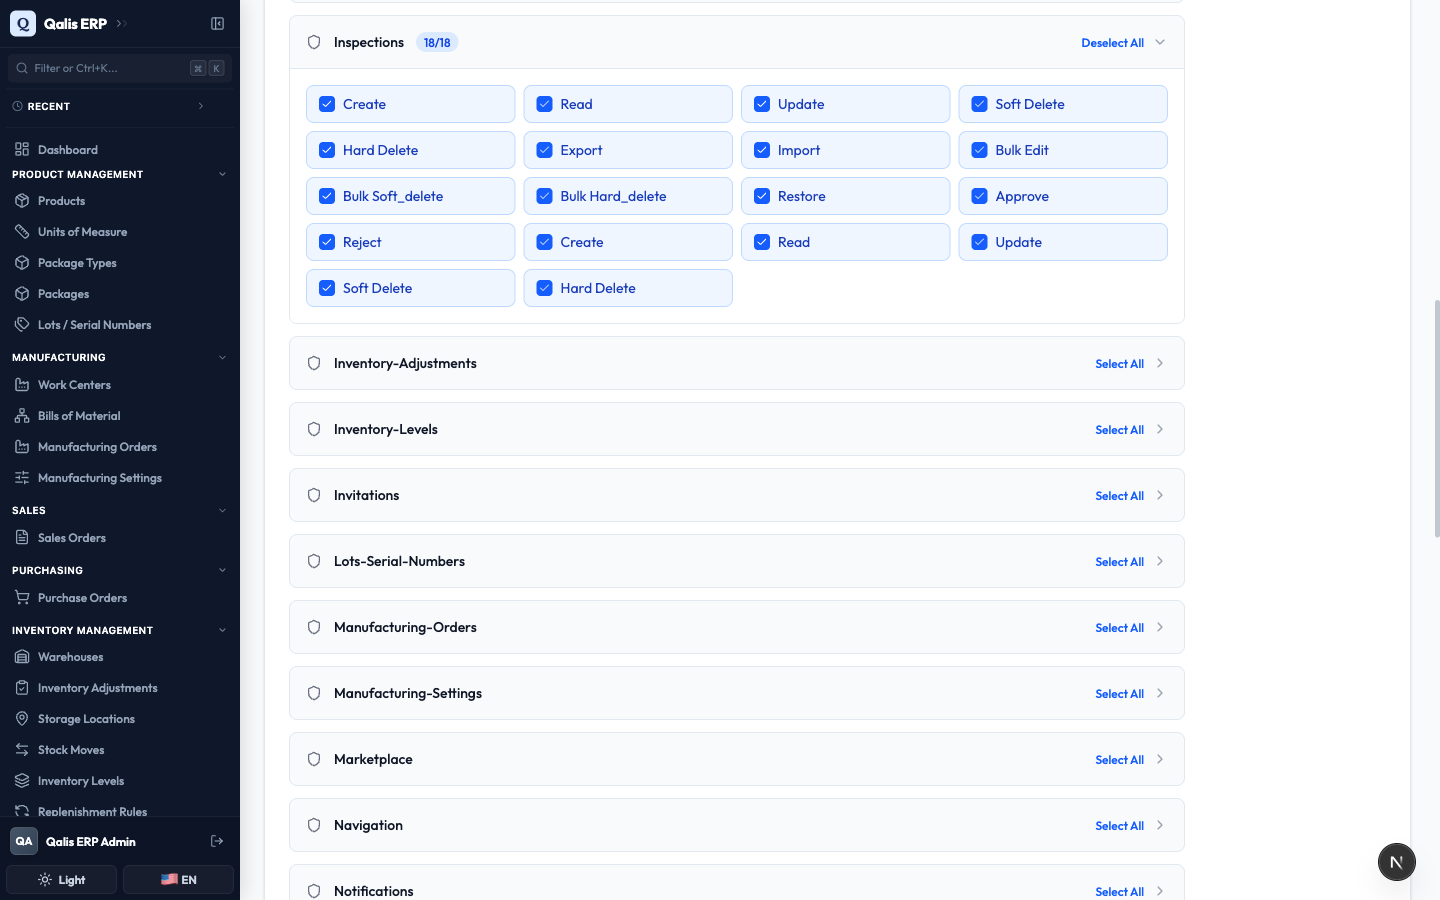
- Click the Permissions step. This works just like granting permissions to a person, but here the access is shared by everyone on the team. Use Select All on a group, or expand a group to tick individual actions.
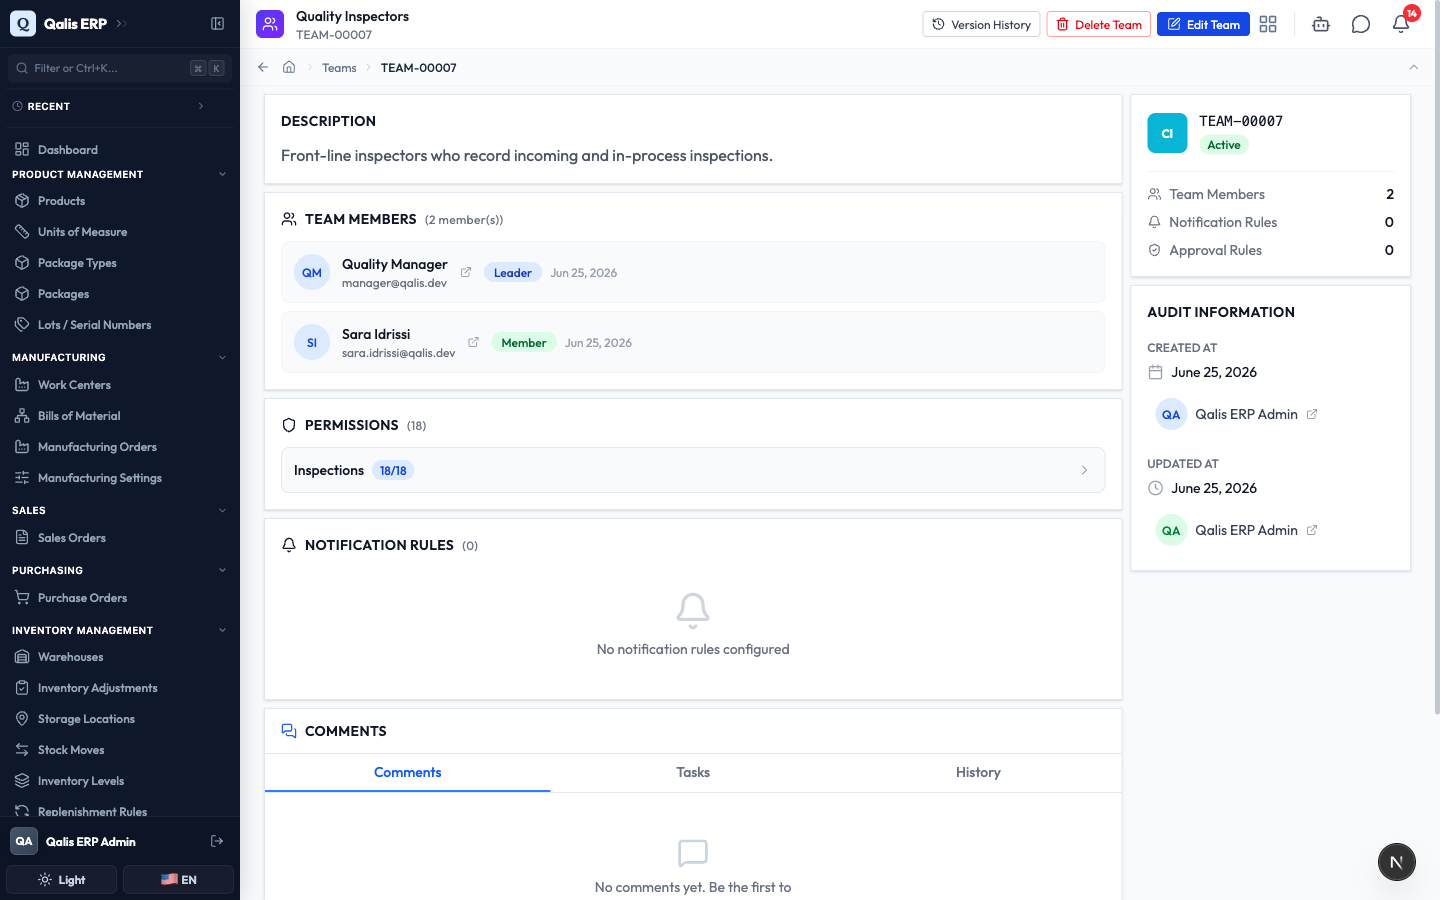
- Click New Team at the top right to save. You land on the team's detail page, which lists its members, its shared permissions, and any notification rules.
Teams can also send automatic notifications when something happens, for example when a purchase order changes status. You set these on the Notification Rules step. They are optional, so you can skip them and add them later.
See how direct and team access combine
Once a person is on a team, the team's permissions are added to whatever they already had directly. You can confirm this on the person's detail page.
Open the member you added earlier. The Permissions card still shows the permissions you gave them directly, and the Teams panel now lists the team you just added them to. Their real access is the two sets combined.
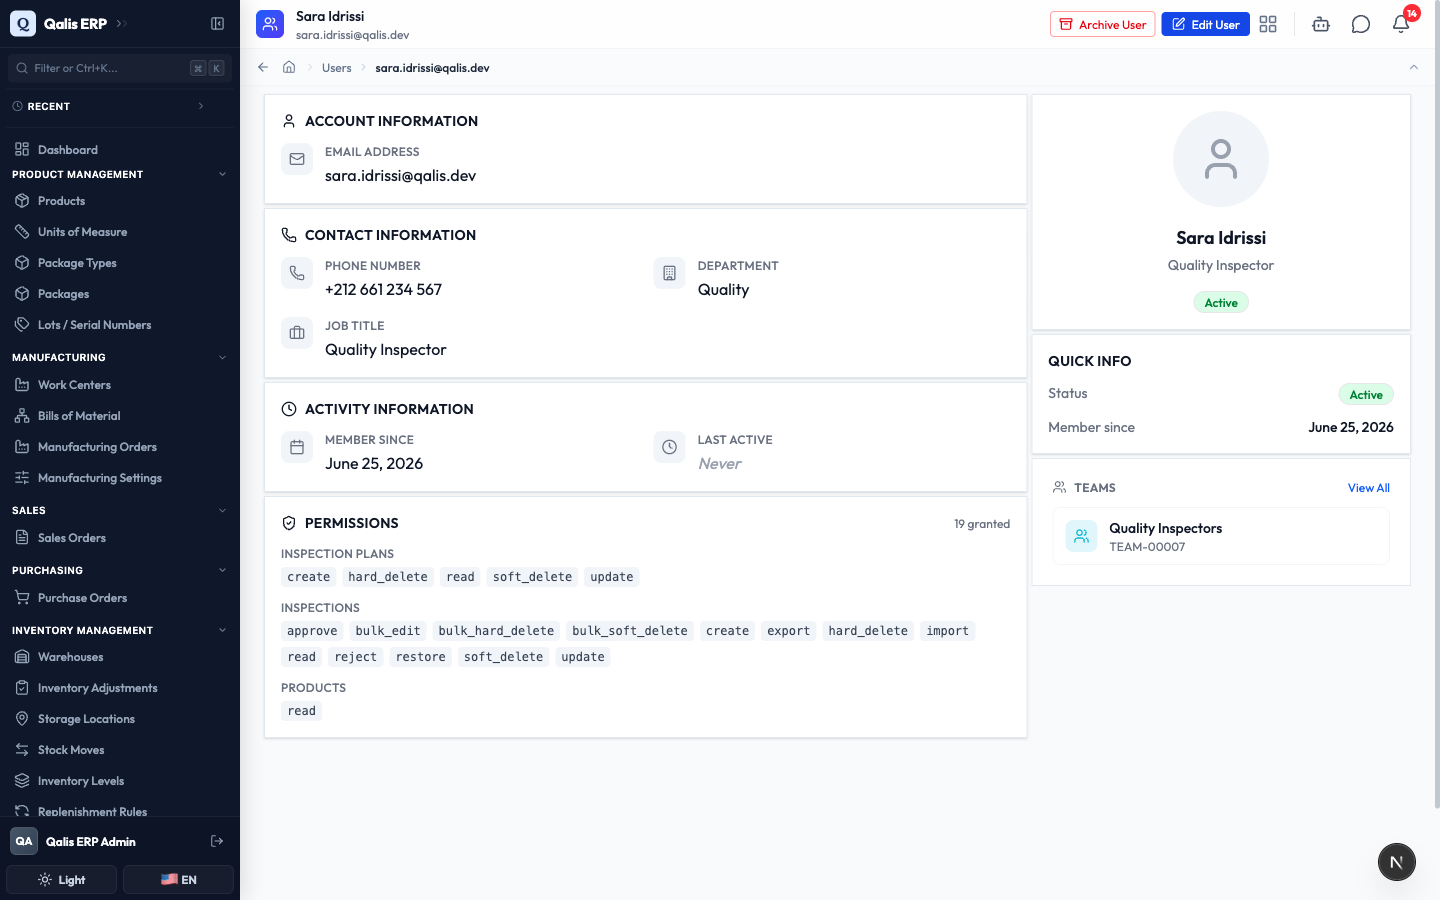
This is why teams are worth setting up. Put the shared access on the team, keep only the person's unique extras as direct permissions, and you have far less to maintain.
Remove someone's access
When a person leaves or changes role, remove their access by archiving them. This is reversible, so it is safe to do.
- Open the person's detail page.
- Click Archive User at the top right. A confirmation appears explaining what will happen.
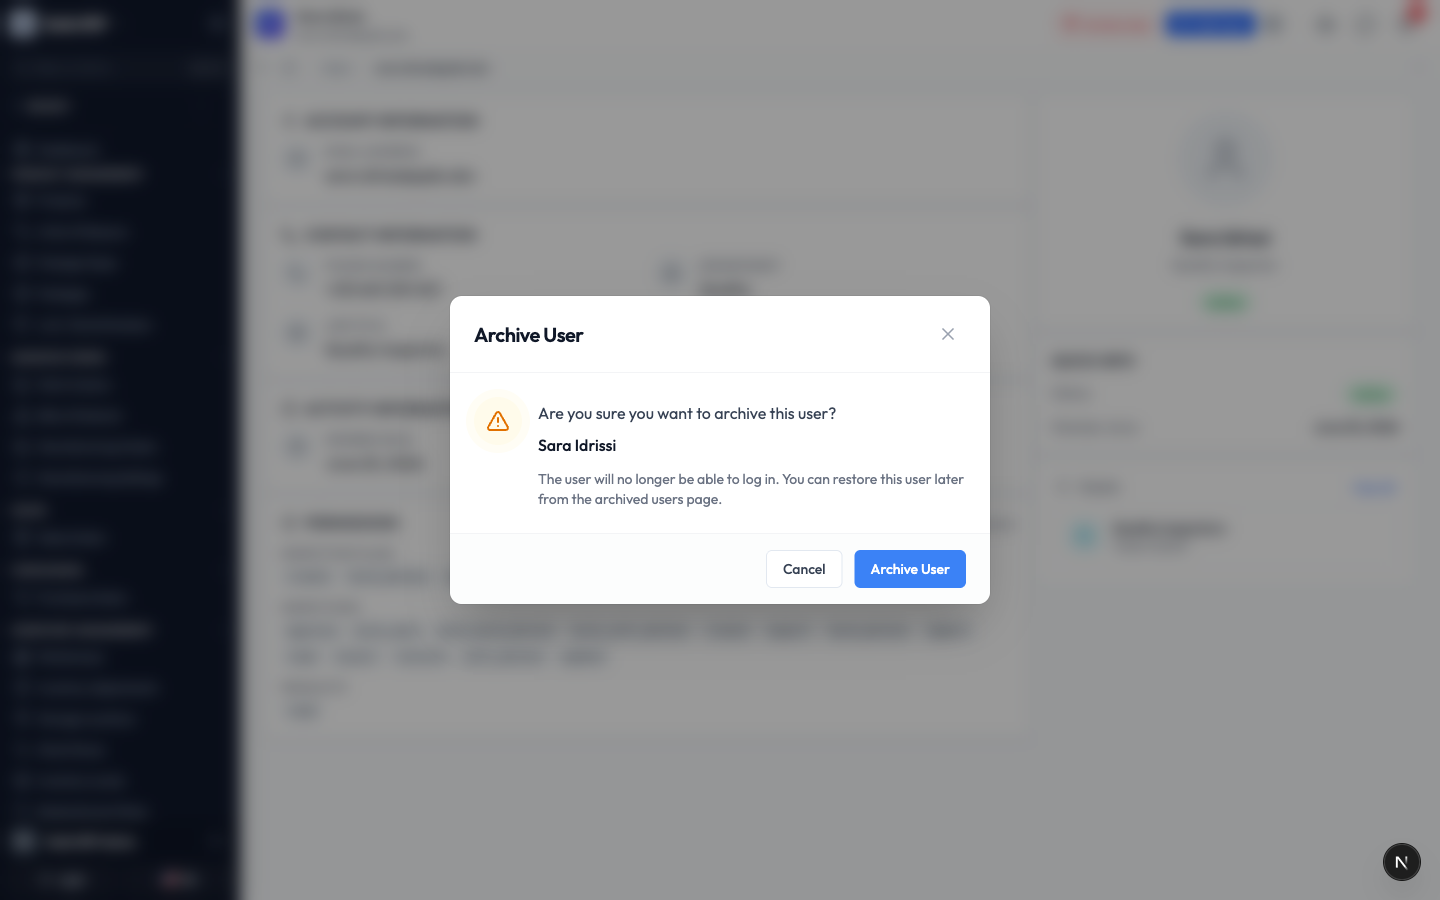
- Click Archive User to confirm. The person can no longer sign in, but their history and record links are kept intact.
To bring someone back, open the Archived users page and restore them. They return as Active and can sign in again.
Archiving is the safe way to remove access. Because so many records refer to people (who created a record, who was assigned a task), members are archived rather than deleted, which keeps your history complete.
Good to know
- Permission: the right to perform one action on one type of record, like creating an inspection or reading products.
- Direct permission: access you grant on a person's own profile.
- Team: a reusable bundle of permissions shared by everyone added to it.
- Leader, Member, Viewer: the three roles a person can hold on a team. Leaders can approve and get leader-only notices.
- Additive access: a person's real access is everything from their direct permissions plus every team they are on. More access can only be added, never taken away by joining a team.
- Org admin: a person who holds every permission in the organization, now and for any module added later.
- Archive: the reversible way to remove a person's access while keeping their history.