Inventory Adjustments
Correct the on-hand stock of a product at one location, with a reason and a full audit trail, so your records match what is really on the shelf.
Last updated on June 29, 2026
An inventory adjustment is how you fix the stock figure for one product in one place when the system count and the real count do not match. Maybe a few units were damaged, a box turned up that nobody had logged, or a shelf count came back different from the screen. You record the difference here, choose a reason, and Qualis updates the on-hand quantity straight away and creates a matching stock move so the change is fully traceable. Adjustments are never edited after the fact: if you make a mistake you reverse the adjustment, which puts the stock back and keeps both entries on the record. This guide covers the things you do most often: browsing your adjustments, recording a new one, reading one, reversing one, and reviewing its history.
Before you start
An adjustment points at things you set up elsewhere in Qualis, so have these ready first:
- A product to adjust, set up in Products. Every adjustment is about one product.
- A storage location where the stock sits, set up in Storage Locations. Every adjustment names one. Only real, physical locations (the internal and transit kind, such as a shelf, a bin, or a shipping dock) hold tracked stock. If you pick a virtual location (a customer or vendor site, for example), the adjustment is still recorded but the on-hand figure does not change.
You do not type the current on-hand figure yourself. Qualis fills it in from the latest stock movements as soon as you choose a product and a location.
You reach the module from the left sidebar under Inventory Management, then Inventory Adjustments.
Find and browse your adjustments
Start here to see every adjustment and zero in on the one you need.
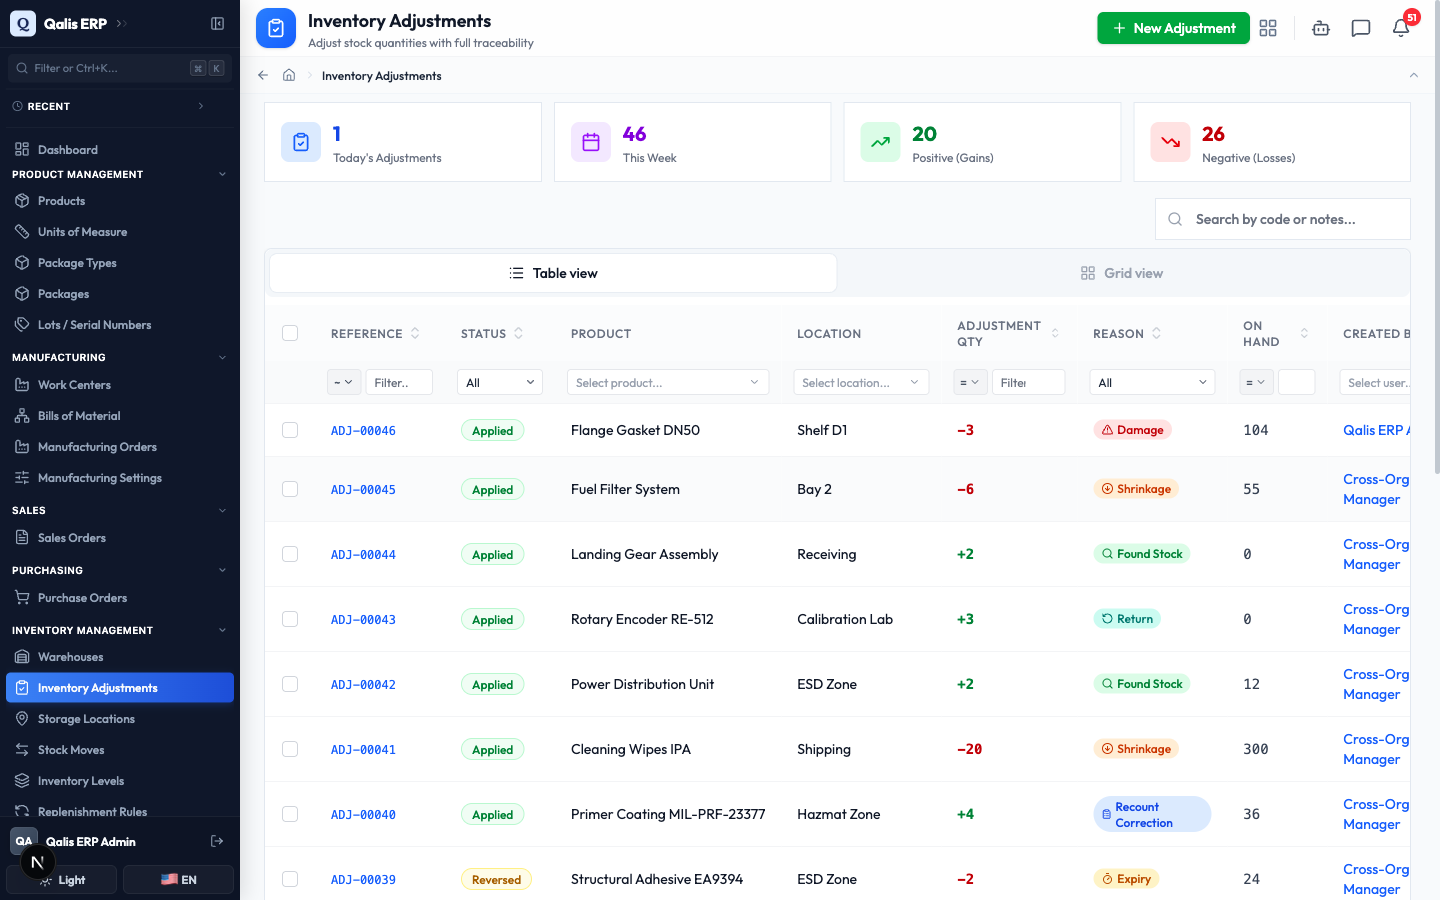
- Open Inventory Adjustments from the sidebar. Across the top, four cards give you the headline numbers at a glance: Today's Adjustments, This Week, Positive (Gains) and Negative (Losses). Below them, the list shows one row per adjustment, with its Reference, Status, Product, Location, Adjustment Qty, Reason, On Hand and who created it. A green plus value means stock was added, a red value means stock was removed. Many cells are links, so you can jump straight to the product or location.
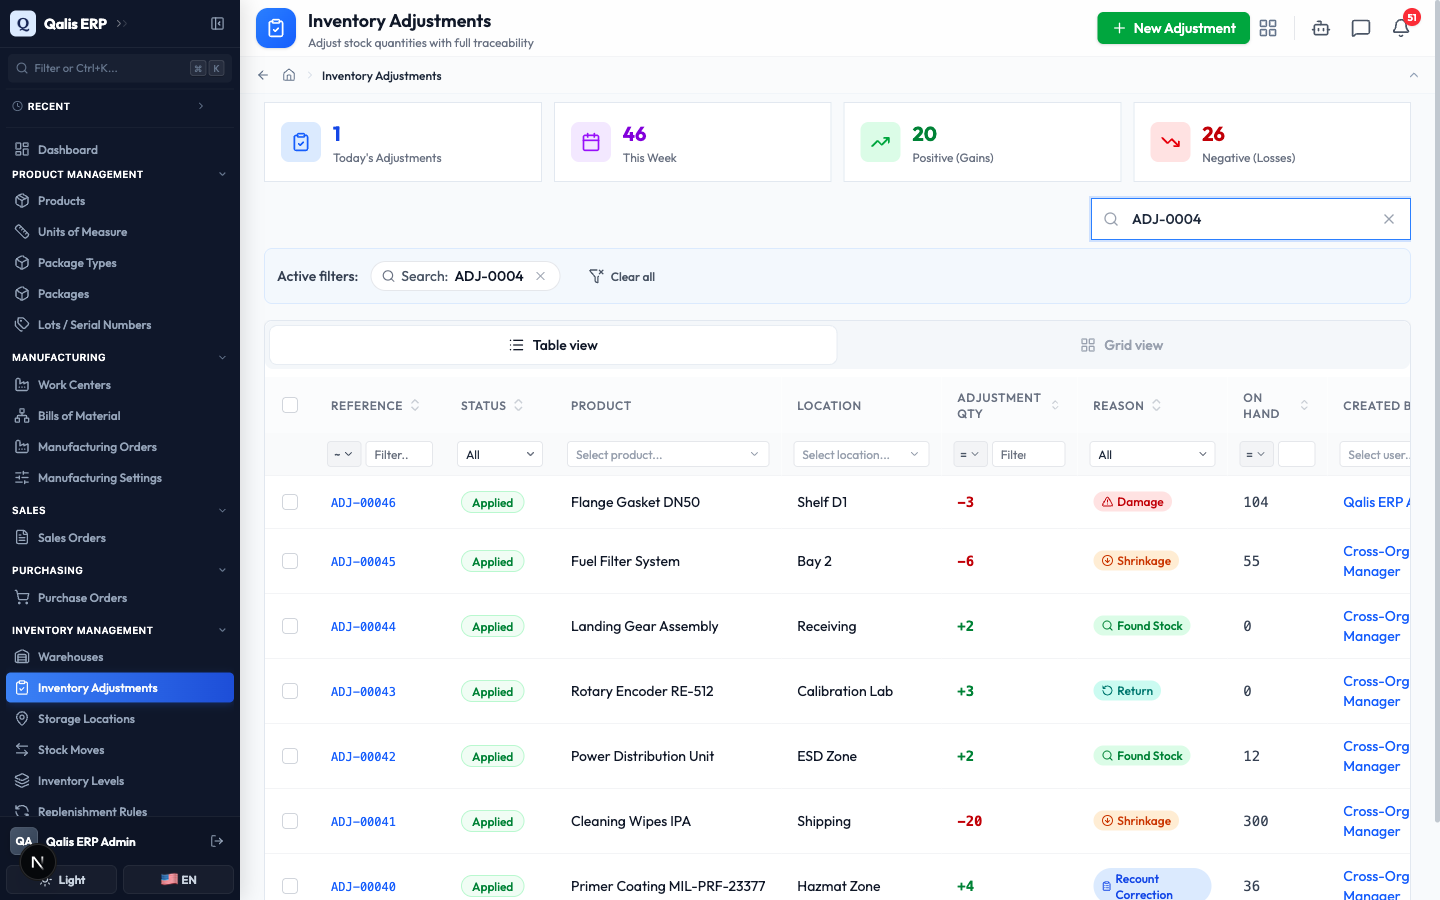
- To find one fast, type in the Search by code or notes... box near the top right. The list filters as you type, so there is no need to press Enter.
- To narrow by a single attribute, use the small filter box under any column heading. For example, open the Reason filter and pick Shrinkage to see only the losses recorded as shrinkage. You can filter the same way by Status, Product, Location, a quantity, or a created-date range.
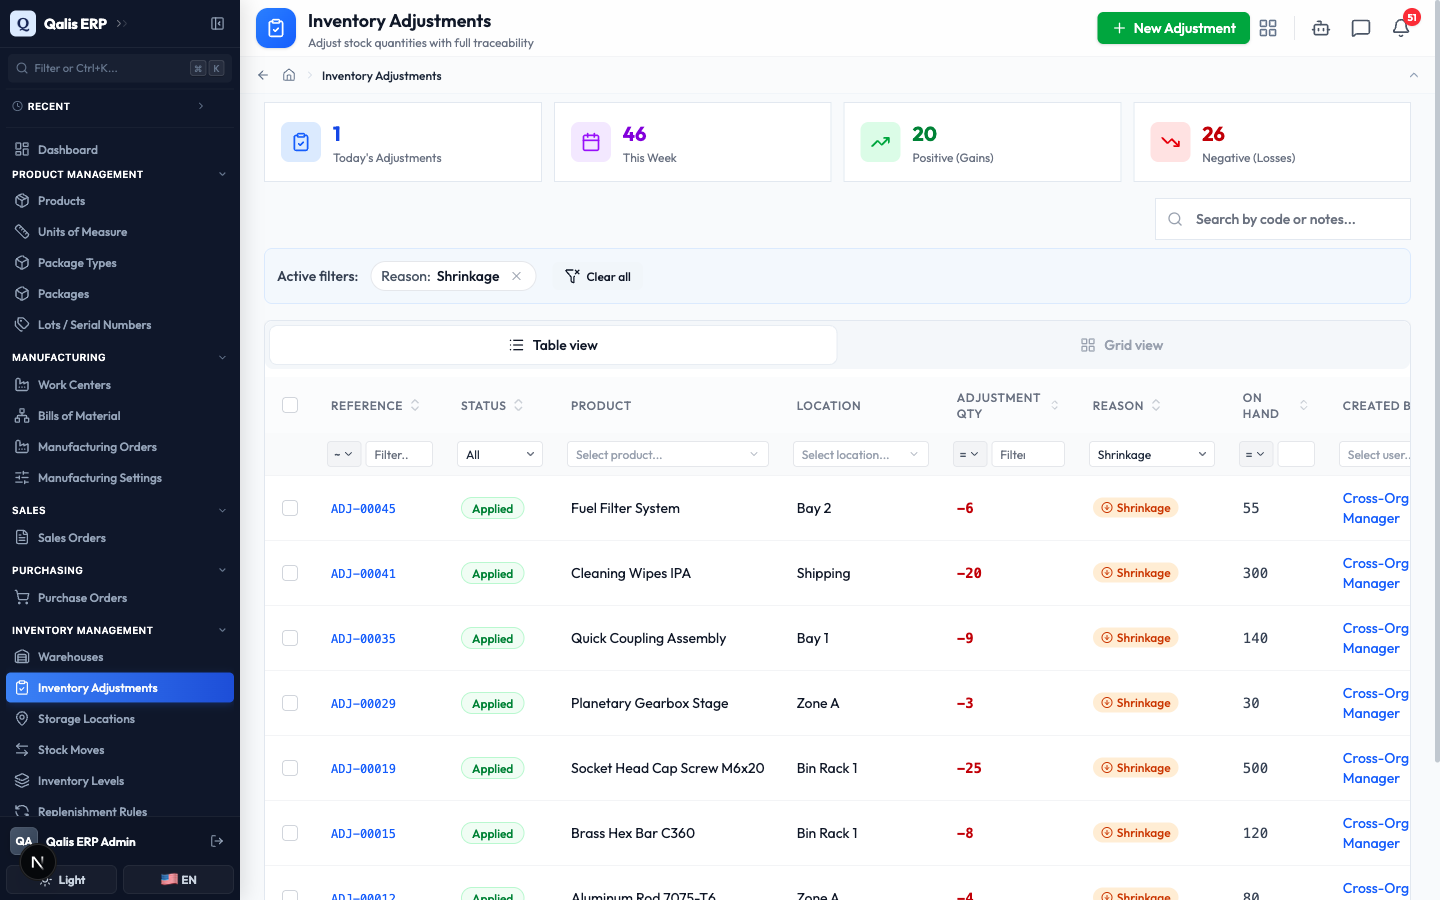
Whenever a filter is on, an Active filters banner appears above the list showing what is applied. Click the small x on a filter to drop it, or Clear all to reset everything. The web address updates too, so you can bookmark or share a filtered view.
Record an adjustment
This is the main task: telling Qualis the real quantity of a product at a location. Everything sits on one short form, and nothing is saved until you click Apply Adjustment.
- On the list, click New Adjustment at the top right. A blank form opens.
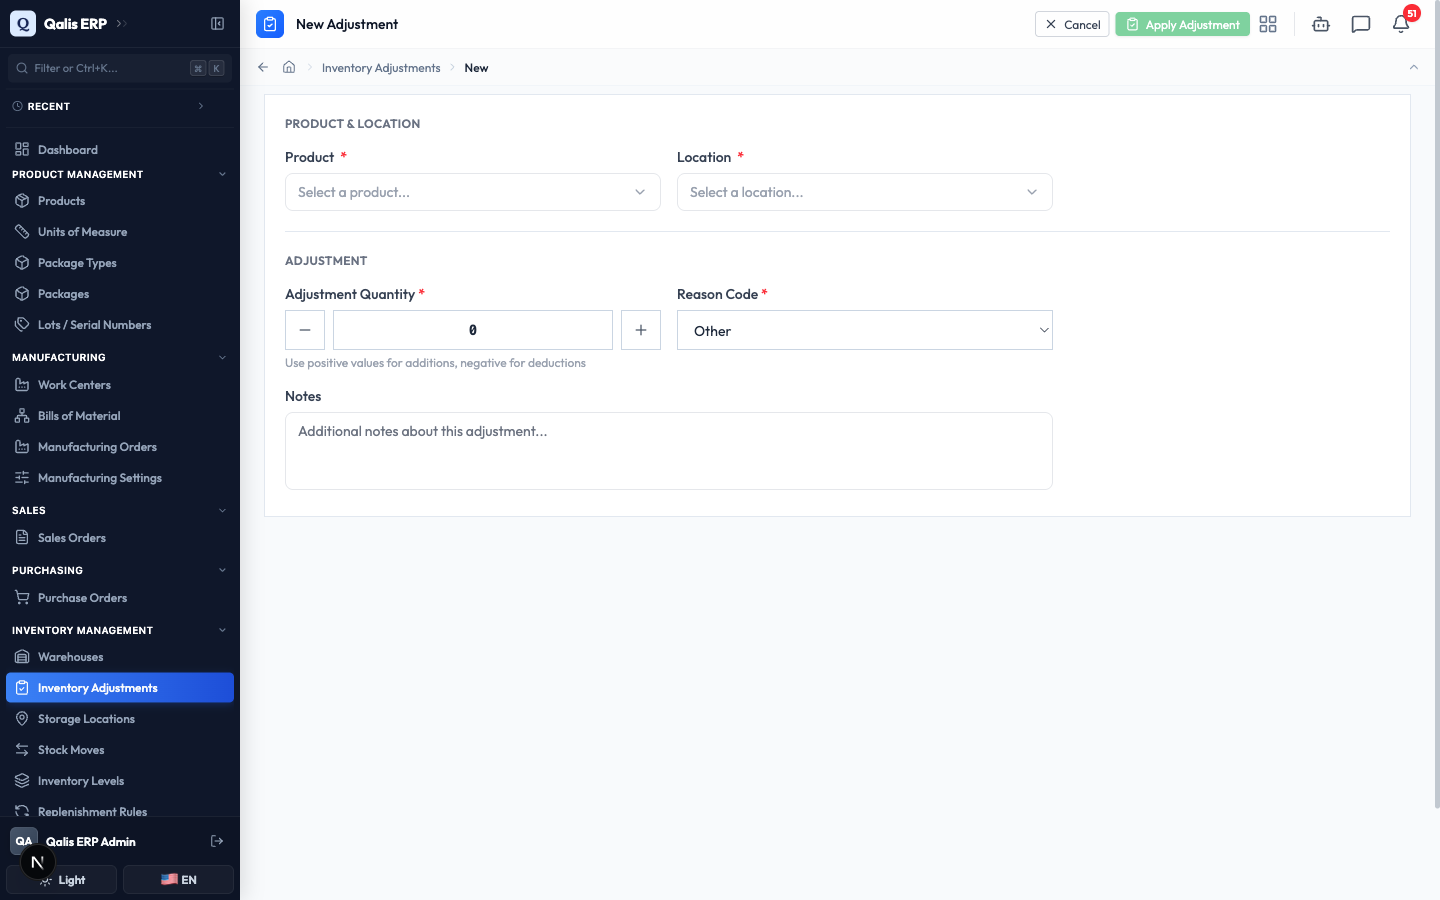
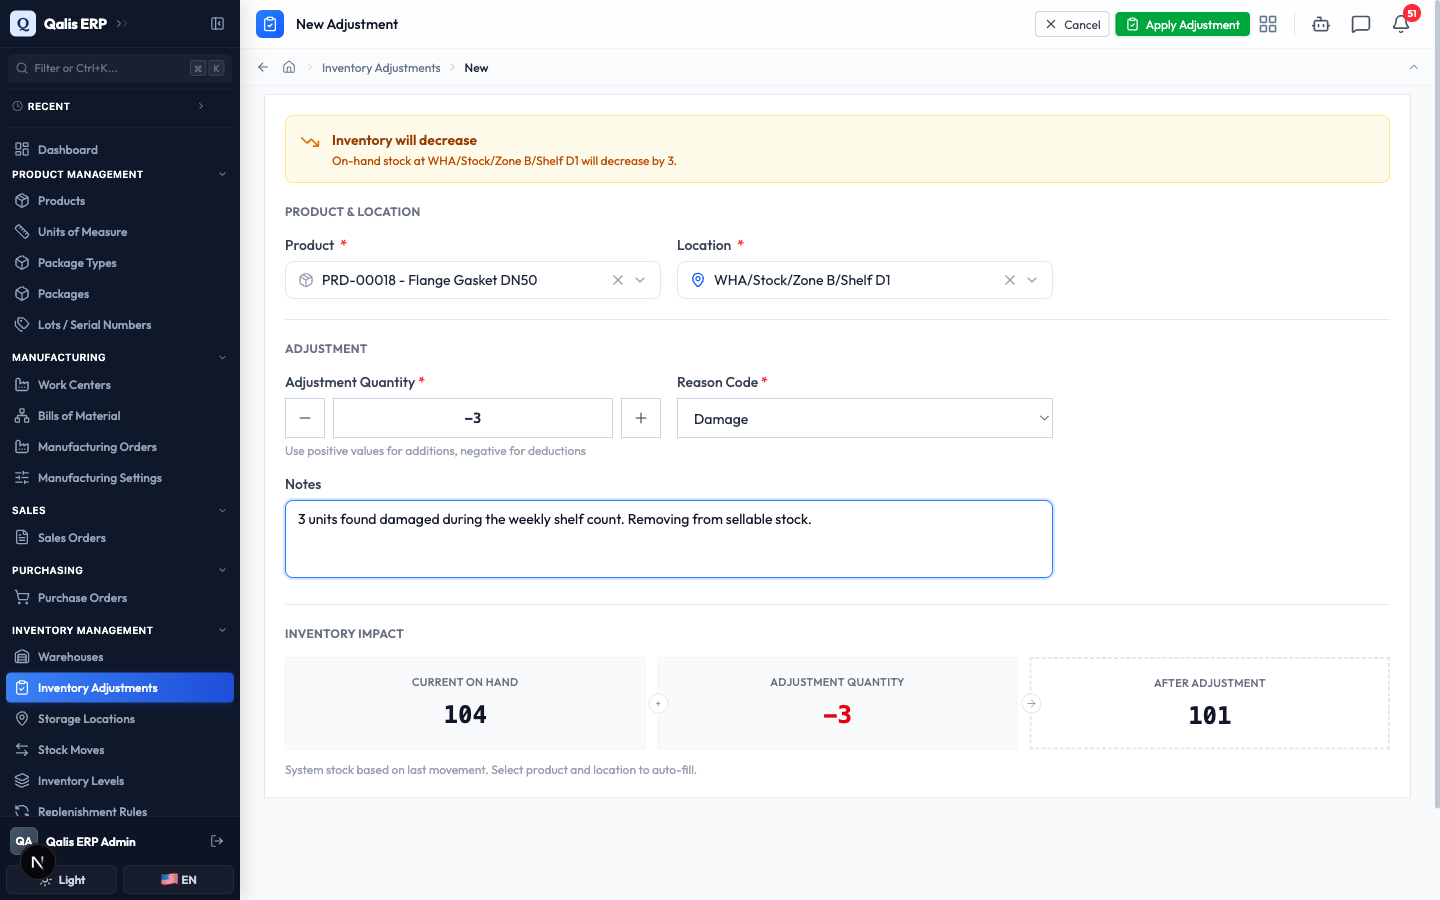
- Under Product & Location, click Select a product... and choose the product you are correcting. Then click Select a location... and choose where the stock is. Both are required.
- As soon as both are set, Qualis looks up the Current On Hand figure for you and shows it in the Inventory Impact panel lower down.
- In the Adjustment section, set the Adjustment Quantity. Type a positive number to add stock or a negative number to remove it (you can also use the minus and plus buttons). For example, to write off 3 damaged units, enter -3.
- Choose a Reason Code that explains the change: Damage, Shrinkage, Found Stock, Recount Correction, Data Entry Error, Return, Production Scrap, Quality Rejection, Expiry or Other. This is required and helps everyone understand the adjustment later.
- Optionally, add Notes with any extra detail, such as what happened or where the difference was spotted.
As you fill the form, a coloured banner at the top and the Inventory Impact panel preview the result, showing the Current On Hand, the Adjustment Quantity, and the After Adjustment figure, so you can check it before saving.
- Click Apply Adjustment at the top right.
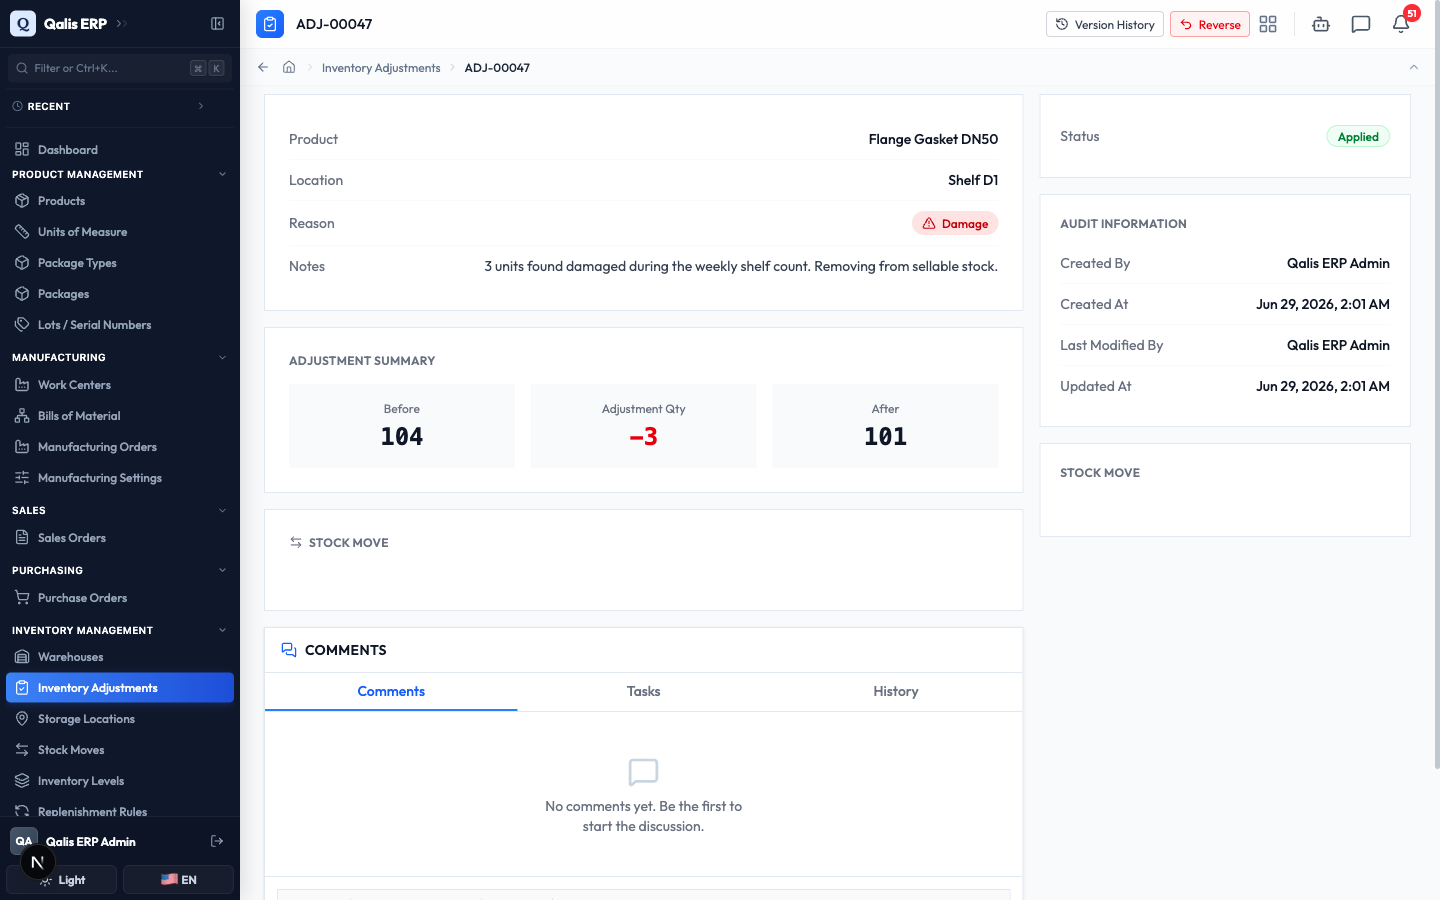
Qualis gives the adjustment its own reference (like ADJ-00047), updates the on-hand stock straight away, creates a matching stock move, and takes you to its detail page. A message confirms "Adjustment applied successfully. Stock move created."
The on-hand figure, the reference code, and the stock move are all worked out for you. You only choose the product, the location, the quantity and the reason.
Read an adjustment
Open any adjustment to see exactly what changed.
- Click a Reference link in the list (or the adjustment's code anywhere in Qualis). The detail page opens (shown above).
- The top of the page shows the adjustment's reference and the buttons for what you can do here: Version History and Reverse.
- The first card shows the Product, the Location, the Reason and any Notes. The Adjustment Summary below it shows three figures: the on-hand Before, the Adjustment Qty, and the on-hand After. On the right, the Status badge (Applied or Reversed) and the Audit Information tell you who created the adjustment and when. Qualis also records a matching entry in Stock Moves, so the change is fully traceable.
Reverse an adjustment
Use this when an adjustment was wrong or is no longer valid. Adjustments are never edited; instead you reverse them, which creates an opposite stock move to undo the change and keeps both entries on the record.
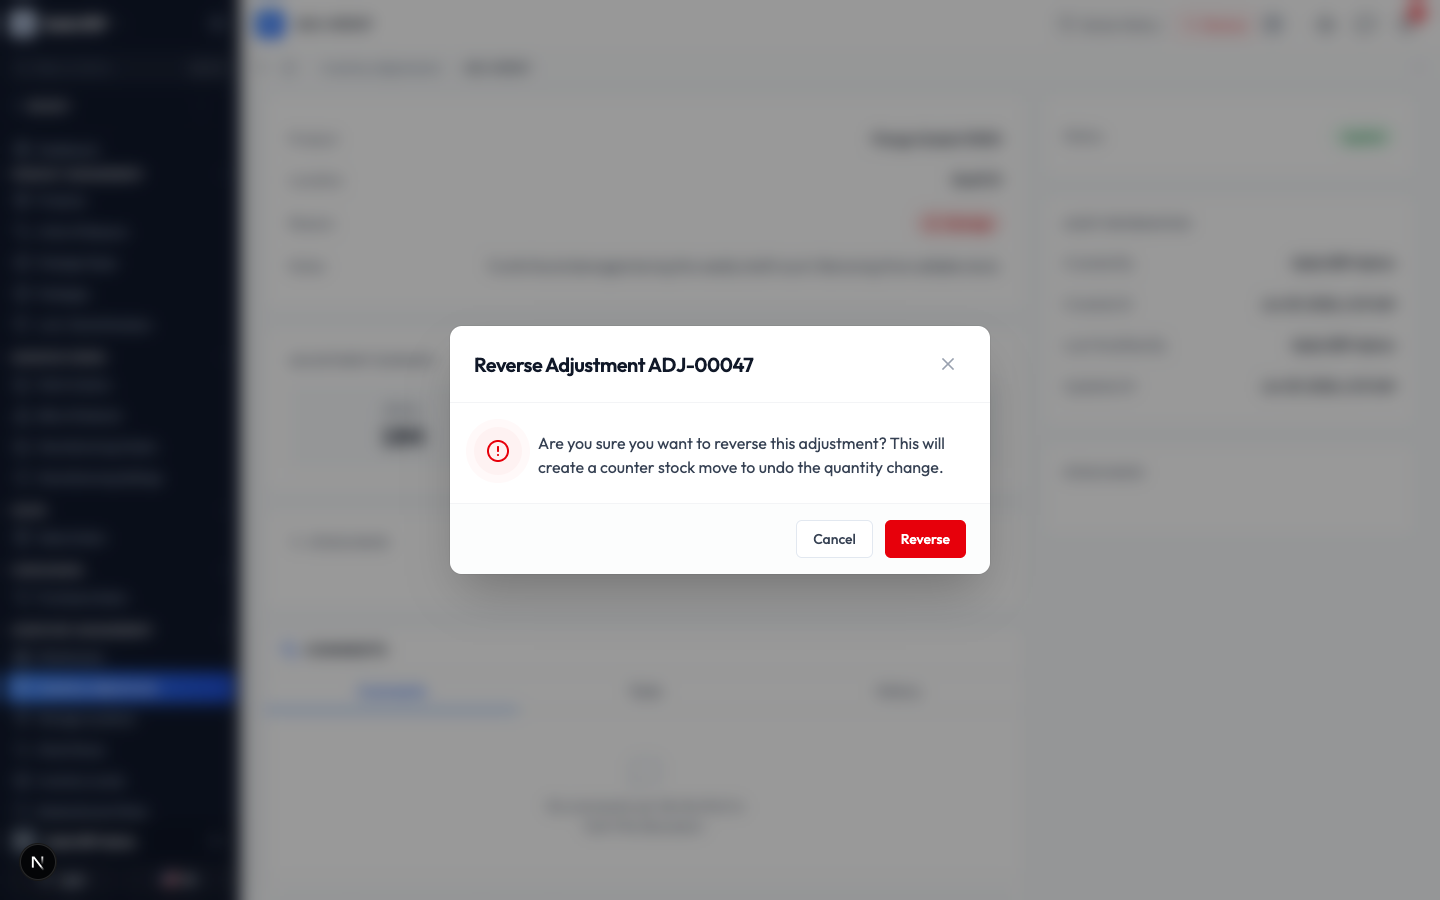
- Open the adjustment you want to undo and click Reverse at the top right.
- A confirmation box explains what will happen. Click Reverse to go ahead, or Cancel to stop.
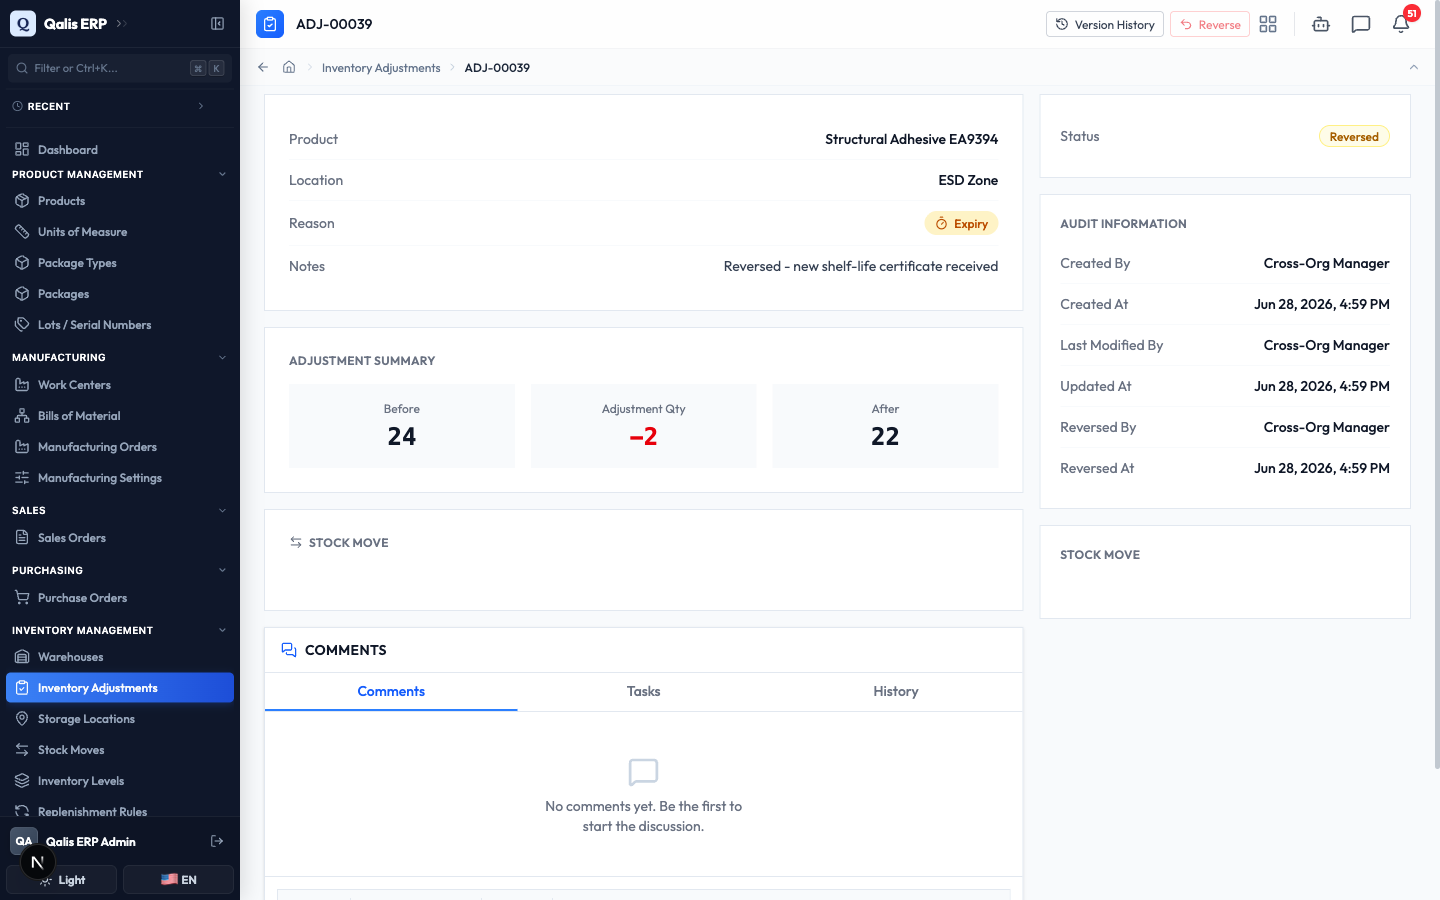
- The adjustment's status changes to Reversed, a counter stock move puts the quantity back, and the audit panel records who reversed it and when.
If your organization requires approval for stock adjustments, reversing first sends the request to the right approver. Once it is approved, run Reverse again to apply it. You can also reverse several at once: tick the adjustments in the list and use Reverse Selected.
See an adjustment's history
Every adjustment keeps a record of each state it has been in, so you always have an audit trail of what happened and who did it.
- On the detail page, click Version History at the top.
- The page shows the Current Version at the top, then each saved state below, newest first. Each entry shows its status (for example Applied, then Reversed), the date and time, and the person responsible.
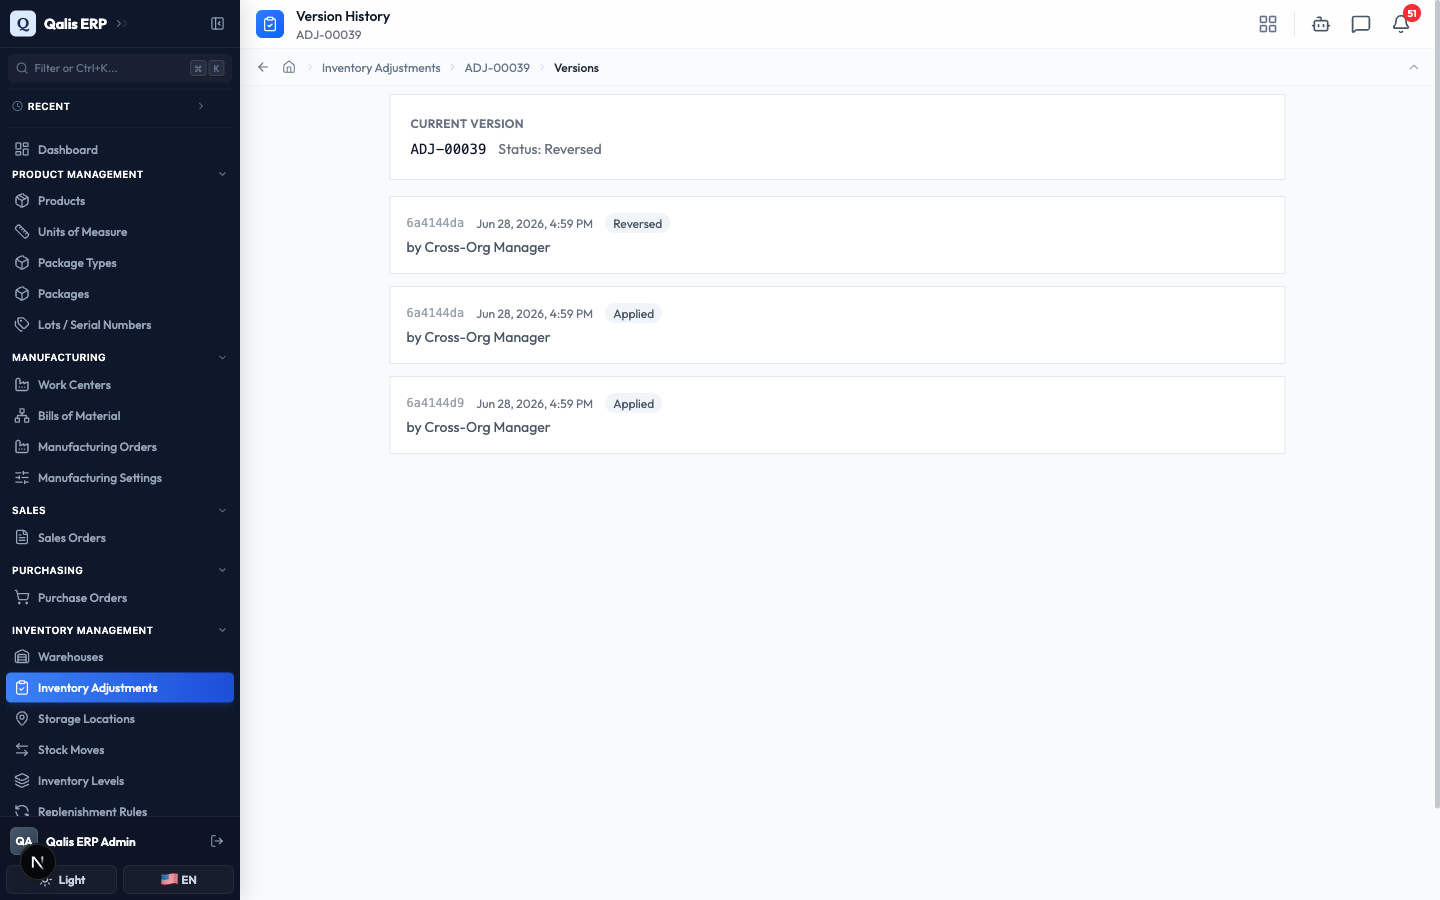
Because an adjustment is never edited in place, this history is a read-only audit trail. To change stock again, you record a new adjustment or reverse an existing one.
Good to know
- Inventory adjustment: a record that corrects the on-hand quantity of one product at one location, with a reason. It updates stock straight away.
- Applied: the normal state of an adjustment. Its change is in effect.
- Reversed: an adjustment that has been undone by an opposite stock move. The original entry stays on the record for the audit trail.
- On hand: how many units the system believes are at the location right now, worked out from the latest stock movements. Qualis fills this in for you.
- Reason code: a short label that explains why the adjustment was made, such as Damage or Found Stock. It is required so the history is easy to follow.
- Stock move: the underlying inventory movement that an adjustment creates. Every adjustment makes one, which is why stock changes are fully traceable.
- Tracked and virtual locations: internal and transit locations hold real stock, so adjusting them changes the on-hand figure. Virtual locations (such as a customer or vendor site) are counterparties: an adjustment there is recorded but does not change on-hand stock.