Invoicing
Bill your customers and get paid: create invoices, finalize them into legal documents, record payments, and keep an eye on what you are owed.
Last updated on July 14, 2026
Invoicing is where you turn work you have done into money your customers owe you. An invoice lists who you are billing, what they bought, the tax, and the total. You start each one as a draft while you get the details right, then finalize it, which locks it and gives it its permanent, gap-free number. From there you send it, record the payments that come in, and the module keeps a running picture of everything still outstanding. This guide walks through the things you do most often: finding an invoice, creating one, finalizing it, recording a payment, correcting a mistake, and reading your aging report.
Before you start
An invoice pulls together things you set up elsewhere, so it helps to have these ready first:
- The customer you are billing, set up in Clients (with a billing address for the printed invoice).
- The products or services you are charging for. You can also type a free description on each line.
- A tax rate for each line (for example VAT 20%), and a payment term (for example Net 30) so the due date fills in for you. Both come with sensible defaults.
- Your seller identity and bank details, set once in the invoicing settings. These print on every finalized invoice, so finalizing is blocked until they are filled in.
You reach the module from the left sidebar under Finance, then Invoices.
Find and browse your invoices
Start here to see everything and zero in on the one you need.
- Open Invoices from the sidebar. The list shows one row per document, with its Number, Type (Invoice, Debit Note or Prepayment), Client, Status, Issue date, Due date, Total, Balance due and who created it.
- Across the top you have AR Aging, Recurring Invoices, Trash and New Invoice, and you can switch between Table view and Grid view.
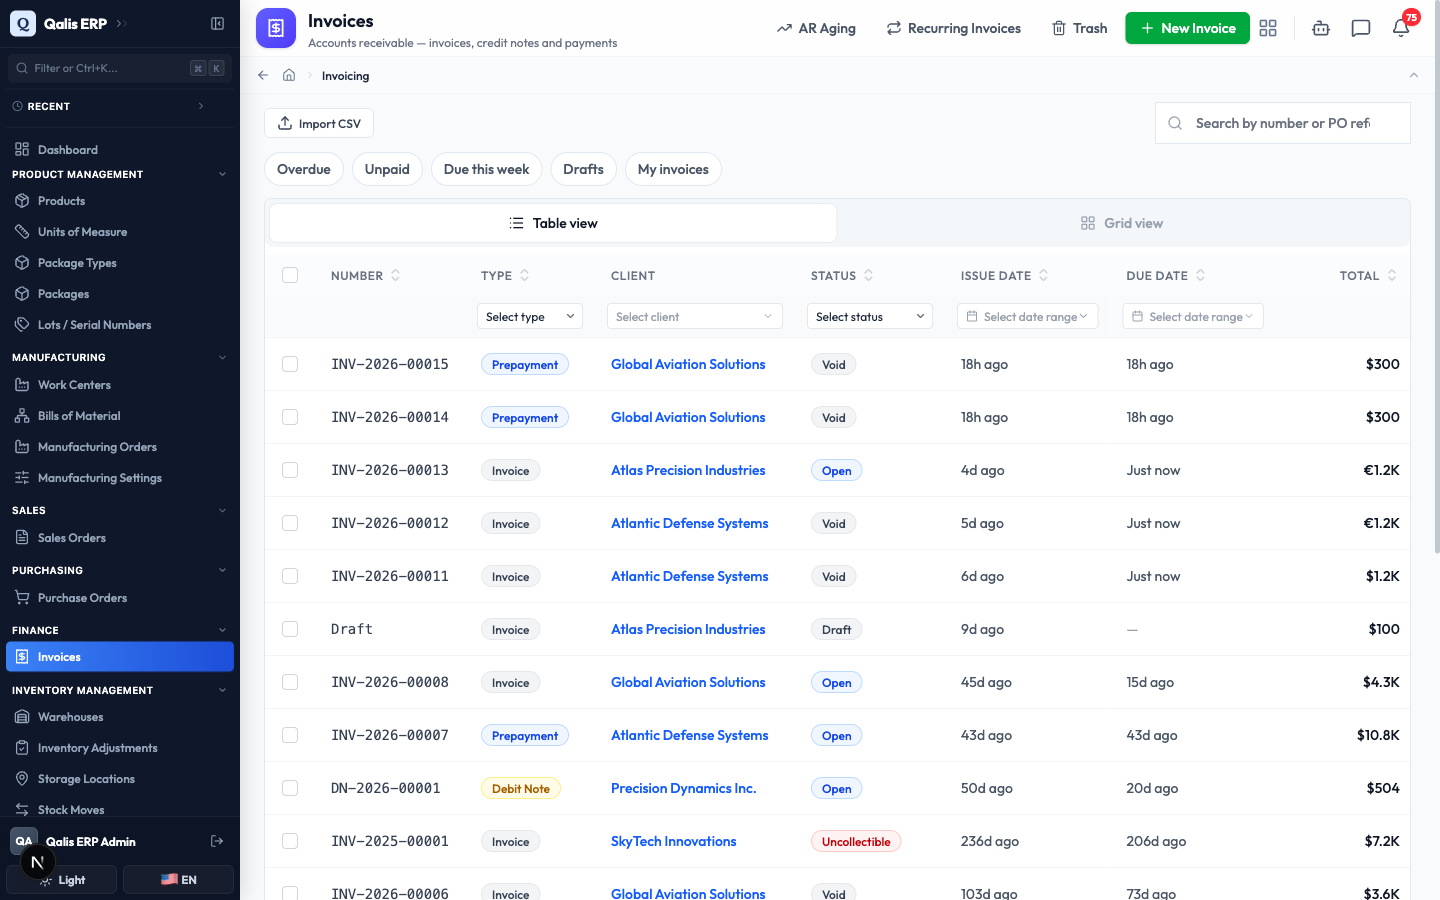
- To find one fast, type in the Search by number or PO reference... box. The list filters as you type, so there is no need to press Enter.
- The quick filters above the table jump to the views you need most: Overdue, Unpaid, Due this week, Drafts and My invoices. Click one to apply it.
- For anything more specific, open a column filter under its heading, for example Status or Client, or filter by a date range. Relationship columns like Client use a searchable picker.
Whenever a filter is on, an Active filters banner appears showing what is applied. Click the small x on a filter to drop it, or clear them all to reset. The web address updates too, so you can bookmark or share a filtered view.
Create an invoice
This is the main task: writing down what a customer owes you. The form is one page split into clear sections. New invoices always start as a draft.
- On the list, click New Invoice at the top right.
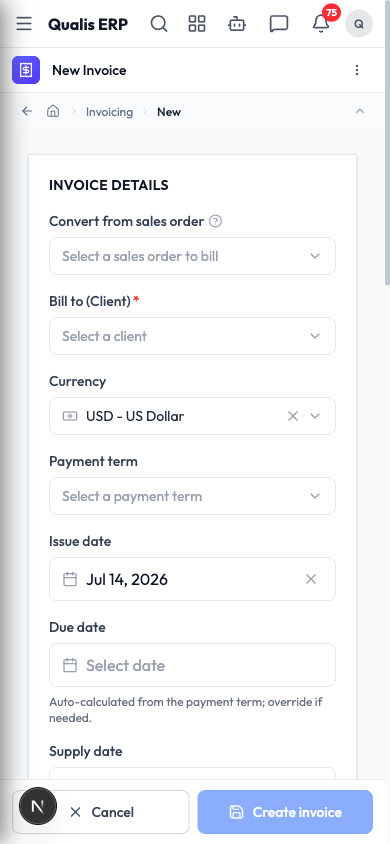
- In Invoice Details, click Select a client and choose who you are billing. This is required and fills in the invoice's currency for you. If the amount comes from a sales order, use Convert from sales order instead to pull the lines in automatically.
- Set the Issue date (it starts on today). The Due date is calculated for you from the Payment term, but you can override it. Optionally record a Supply date, the Nature of supply (goods, services or mixed) and a Purchase order reference.
- Choose the Price tax treatment: whether your prices are tax exclusive or tax inclusive.
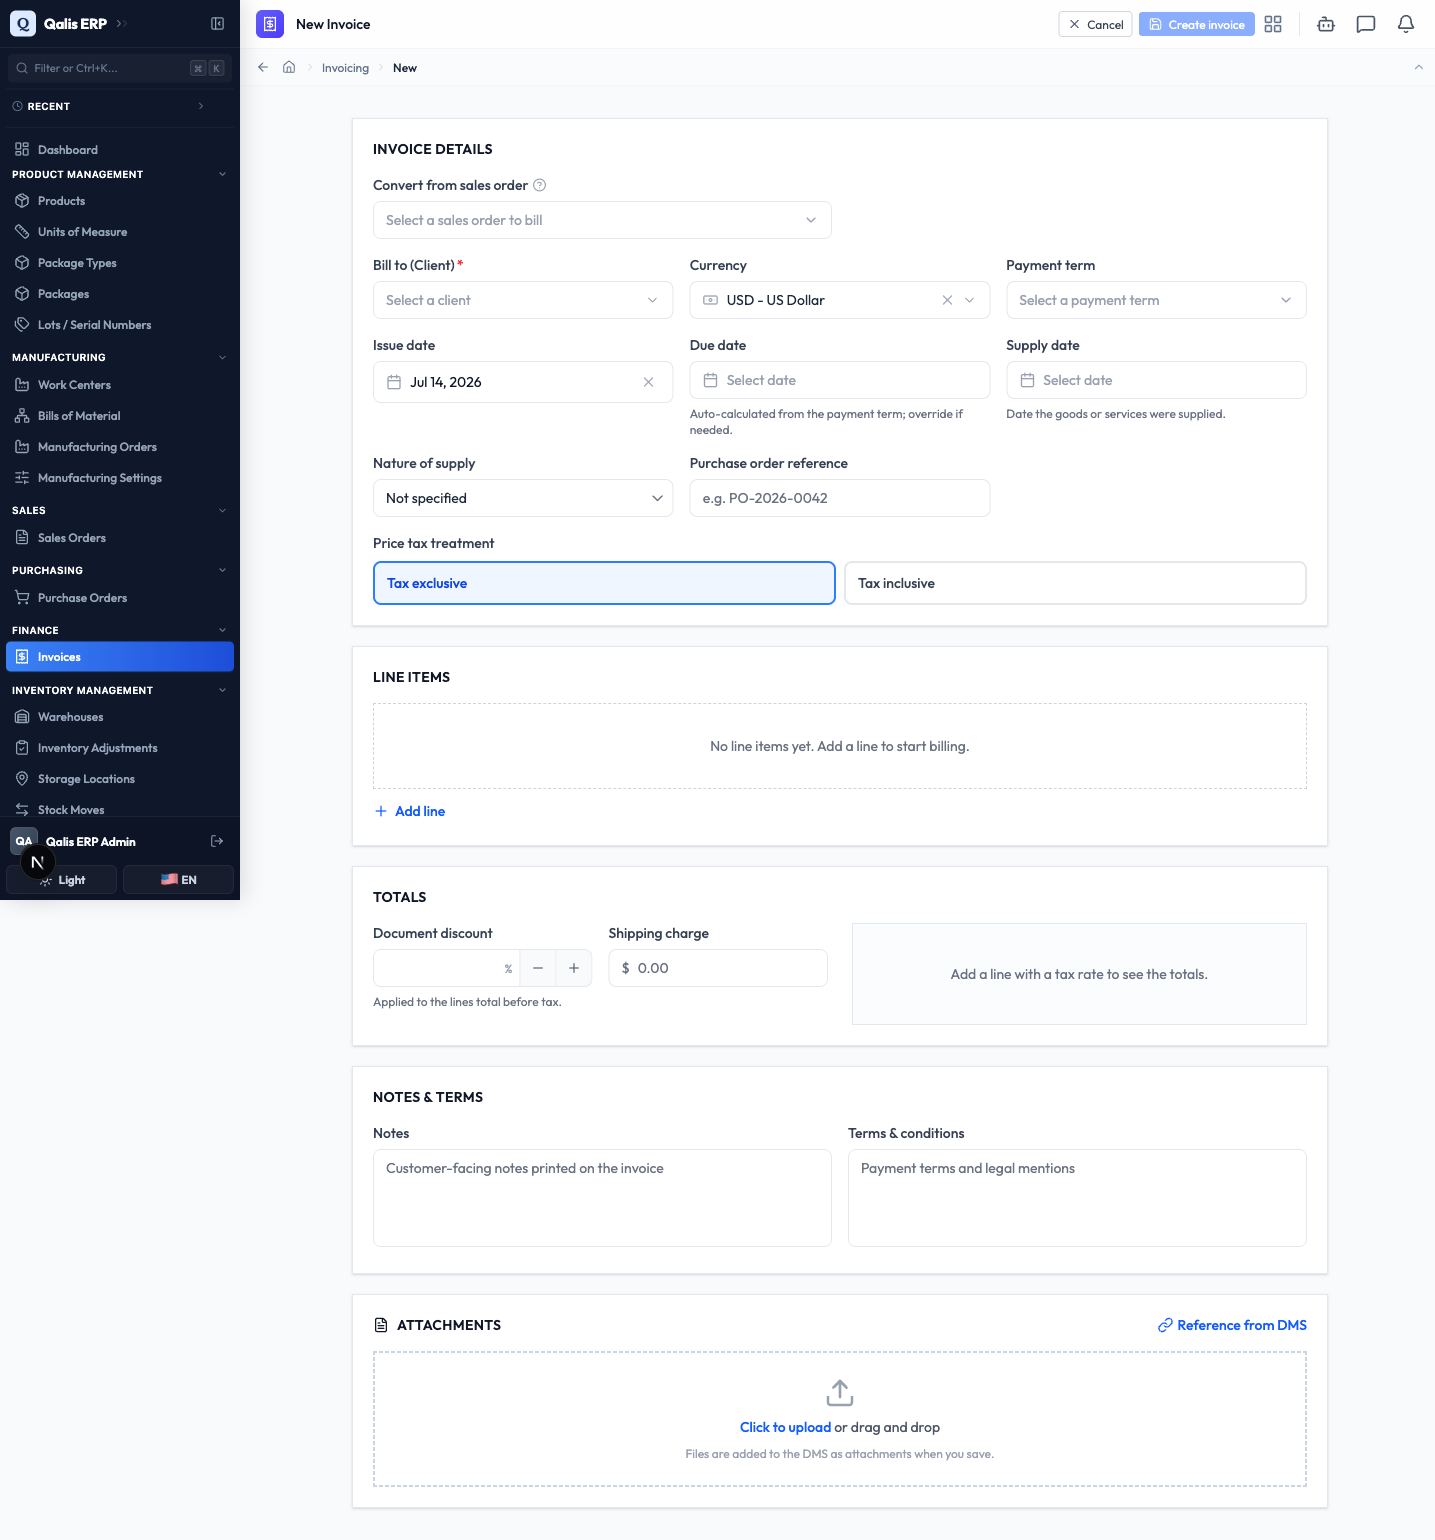
- In Line Items, click Add line for each thing you are charging. Pick the product (or type a description), set the quantity, the unit price and the tax rate. A line discount is optional.
- In Totals you can add a whole-document discount or a shipping charge. The summary updates live as you type, showing the net, the tax per rate, and the grand total.
- Add customer-facing Notes and Terms & conditions if you need them, and drag any supporting files into Attachments (they are stored in the DMS when you save).
- Click Create invoice. Your new invoice opens as a draft, which you can still freely edit or delete.
Drafts have no number and no legal weight; they are your working copy. The number is only assigned when you finalize.
Read an invoice
Open any invoice from the list to see its full detail: the buyer and seller identity, the lines, the tax breakdown, the totals and the current status. From here the top bar gives you every action you can take: Edit, Delete and Version History are always present, alongside Record payment, Create credit note, Send, Download PDF, a Tax calculation trace and more (some are greyed out when they do not apply to the current status).
Statuses tell you where an invoice stands: Draft, Open (finalized and awaiting payment), Sent, Partially Paid, Paid, Void and Uncollectible. Overdue is worked out for you from the due date and the balance, so you never have to set it by hand.
Finalize an invoice
Finalizing turns a draft into a legal document.
- Open the draft and choose Finalize (or the equivalent status action).
- The invoice is assigned the next gap-free number in its series (for example
INV-2026-00013), its buyer, tax and currency details are snapshotted, and the document is locked, so you can no longer edit it.
Once finalized, an invoice cannot be edited or deleted. This is deliberate: legal numbering must have no gaps. If something is wrong, you correct it with a credit note (see below), not by changing the original.
Record a payment
When money comes in, record it against the open invoice.
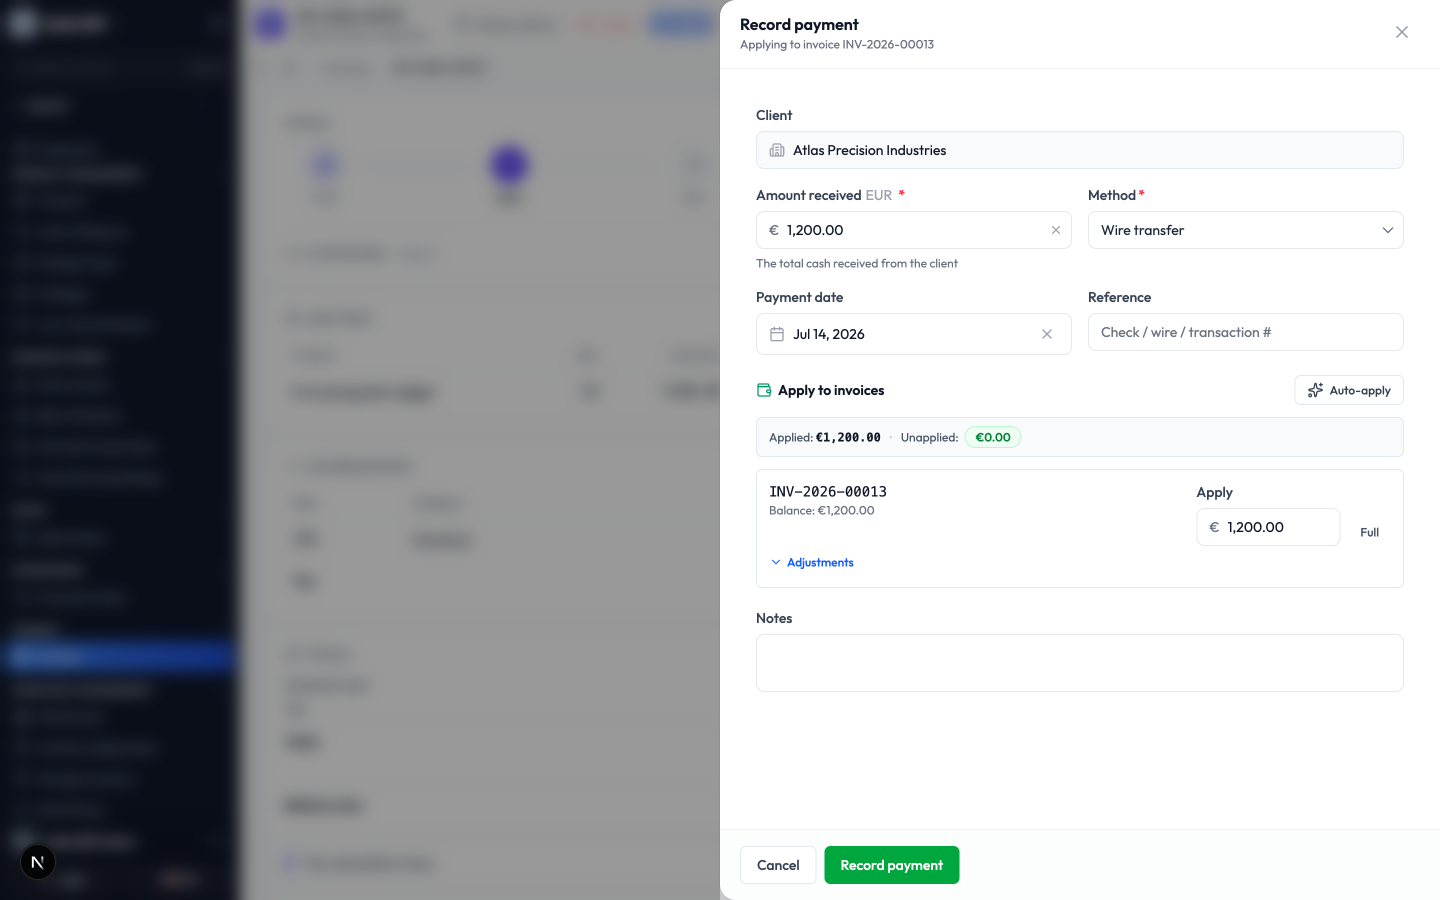
- Open the invoice and click Record payment.
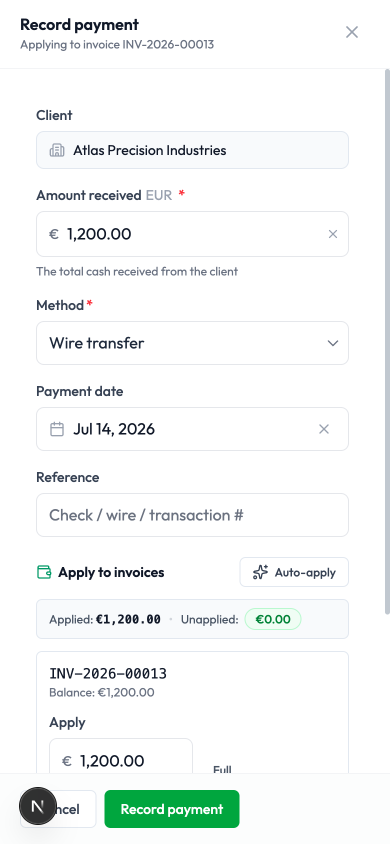
- Enter the Amount received in the client's currency and pick the Method: Check, ACH / SEPA, Wire transfer, Card, Cash or Lockbox. Set the Payment date and an optional Reference (cheque or transaction number).
- Under Apply to invoices, the payment is spread across the client's open invoices oldest-first with Auto-apply, or you can set each amount yourself and use Full to pay a line off. The Applied and Unapplied totals update as you go.
- Click Record payment. The invoice's Balance due drops, and its status moves to Partially Paid or Paid automatically.
Correct a mistake with a credit note
Because finalized invoices are locked, the way to reduce or cancel what a customer owes is a credit note. From the invoice detail, click Create credit note. It opens pre-filled from the invoice, with the amounts reversed, and follows the same finalize-and-number path. Once issued, it reduces the customer's balance and is linked back to the original invoice for a clean audit trail.
Watch what you are owed
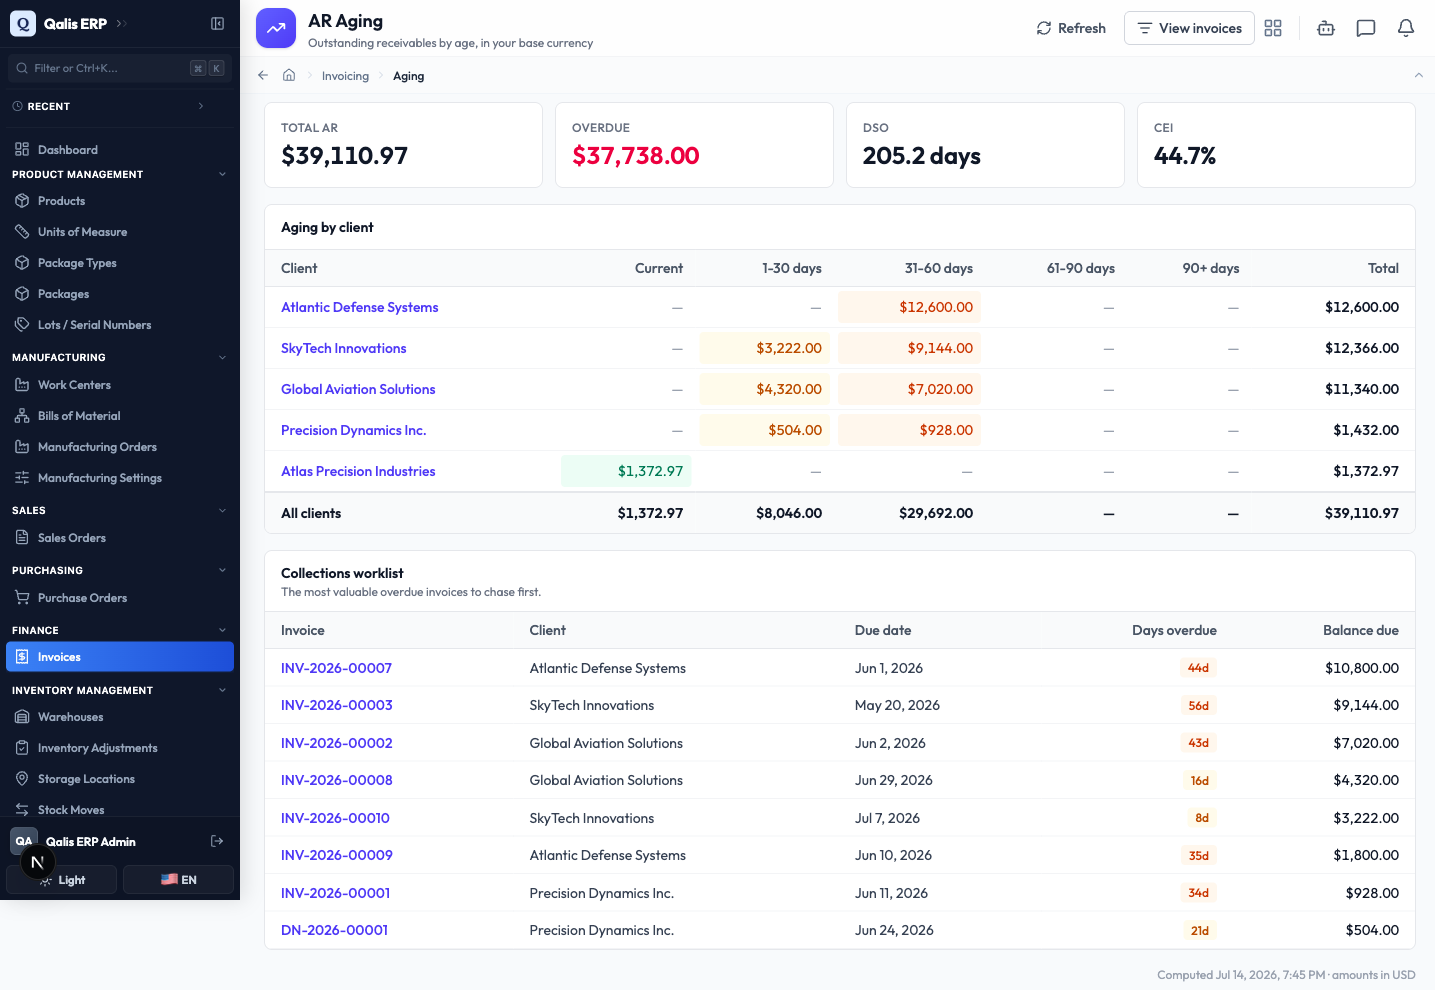
The AR Aging dashboard (the AR Aging button on the list) is your at-a-glance view of outstanding receivables, all shown in your organization's base currency.
- The tiles at the top show your Total AR, how much is Overdue, your DSO (average days to get paid) and your CEI (collection effectiveness).
- Aging by client breaks each customer's balance into buckets (current, 1-30, 31-60, 61-90 and 90+ days overdue) so you can see who is slipping.
- The Collections worklist ranks the most valuable overdue invoices to chase first, with the days overdue and the balance due.
On your phone
The whole module works on a phone. On a narrow screen the tables become tidy cards, dialogs like Record payment slide up from the bottom as a sheet you can scroll, and the Save / Cancel buttons stick to the bottom of the create and edit forms so they are always within thumb reach.