Work Centers
Set up the places where work happens on your shop floor, with their cost rates, schedules, and machines, so your manufacturing recipes have somewhere to run.
Last updated on June 26, 2026
A work center is a place on your shop floor where work gets done. It might be an assembly line, a machining cell, a welding bay, or a paint booth. Each work center carries the information your manufacturing recipes need: how its cost is worked out (by labor time or machine time), the hourly rates that feed your product costs, and a few defaults that keep production tidy. This guide walks you through the things you do most often: finding a work center, creating one, reading it, editing it, setting up a work calendar (the schedule a work center runs on), and adding a machine.
You reach the module from the left sidebar under Manufacturing, then Work Centers.
Before you start
You can create a work center with nothing more than a name, so there are no hard requirements. A few things set up elsewhere make a work center more useful, so it helps to have them ready first:
- A site (a warehouse), set up in Warehouses, if you want to say where the work center physically sits.
- A work calendar, if you want the work center to follow a specific schedule of working days and shifts. You can create one in this same area (see "Set up a work calendar" below).
- A supplier, set up in Suppliers, if the work is sent out to an outside vendor (subcontracted).
- Storage locations (bins), set up in Storage Locations, if you want to set default bins or route scrap to a location.
The Work Centers area also holds Work Calendars, Machines, and Tooling. Each has its own list. You open them from their web address: add
/calendars,/machines, or/toolingto the work centers address (for example.../dashboard/work-centers/calendars). This guide covers calendars and machines below.
Find and browse your work centers
Start here to see everything you have and zero in on the one you need.
- Open Work Centers from the sidebar. The list shows one row per work center, with its Reference, Name, Capacity Basis, Site, whether it is an Outside Process, and whether it is Active.
- Across the top you have an Import button, a search box, and a switch between Table view and Grid view.
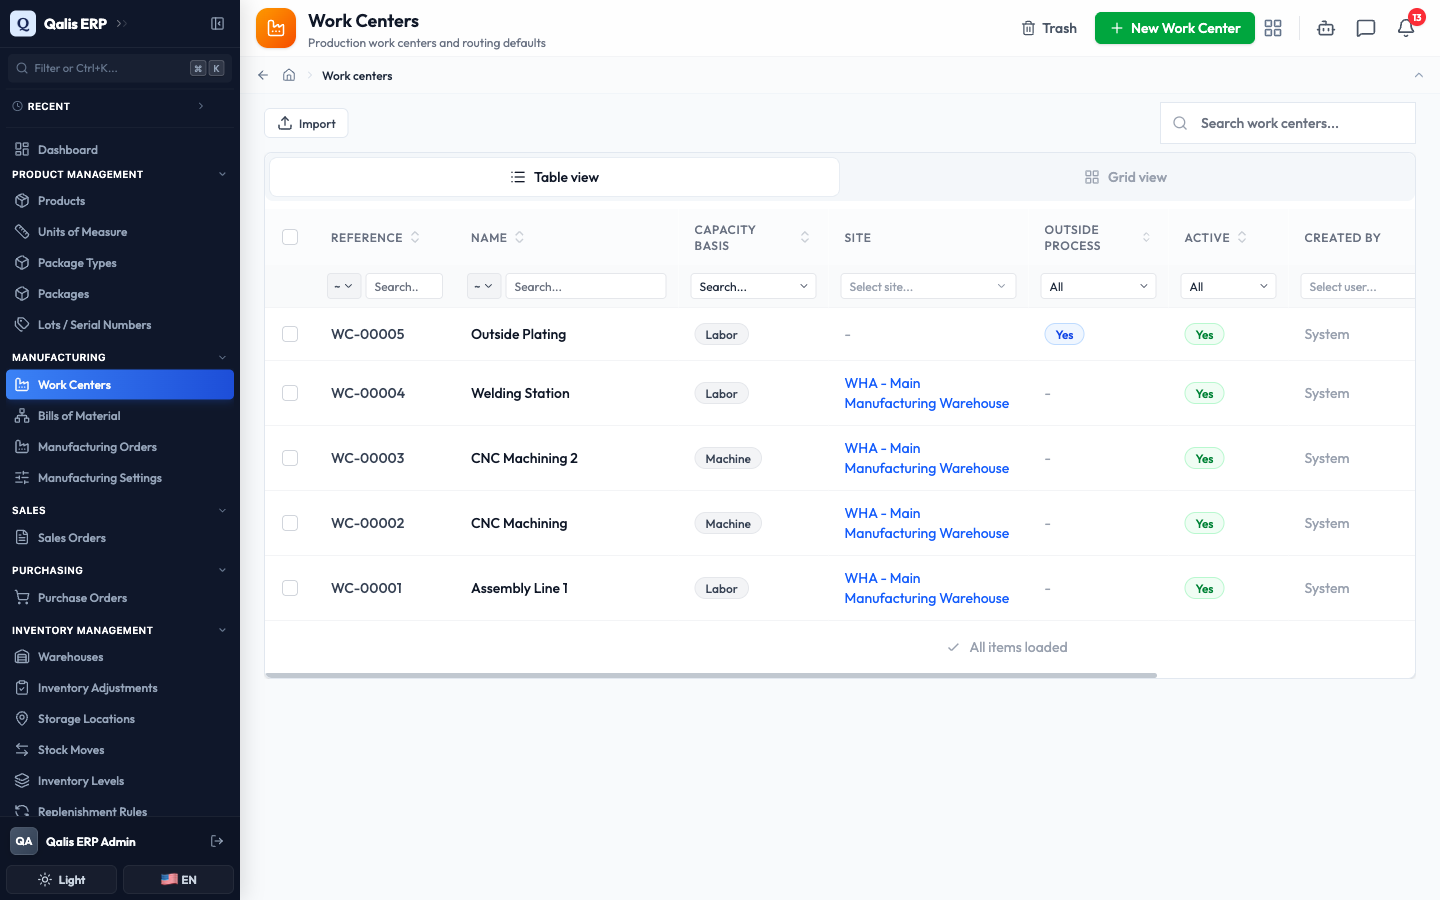
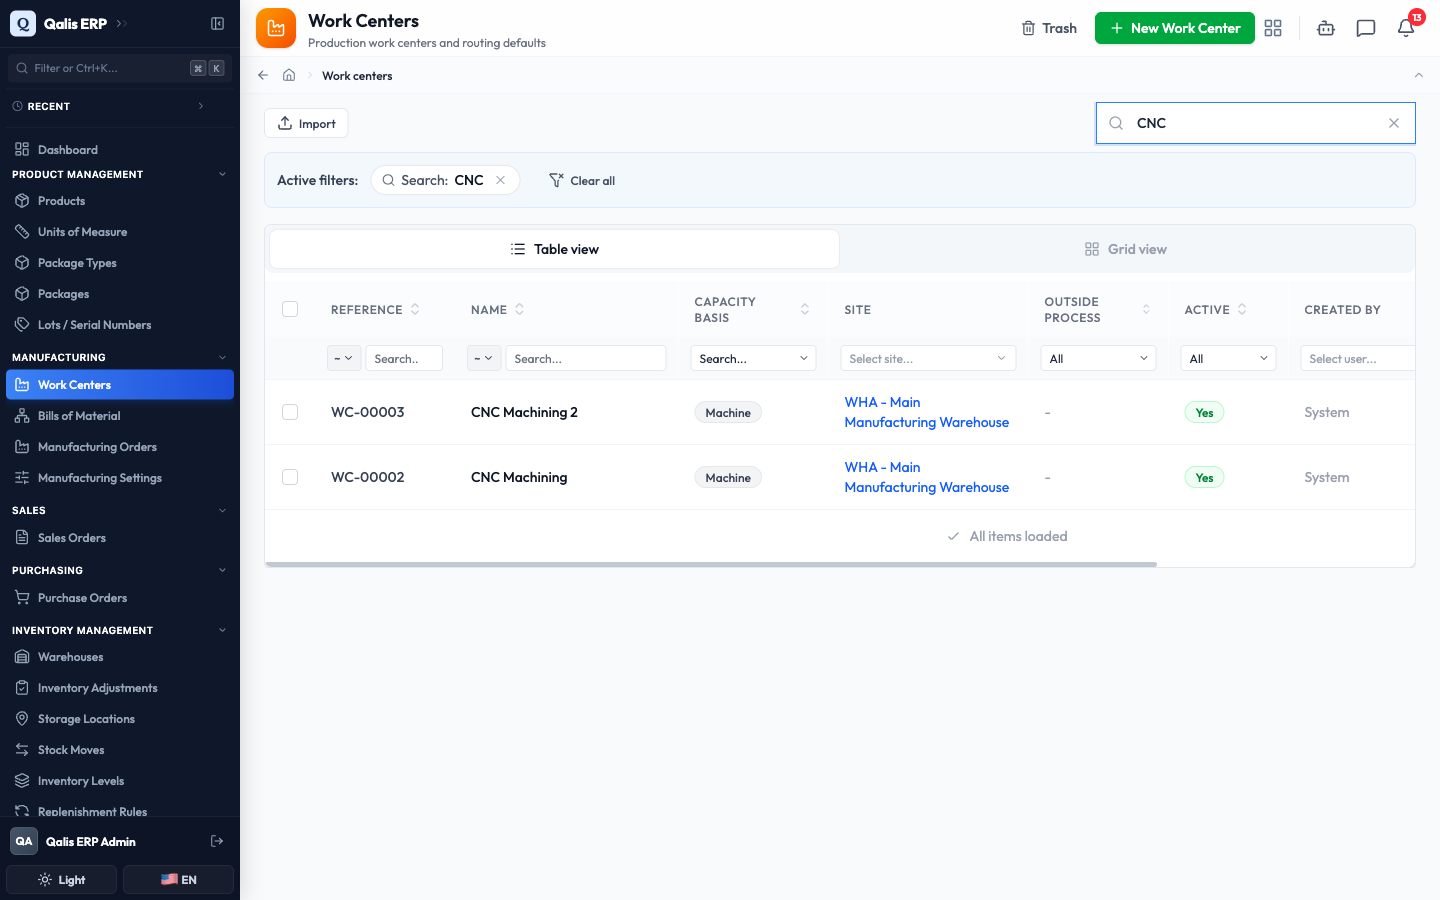
- To find one fast, type in the Search work centers... box at the top right. The list filters as you type, so there is no need to press Enter.
- To narrow by a column, open the small dropdown under a column heading and pick a value. For example, set Capacity Basis to Machine to see only machine-driven work centers.
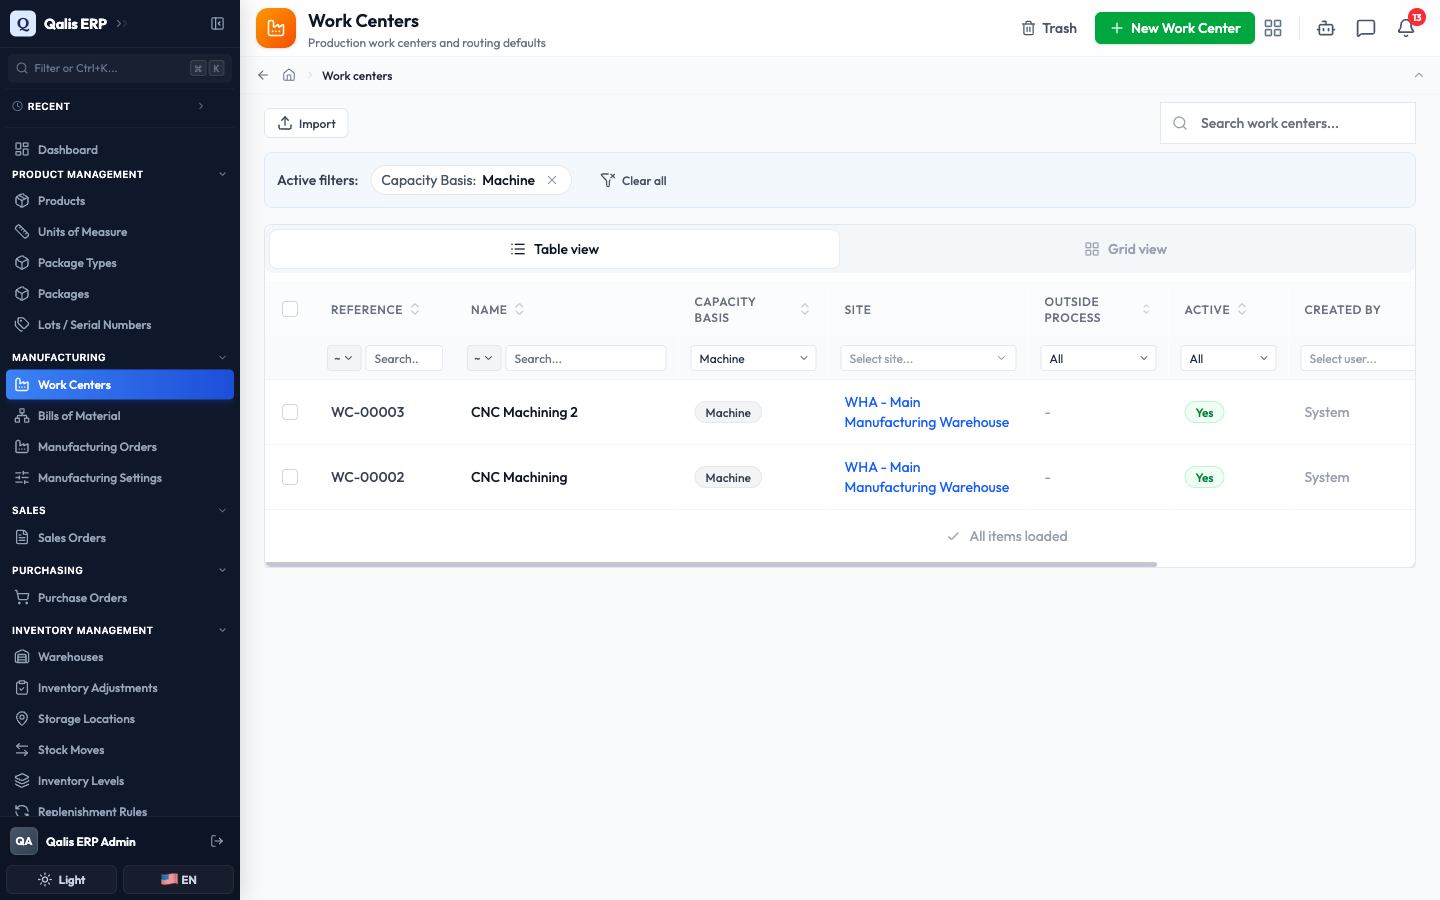
Whenever a filter is on, an Active filters banner appears under the search box showing what is applied. Click the small x on a filter to drop it, or Clear all to reset everything. The web address updates too, so you can bookmark or share a filtered view.
Create a work center
This is the main task: describing a place where work happens. The form is split into tabs, so you can fill it in one section at a time. Only a Name is required, and you can come back to add the rest later.
- On the list, click New Work Center at the top right.
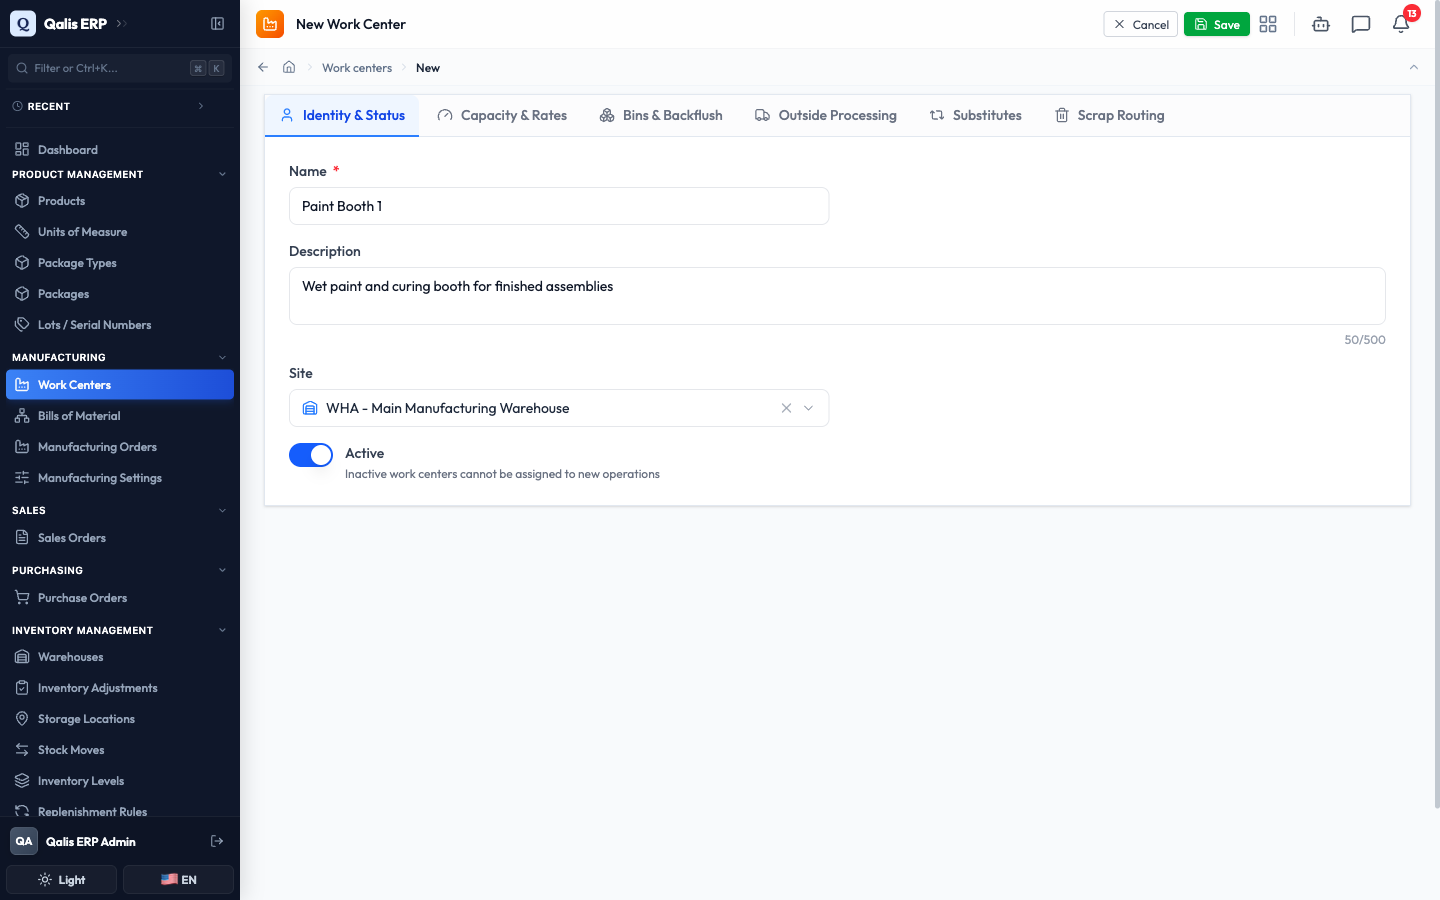
- On the Identity & Status tab, type a Name (for example, "Paint Booth 1"). This is the only required field.
- Add an optional Description, choose a Site from the dropdown if the work center sits in a known warehouse, and leave Active on so the work center can be used in production.
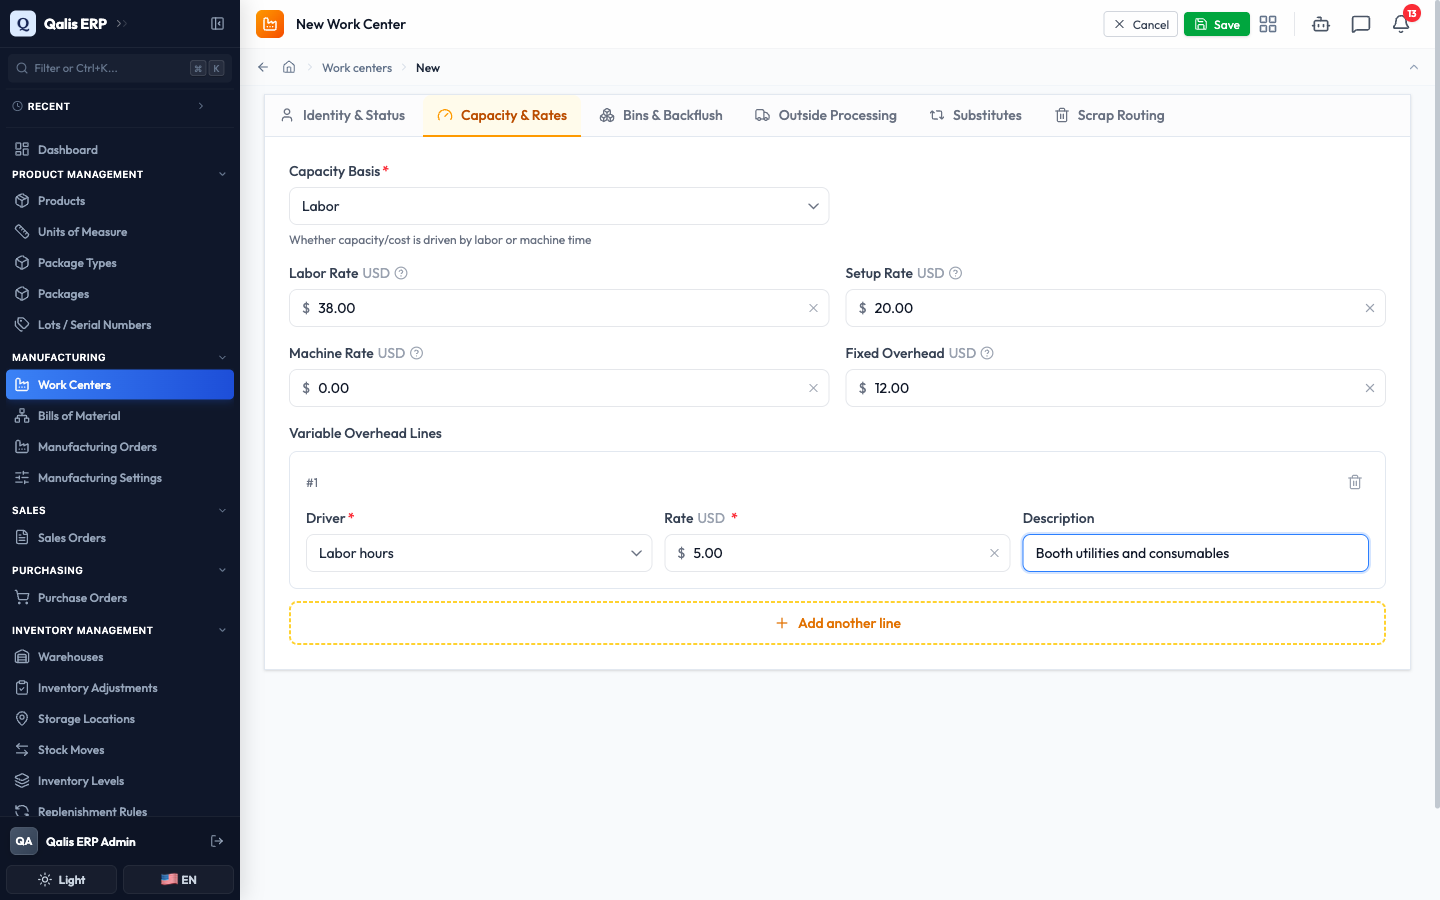
- Switch to the Capacity & Rates tab. Choose a Capacity Basis: Labor if the work is driven by people's time, or Machine if it is driven by machine time. This is required.
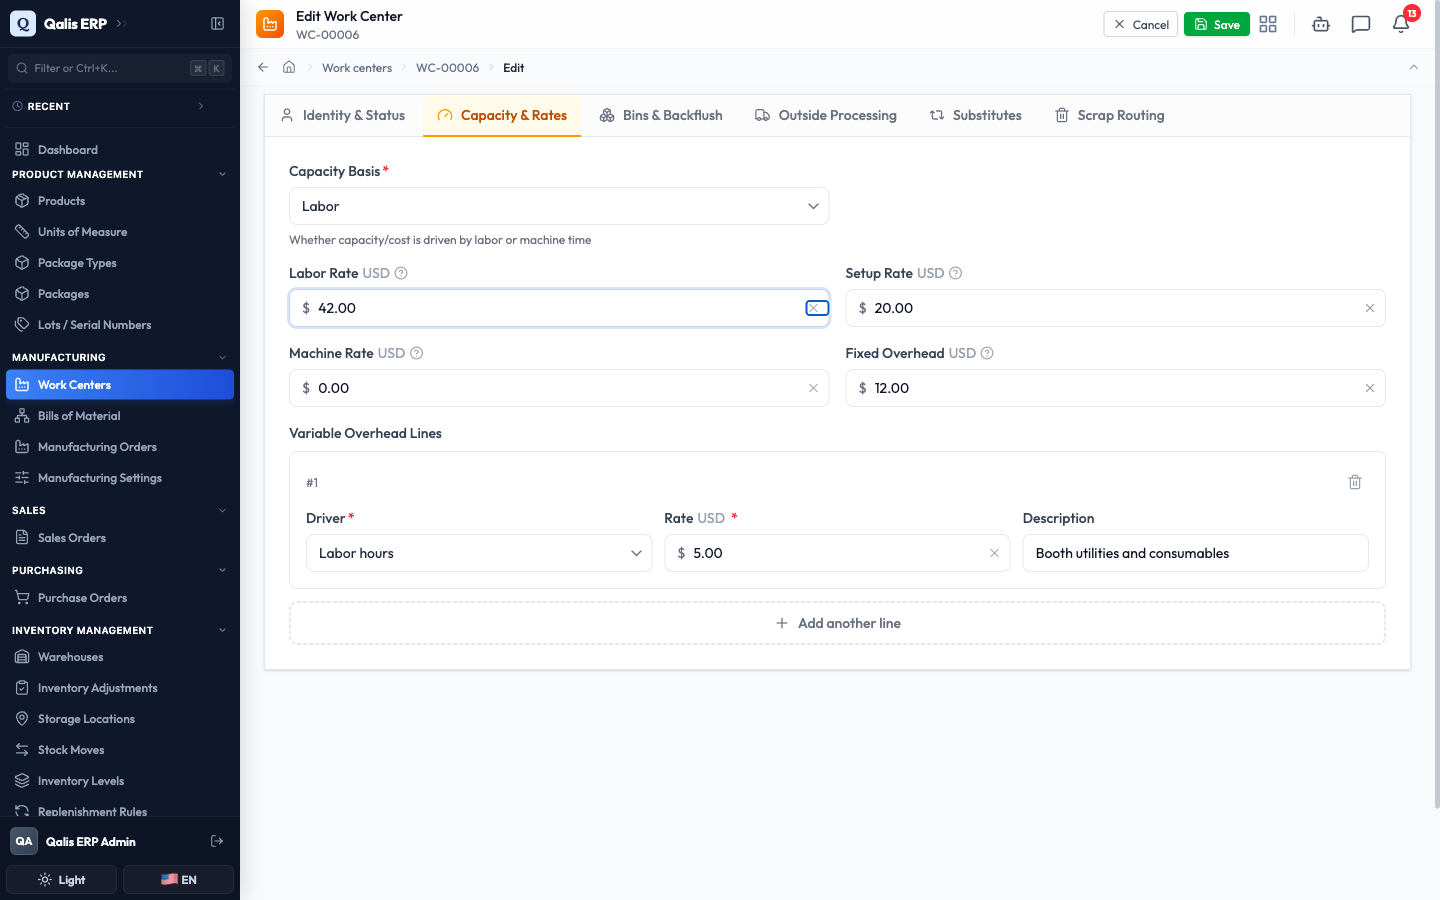
- Fill in the hourly rates that apply: Labor Rate, Setup Rate, Machine Rate, and a flat Fixed Overhead. These feed the cost of anything made here. Each shows the amount in your organization's currency and tidies up the formatting when you click away.
- If you have extra running costs, add a Variable Overhead line. Click Add first line, pick a Driver (such as Labor hours), set a Rate, and add a short note.
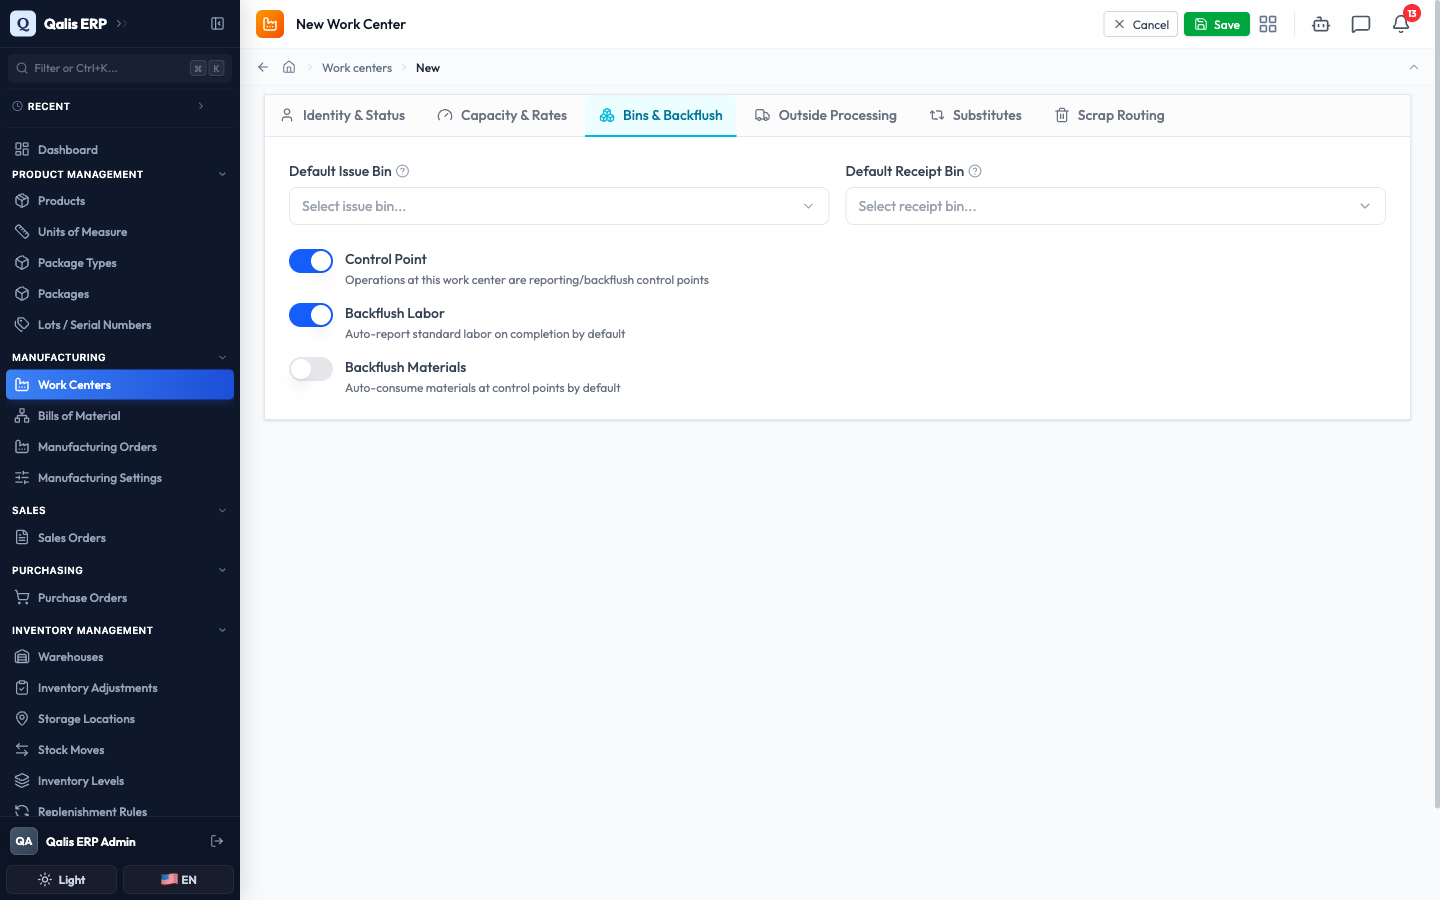
- Open the Bins & Backflush tab. Here you can set the default bins materials are issued from and finished work is received into, and turn on automatic reporting. Switch on Control Point if work here should be a reporting checkpoint, and Backflush Labor to report standard labor automatically when the step is done.
- The remaining tabs are optional. Use Outside Processing if the work is sent to a supplier, Substitutes to list interchangeable work centers, and Scrap Routing to say what happens to scrap reported here.
- Click Save at the top right.
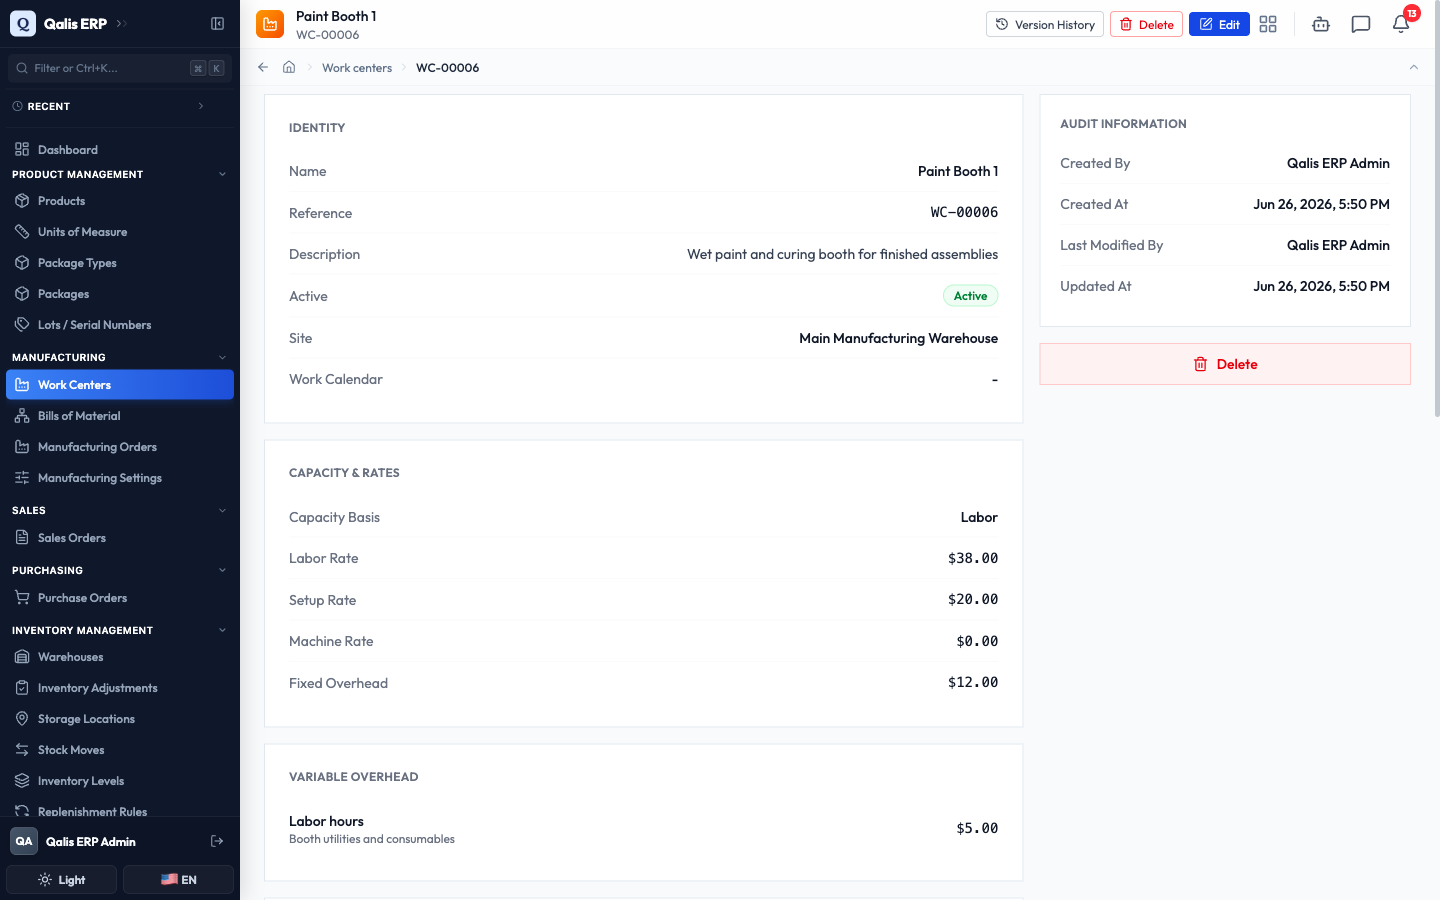
Qualis saves the work center, gives it a reference (like WC-00006), and takes you straight to its detail page.
Nothing is saved while you are still filling in the form, so you can change your mind freely. The work center only exists once you click Save.
Read a work center
Open any work center to understand how it is set up.
- Click a row in the list (or a Reference link anywhere in Qualis). The detail page opens.
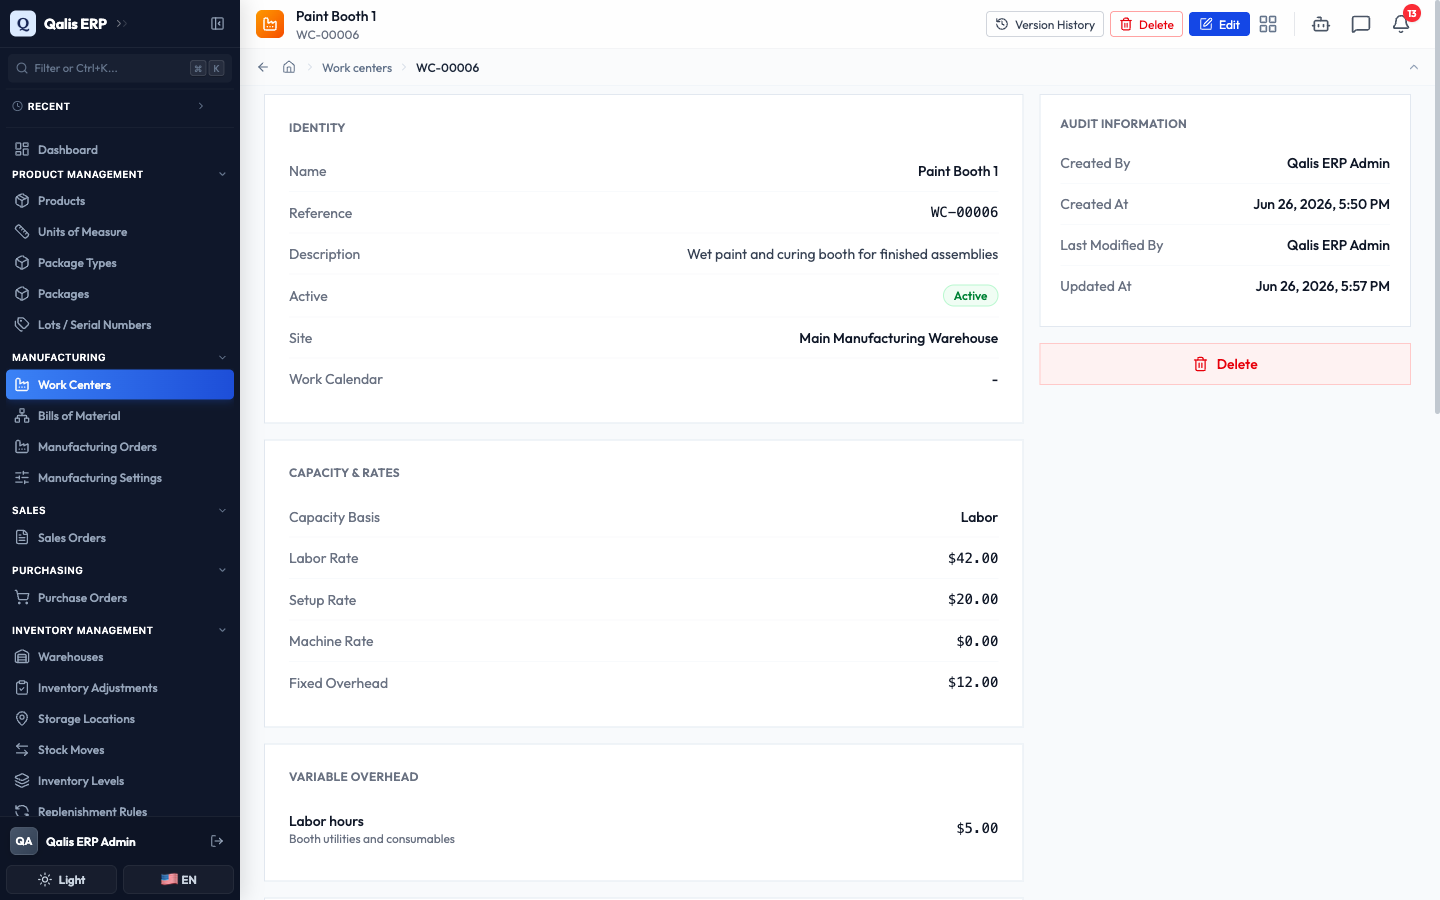
- The top of the page shows the name and reference, and the buttons for everything you can do: Version History, Delete, and Edit.
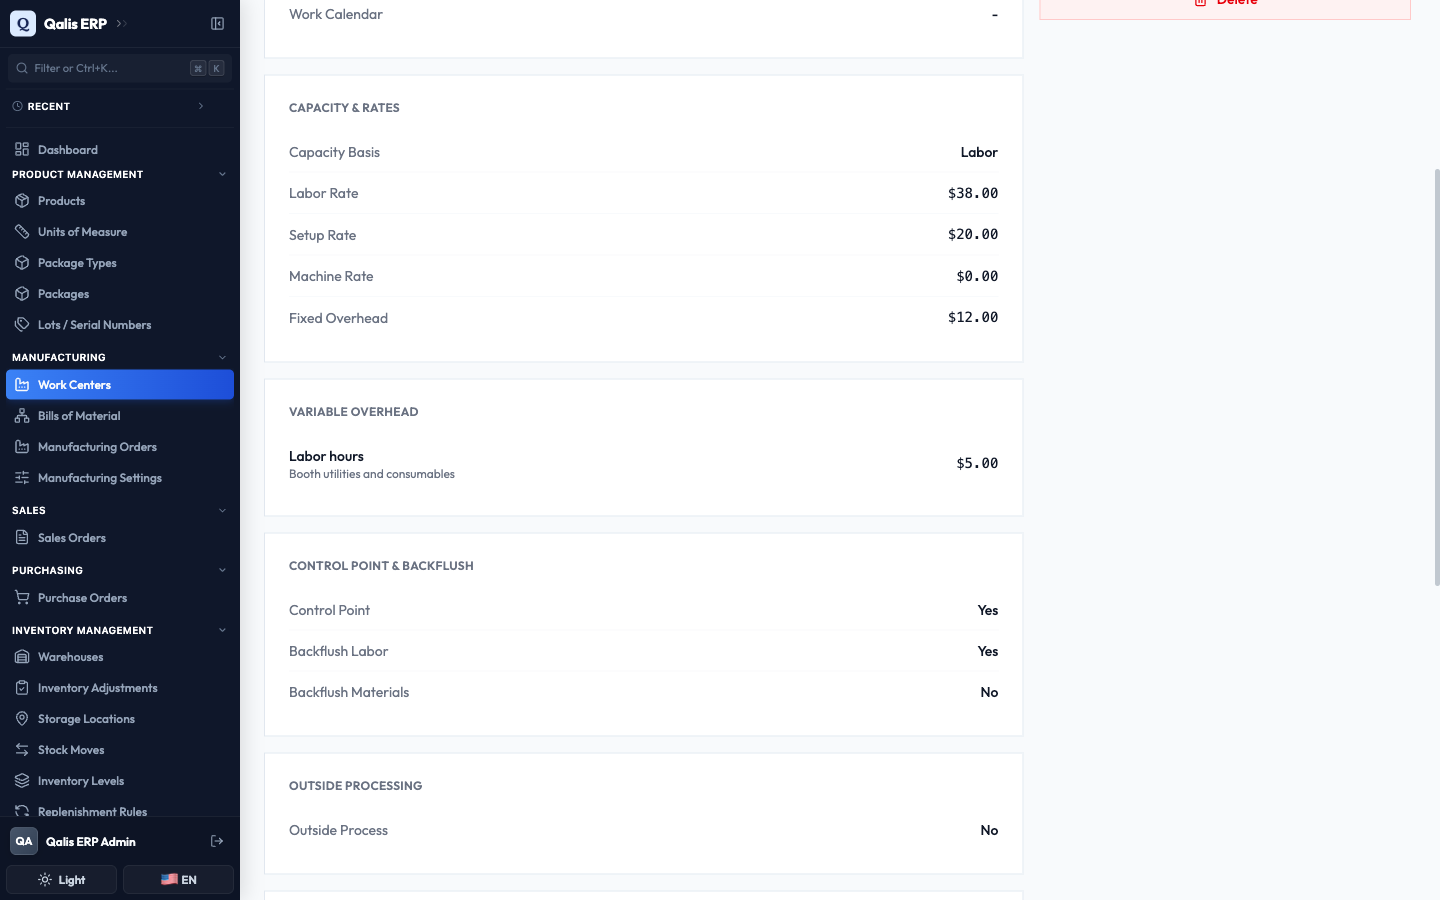
- The Identity panel lists the name, description, site, and work calendar. The Capacity & Rates panel shows the capacity basis and every rate, and Variable Overhead lists any extra cost lines. On the right, the Audit Information panel records who created the work center and when it last changed.
- Scroll down to see the rest as read-only sections: Control Point & Backflush, Outside Processing, Substitutes, and Scrap Routing. These show the choices you made in the form at a glance.
Every detail page also has a Comments area at the bottom, where you and your team can leave notes, add tasks, and see the work center's history.
Edit a work center
Update a work center when a rate changes or a setting needs adjusting.
- Open the work center and click Edit at the top right. The same tabbed form opens, already filled in with the current values.
- Make your change. For example, on the Capacity & Rates tab, update the Labor Rate (here it changes from 38.00 to 42.00).
- Click Save. Qualis returns you to the detail page, where your change is shown right away. The Updated At time in the Audit Information panel also moves forward.
Set up a work calendar
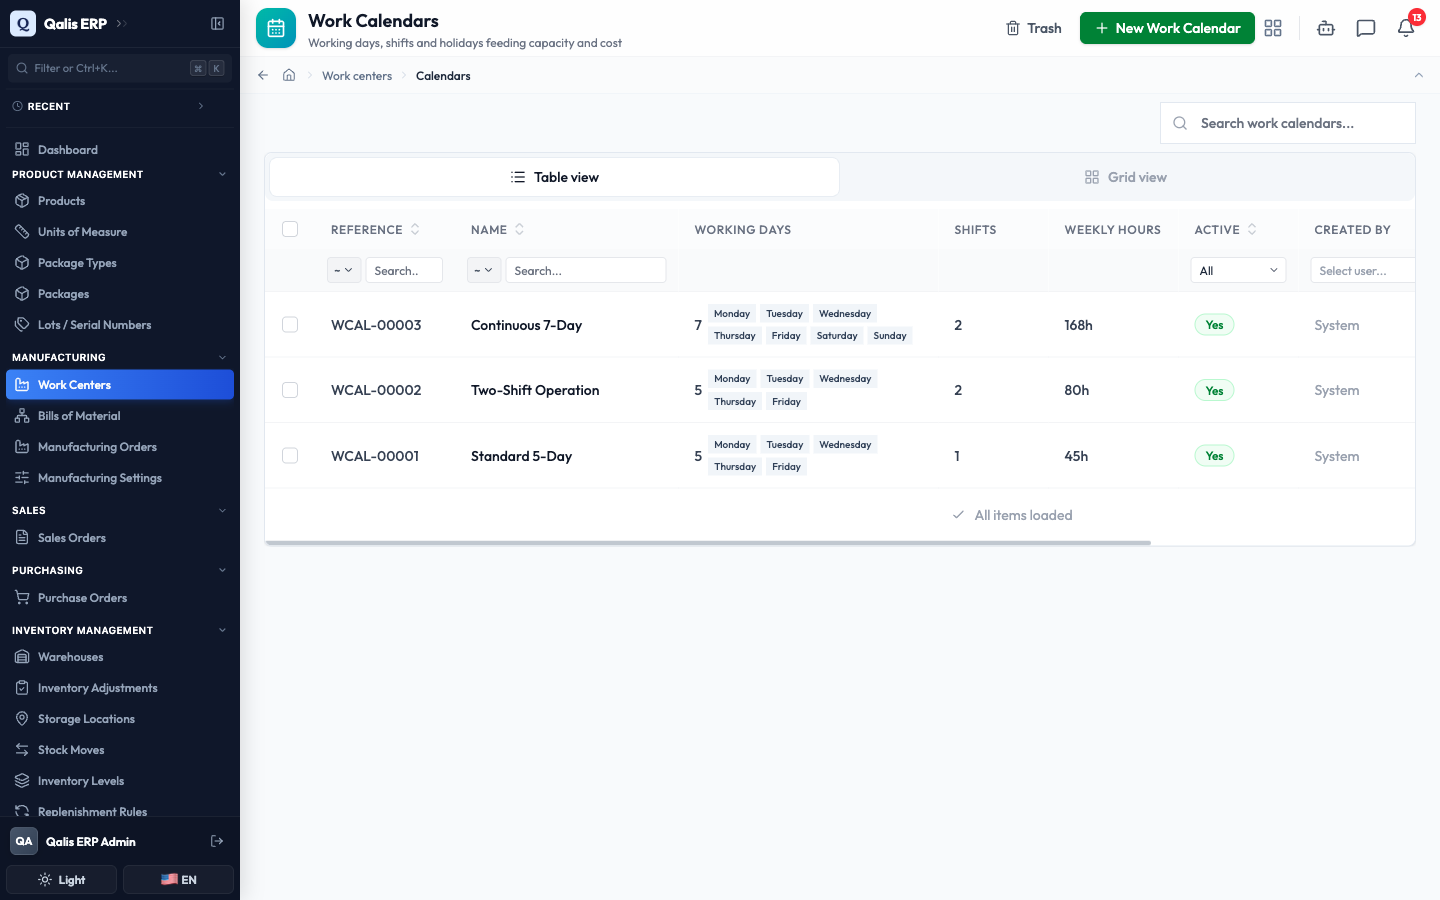
A work calendar is the schedule a work center runs on: which days are working days, the shifts worked each day, and any holidays. It feeds the capacity and timing calculations for your production. You open the calendars list from its web address, by adding /calendars to the work centers address.
- Go to the Work Calendars list. It shows each calendar with its Working Days, the number of Shifts, and the Weekly Hours it adds up to.
- Click New Work Calendar. On the Identity & Status tab, give it a Name (for example, "Standard 6-Day") and an optional description.
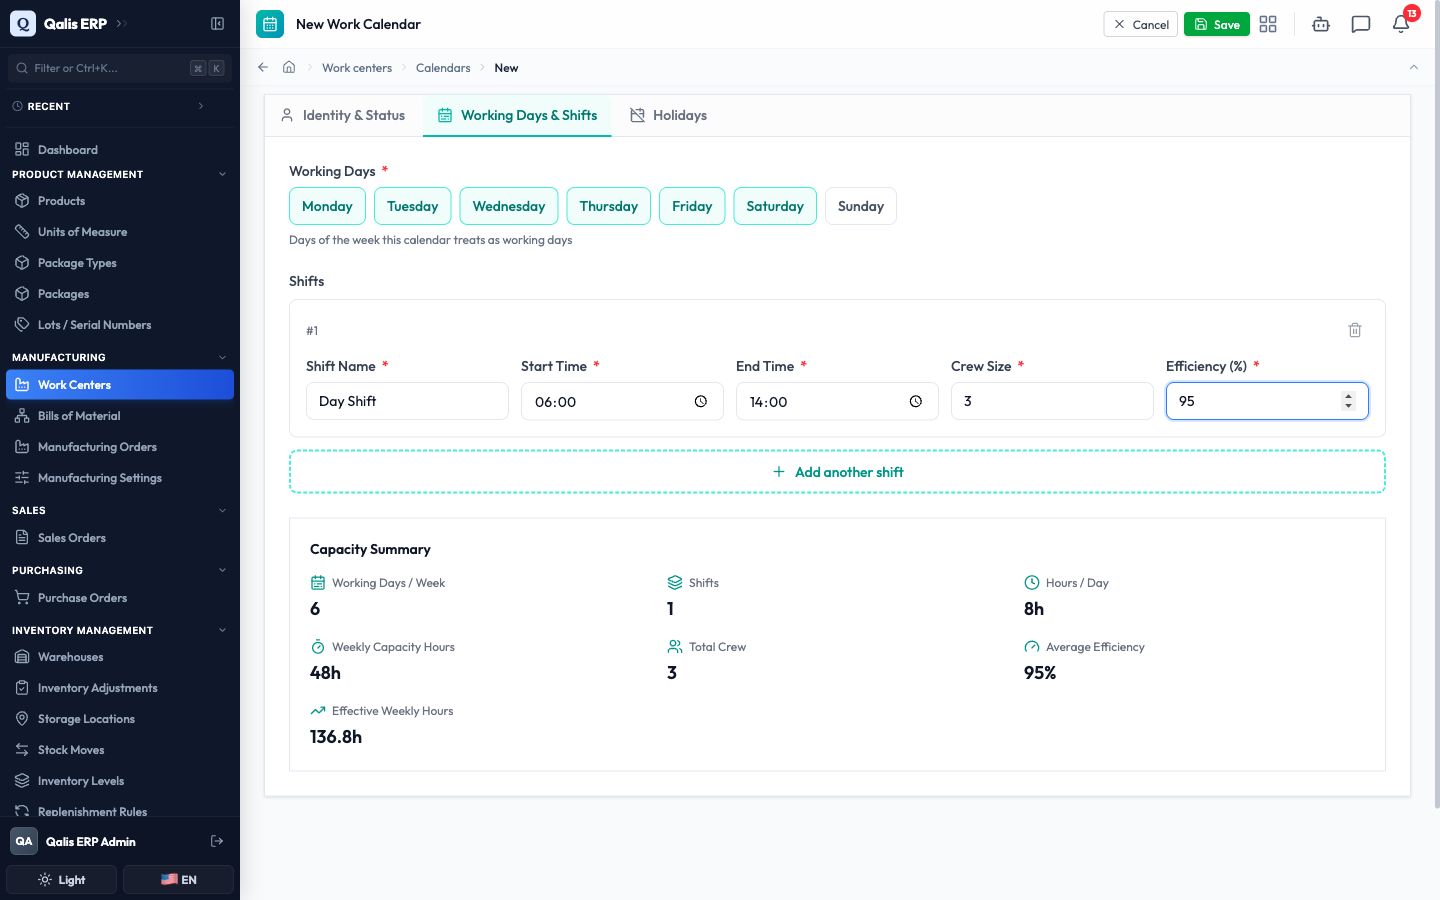
- Switch to the Working Days & Shifts tab. Click the days of the week this calendar treats as working days (here, Monday through Saturday).
- Click Add first shift, then fill in the Shift Name, the Start Time and End Time in 24-hour form, the Crew Size, and the Efficiency (%). As you type, the Capacity Summary on the right updates with the hours and crew this calendar provides.
- Add any non-working dates on the Holidays tab, then click Save.
Qualis saves the calendar and shows its detail page, with the working days, shifts, holidays, and capacity all laid out.
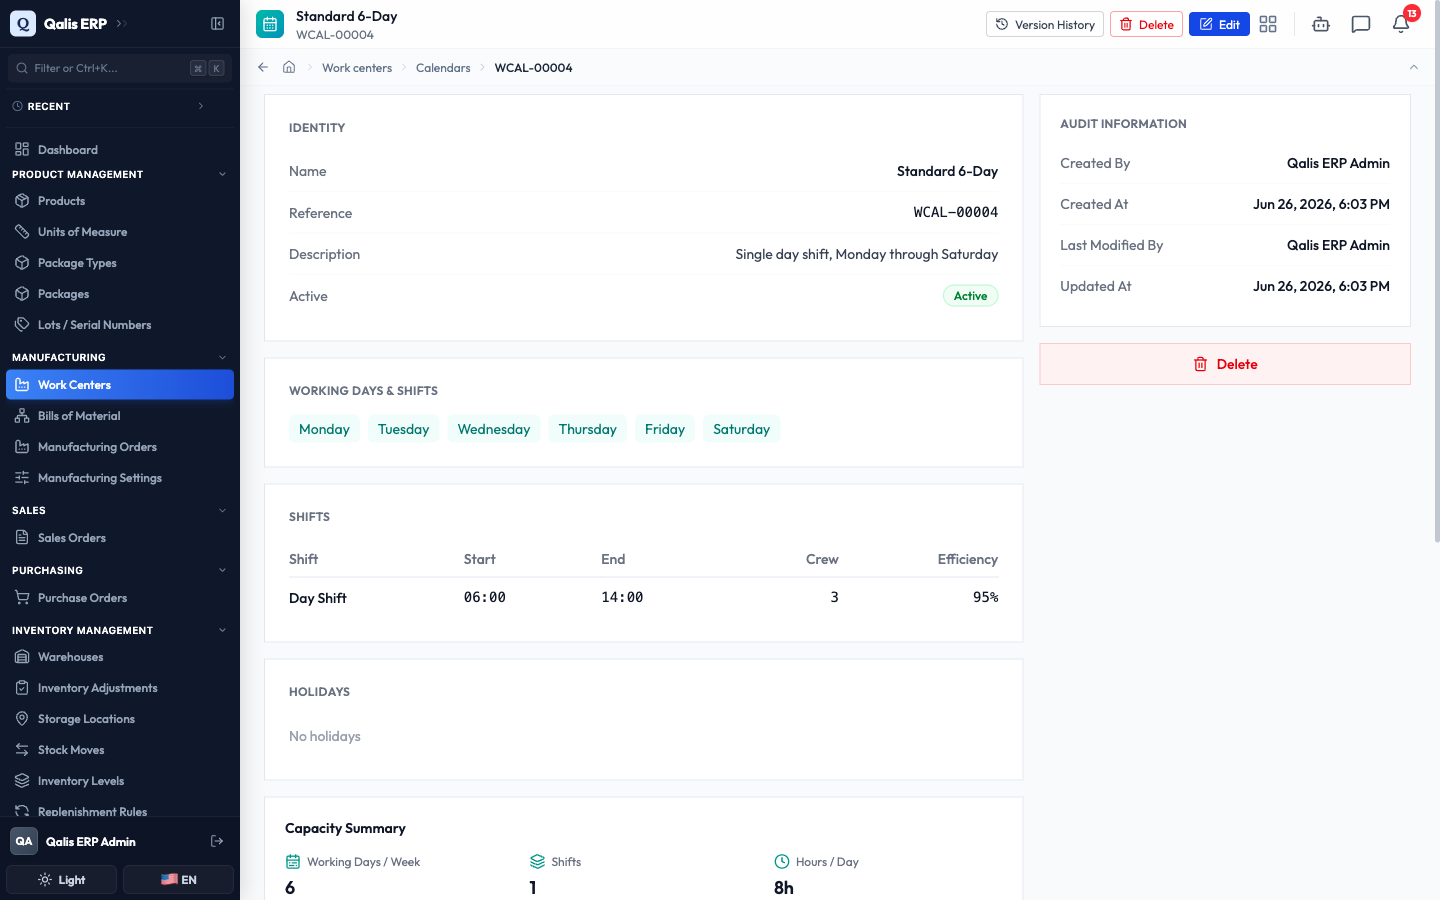
To use a calendar, choose it in a work center's Work Calendar field (on the Identity tab) or in a machine's Calendar field. A machine can have its own calendar, and falls back to its work center's calendar when you leave it empty.
Add a machine to a work center
A machine sits inside a work center and captures machine-level details: how fast it runs and whether it is available. You open the machines list from its web address, by adding /machines to the work centers address.
- Go to the Machines list. It shows each machine with its Work Center, its Status (a colored badge: green for Available, amber for Maintenance, red for Down), and its Run Rate.
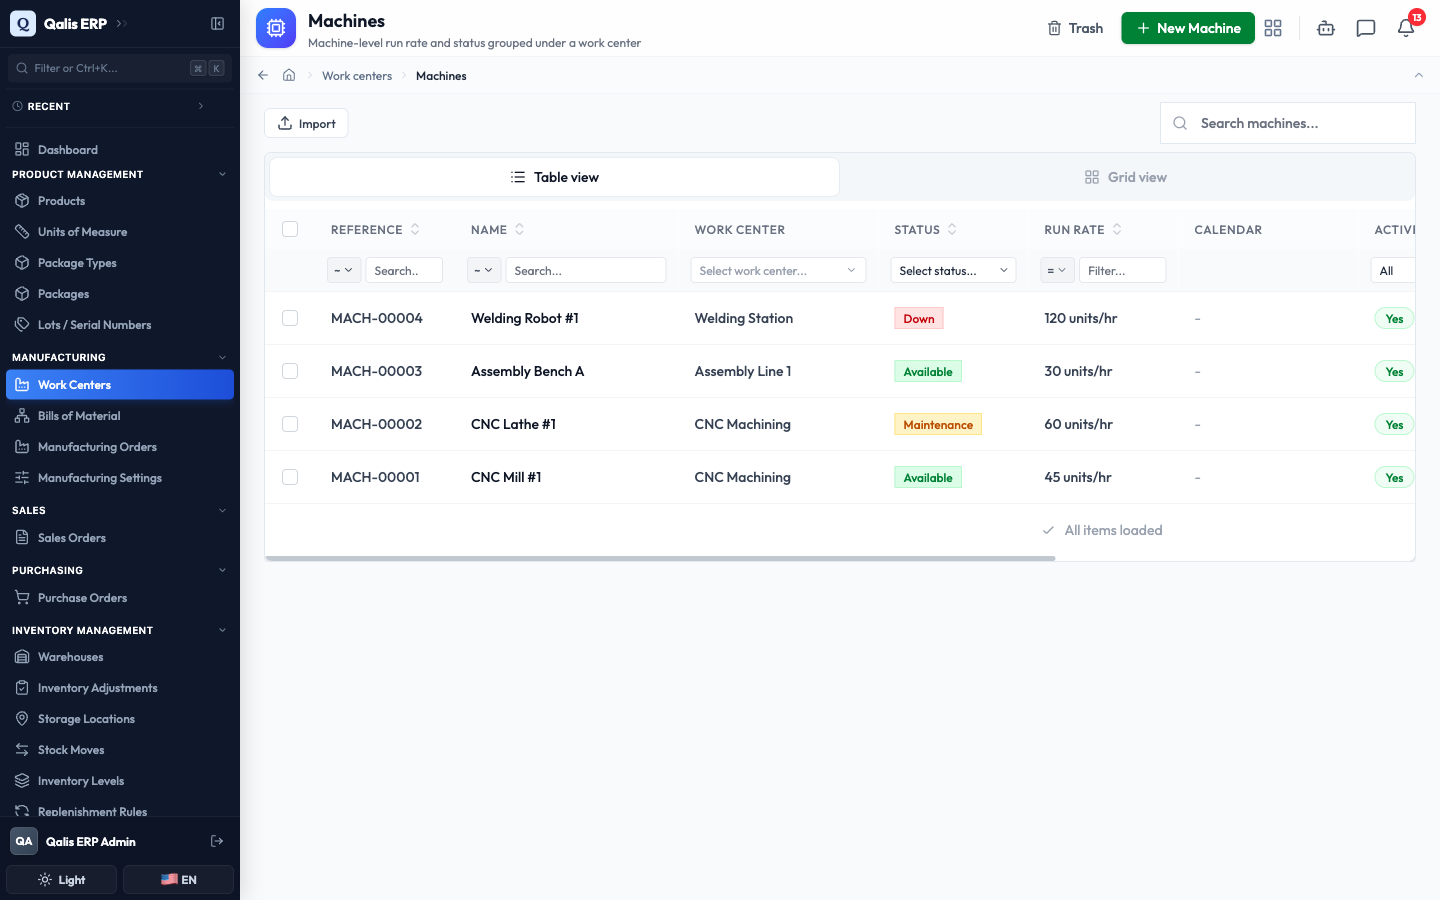
- Click New Machine. Type a Name, then choose the Work Center this machine belongs to. The work center is required, so pick the one it sits in (here, "Paint Booth 1").
- Choose a Status with the buttons (Available, Maintenance, or Down), and set the Run Rate in units produced per hour. You can leave the Calendar empty to use the work center's schedule.
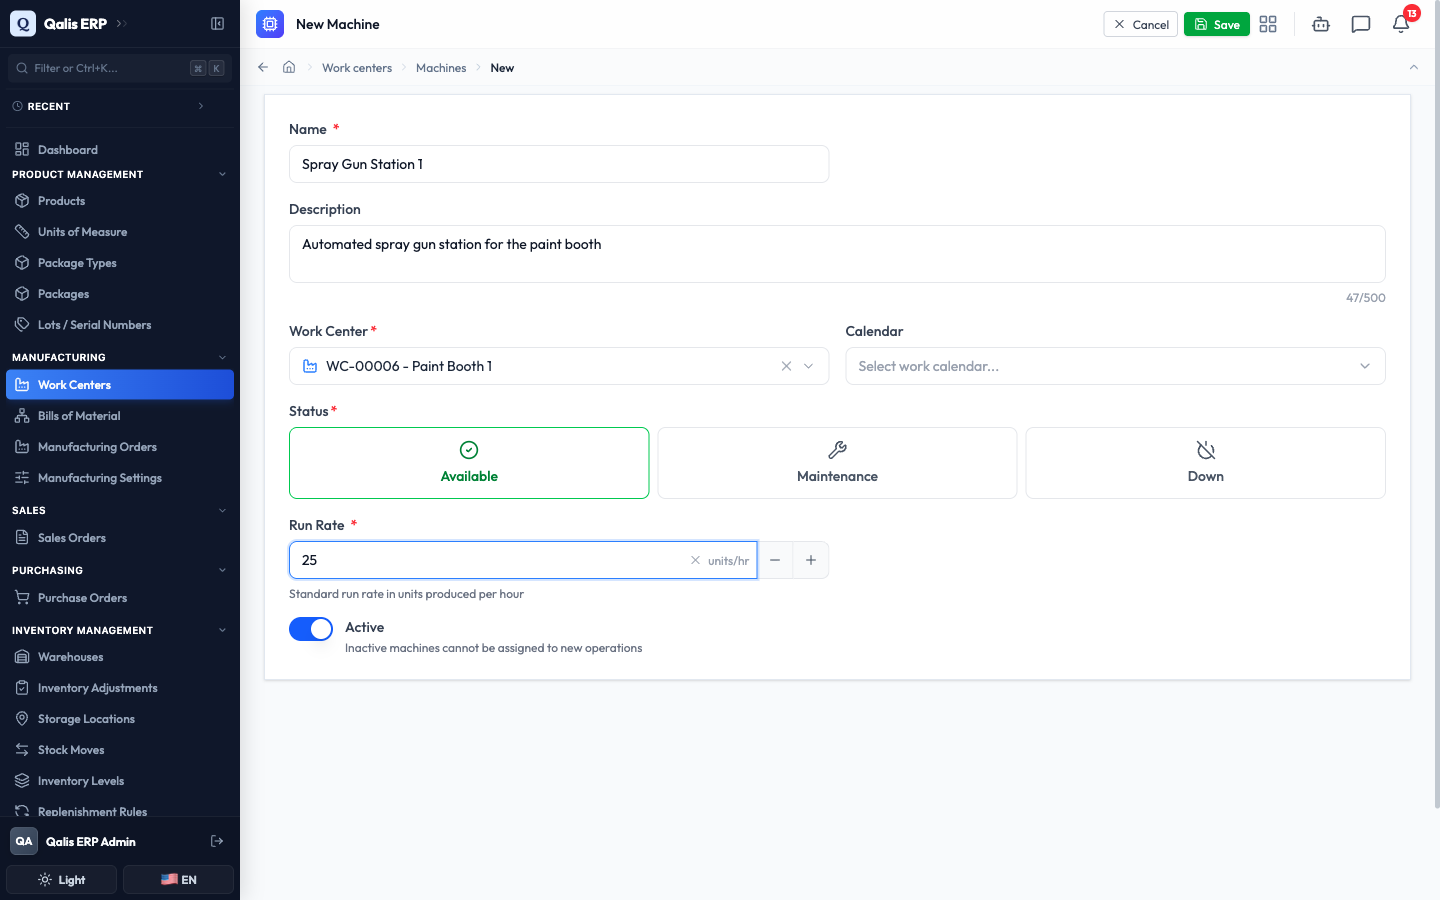
- Click Save.
Qualis saves the machine, gives it a reference (like MACH-00005), and shows its detail page. The Capacity & Machine Time section turns your run rate into the time per unit, which helps with planning.
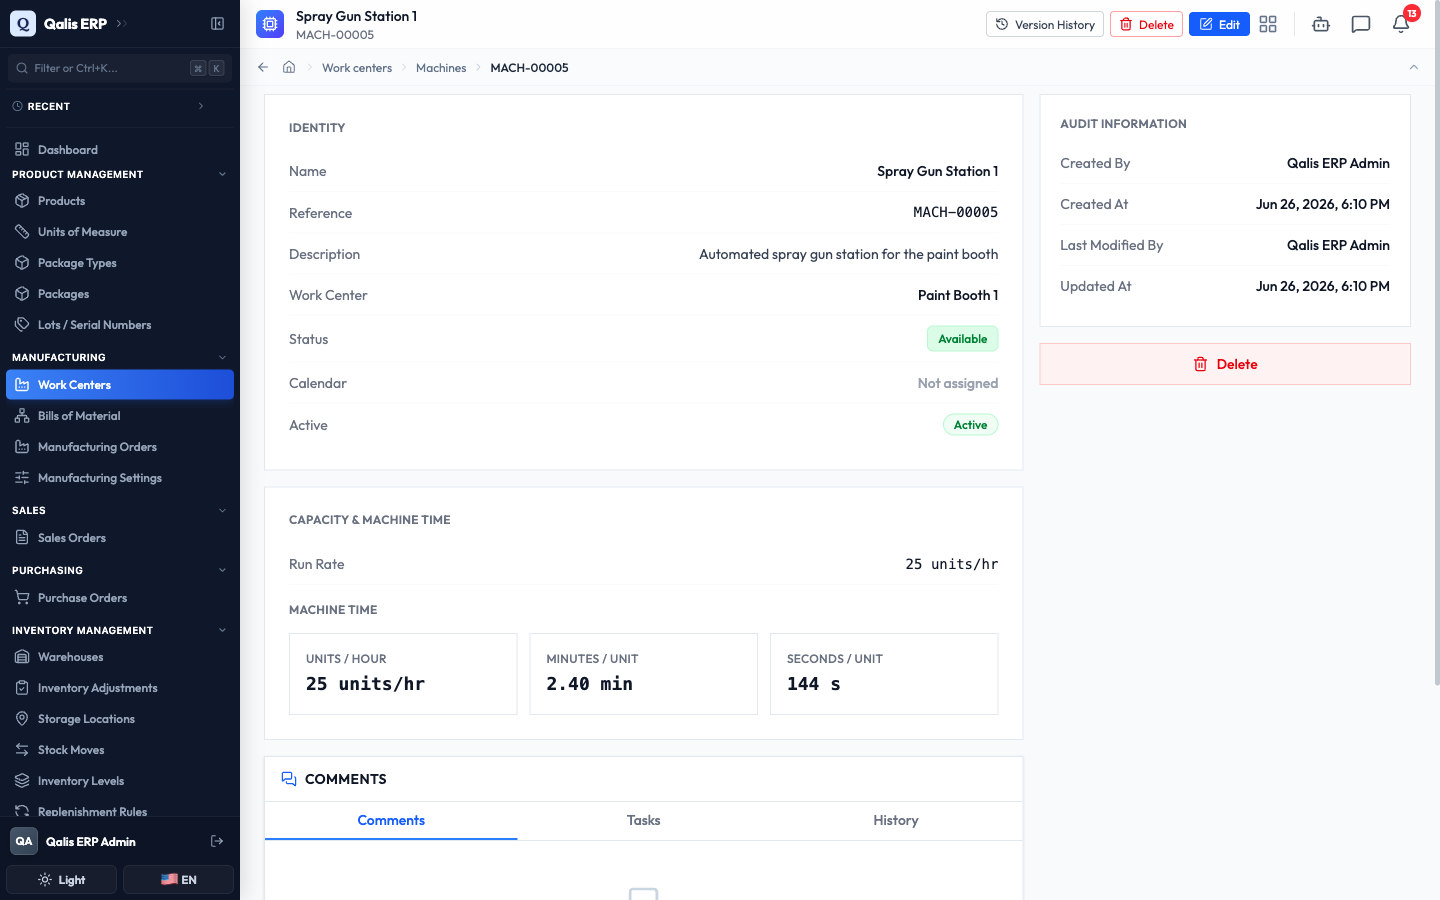
Good to know
A few terms show up across this area. Here is what each means in plain language:
- Capacity Basis: whether a work center's capacity and cost are driven by people's time (Labor) or by machine time (Machine).
- Labor / Setup / Machine Rate: the cost per hour for working, for setting up, and for machine time. They feed the cost of whatever is made at the work center.
- Fixed Overhead: a flat extra cost added per operation, no matter how long it takes. Variable Overhead is an extra cost that scales with a driver you choose, such as labor hours.
- Control Point: a work center marked as a reporting checkpoint, where labor and materials can be recorded automatically. Backflush means that automatic recording: backflush labor reports standard labor when a step finishes, and backflush materials consumes the materials at the checkpoint.
- Outside Process: work that is sent to an outside supplier rather than done in-house (also called subcontracting).
- Substitute Work Centers: other work centers that can run the same work, so production can switch to them when needed.
- Scrap Routing: what happens to quantity reported as scrap. It can be written off, or moved to a scrap location.
- Work Calendar: the schedule (working days, shifts, holidays) a work center or machine follows.
- Machine: a single piece of equipment inside a work center, with its own run rate and availability.
- Tooling: the jigs, molds, dies, and fixtures used in production. The Work Centers area keeps a list of these too, reached by adding
/toolingto the work centers address.