Organization Settings
Make the app your own: set a white-label name and logo, your brand colors, fonts and corner styles, and your base currency, all from one page with a live preview.
Last updated on June 29, 2026
Organization Settings is where you make Qualis look and feel like your own company. From this one page you choose the name and logo shown across the app, your brand colors, the font and text sizes, how rounded things look, and the currency every amount is reported in. A live preview on the right shows your changes as you make them, and nothing takes effect until you click save. You will usually visit this page once when you set up your organization, then only now and then to fine tune the look.
Before you start
A couple of things are worth knowing:
- Editing these settings is reserved for platform staff and administrators of your organization. Anyone with access can open the page and read it, but if you are not an administrator the Save settings button stays greyed out, with a tooltip explaining why.
- Your base currency is a one time choice. You can set it freely now, but once your organization has its first purchase order, sales order, NRC or scrap order, it can no longer be changed.
You reach the page from the left sidebar under Administration, then Organization Settings.
Open your organization settings
Start here to see everything in one view.
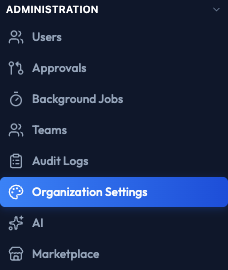
- In the left sidebar, open the Administration group.
- Click Organization Settings.
The page opens with your settings on the left, grouped into Branding, Currency & exchange rates, Colors, Typography and Corners, and a Live preview panel on the right.
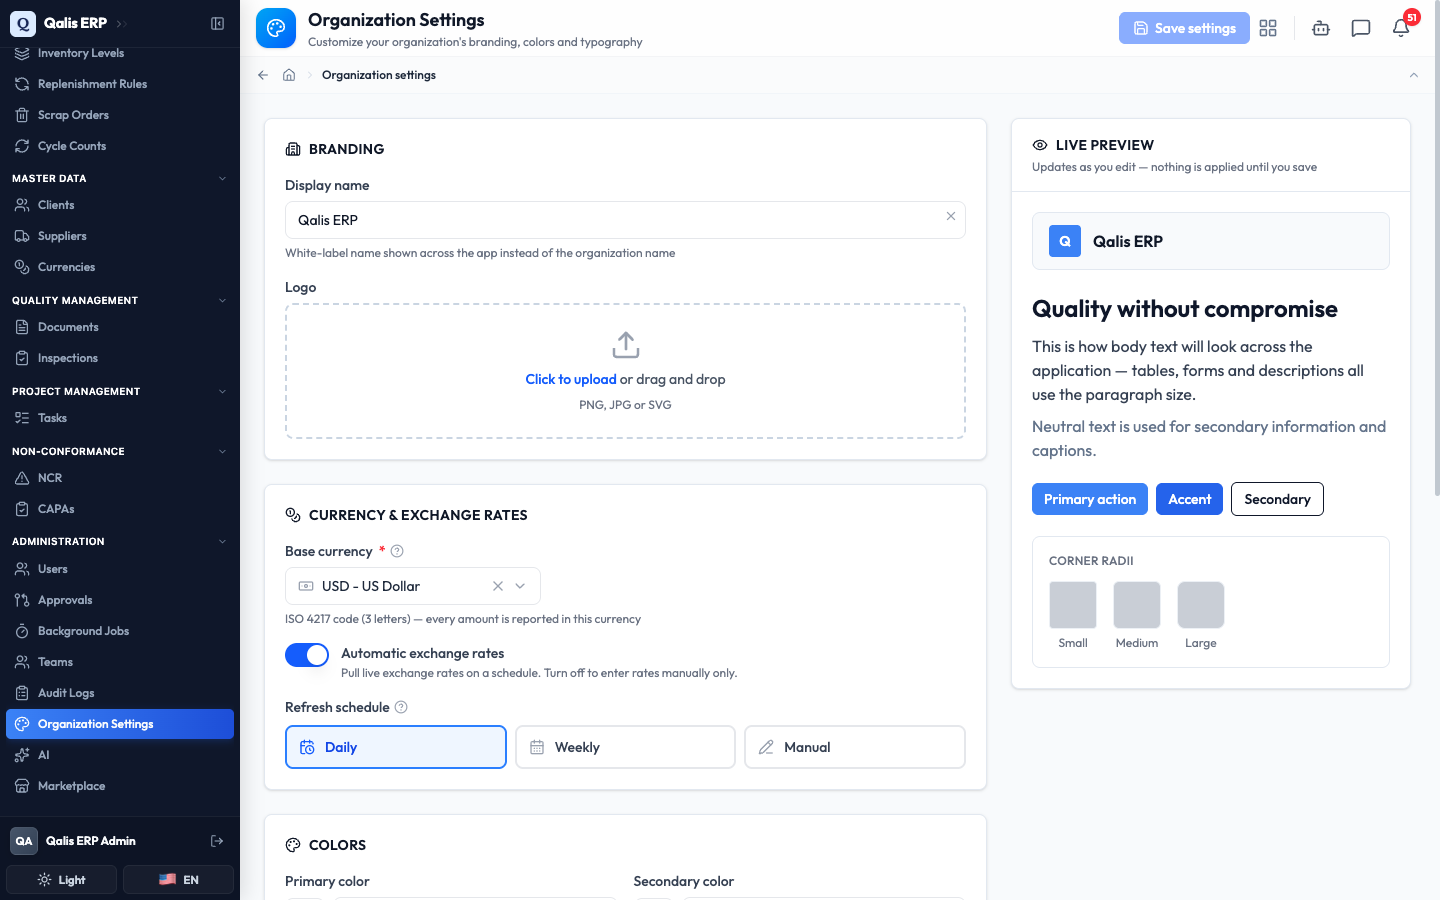
There is a single Save settings button at the top right. It stays disabled until you change something, so you can look around freely without saving anything by accident.
Set your white-label name and logo
This decides the name and logo people see across the whole app.
- In the Branding area, type your company name in the Display name field. This name is shown everywhere in place of your organization's registered name. Use the small x at the end of the field to clear it if you want to go back to the registered name.
- To add a logo, click the Logo box (or drag an image onto it) and choose a PNG, JPG or SVG file. You will see a preview of it before you save.
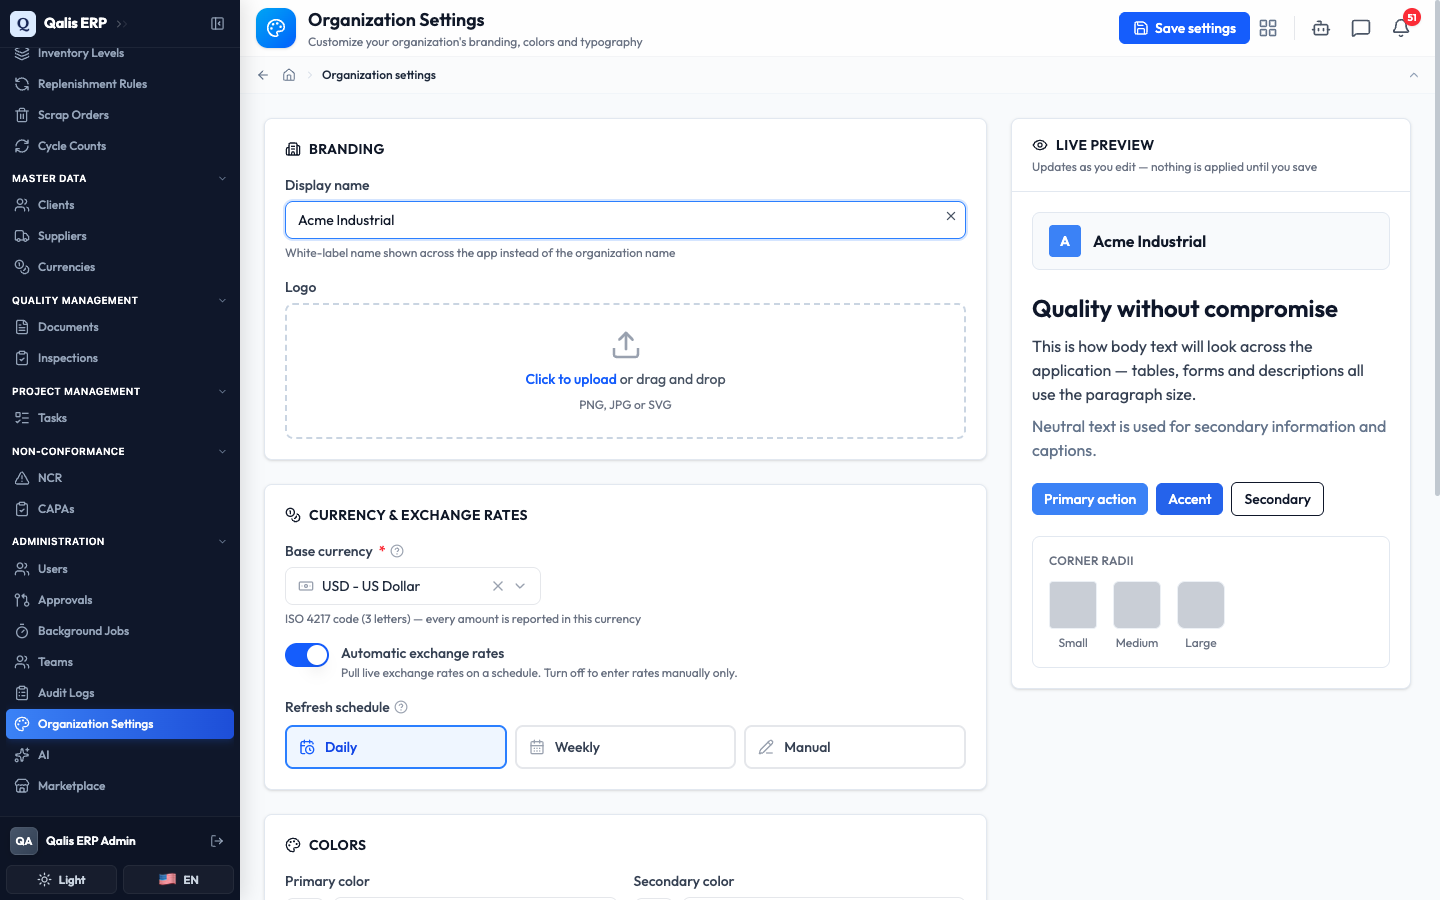
Notice the Live preview on the right already shows your new name, but the app's own header still shows the old one. That is normal: your changes only go live after you save.
Set your base currency and exchange rates
This is the currency every amount in the system is reported in, plus how exchange rates are kept up to date.
- In the Currency & exchange rates area, click the Base currency box and pick your currency from the searchable list. Start typing a name or three letter code (such as
USD) to narrow it down. - Turn Automatic exchange rates on to have Qualis pull live rates on a schedule, or off to enter rates by hand.
- If automatic rates are on, choose how often they refresh: Daily, Weekly or Manual.
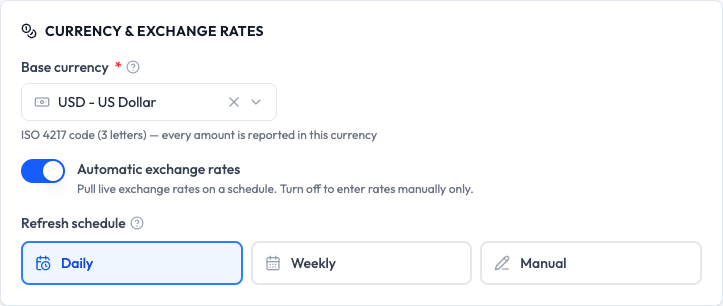
The base currency is special: it can be set only once. Hover the small question mark next to Base currency to see the reminder.
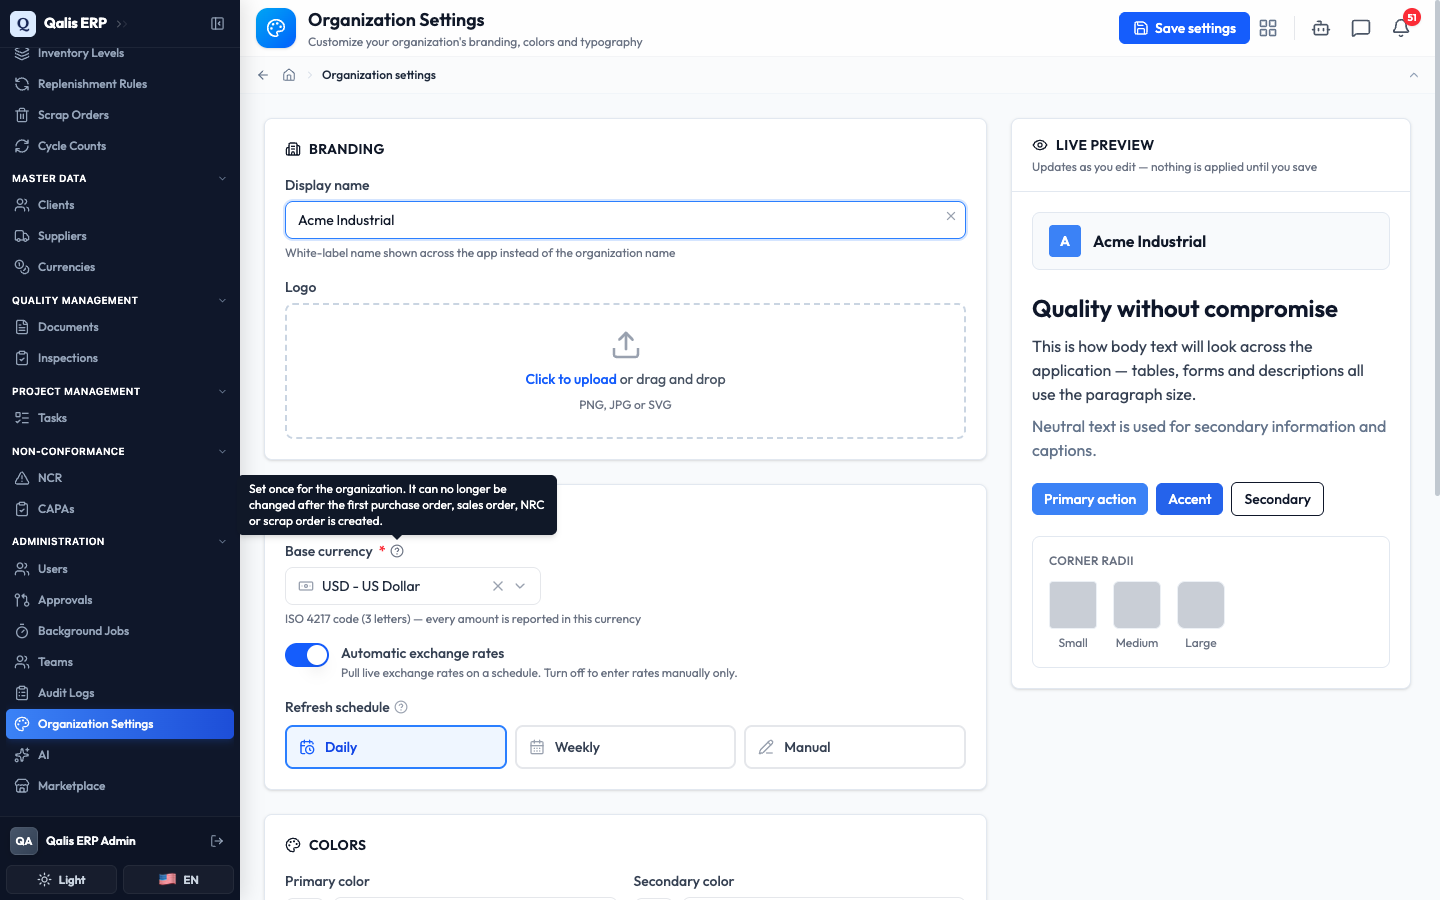
Choose your base currency carefully. After your organization creates its first purchase order, sales order, NRC or scrap order, every stored amount is tied to it and the field locks.
Choose your brand colors
Four colors drive the look of the whole app.
- In the Colors area, set each color in one of two ways: click the small swatch on the left to open a color picker, or type a 6 digit hex code (like
#0D9488) into the box next to it. - Set the four colors to suit your brand:
- Primary color is used for buttons, links and the active item in the menu.
- Secondary color is used for headings and prominent text.
- Accent color is used for highlights and secondary emphasis.
- Neutral color is used for secondary text and captions.
- If you change a color and want the original back, click the small reset icon that appears in the box to return it to its default.
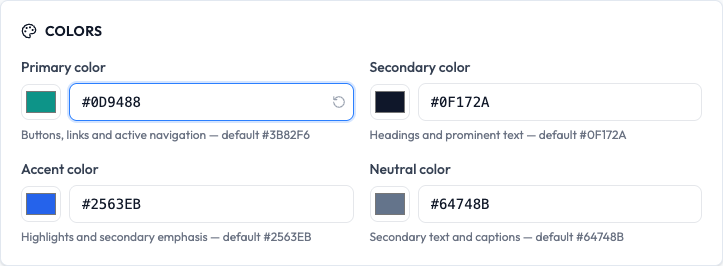
Each color shows its default value in the hint beneath it, so you always know what the standard looks like before you change it.
Pick your fonts and text sizes
Choose the typeface and how big text appears.
- In the Typography area, click the Font family box and pick a font. The choices are Outfit, Inter, Roboto, Open Sans and Montserrat.
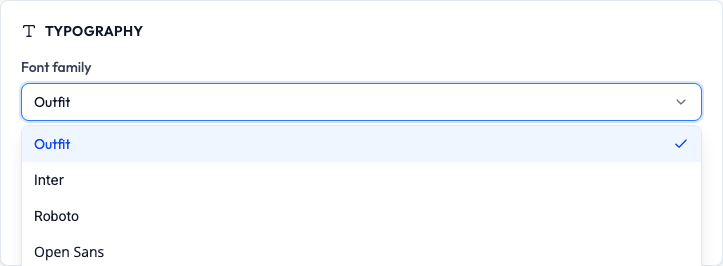
- Set the Paragraph size for body text (the default is 16 pixels) and the Heading size for titles (the default is 24 pixels). Type a number, or use the small minus and plus buttons to step it up or down. Both values are shown in pixels.
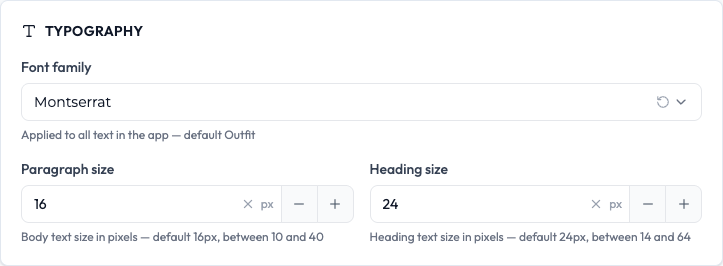
Each size has a sensible range. If you enter a number outside it, the field turns red and tells you the lowest and highest values allowed.
Round the corners
This controls how rounded edges look across the app.
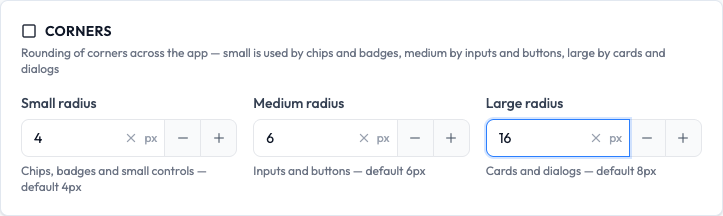
- In the Corners area, set three values, each in pixels:
- Small radius is used by chips, badges and small controls.
- Medium radius is used by inputs and buttons.
- Large radius is used by cards and dialogs.
- Type a number or use the minus and plus buttons. A larger number means more rounded, a smaller number means sharper.
Preview and save your changes
The live preview lets you check your work before anything goes live.
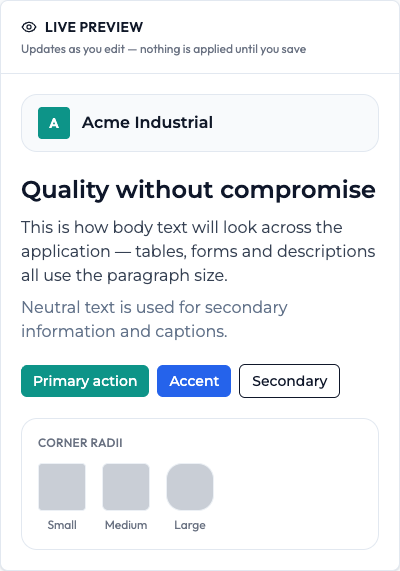
- As you edit, watch the Live preview panel on the right. It shows a sample header, headings, body text, buttons and corner styles using your current choices. Nothing here is applied to the real app until you save.
- When you are happy, click Save settings at the top right. A green message confirms your settings were saved and the theme was applied.
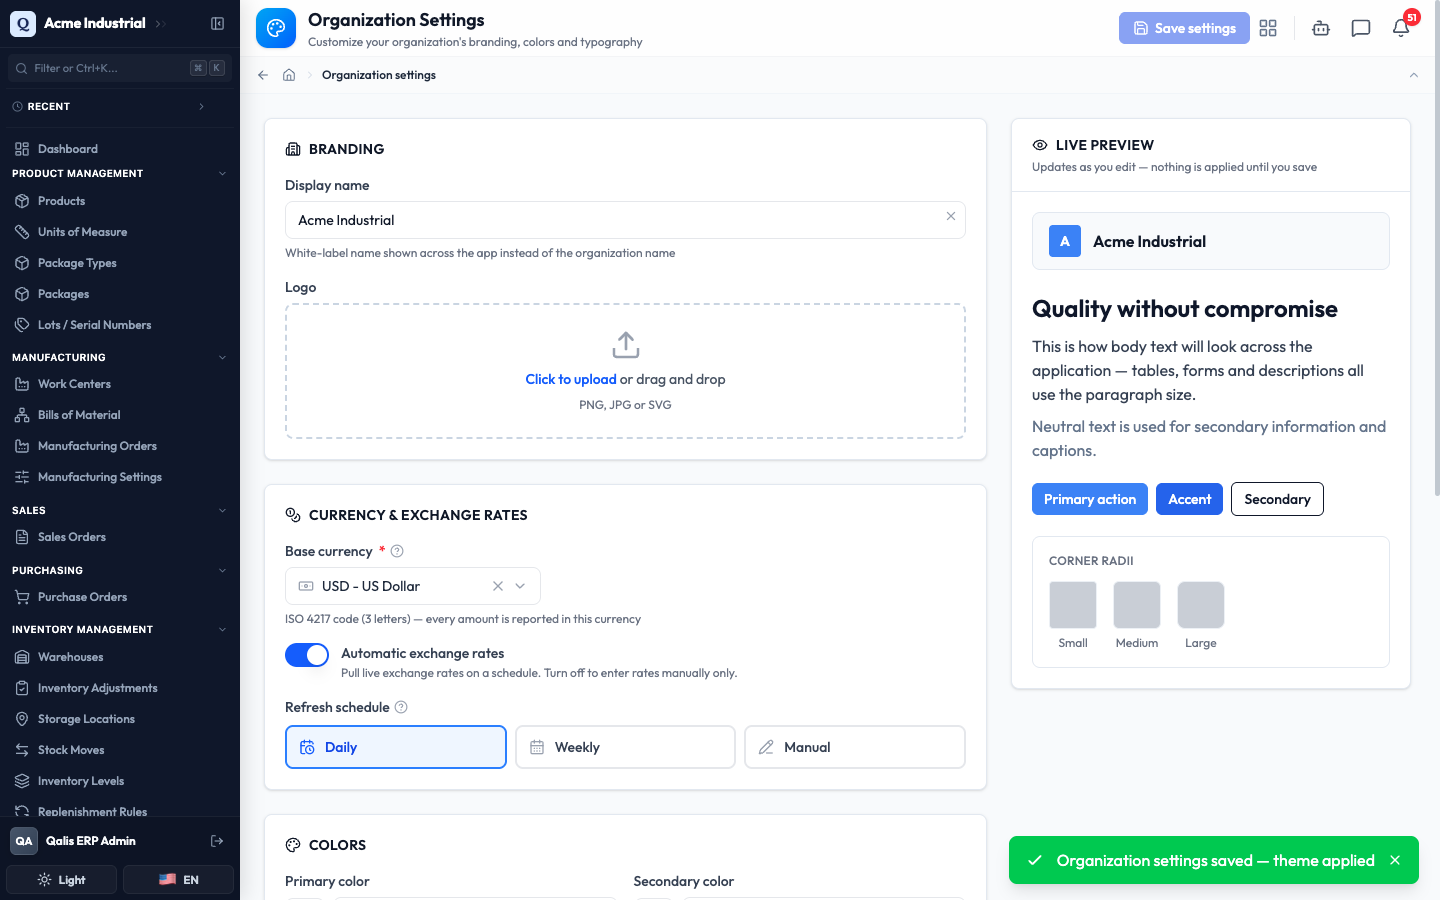
- Your colors, fonts and corners update across the app straight away. Your white-label name and logo appear the next time a page loads, so you will see them in the app's own header after a refresh.

If a value is not valid (for example a color that is not a proper hex code, or a size outside its range), the field turns red and saving is blocked until you fix it. Your other changes are kept, so you do not lose your work.
Good to know
A few terms you will meet on this page:
- White-label name: the company name shown across the app in place of your organization's registered name. Handy if you trade under a brand that is different from your legal name.
- Base currency: the single currency every amount in the system is reported in. It can be set only once, before any orders exist.
- Hex color: a 6 digit code that names an exact color, written with a
#in front (for example#3B82F6). You can also use the color picker instead of typing one. - Exchange rate refresh: how often Qualis pulls fresh currency rates. Daily and Weekly are automatic, Manual means you enter rates yourself.