CAPA (Corrective & Preventive Actions)
Track a quality problem from the moment it is found, through investigation and fixes, to a final check that the fixes actually worked.
Last updated on June 28, 2026
CAPA stands for Corrective and Preventive Action. A CAPA is the record you open when something goes wrong with quality (or might go wrong) and you want to make sure it is fixed properly and does not come back. It holds the whole story in one place: what happened, why it happened (the root cause), what you are doing about it, and proof that the fix worked. Corrective actions deal with a problem that already happened. Preventive actions stop a problem before it starts. This guide walks you through the things you do most often: finding a CAPA, creating one, reading it, updating it, and exporting your list.
You reach the module from the left sidebar under Non-Conformance, then CAPAs.
Before you start
A CAPA can stand on its own, so there is nothing you must set up first. It can also link to records from other parts of Qualis, which is optional but useful:
- The NCR (Non-Conformance Report) that first raised the problem, if there is one.
- The products, suppliers, or clients the problem involves.
- The people who will own, investigate, verify, and approve the work.
Find and browse your CAPAs
Start here to see everything you have and zero in on the one you need.
- Open CAPAs from the sidebar. The page is titled Corrective & Preventive Actions. Across the top, five cards summarize your workload: Total CAPAs, Open, Overdue, Pending Verification, and your Effectiveness Rate (the share of closed CAPAs that were found effective).
- Below the cards, the table shows one row per CAPA, with its CAPA #, Title, Status, Priority, Type, Category, Source Type, Risk Level, RPN, Owner, and more. The top right has a New CAPA button and a Trash button for deleted records.
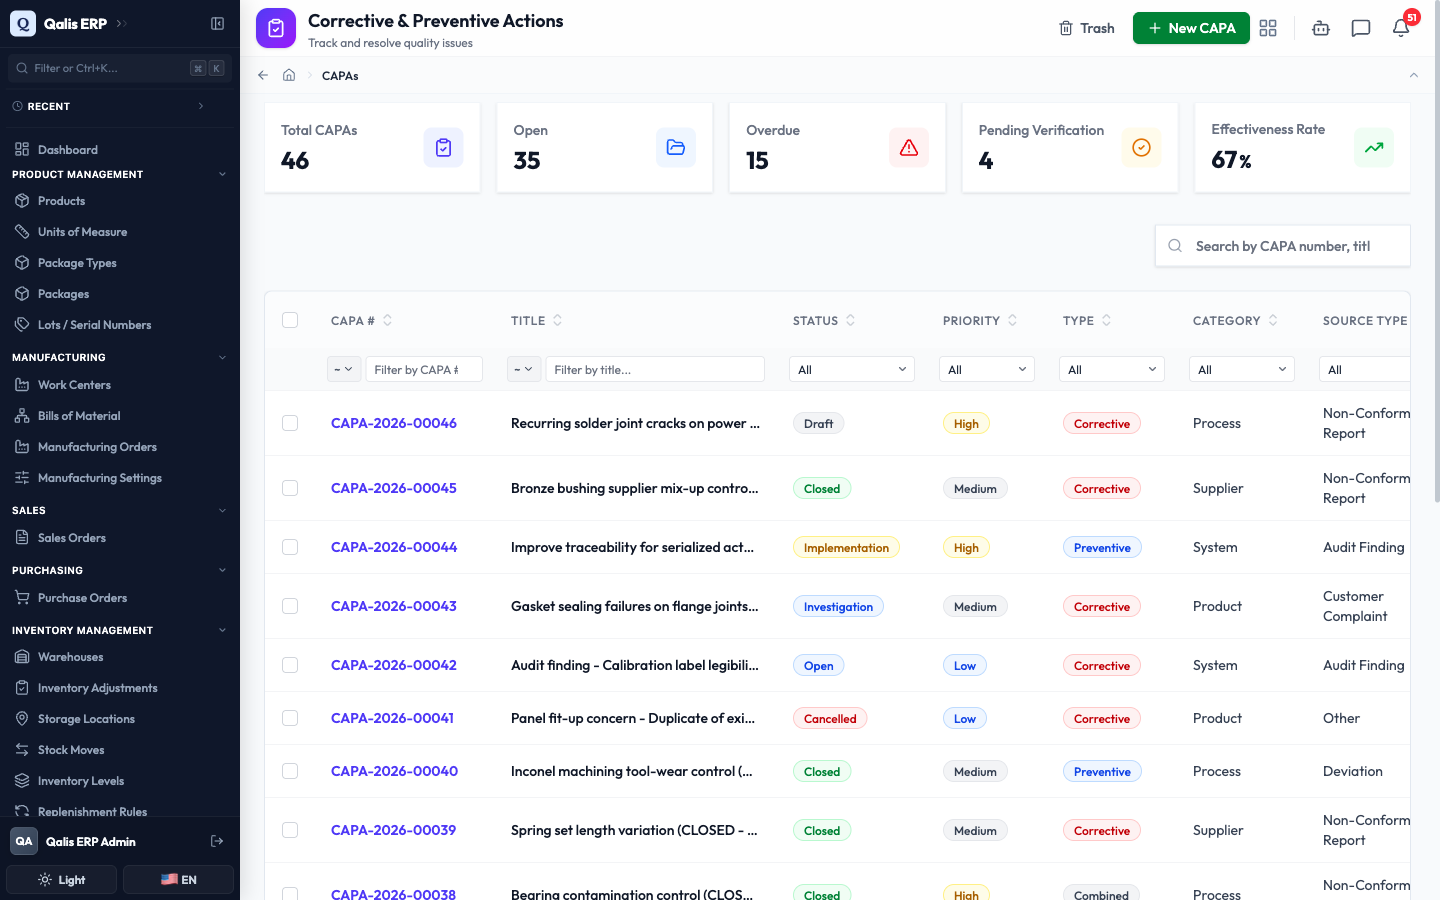
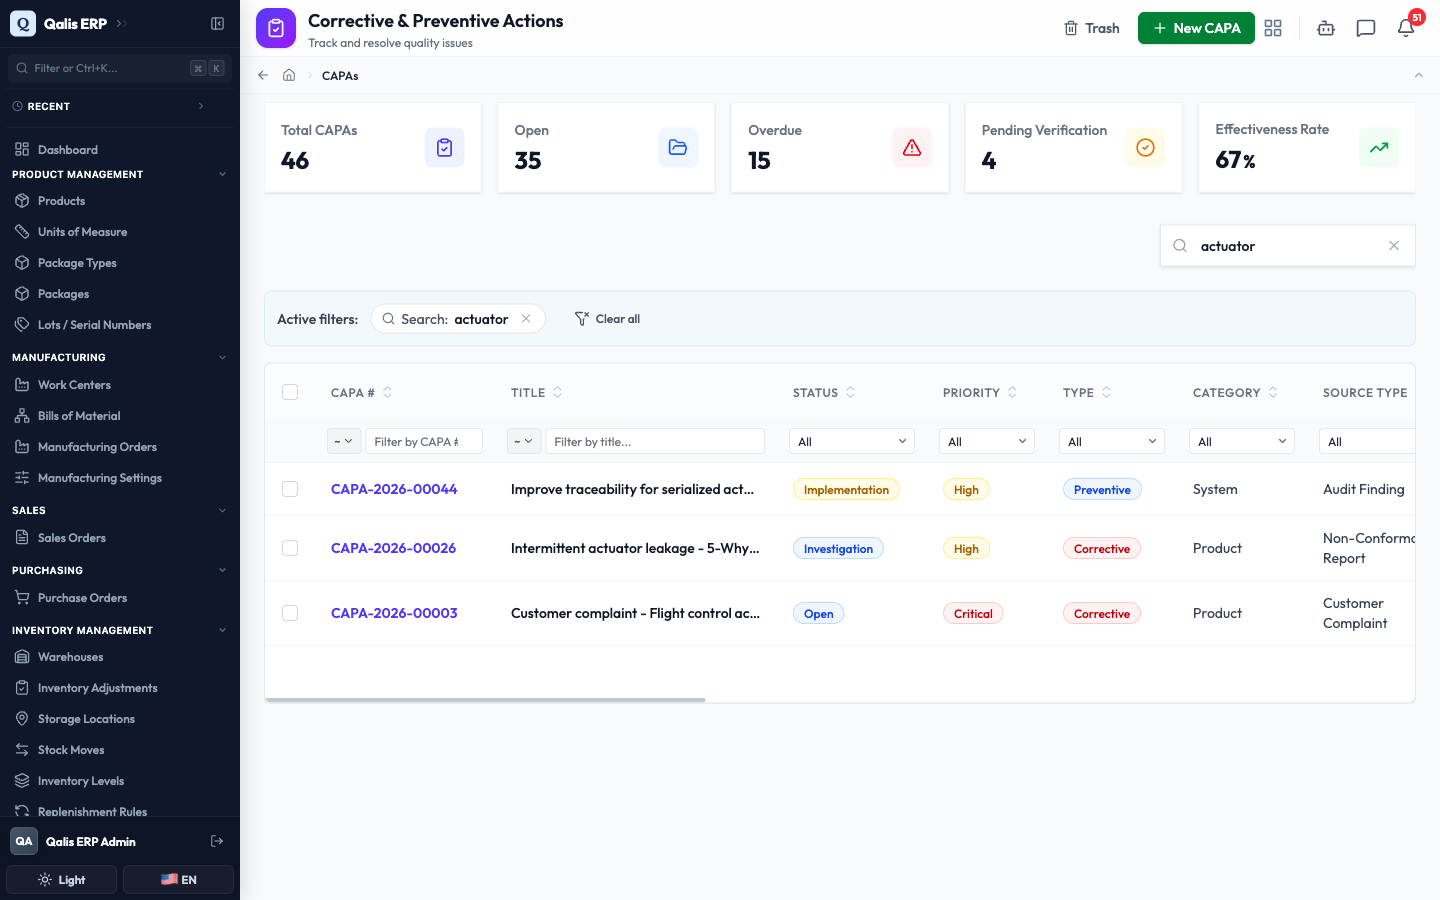
- To find one fast, type in the Search by CAPA number, title, description... box. The list filters as you type, so there is no need to press Enter.
- To see only CAPAs in a certain state, open the Status dropdown under the column heading and pick one, for example Investigation. You can filter the same way by Priority, Type, Category, Source Type, Risk Level, a person, or a date range.
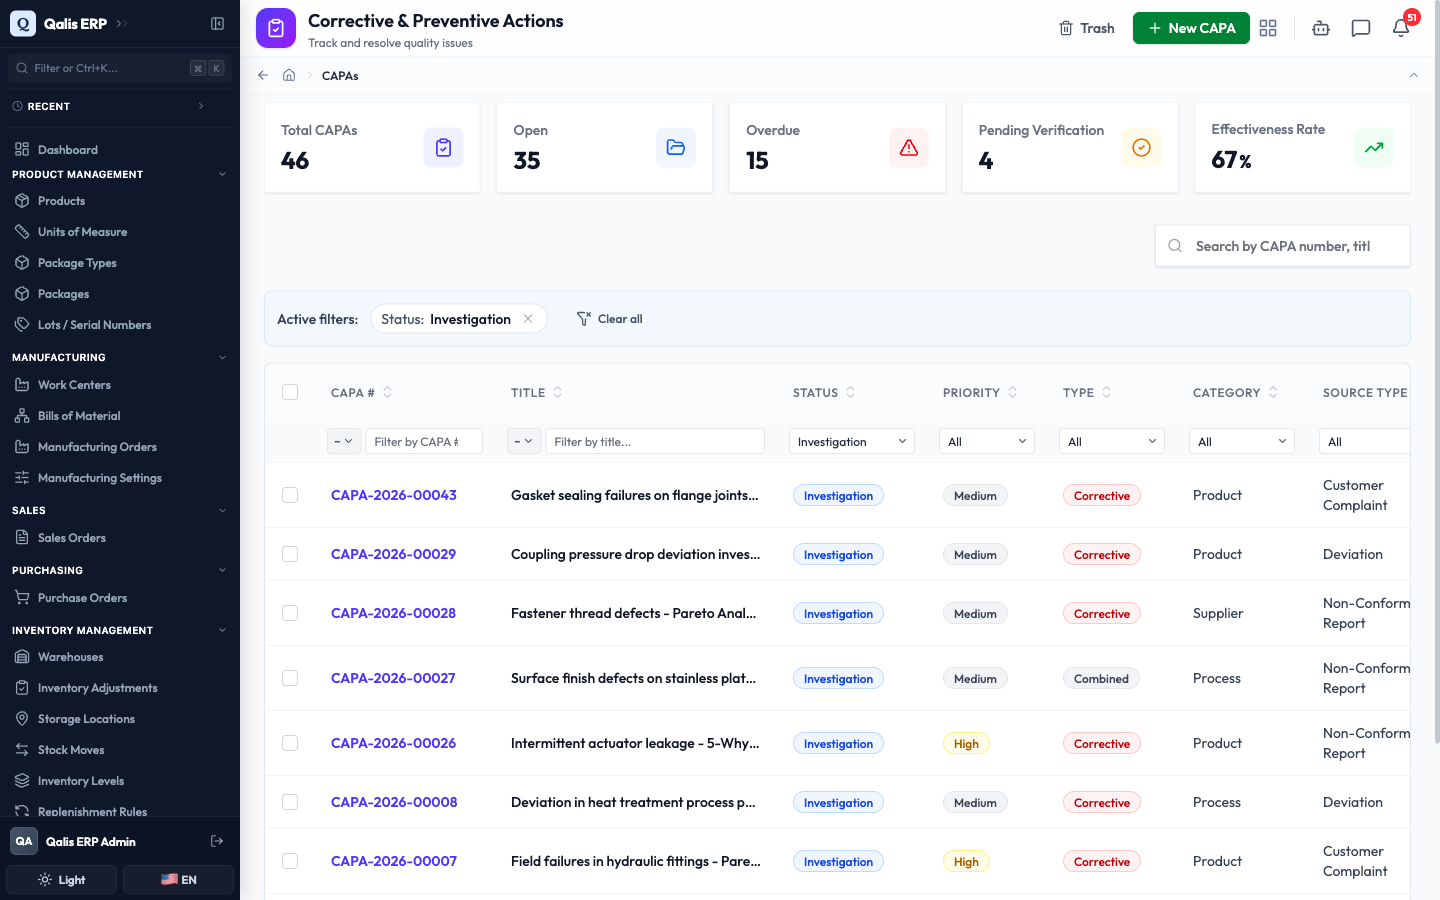
Whenever a filter is on, an Active filters banner appears showing what is applied. Click the small x on a filter to drop it, or Clear all to reset everything. The web address updates too, so you can bookmark or share a filtered view.
Create a CAPA
This is the main task: opening a new record for a problem you want to resolve. The form is split into six tabs so you can fill it in one section at a time. You can save once the required fields (marked with a red asterisk) are filled, even if you complete the later tabs another day.
Basic Information
- On the list, click New CAPA at the top right.
- On the Basic Info tab, type a clear Title that says what the problem is.
- Add a Description with the details (optional but recommended).
- Choose a Priority (Critical, High, Medium, or Low), a CAPA Type (Corrective, Preventive, or Combined), and a Category (Product, Process, System, or Supplier). These three are required.
- Leave Status on Draft for now. You move it forward as the work progresses.
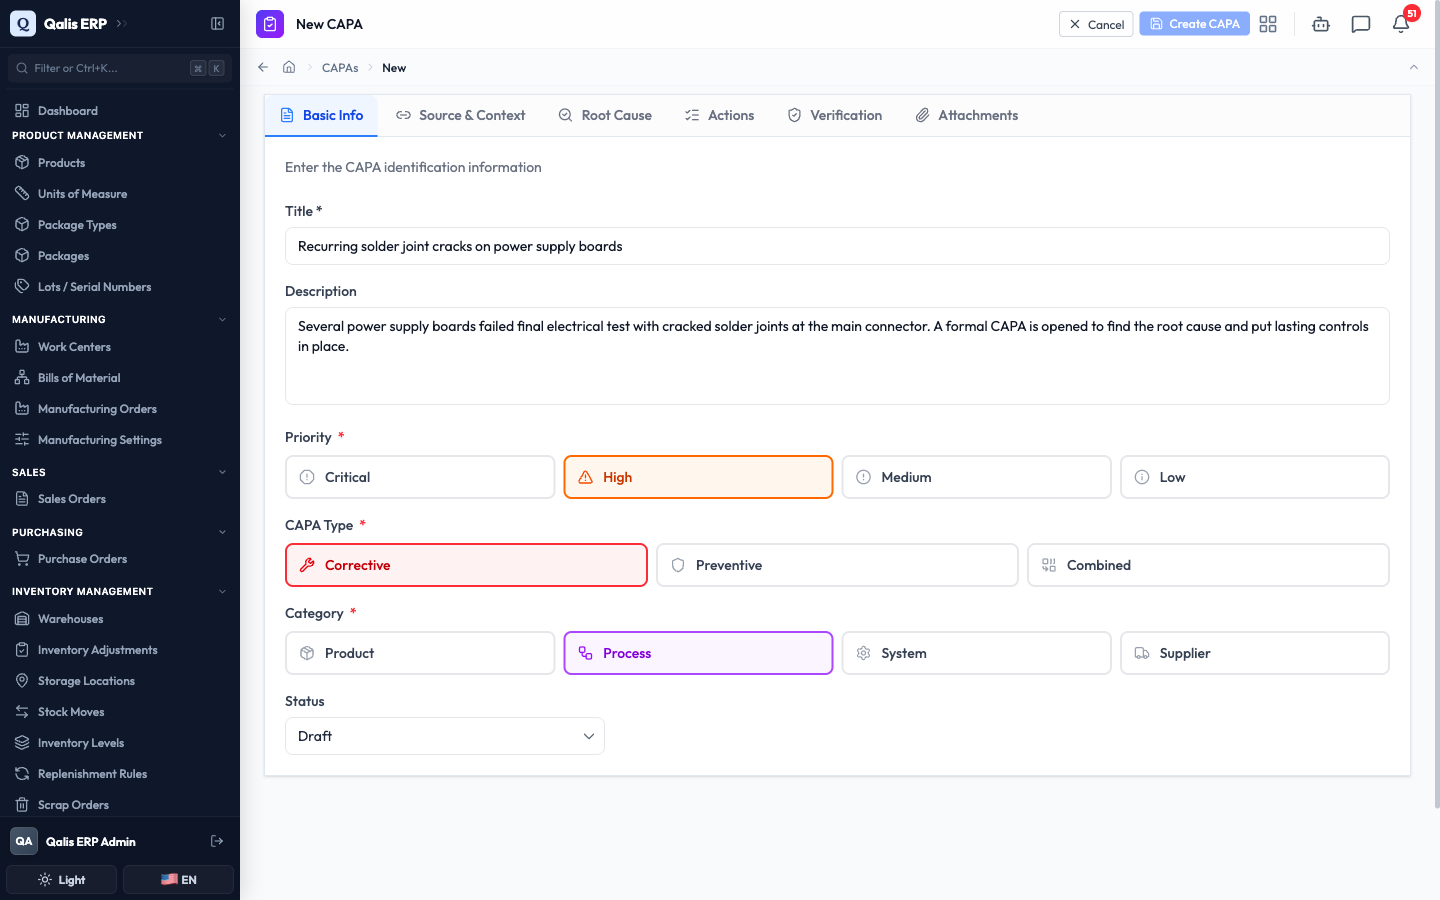
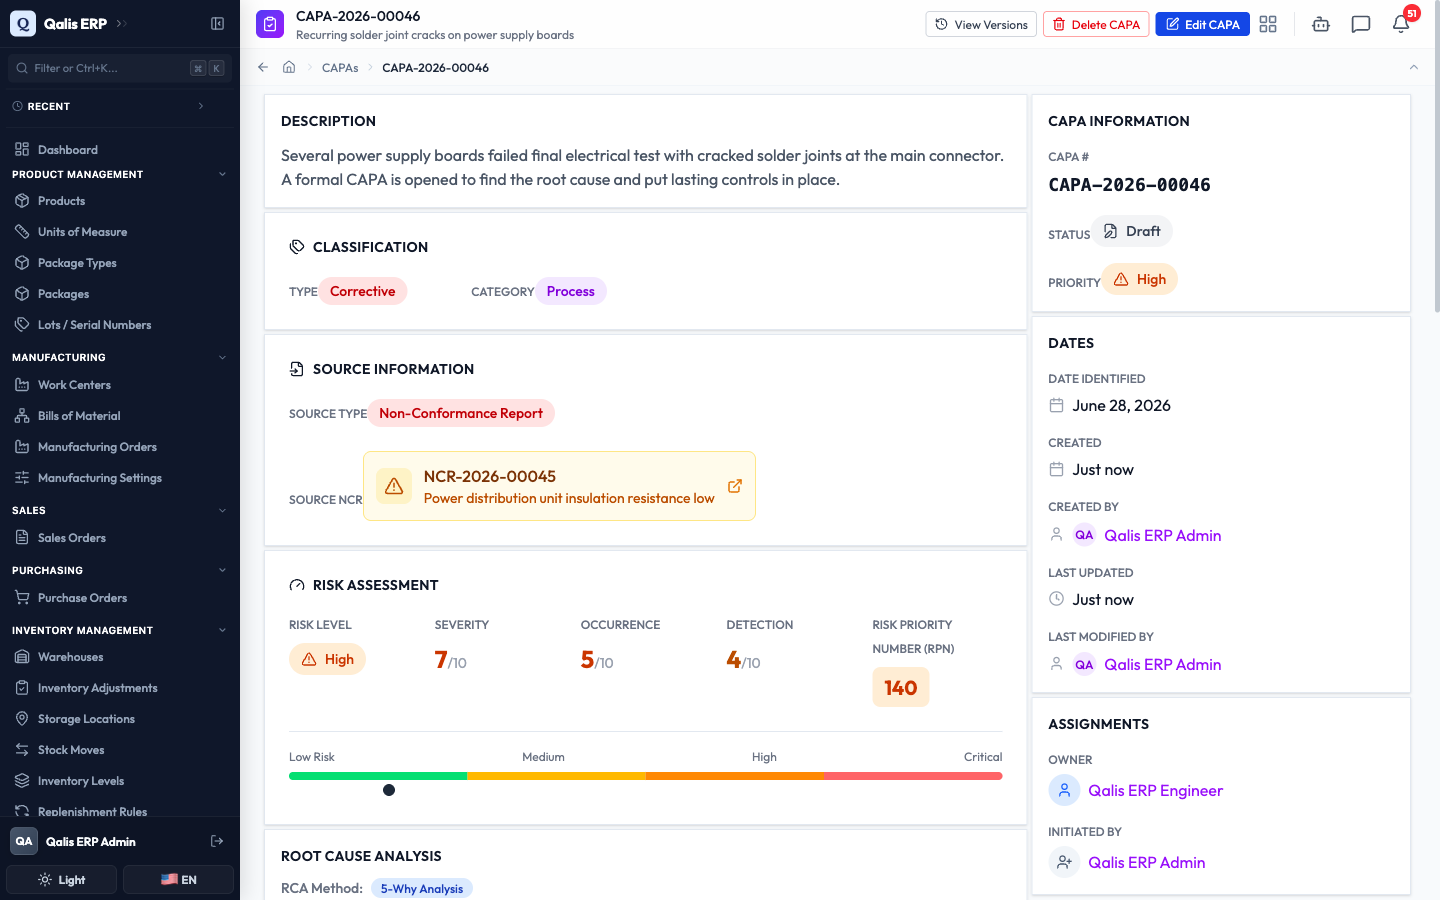
You do not type a CAPA number. Qualis assigns one automatically (like CAPA-2026-00046) when you save.
Source & Context
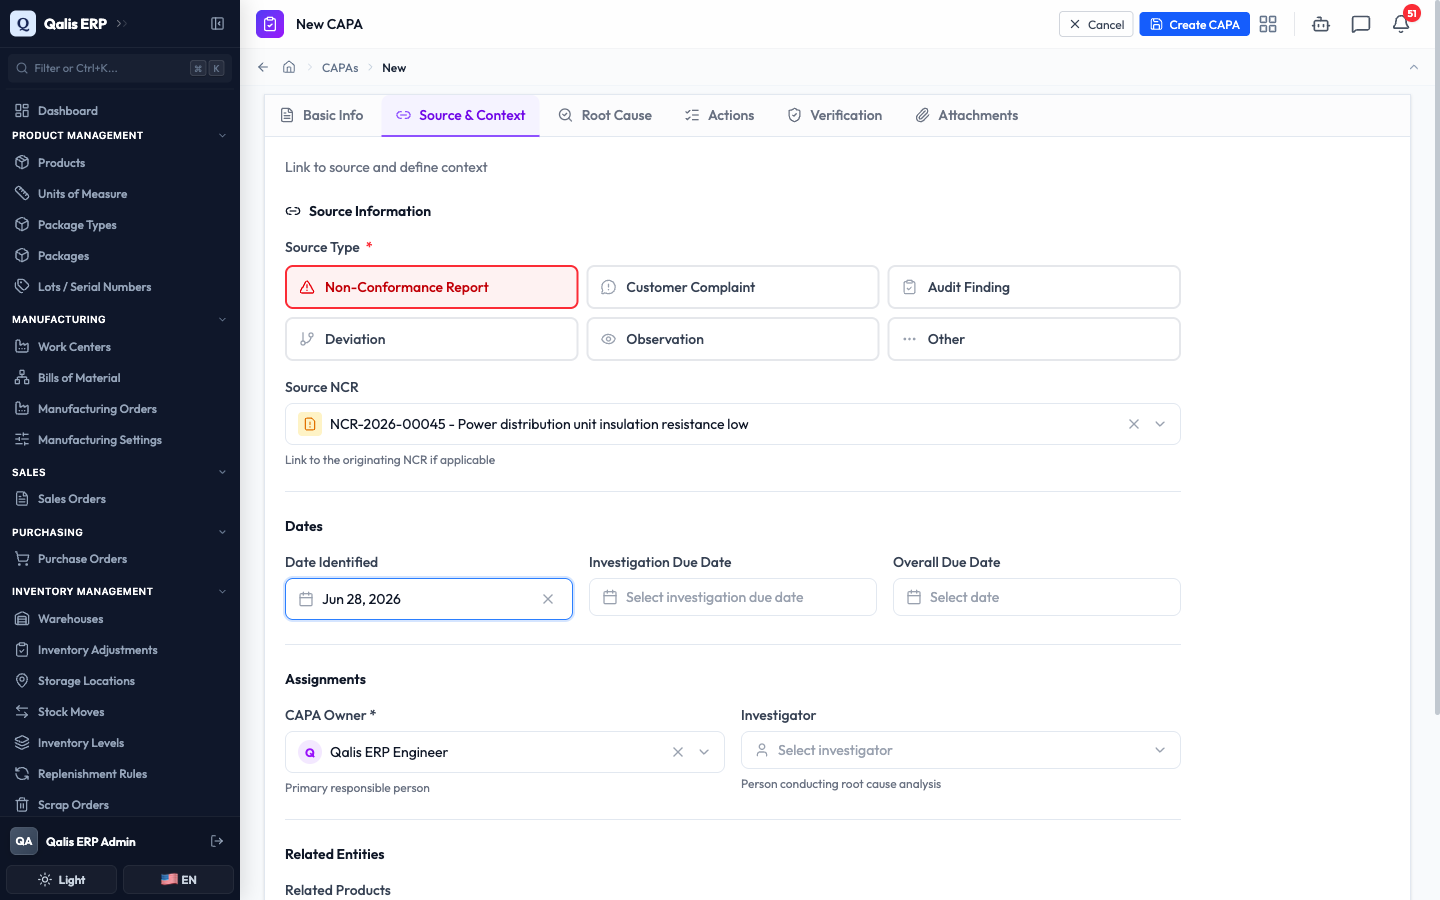
- Open the Source & Context tab. Pick a Source Type to say where the problem came from. If you choose Non-Conformance Report, a Source NCR picker appears so you can link the originating NCR. For any other source type, a Source Description box appears instead.
- Set the Date Identified and, if you have them, an Investigation Due Date and an Overall Due Date.
- Choose a CAPA Owner (required), the person responsible for the CAPA. You can also name an Investigator and link any related products, suppliers, or clients.
Root Cause
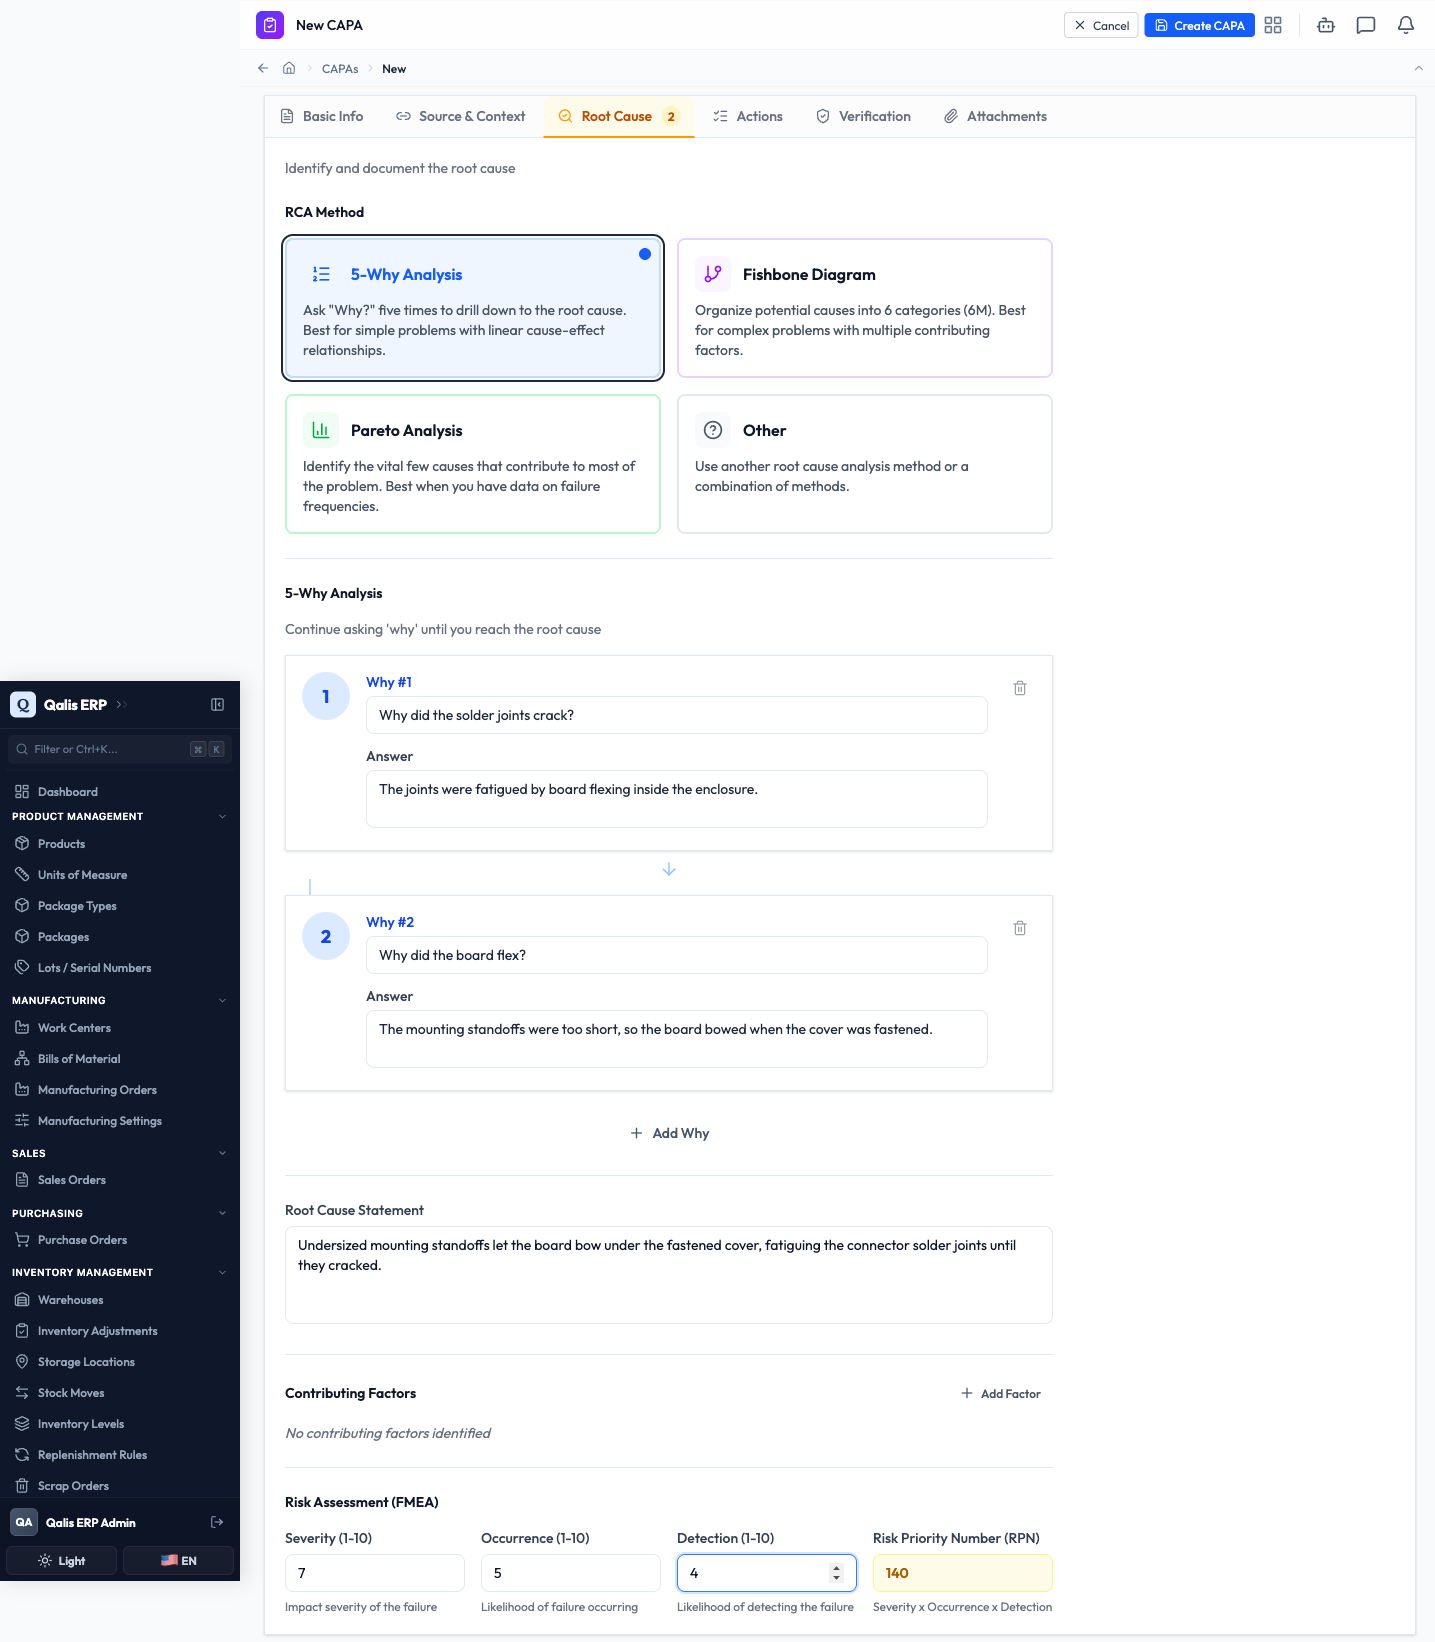
- Open the Root Cause tab and pick an RCA Method (root cause analysis method). 5-Why Analysis asks "why" until you reach the real cause, Fishbone Diagram groups possible causes into six categories, and Pareto Analysis ranks causes by how much they contribute.
- Work through your chosen method. For 5-Why, type each Why and its Answer, and click Add Why to go deeper. Then write your conclusion in the Root Cause Statement box.
- Fill in the Risk Assessment by scoring Severity, Occurrence, and Detection from 1 to 10. Qualis multiplies them into a Risk Priority Number (RPN), so a higher number means a riskier problem.
Actions
- Open the Actions tab and click Add Action. In the panel that opens, choose the Action Type (Corrective or Preventive), write a Description of what will be done, and optionally set an Action Owner and Due Date. Turn on Requires Verification if the action must be checked before the CAPA can close.
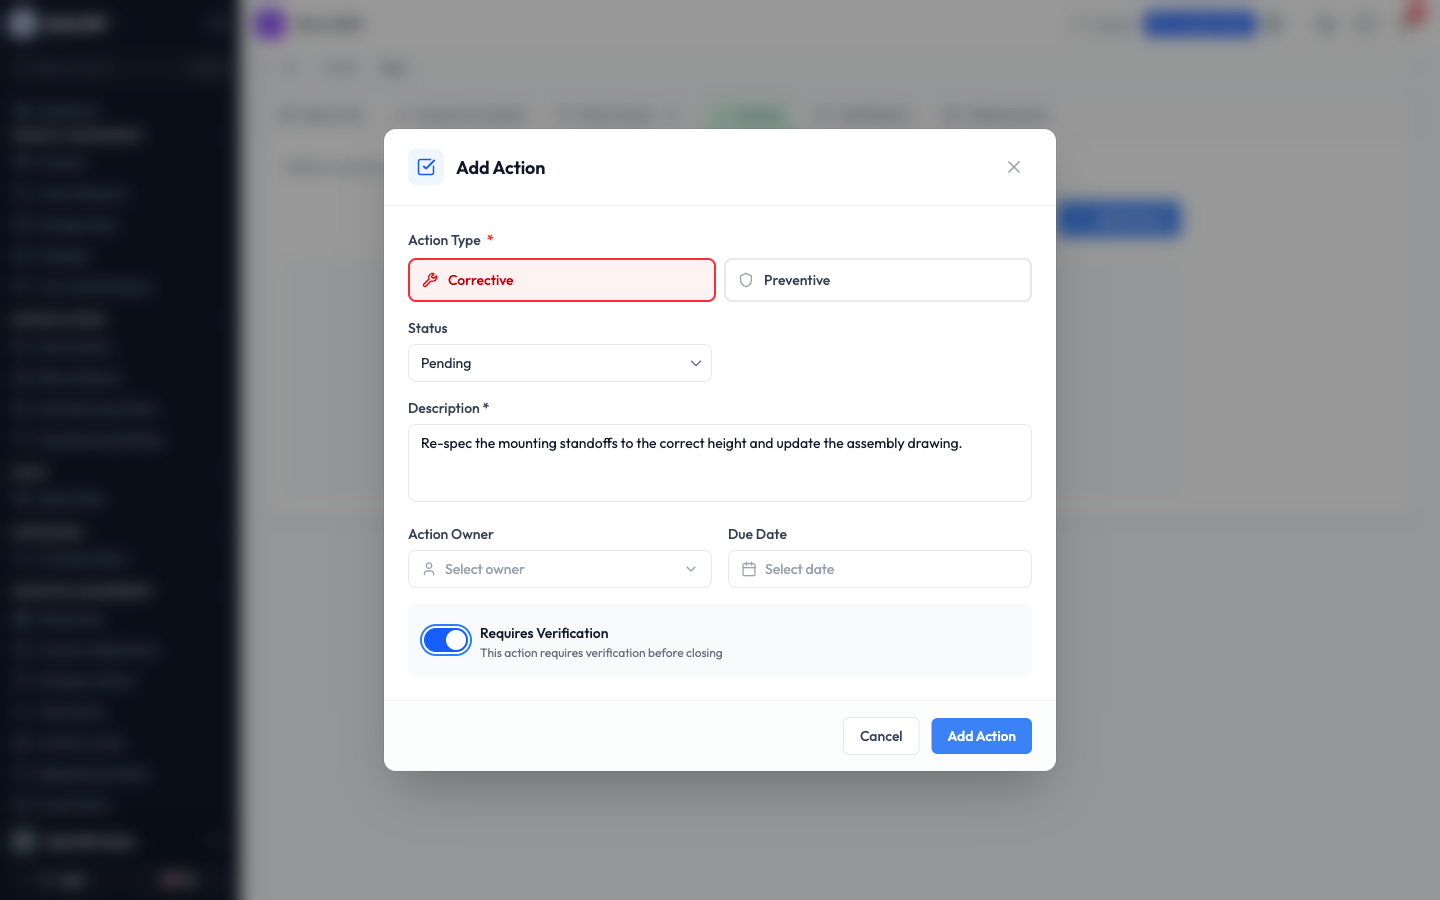
- Click Add Action in the panel to add it to the list. Repeat for as many corrective and preventive actions as you need.
Verification
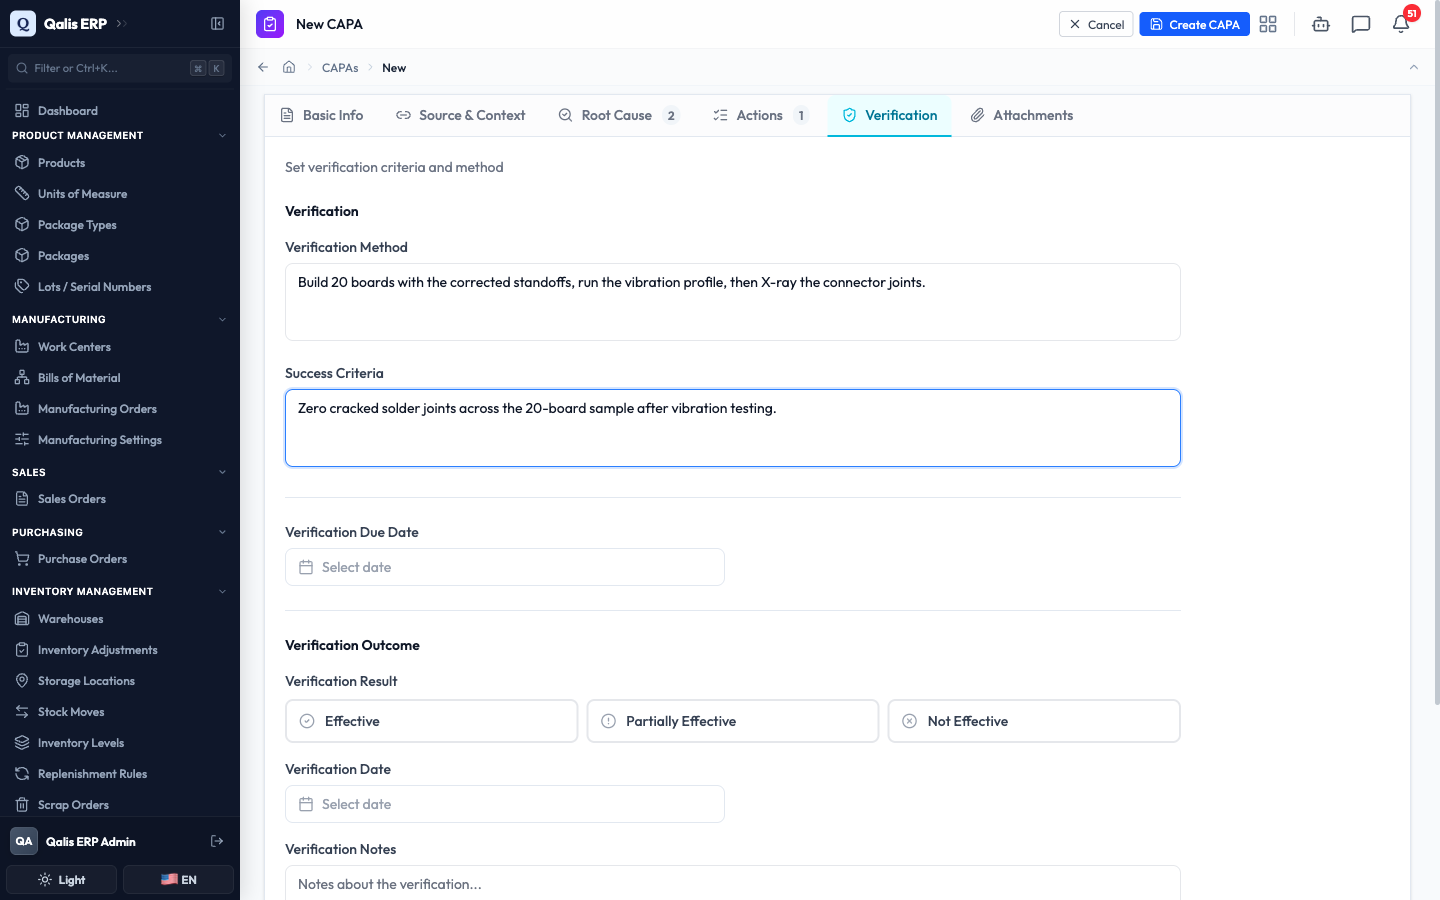
- Open the Verification tab. Here you plan how you will prove the fix worked. Write the Verification Method (how you will check) and the Success Criteria (what a good result looks like). You record the actual result later, once the actions are done.
- The Attachments tab lets you upload supporting documents and images, or link files that already live in your document library. When you are ready, click Create CAPA at the top right.
Qualis saves the CAPA, gives it a number, and takes you straight to its detail page. The new CAPA starts in Draft status.
Read a CAPA's details
Open any CAPA to see the full picture at a glance. Click its CAPA # or title in the list.
- The top of the page shows the title and number, with Edit CAPA, Delete CAPA, and View Versions buttons. The main area opens with the Description, the Classification (type and category), and the Source Information. The right sidebar gives you the quick facts: the CAPA Information card with the status and priority, the key Dates, and the Assignments (who owns, investigates, verifies, and approves it).
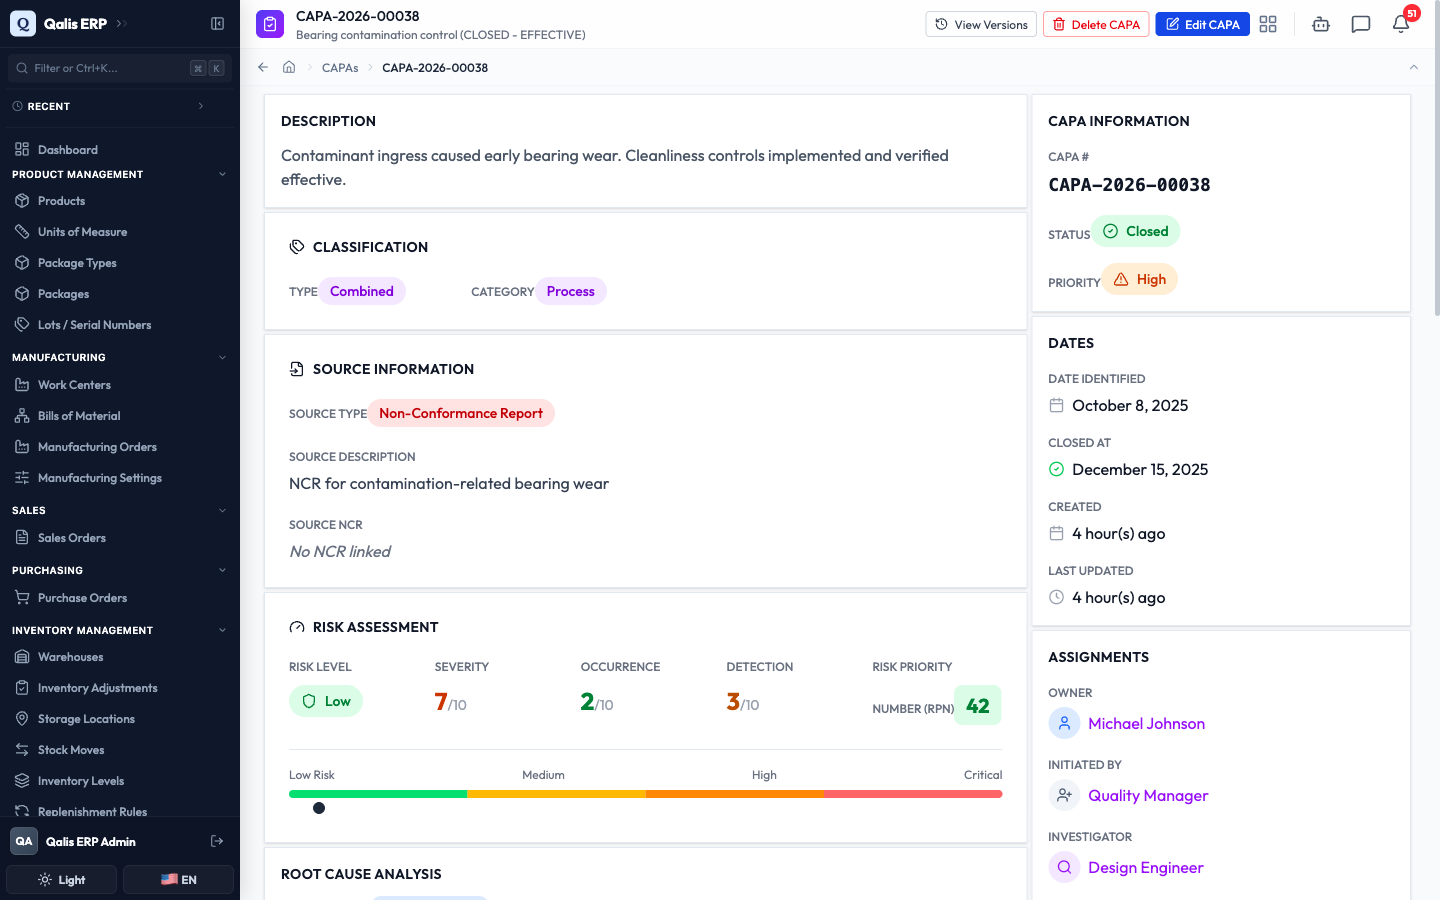
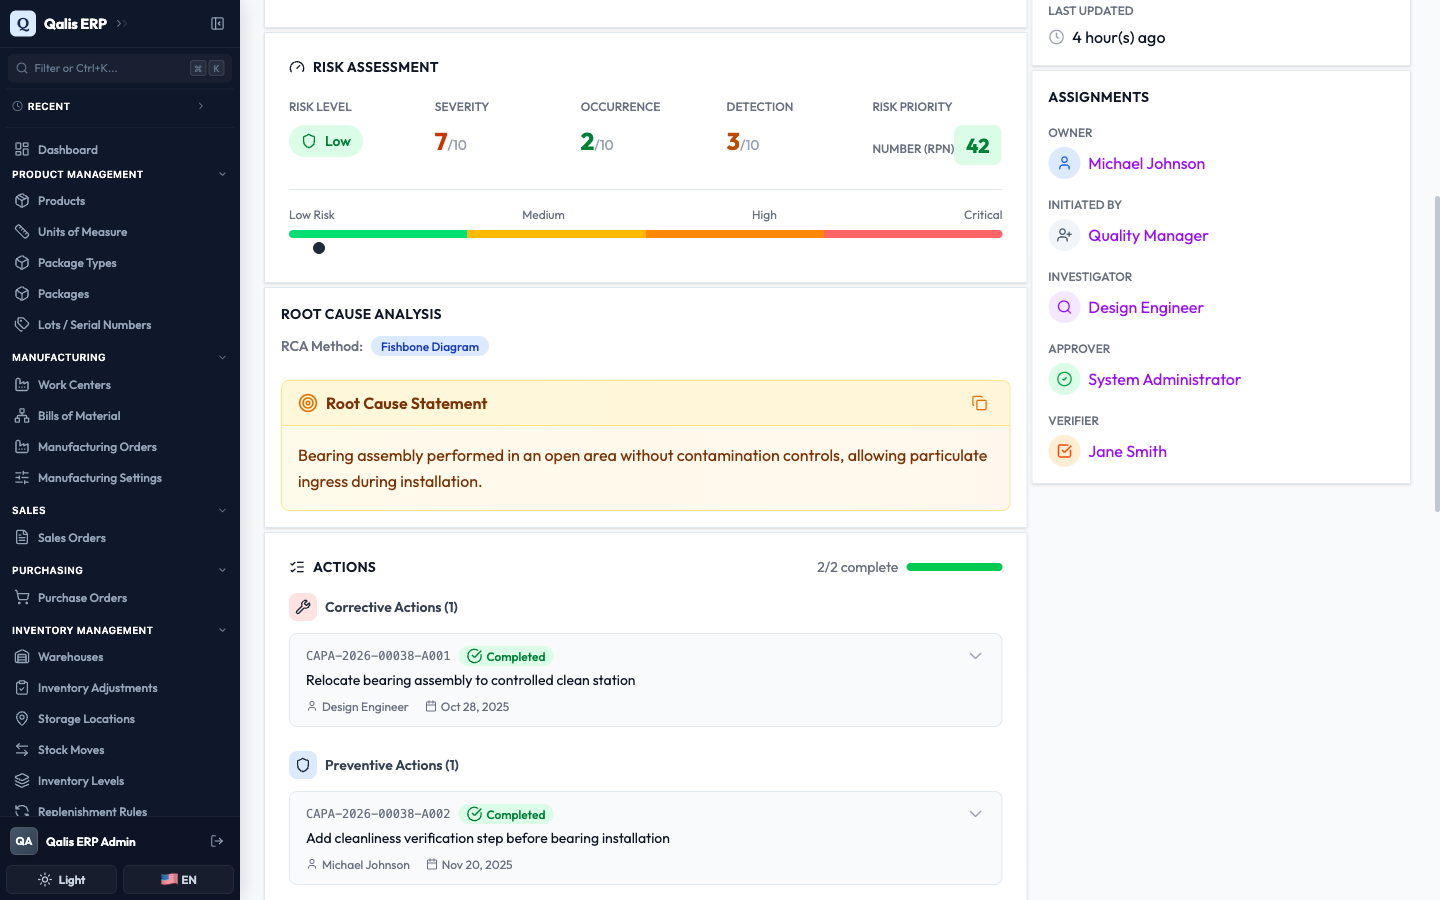
- Scroll down to the Risk Assessment and Root Cause Analysis sections. The risk bar shows where this CAPA sits from Low to Critical, and the root cause section shows which method was used and the final root cause statement.
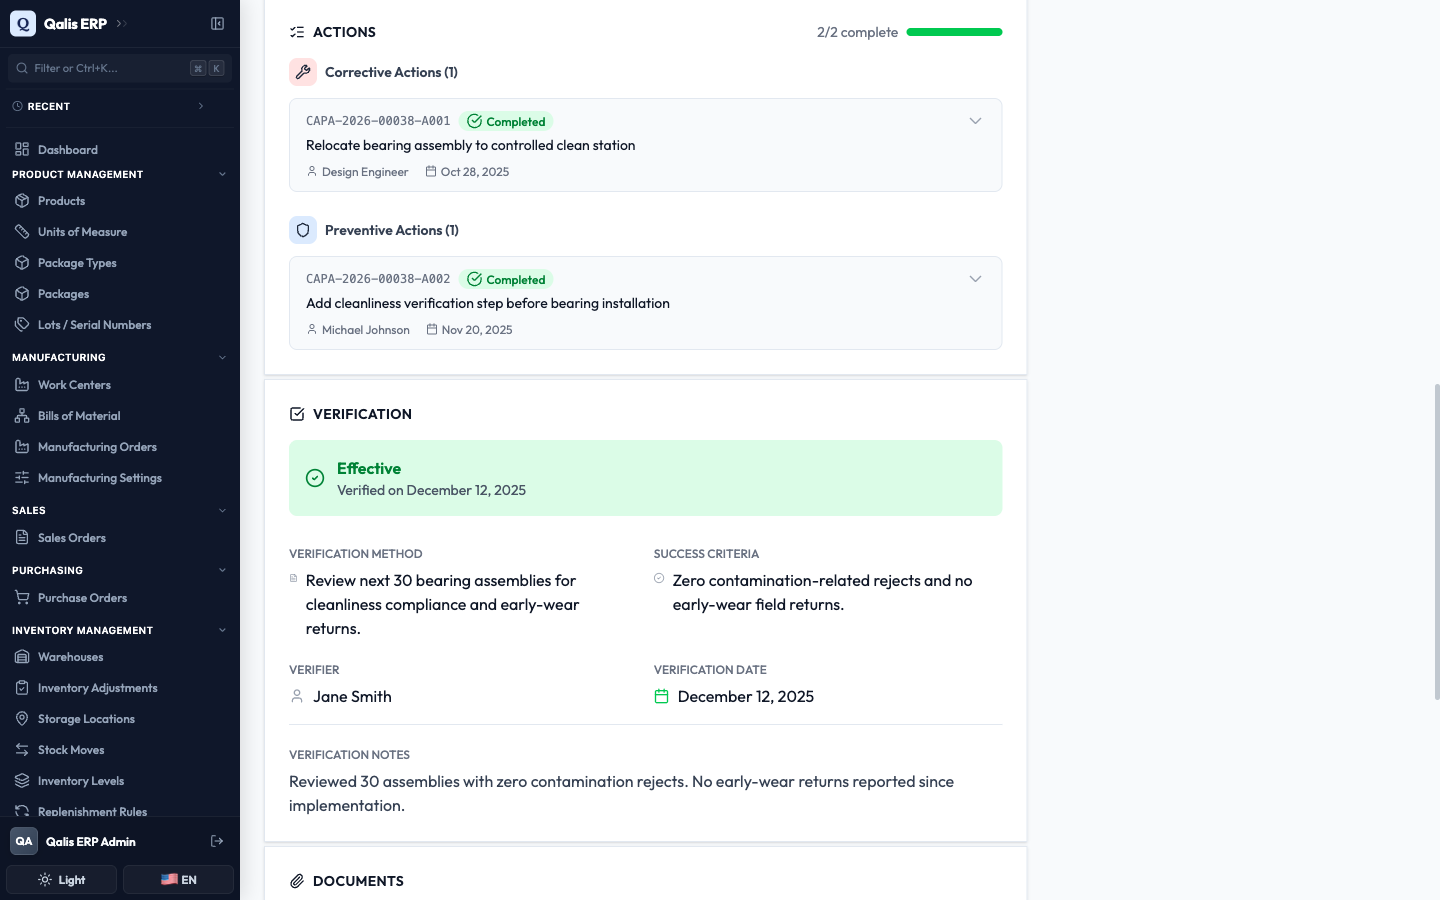
- Keep scrolling to the Actions section, where corrective and preventive actions are grouped with a progress bar, and the Verification section. When a CAPA has been checked, a colored banner tells you the result: Effective, Partially Effective, or Not Effective, along with the method, criteria, verifier, and notes.
Update a CAPA
As the work moves forward, you edit the CAPA to record progress: add the investigation findings, list new actions, assign people, or fill in the verification result.
- On the detail page, click Edit CAPA at the top right. The same six tabs open, this time filled with the current details.
- Change whatever you need across the tabs. For example, you can name the Investigator on the Source & Context tab, or add another action. The CAPA Number is shown but cannot be changed.
- Click Save Changes at the top right. You return to the detail page and your updates appear right away.
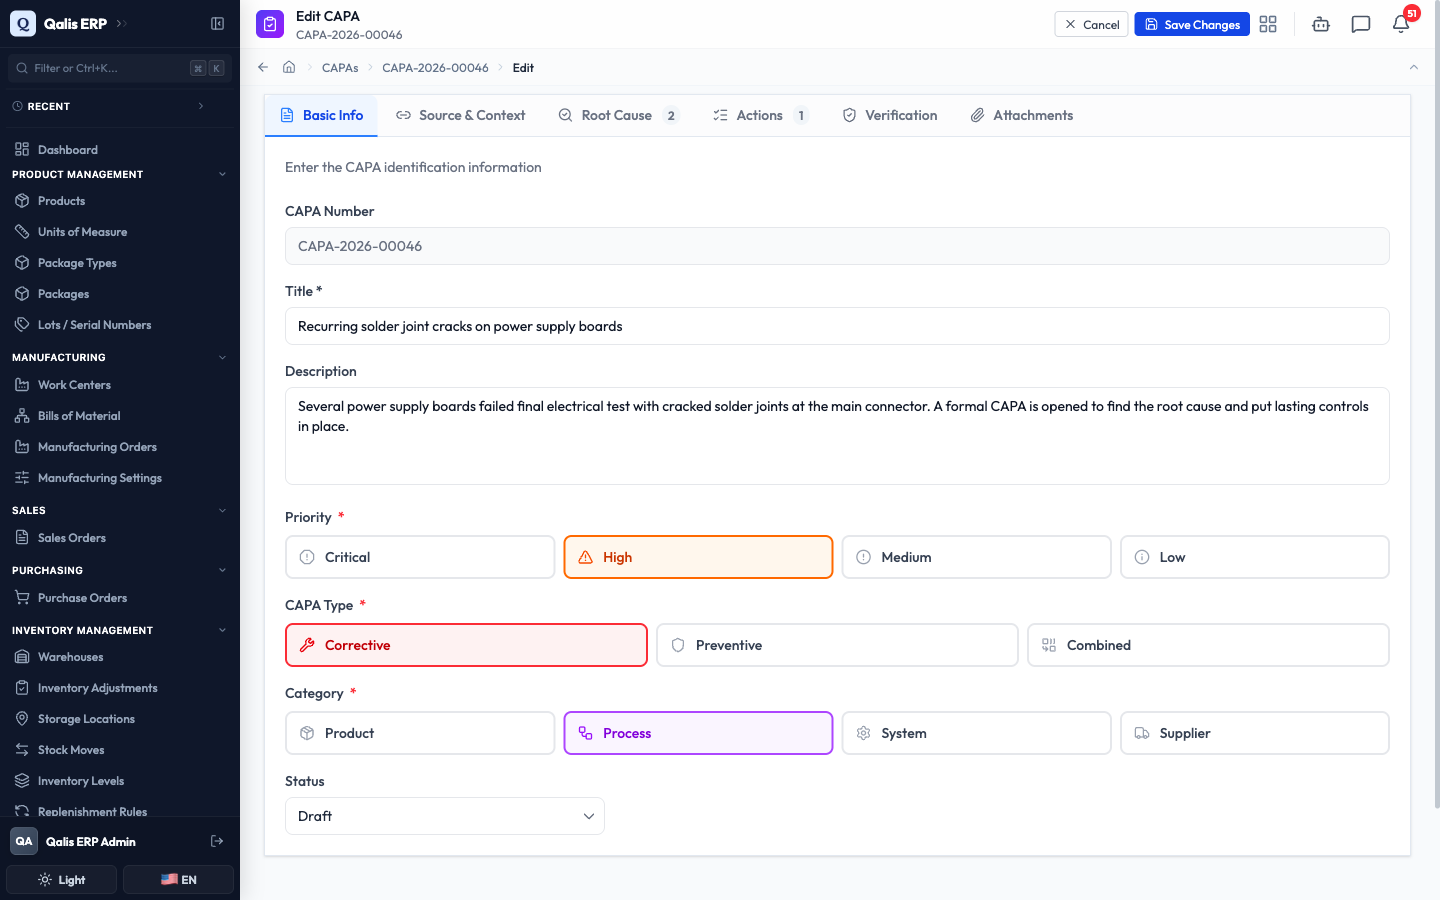
The Status dropdown is how you move a CAPA through its life: Draft, Open, Investigation, Action Planning, Implementation, Verification, and finally Closed (or Cancelled). Some status changes, such as closing a CAPA, go through an approval step first. If a change needs approval, Qualis tells you, and the new status takes effect once the approval is granted.
Export your CAPAs to a spreadsheet
When you need your CAPAs outside Qualis, for a report or a review meeting, you can export them.
- On the list, tick the checkbox at the start of each row you want. A bar appears showing how many are selected.
- Click Export CSV or Export Excel. Your file downloads with the selected records and their details.
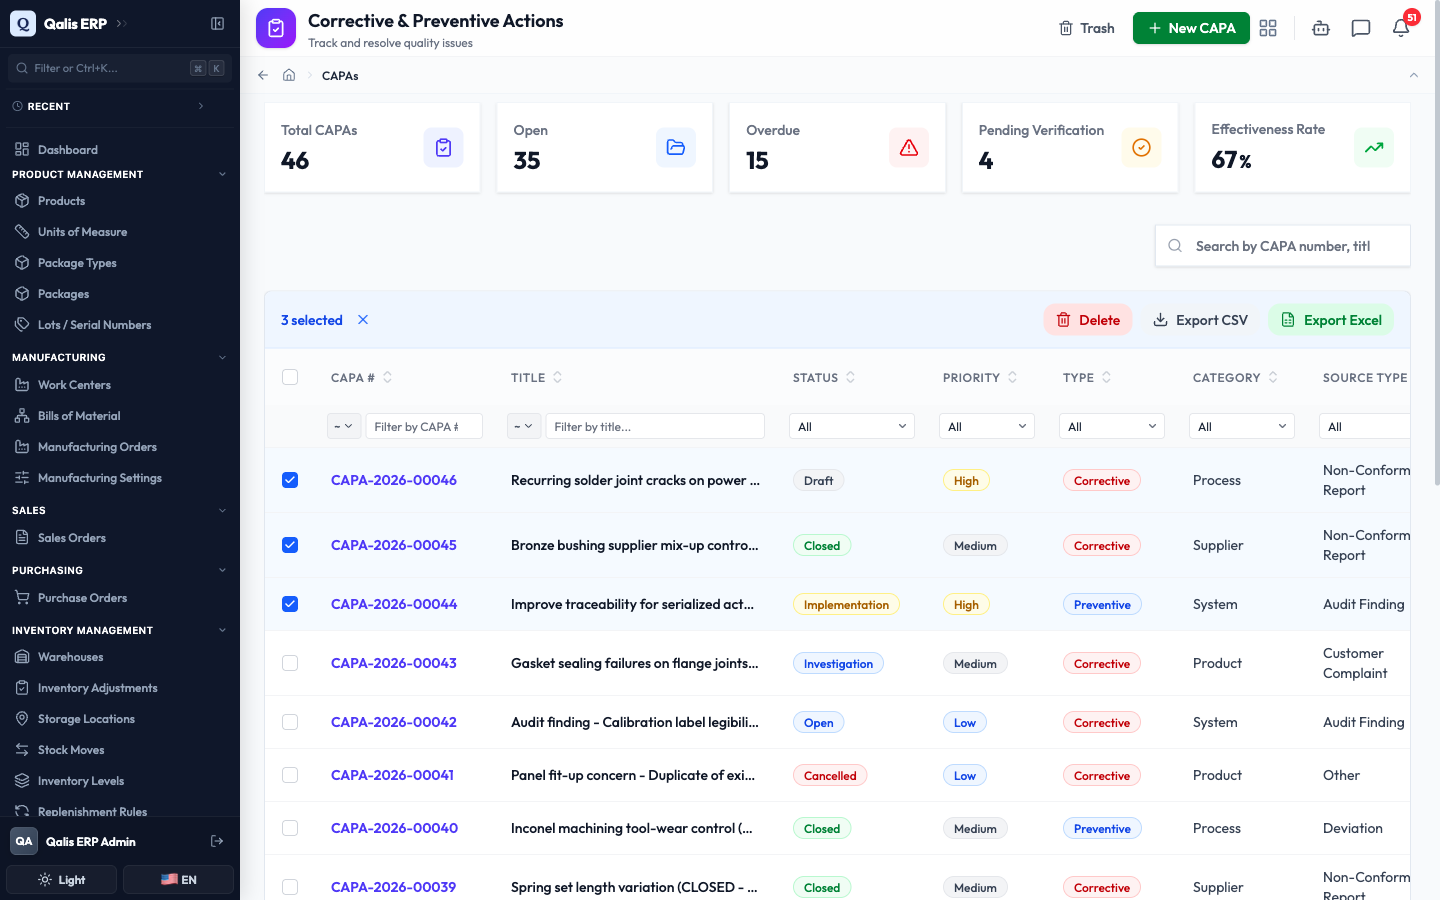
To export many records at once, use the checkbox in the table header to select the whole page first.
Good to know
A few terms show up throughout the module:
- CAPA: Corrective and Preventive Action. The full record of a quality problem and its resolution.
- Corrective vs Preventive: a corrective action fixes a problem that already happened; a preventive action stops one from happening. A Combined CAPA does both.
- NCR: a Non-Conformance Report, the record that often first flags the problem a CAPA is opened to solve.
- Root cause analysis (RCA): the structured way you dig past the symptoms to the real cause, using 5-Why, Fishbone, or Pareto.
- RPN (Risk Priority Number): severity times occurrence times detection. A higher number means a higher priority risk.
- Effectiveness: the final judgment, after the fix, of whether the problem is truly resolved (Effective), partly resolved (Partially Effective), or not resolved (Not Effective).