Approval Workflows
Set up step-by-step sign-offs so the right people review important documents, like purchase orders or quality cases, before they move ahead.
Last updated on June 29, 2026
An approval workflow is a set of rules that decides who has to say "yes" before a document can go ahead. You build a workflow once, for example "every sales order needs a manager to approve it", and from then on Qualis handles the rest: whenever someone raises a matching document, it automatically asks the right people to review it, waits for their decision, and keeps a full record of who approved what and when. This guide walks you through the things you do most often: finding your workflows, building a new one, reviewing the approvals waiting for you, following a request from start to finish, and handing your approvals to a colleague while you are away.
You reach the module from the left sidebar under Administration, then Approvals. Inside, four tabs organise everything: Workflows (the rules you set up), Instances (the live and finished approval requests), Delegations (stand-ins for when someone is away), and My Approvals (the requests waiting on you).
Before you start
- You need at least a few users set up, because every approval step points to one or more people who will approve.
- If you want a whole team to approve as a group (rather than naming people one by one), set that team up first.
- A workflow attaches to one type of document. The types you can choose from are Purchase Orders, Sales Orders, NRC, CAPAs, Scrap Orders, Manufacturing Orders, and Inventory Adjustments.
Find and browse your workflows
Start here to see every approval rule you have and open the one you need.
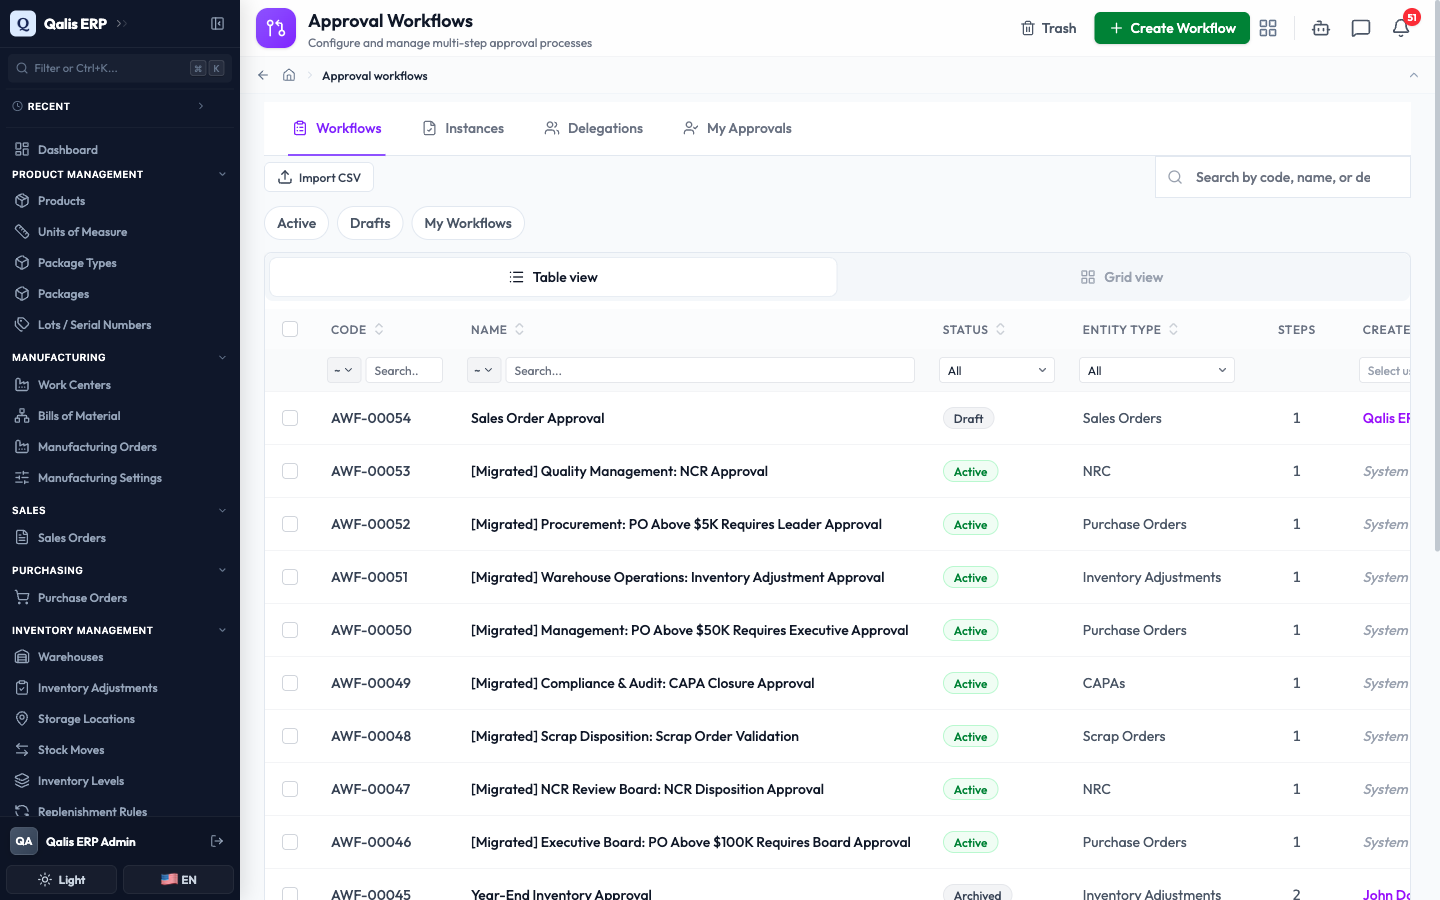
- Open Approvals from the sidebar. You land on the Workflows tab. Each row is one workflow and shows its Code (for example
AWF-00001), Name, Status, the Entity Type it applies to, how many Steps it has, and who created it. The quick buttons Active, Drafts, and My Workflows let you jump to a common view in one click.
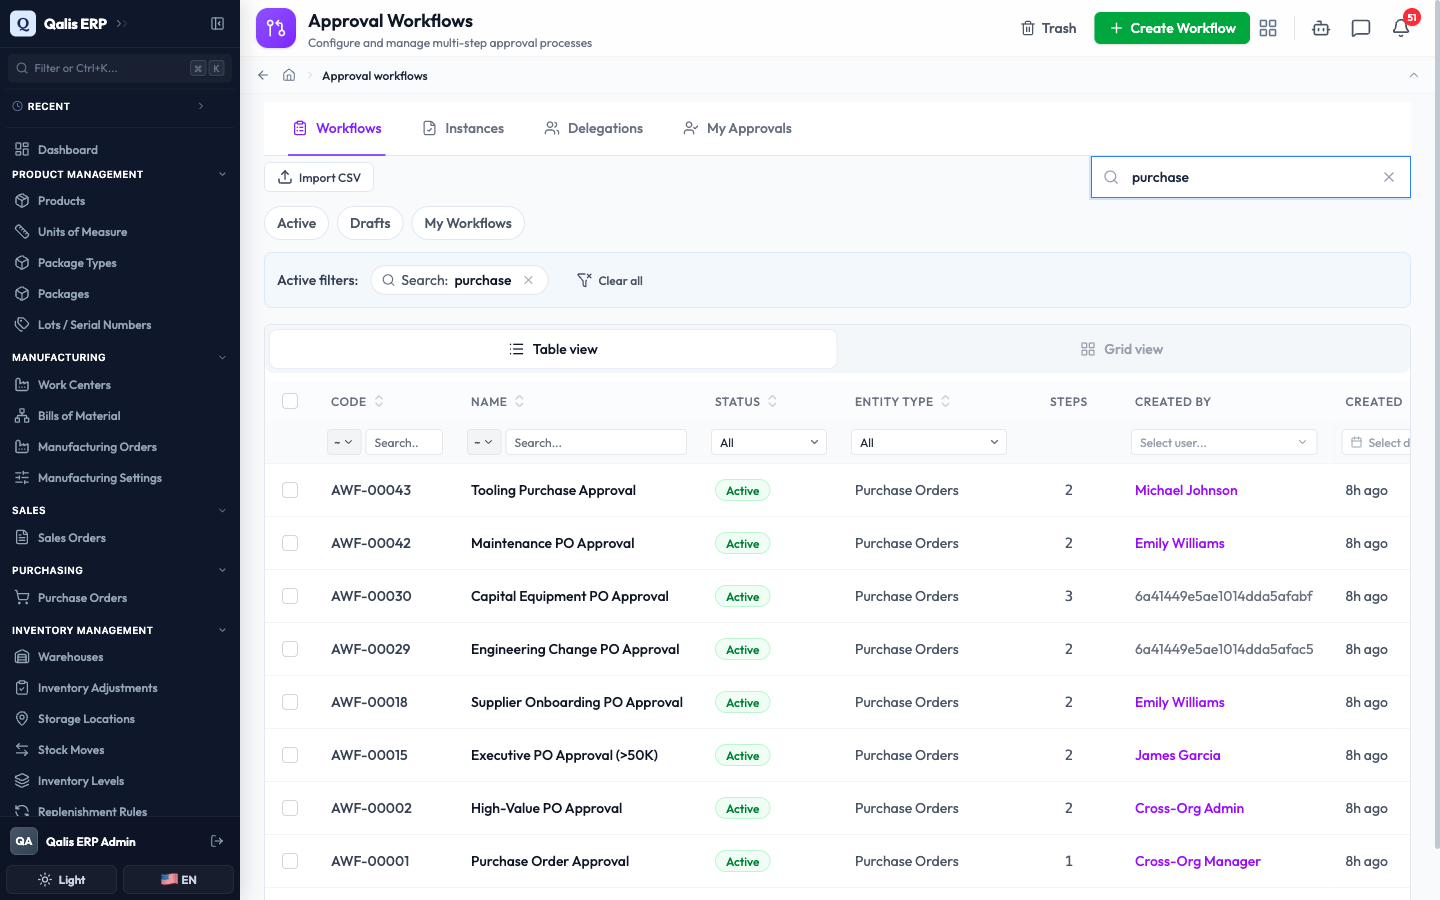
- To find one fast, type in the Search by code, name, or description box at the top right. The list filters as you type, so there is no need to press Enter.
- To see only workflows in a certain state, open the Status dropdown under the column heading and choose, for example, Active. You can filter the same way on the Entity Type or Created By columns.
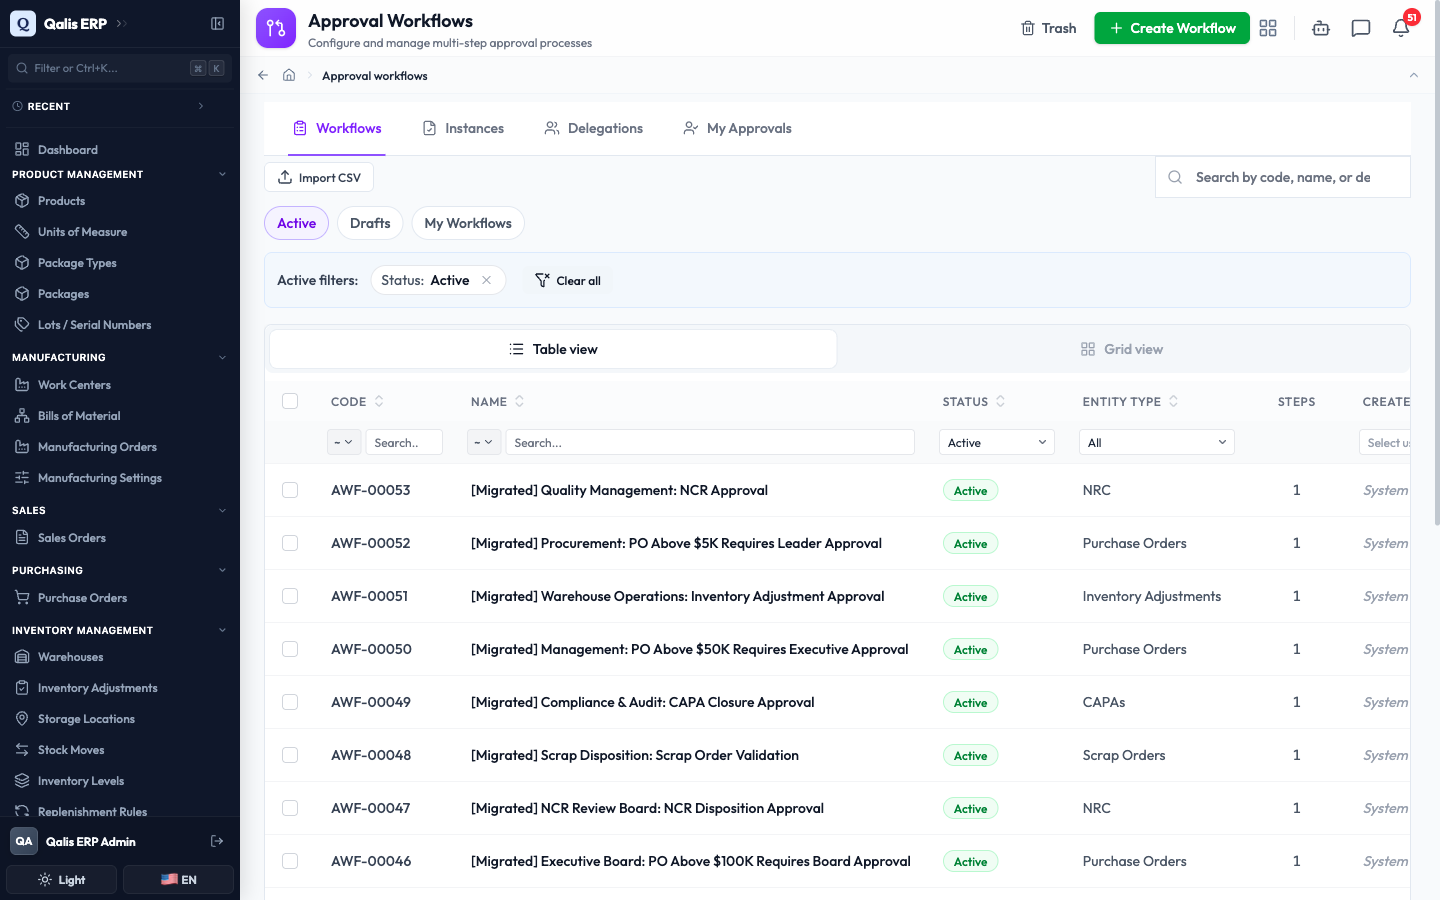
Whenever a filter is on, an Active filters banner appears showing what is applied. Click the small x on a filter to drop it, or Clear all to reset everything. The web address updates too, so you can bookmark or share a filtered view.
Create an approval workflow
This is the main setup task: building a rule that decides who must approve a type of document. You can start from a ready-made template or from a blank canvas.
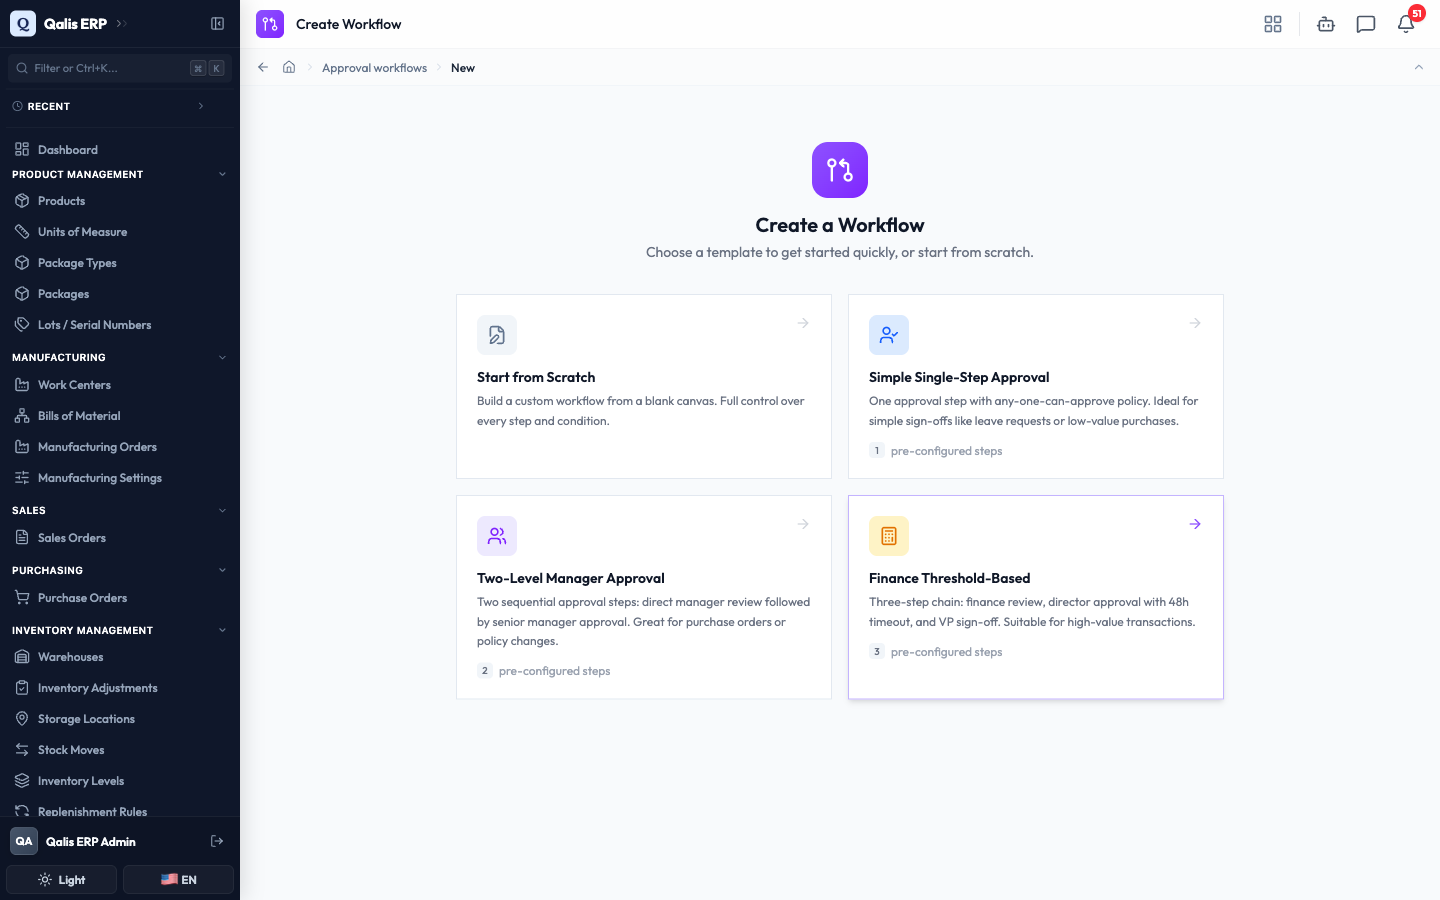
- Click Create Workflow (top right of the list). You first choose a starting point. Start from Scratch gives you a blank workflow, while the three templates come with steps already filled in. For a first workflow, Simple Single-Step Approval is the easiest: it sets up one approval step where any one person can approve.
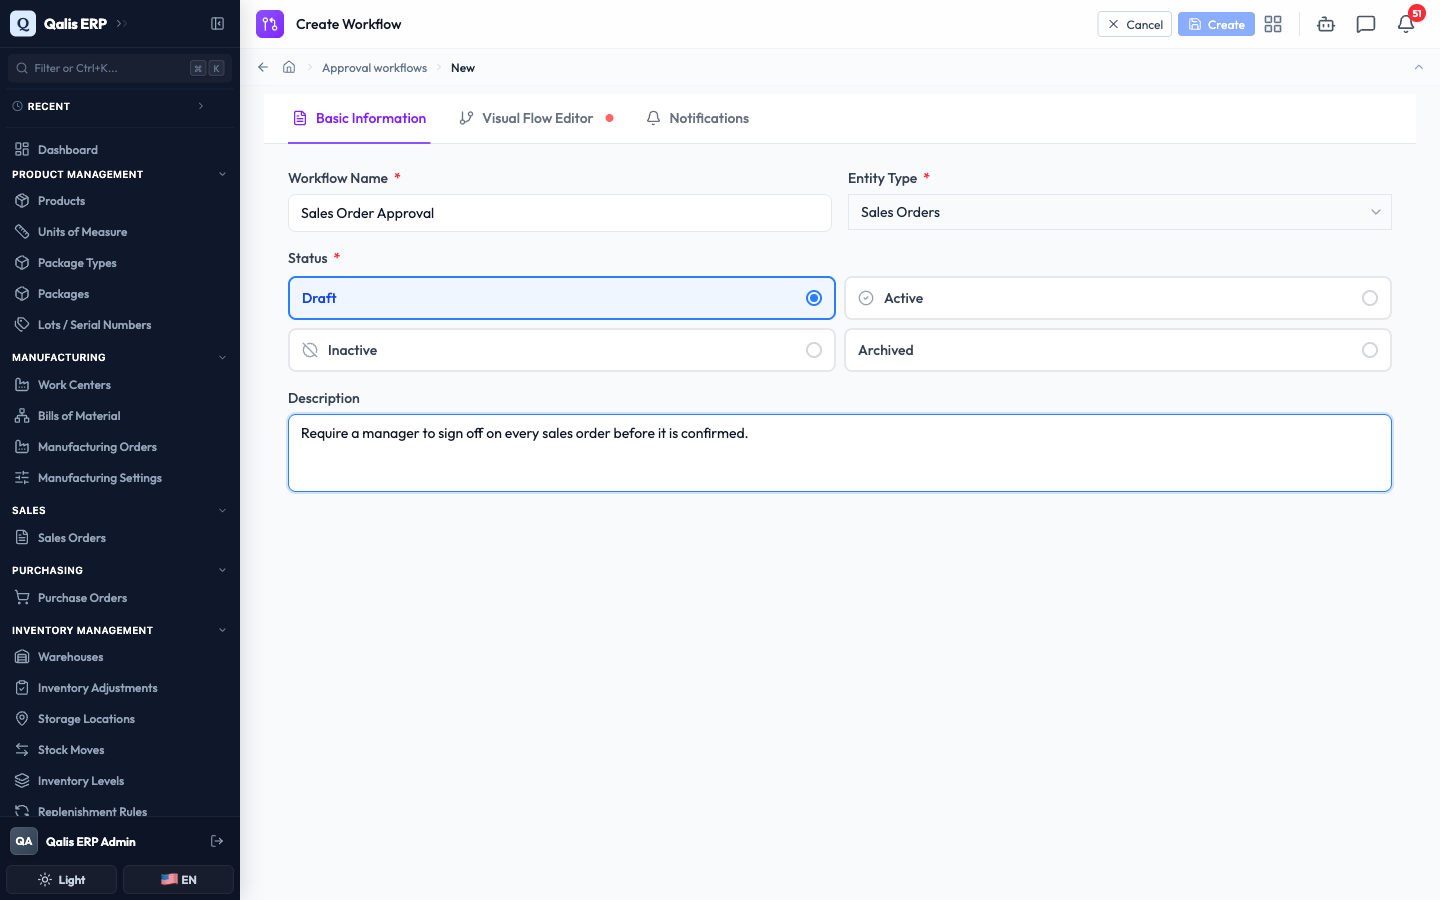
- On the Basic Information tab, give the workflow a clear Workflow Name (for example
Sales Order Approval), pick the Entity Type it applies to (here Sales Orders), and add an optional Description. Leave the Status on Draft for now, so the workflow does not start running until you are ready.
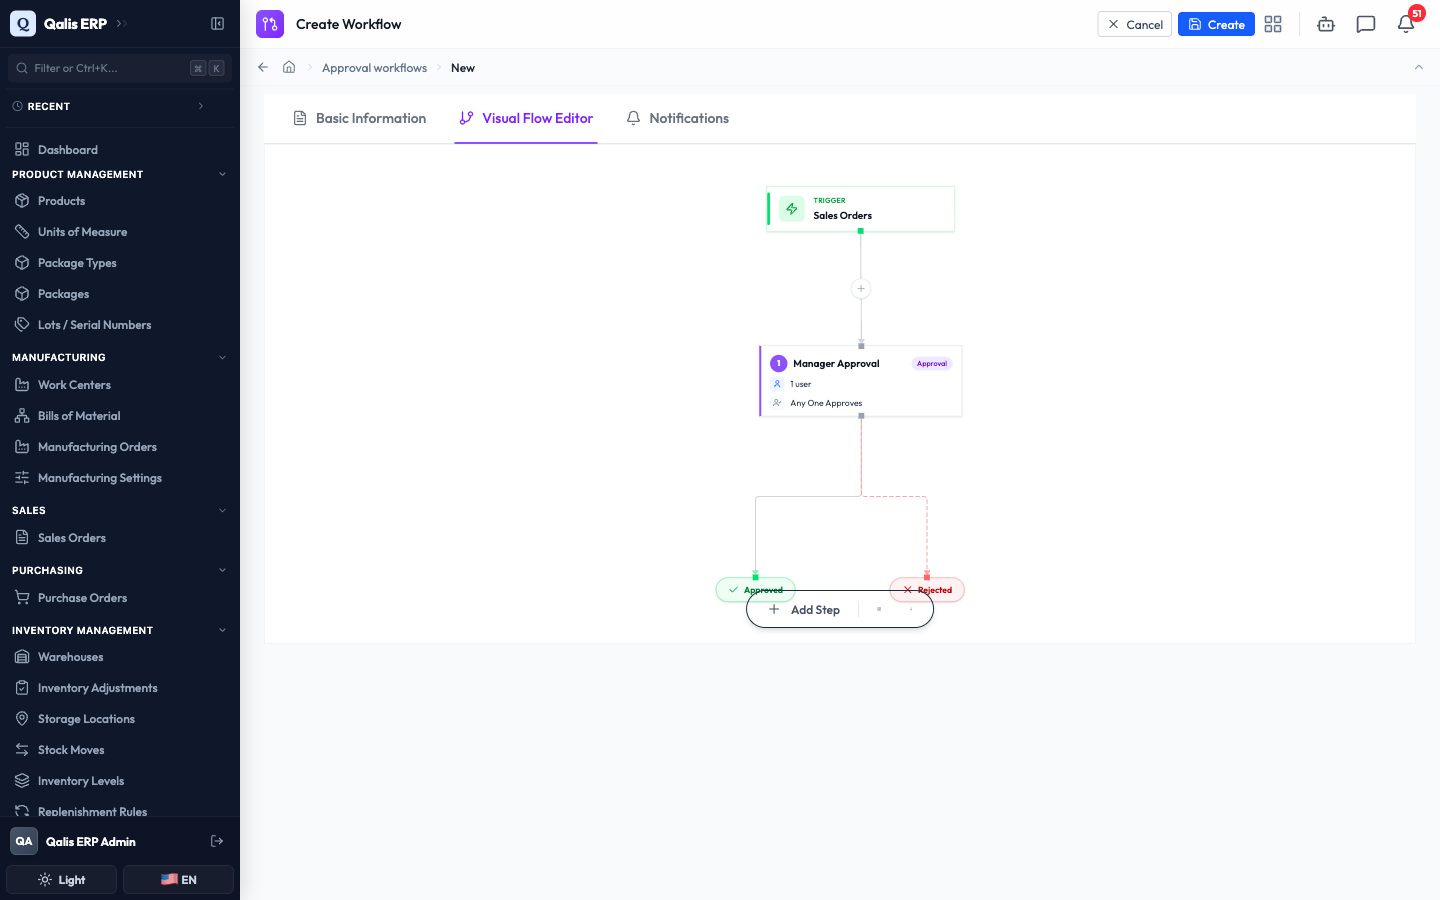
- Open the Visual Flow Editor tab to see your workflow as a diagram. It reads from top to bottom: the Trigger (the document type) flows into each approval step, and then into the Approved and Rejected outcomes. Use Add Step if you want more than one round of approval.
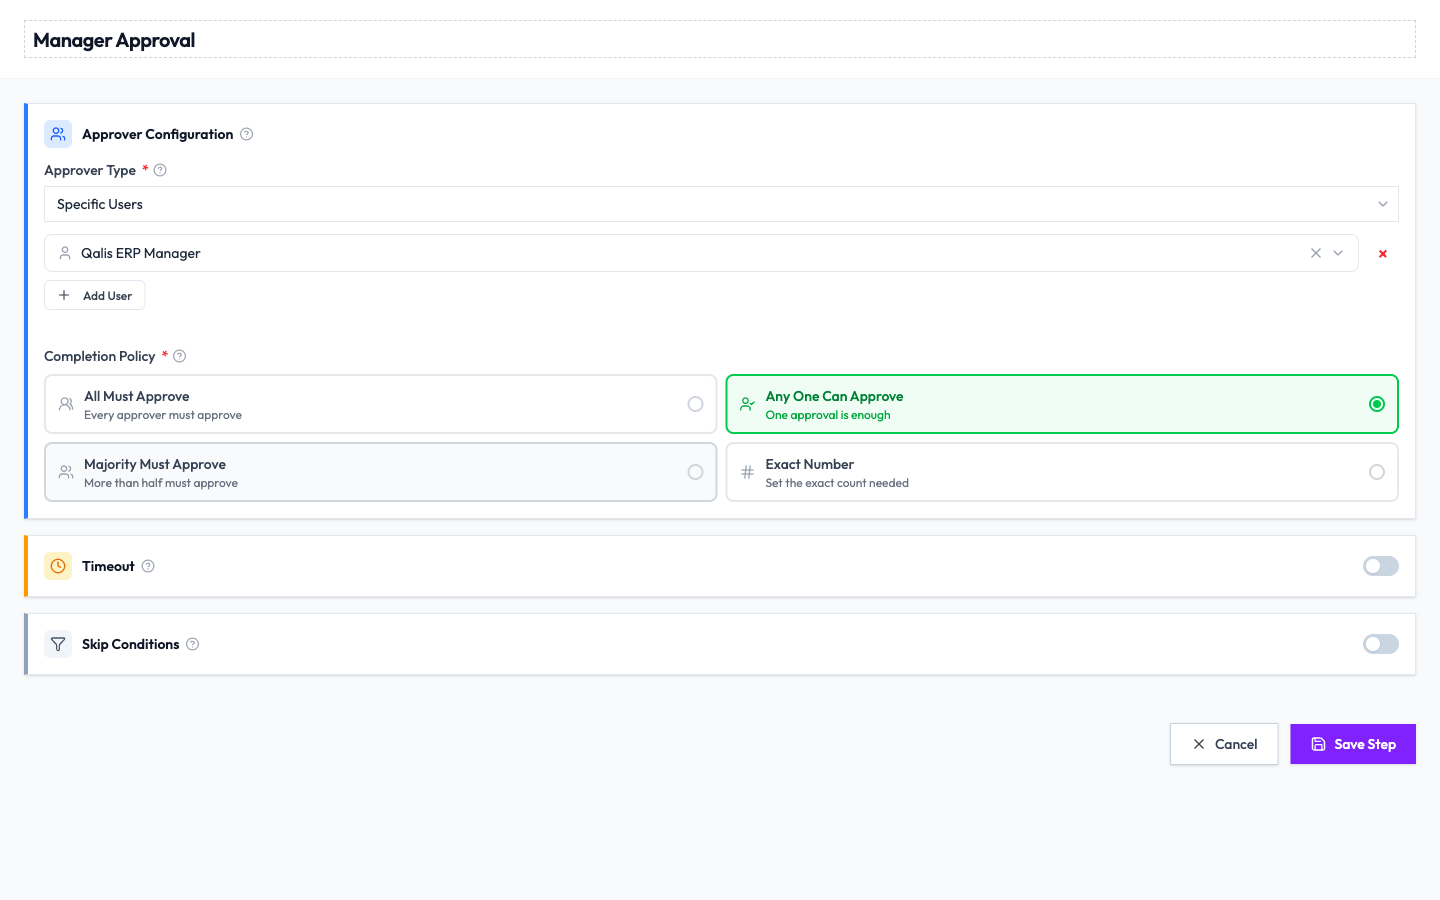
- Click a step in the diagram to set it up. Add the people who can approve under Approver Users, and whole teams under Approver Teams. You can use either or both: everyone you list, including every member of every team you list, goes into one pool of approvers for that step. Then choose a Completion Policy that decides how many of that pool must agree: All Must Approve, Any One Can Approve, Majority Must Approve, or an Exact Number. You can also switch on a Timeout to move things along if nobody responds in time. Click Save Step when you are done.
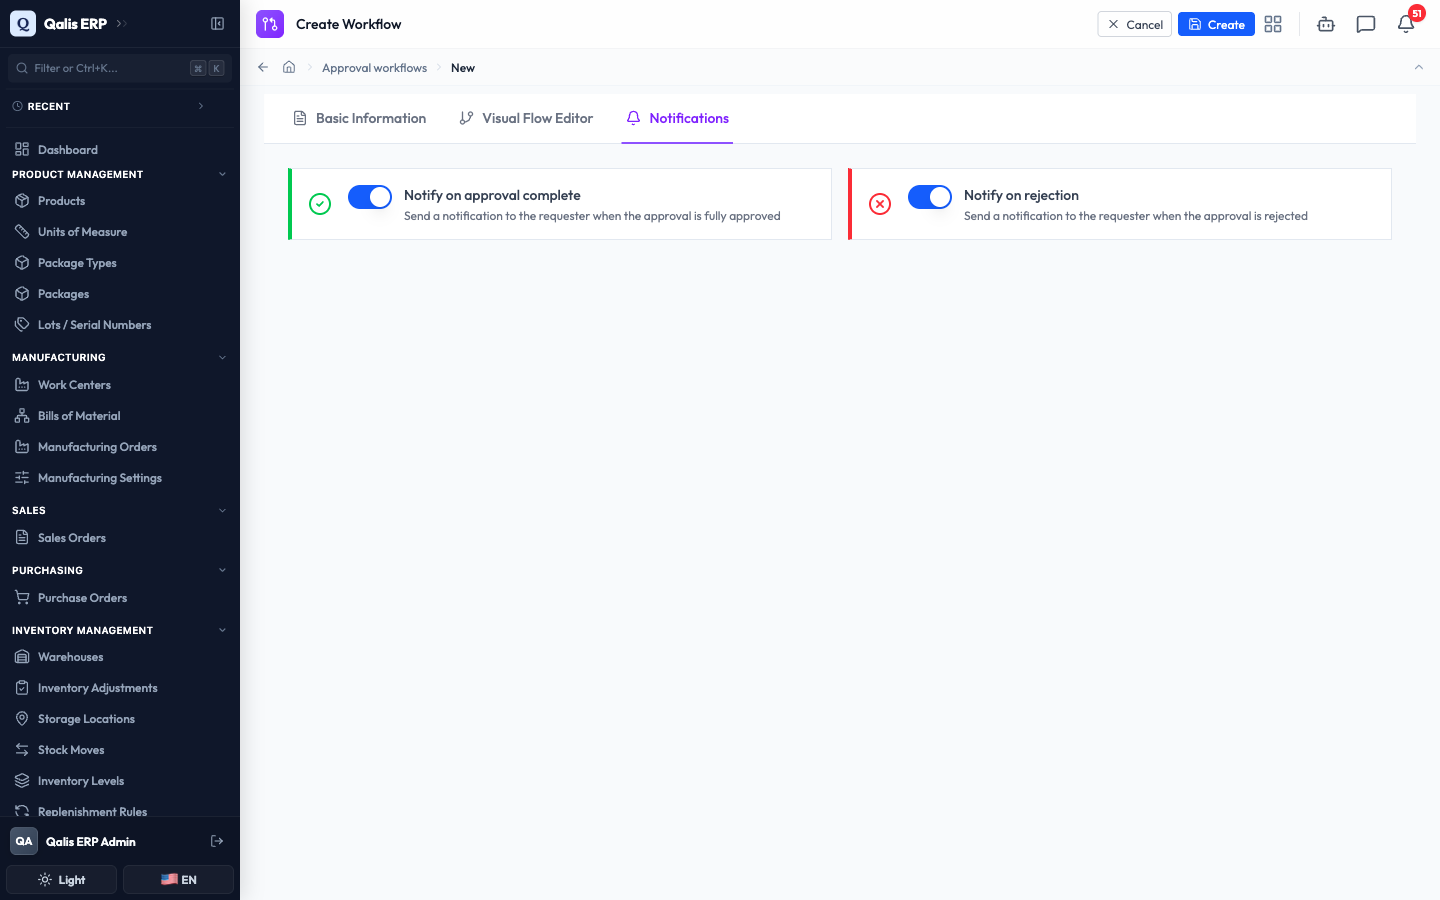
- Open the Notifications tab to decide who gets told about the result. Notify on approval complete lets the person who raised the document know once it is fully approved, and Notify on rejection tells them if it is turned down. Both are on by default.
- Click Create (top right). You are taken to the new workflow's page, which shows its code, status, the document type it covers, and the same flow diagram for reference. From here you can Edit it, view its Version History, or Delete it.
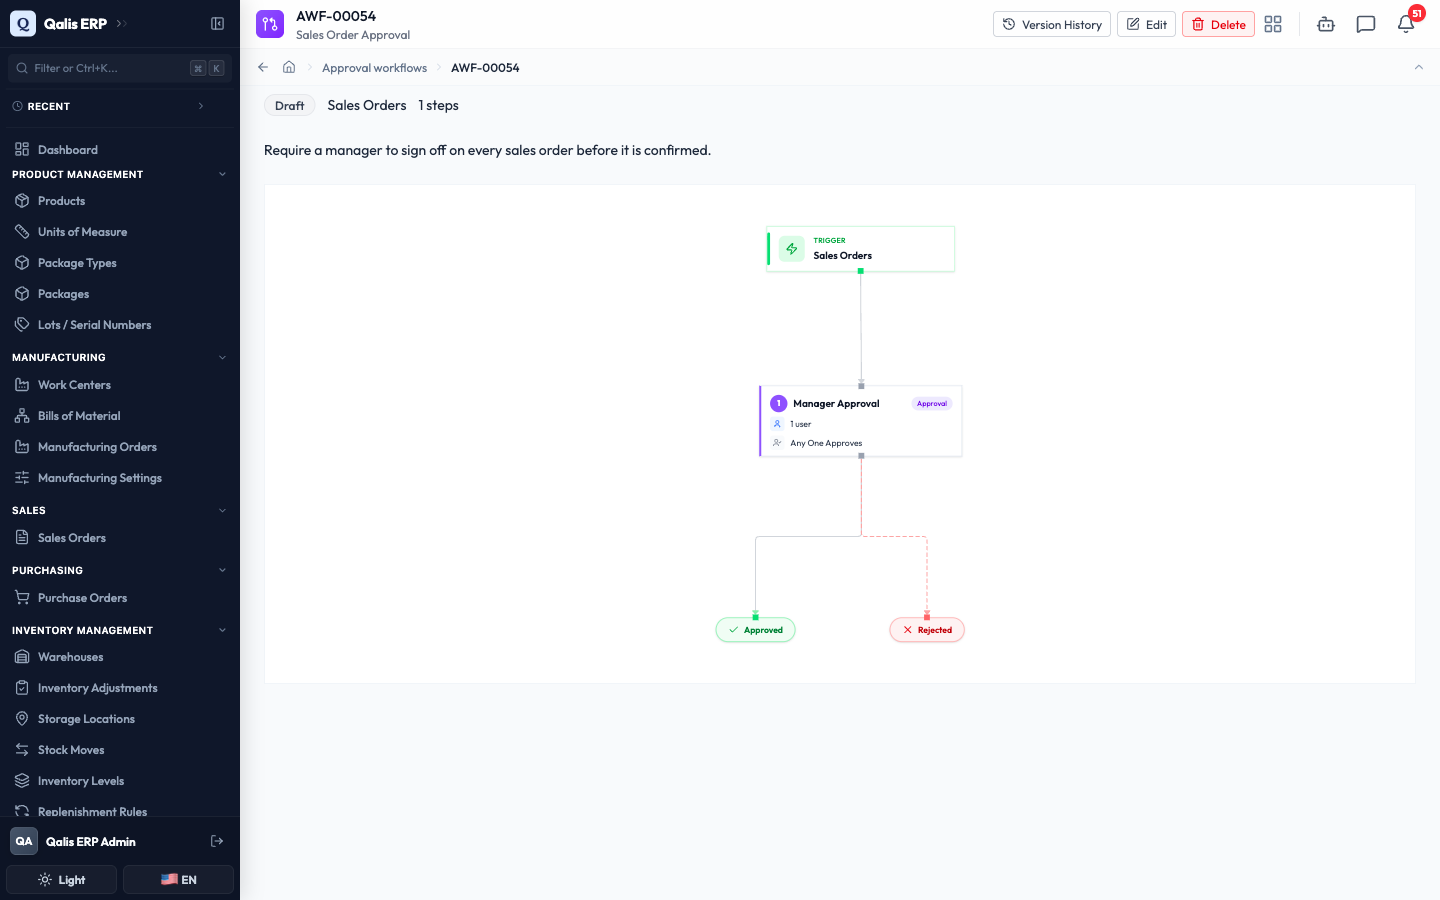
A new workflow starts as a Draft, which means it is saved but not yet running. When you are happy with it, click Edit, change the Status to Active, and save. From that moment, every matching document will ask for approval automatically.
Review the approvals waiting for you
When a document needs your sign-off, it shows up in your personal queue. This is where approvers spend most of their time.
- Open the My Approvals tab. The cards along the top give you a quick read of your workload: how many approvals are Pending, how many you Approved Today or Rejected Today, and your average response time. Anything waiting on you appears in the list below.
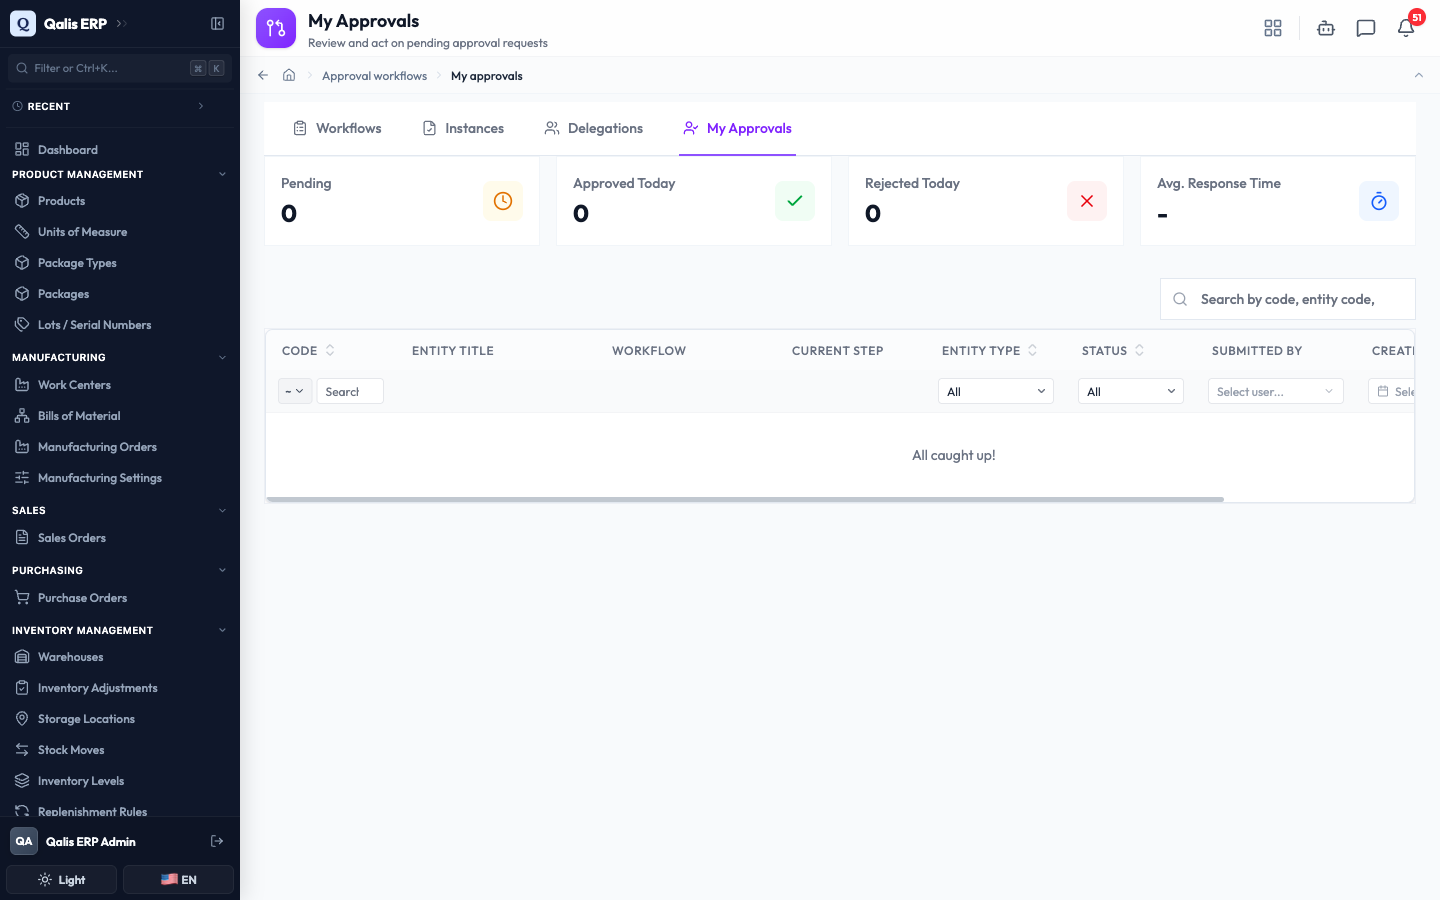
- Click a request to open it, then choose what to do. Approve passes it to the next step (or finishes it if yours is the last step). Reject stops the request, and you are asked to give a reason so everyone understands why. You can also Comment to add a note without deciding, or Reassign the request to someone else.
You cannot approve a request that you raised yourself. Another approver has to sign it off, which keeps the review independent.
Follow an approval request from start to finish
Every time a document is submitted for approval, Qualis creates a request (also called an instance) and tracks it for you. You never create these by hand. Use the Instances tab to see them all and check progress.
- Open the Instances tab. Each row is one approval request and shows its Code (for example
AIN-00001), the Workflow it follows, the document it is reviewing, and its current Status (such as In Progress, Approved, or Rejected). The In Progress, Completed, and My Submissions buttons help you focus on what matters.
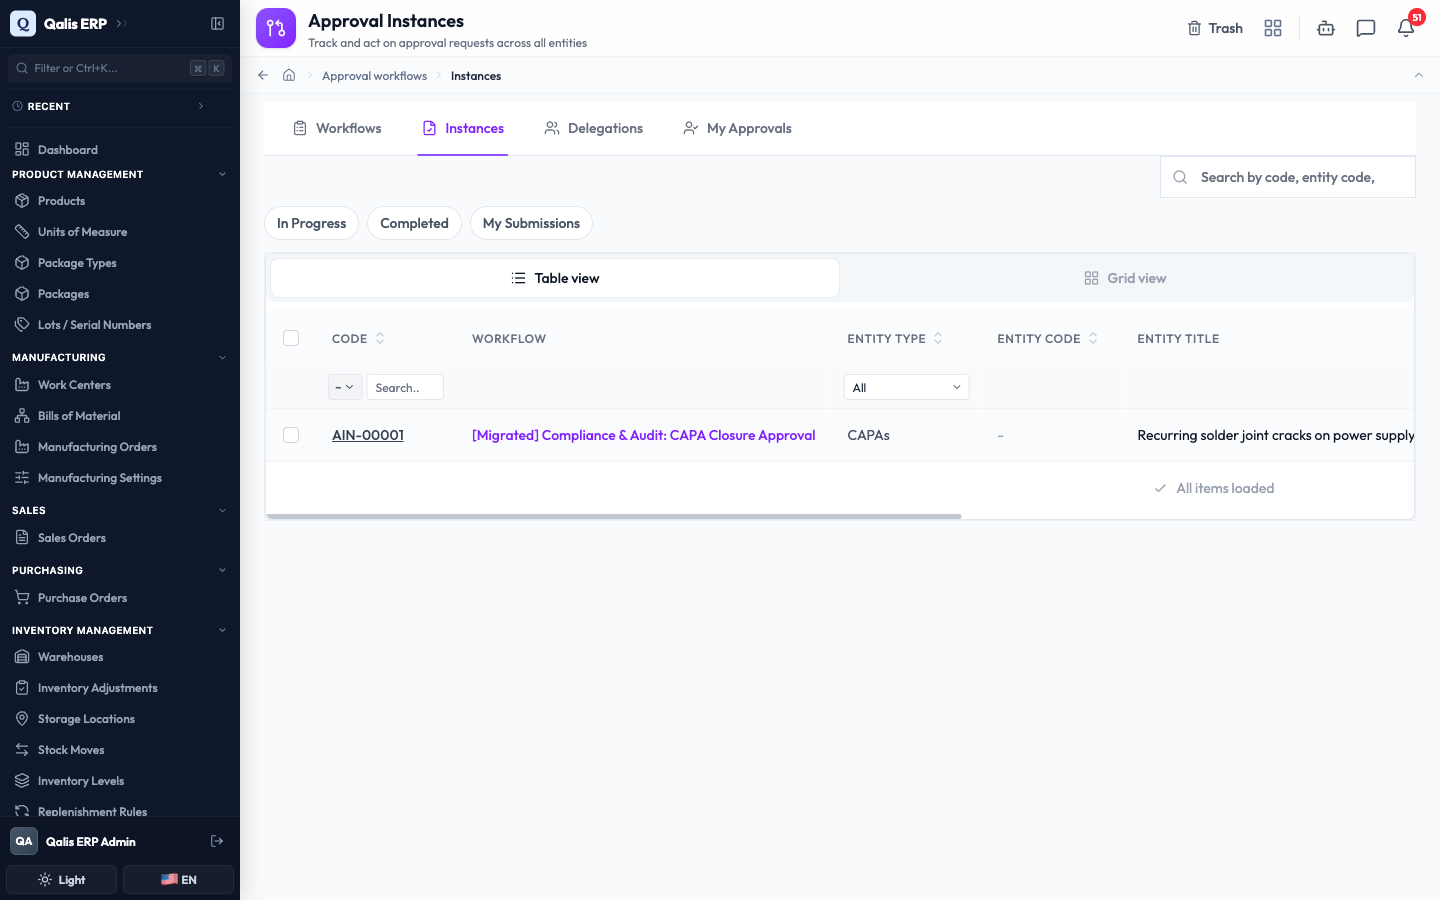
- Click a request to open it. The top of the page shows where it stands, who raised it, and which document it is about. The Waiting for approval from panel names the people whose decision is needed and how soon it is due, and the Approval Timeline below lays out each step in order so you can see exactly what has happened and what is next.
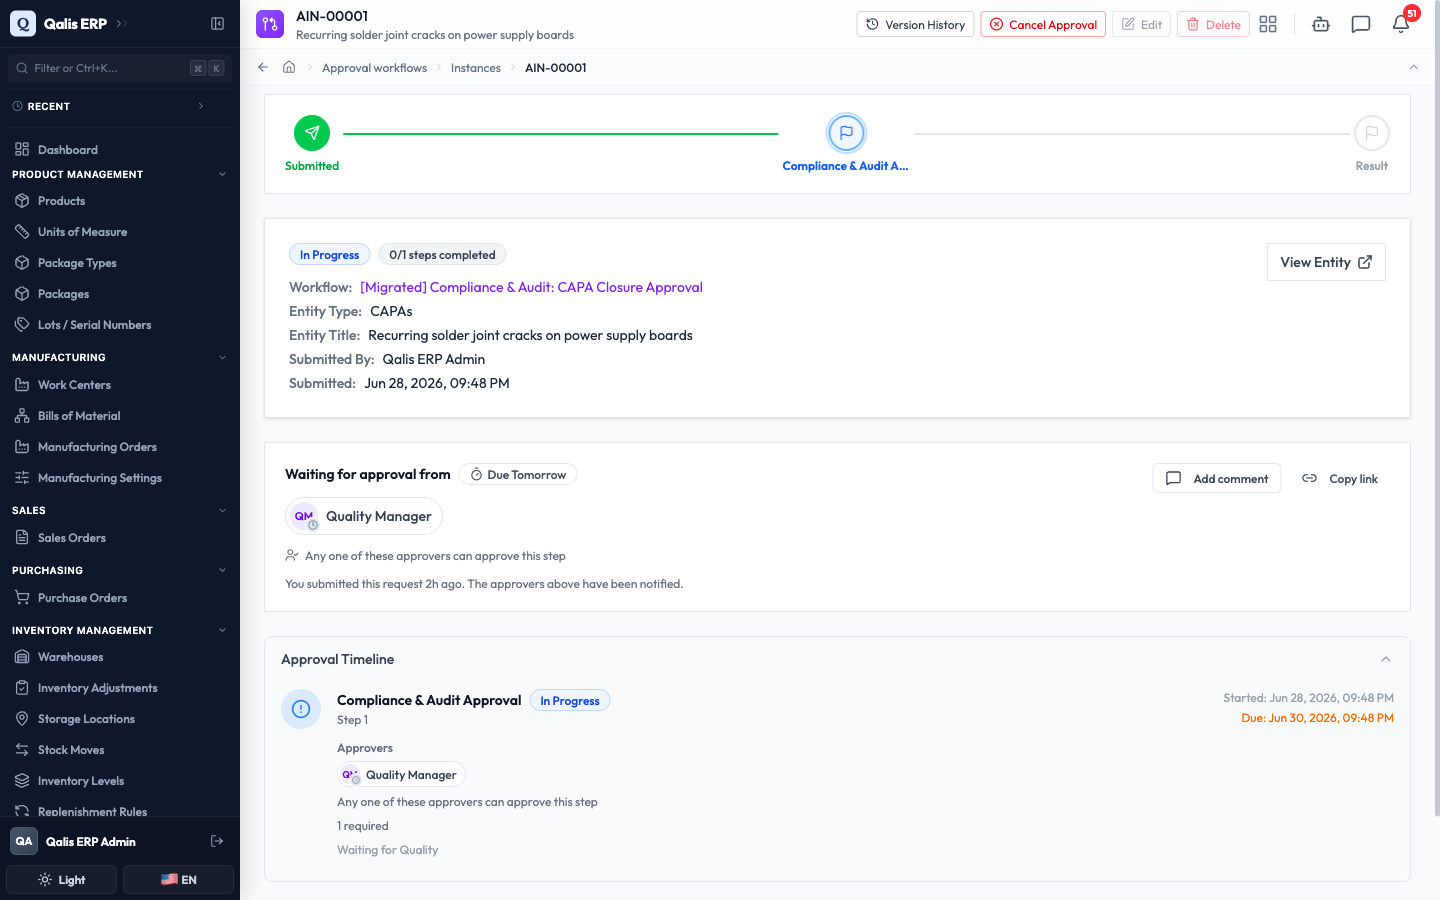
If a request was raised by mistake, the person who raised it can click Cancel Approval at the top to withdraw it while it is still in progress.
Delegate your approvals while you are away
Going on leave? You can hand your approval duties to a trusted colleague for a set period, so nothing waits on you while you are out.
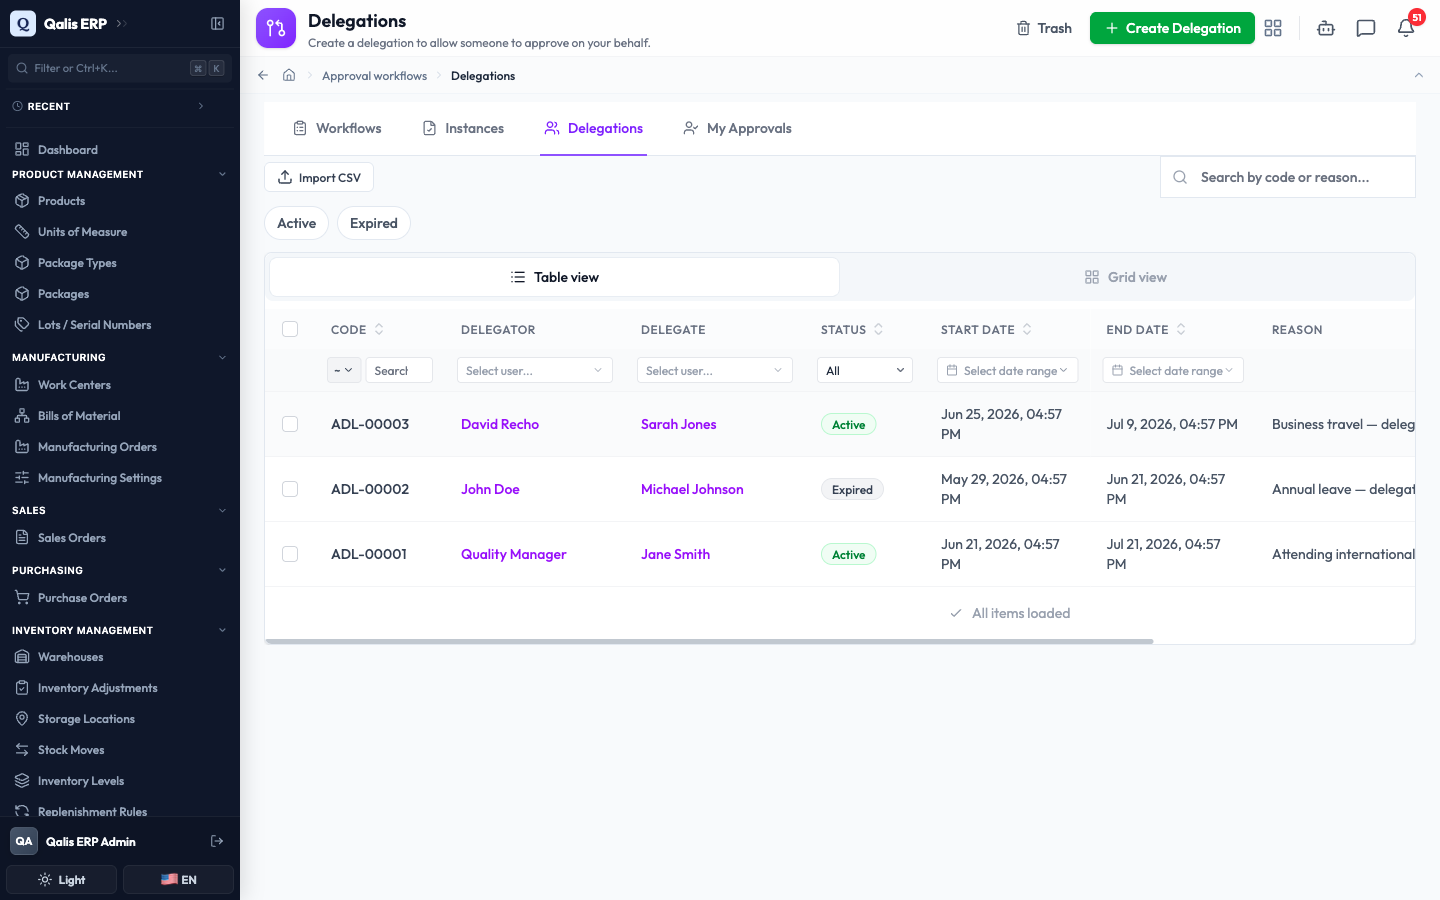
- Open the Delegations tab to see who is currently standing in for whom. Each row shows the Delegator (the person handing over), the Delegate (the person taking over), the dates it covers, and whether it is still Active.
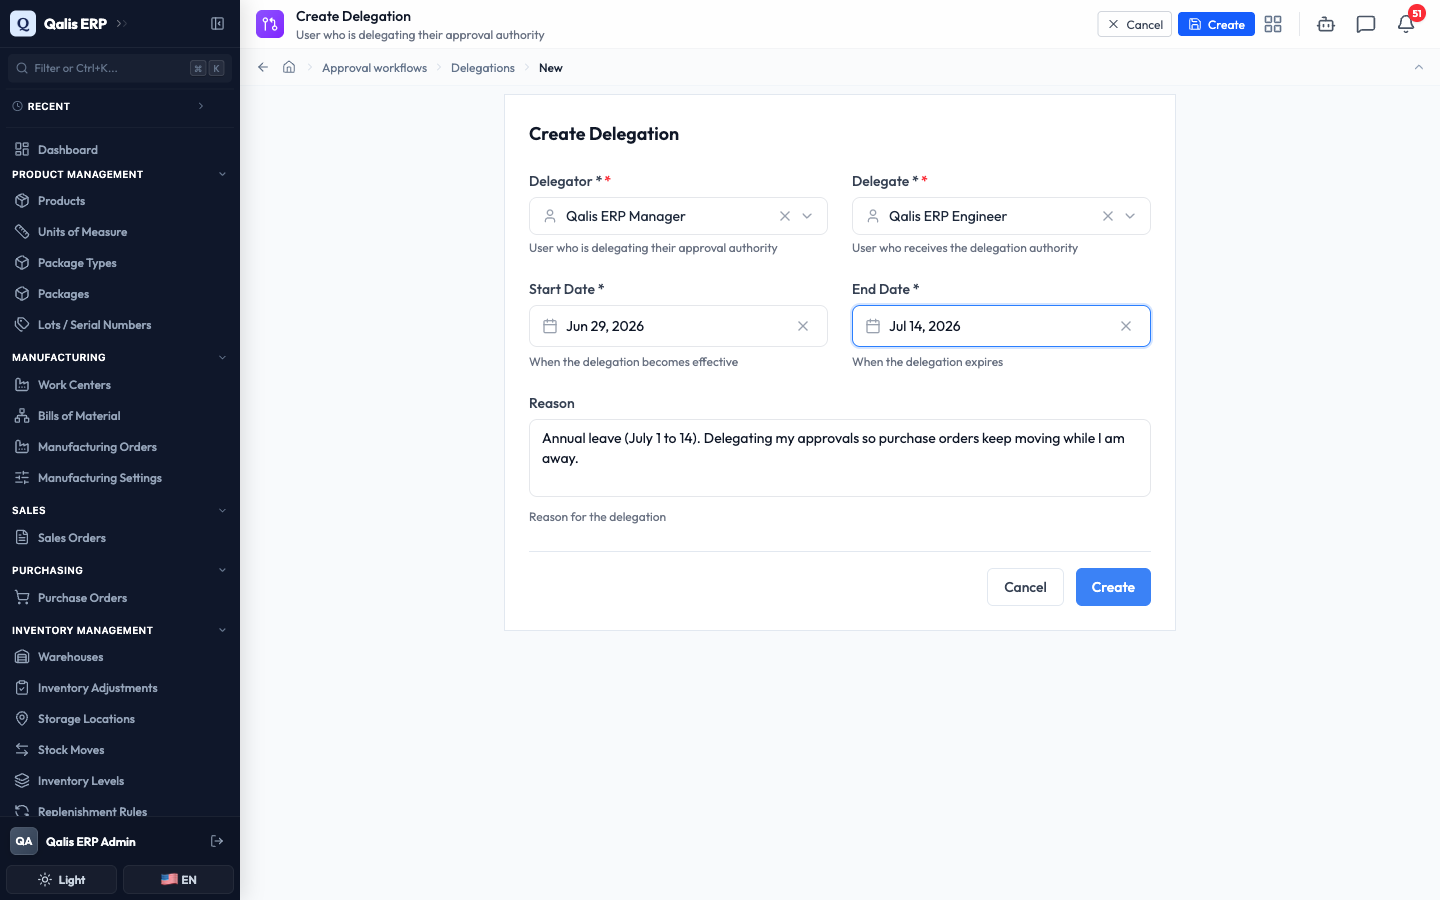
- Click Create Delegation. Choose the Delegator (the person whose approvals are being handed over) and the Delegate (the person who will act for them). Set a Start Date and End Date for the cover, and add an optional Reason so the record is clear. Click Create when you are done.
- You land on the new delegation's page. While it is Active, the delegate can approve anything that would normally wait on the delegator. If plans change, click Revoke to end it early.
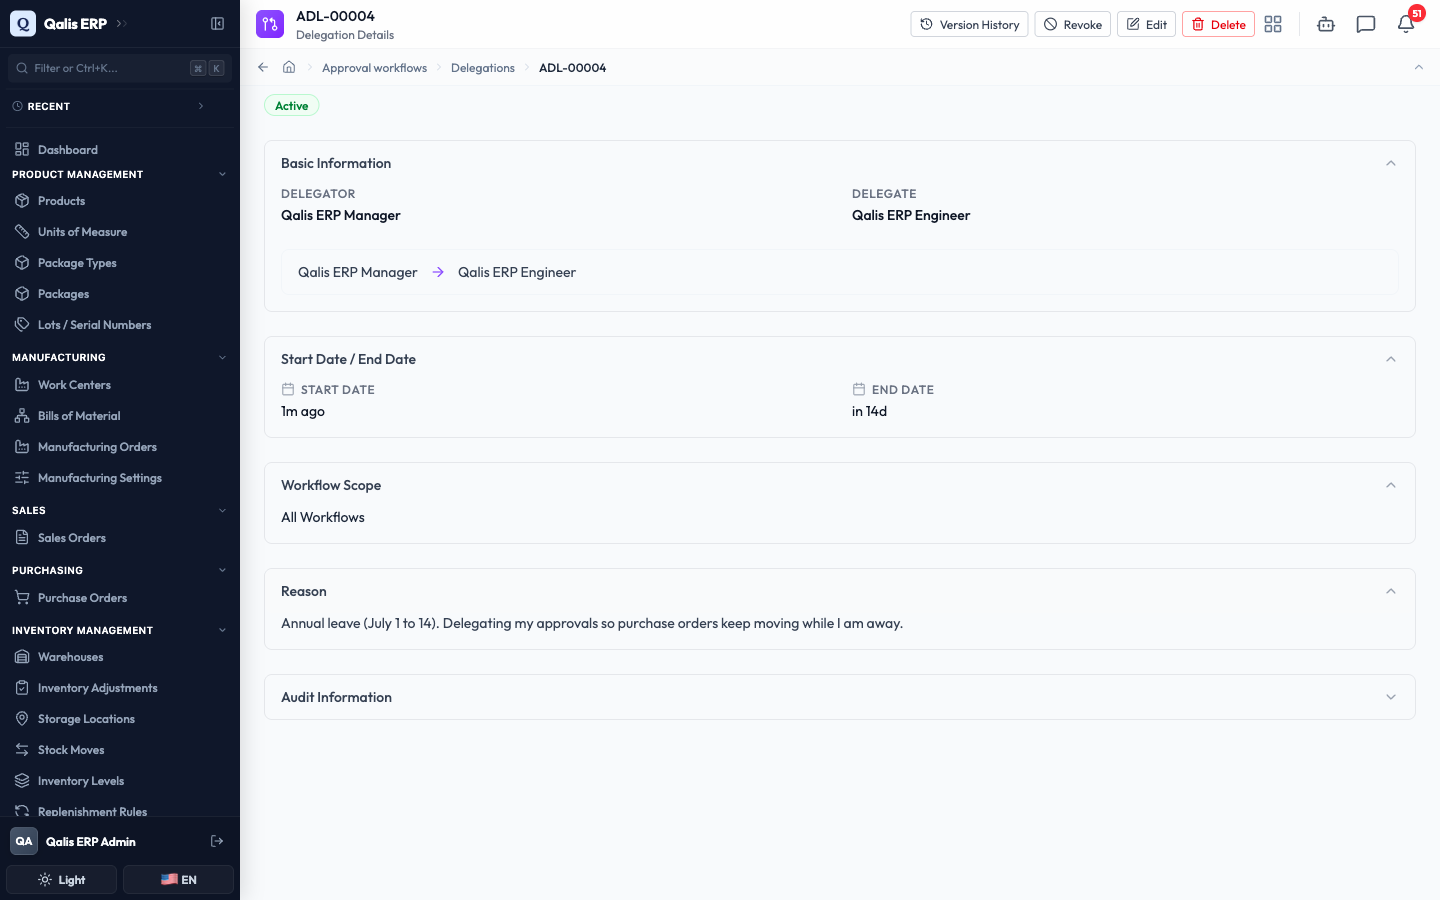
A delegation only works inside its date range. Once the end date passes it becomes Expired on its own, so you do not have to remember to switch it off.
Good to know
- Workflow: the reusable rule you set up that decides who must approve a type of document.
- Approval request (instance): one live or finished review, created automatically when a matching document is submitted.
- Step: one round of approval inside a workflow. A workflow can have several steps that run in order.
- Completion policy: how many of a step's approvers must agree before it passes, for example any one of them or all of them.
- Delegation: a temporary handover that lets one person approve on another's behalf for a set period.