Storage Locations
Map out the exact places inside your warehouses where stock can sit, and organize them into a clear tree of zones, aisles, shelves, and bins.
Last updated on June 30, 2026
Storage Locations is where you describe the real, physical places inside your warehouses where stock can sit: a whole zone, a single shelf, a picking bin, or a special spot like a quarantine corner or a scrap area. The trick that makes it powerful is nesting. A location can live inside another location, so you can build a tree that mirrors your warehouse exactly: a warehouse holds zones, a zone holds aisles, an aisle holds shelves, and a shelf holds bins. Every stock movement, count, and inventory level points at one of these locations, so setting them up well is what lets the rest of the system tell you precisely where everything is. This guide covers the things you do most often: browsing your locations, seeing them as a tree, creating one, reading its details, building a hierarchy with sub-locations, and editing.
Before you start
A storage location always lives inside a warehouse, and you choose that warehouse when you create the location. So you need at least one warehouse set up first. If you do not have one yet, create it in the Warehouses module, then come back here. The warehouse also needs to be open (not closed or out of service) before you can add locations to it.
You reach the module from the left sidebar under Inventory Management, then Storage Locations.
Find and browse your storage locations
Start here to see every location you have and to zero in on the one you need.
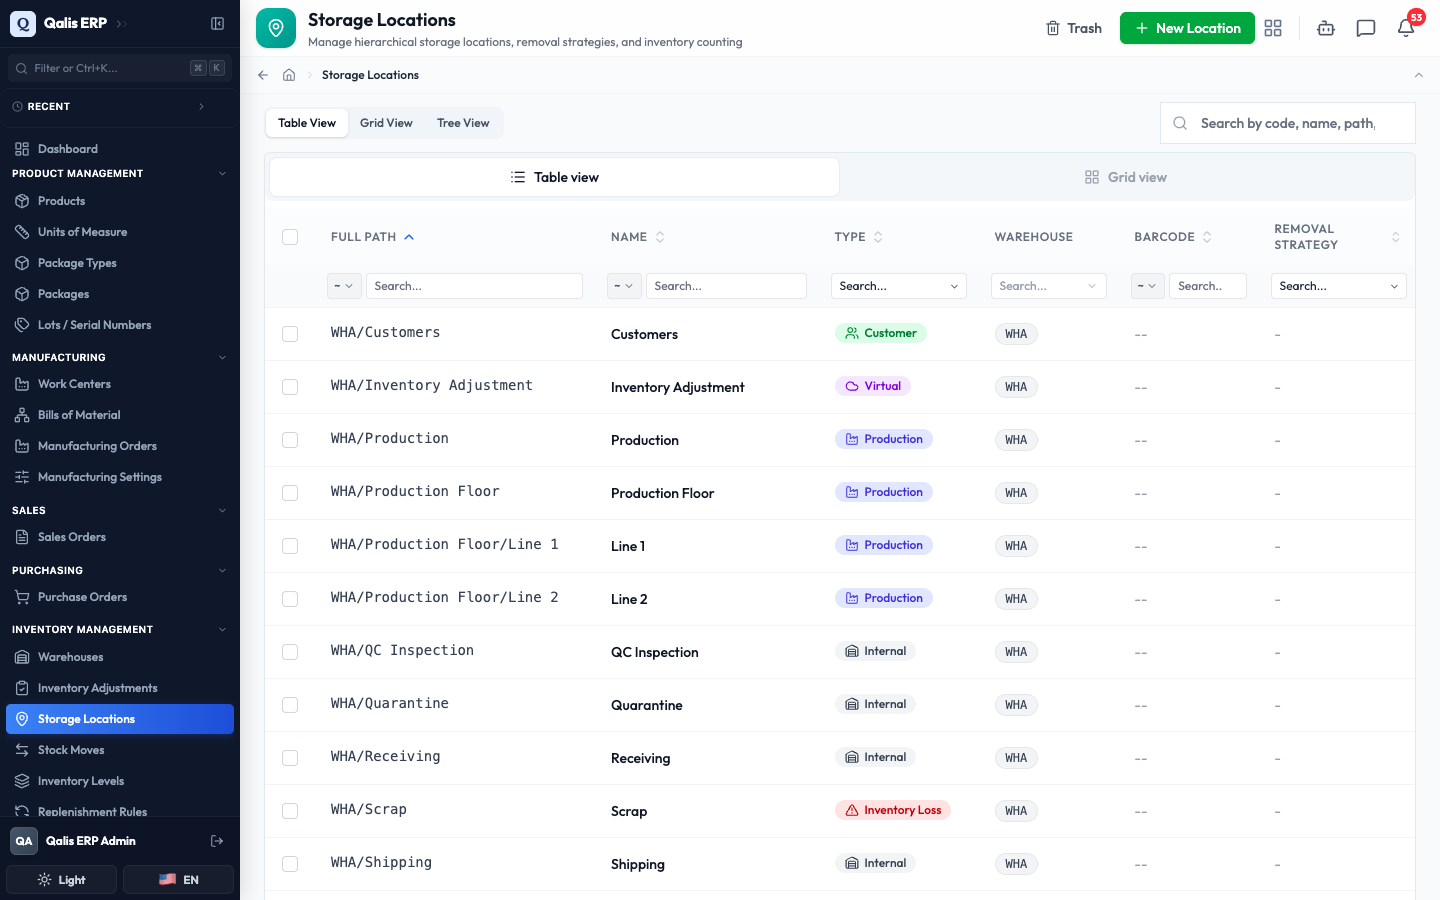
- Open Storage Locations from the sidebar. At the top you will find the page title and three view buttons: Table View, Grid View, and Tree View. Table view is the default. It lists every location with its Full Path, Name, Type, Warehouse, Barcode, and Removal Strategy.
-
Each row tells you where the location sits and what it is for. The Full Path (for example
WHA/Stock/Zone A) reads like a breadcrumb from the warehouse down to the location, the colored Type tag tells you its purpose (Internal, Production, Virtual, and so on), and the Warehouse shows which warehouse owns it. Many cells are clickable, so you can jump straight to a related record. -
To find something fast, type in the Search by code, name, path, or barcode box on the top right. The list filters as you type, so there is no need to press Enter. A banner appears showing your active search as a chip with an X to remove it, plus a Clear all button.
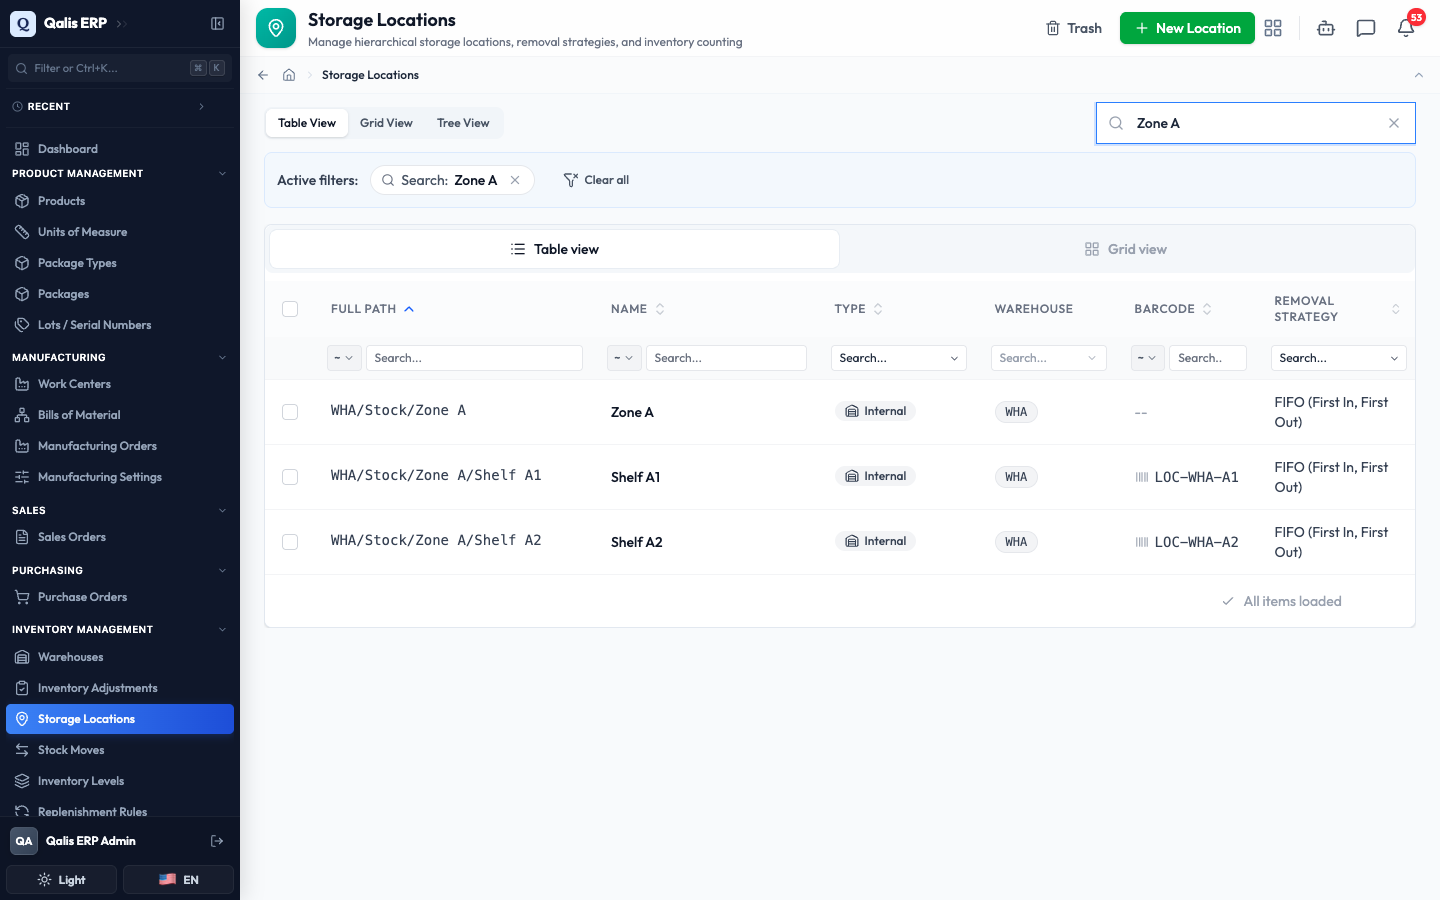
Each column header lets you sort (click it) and filter (use the small box just below it). You can also switch to Grid View for a card layout if you prefer cards to rows.
See your locations as a tree
This is the clearest way to understand how your locations nest inside one another.
- Click Tree View. Your locations are grouped by warehouse. Each warehouse shows a small number telling you how many locations it holds. Open a warehouse to reveal its top-level locations, then open a location to reveal the ones nested inside it.
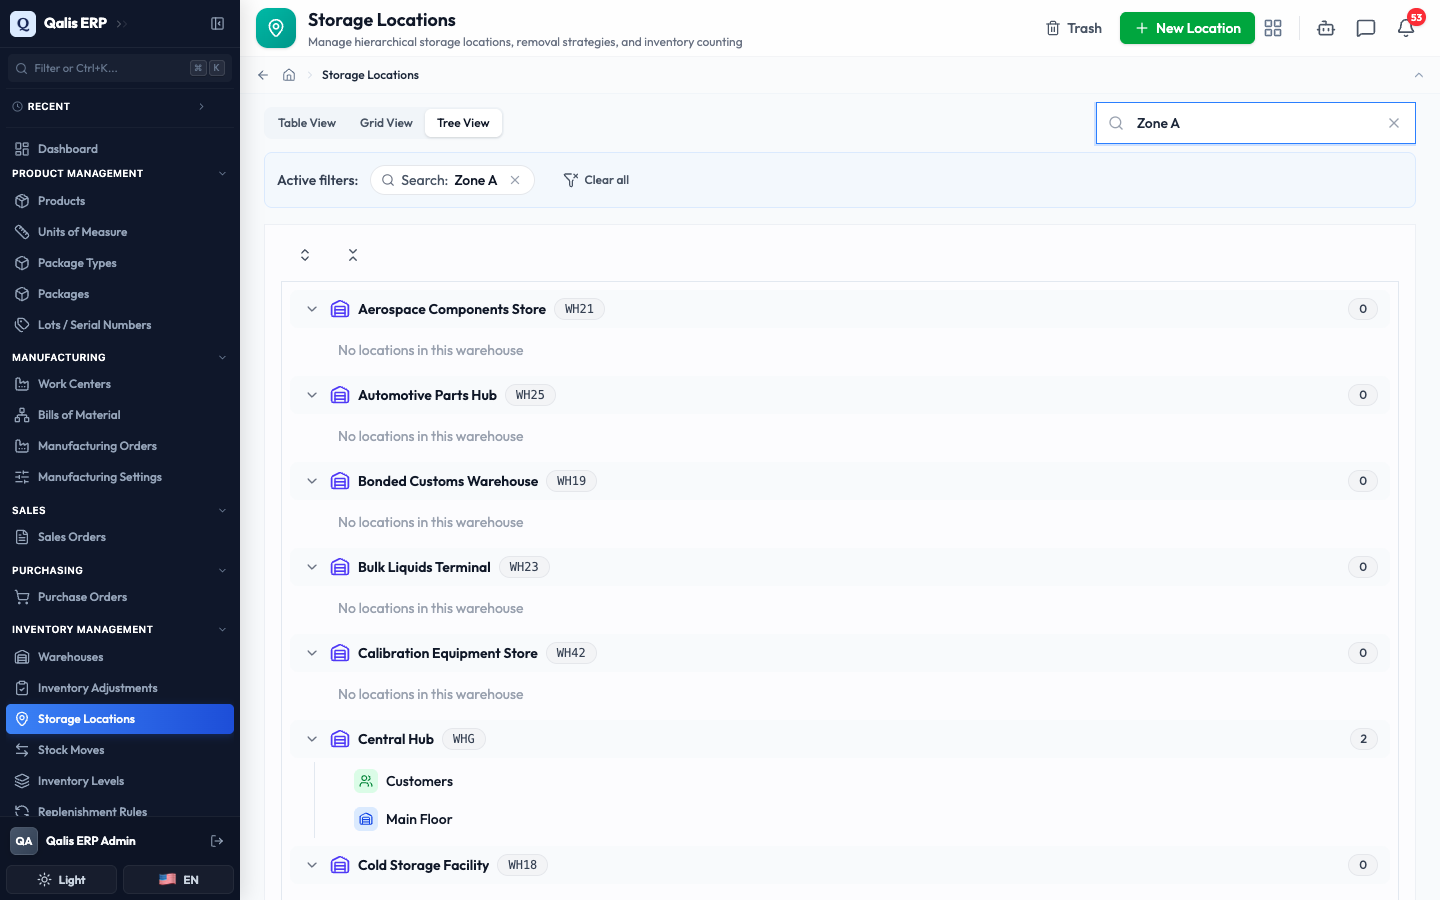
- Use Expand All and Collapse All (the two buttons above the tree) to open or close everything at once. Click a location's name to open its detail page.
The tree mirrors your real warehouse layout. If you ever lose track of where a shelf or bin lives, this view shows you its full path at a glance.
Create a new storage location
This is the walkthrough you will use whenever a new shelf, bin, or zone needs a home in the system.
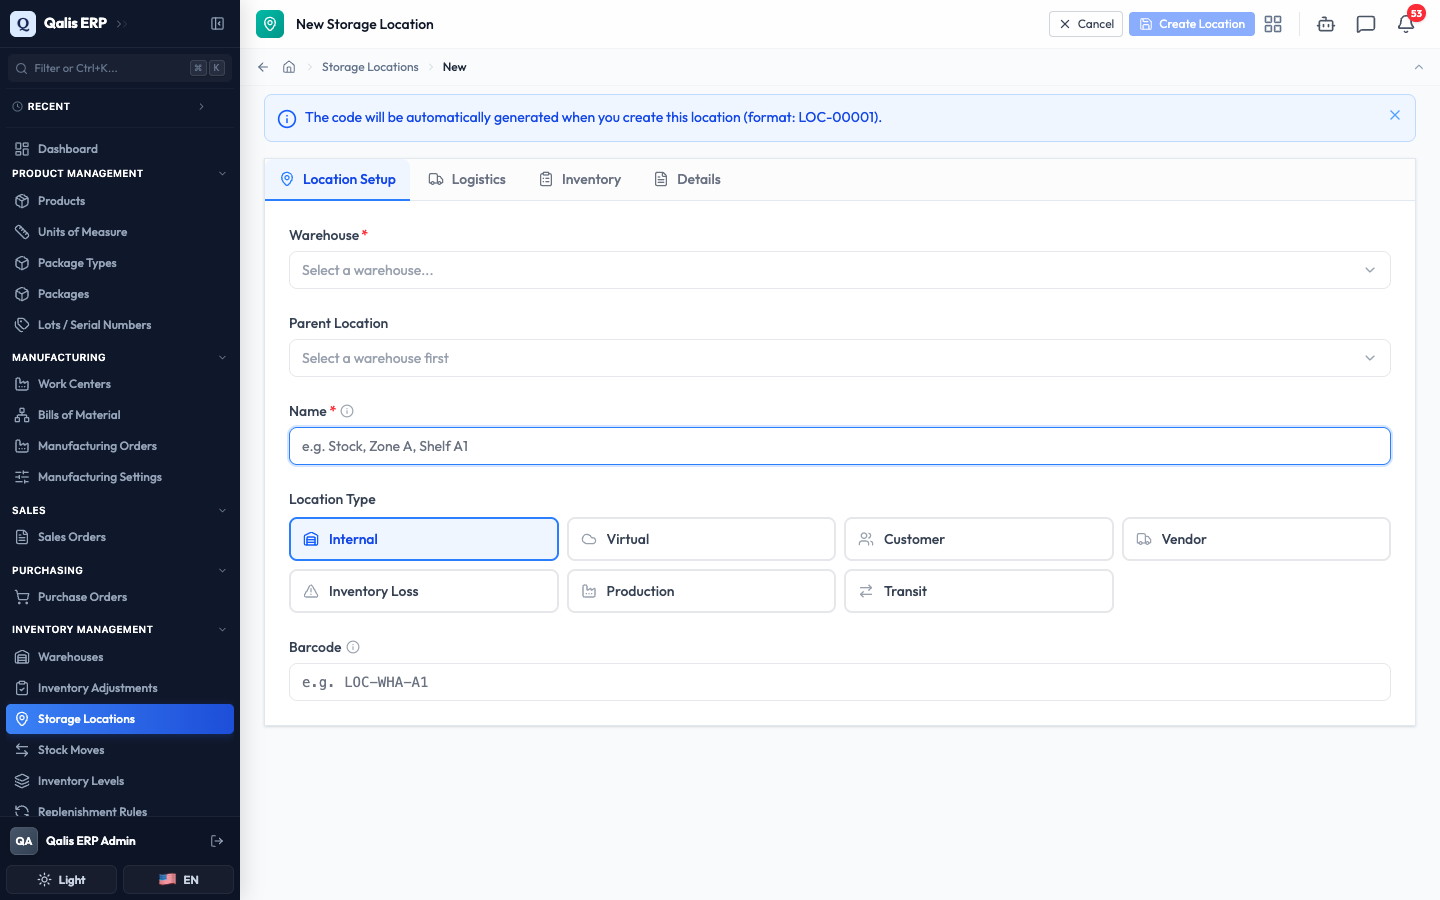
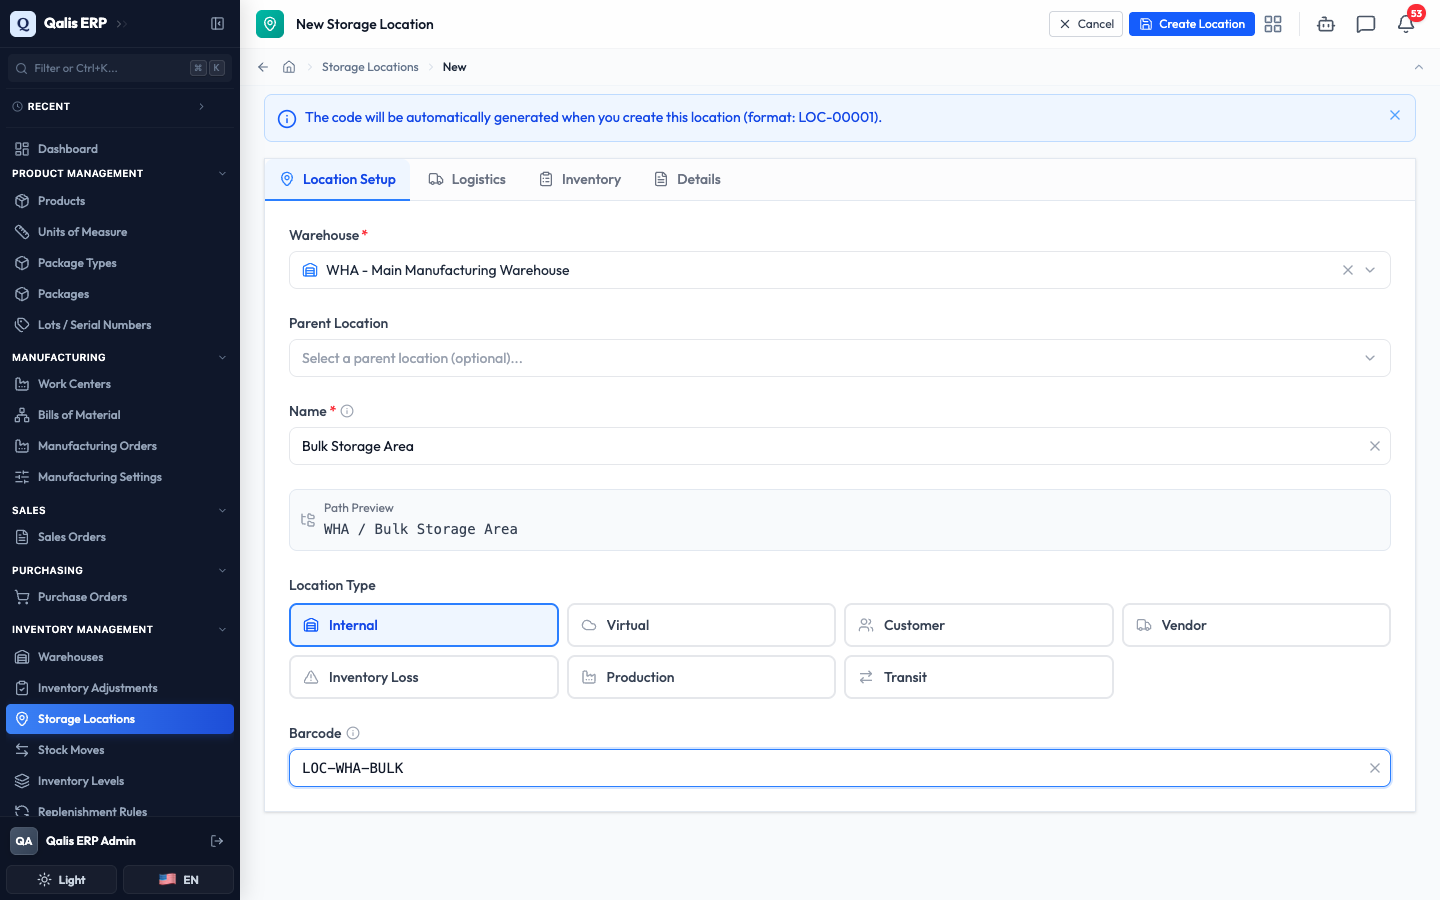
- Click the green New Location button at the top right of the list. The form opens on the Location Setup tab. A note reminds you that the location's code is generated for you, so there is nothing to type there.
-
Choose the Warehouse (required). Click the field, search by name or code, and pick the warehouse this location belongs to.
-
Optionally choose a Parent Location. Leave it empty for a top-level location, or pick another location to nest this one inside it. This list only offers locations in the same warehouse, and it stays locked until you have chosen a warehouse.
-
Enter the Name (required), for example
Bulk Storage Area. As you fill in the form, the Path Preview updates live to show exactly where the location will sit.
-
Pick a Location Type. Internal (ordinary storage) is selected by default. The seven types are explained at the end of this guide. You can also add a Barcode for scanning if you use one.
-
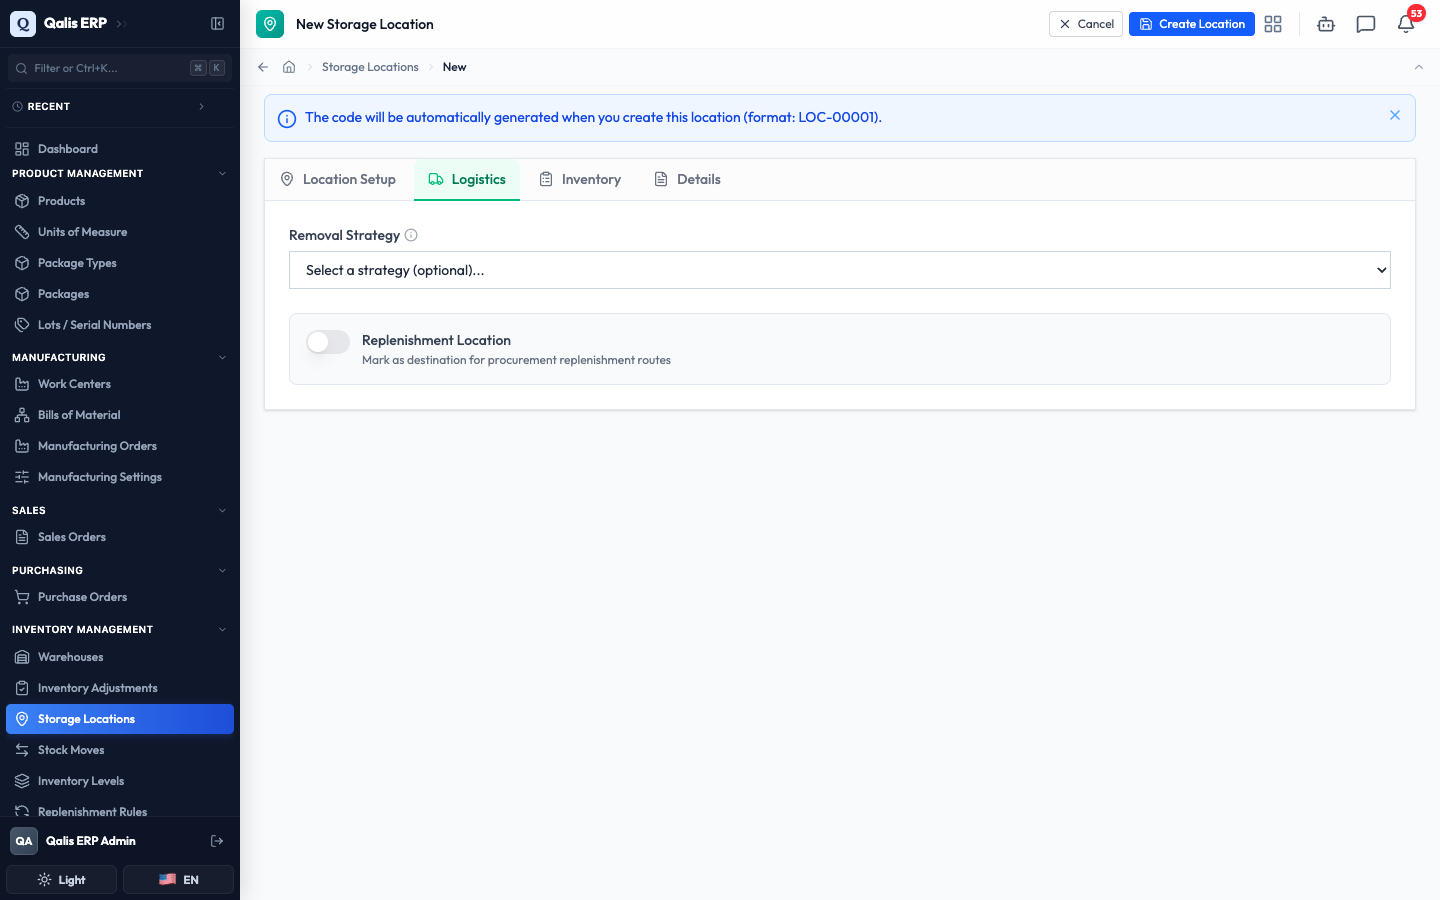
The other tabs are optional. Logistics lets you set a Removal Strategy (the rule for which stock to pick first) and mark the location as a Replenishment Location. Inventory lets you schedule how often the location should be counted, and Details holds Notes and the Active switch.
- Click Create Location. Qualis saves the location and takes you straight to its detail page, where its code (here
LOC-00095) is now assigned.
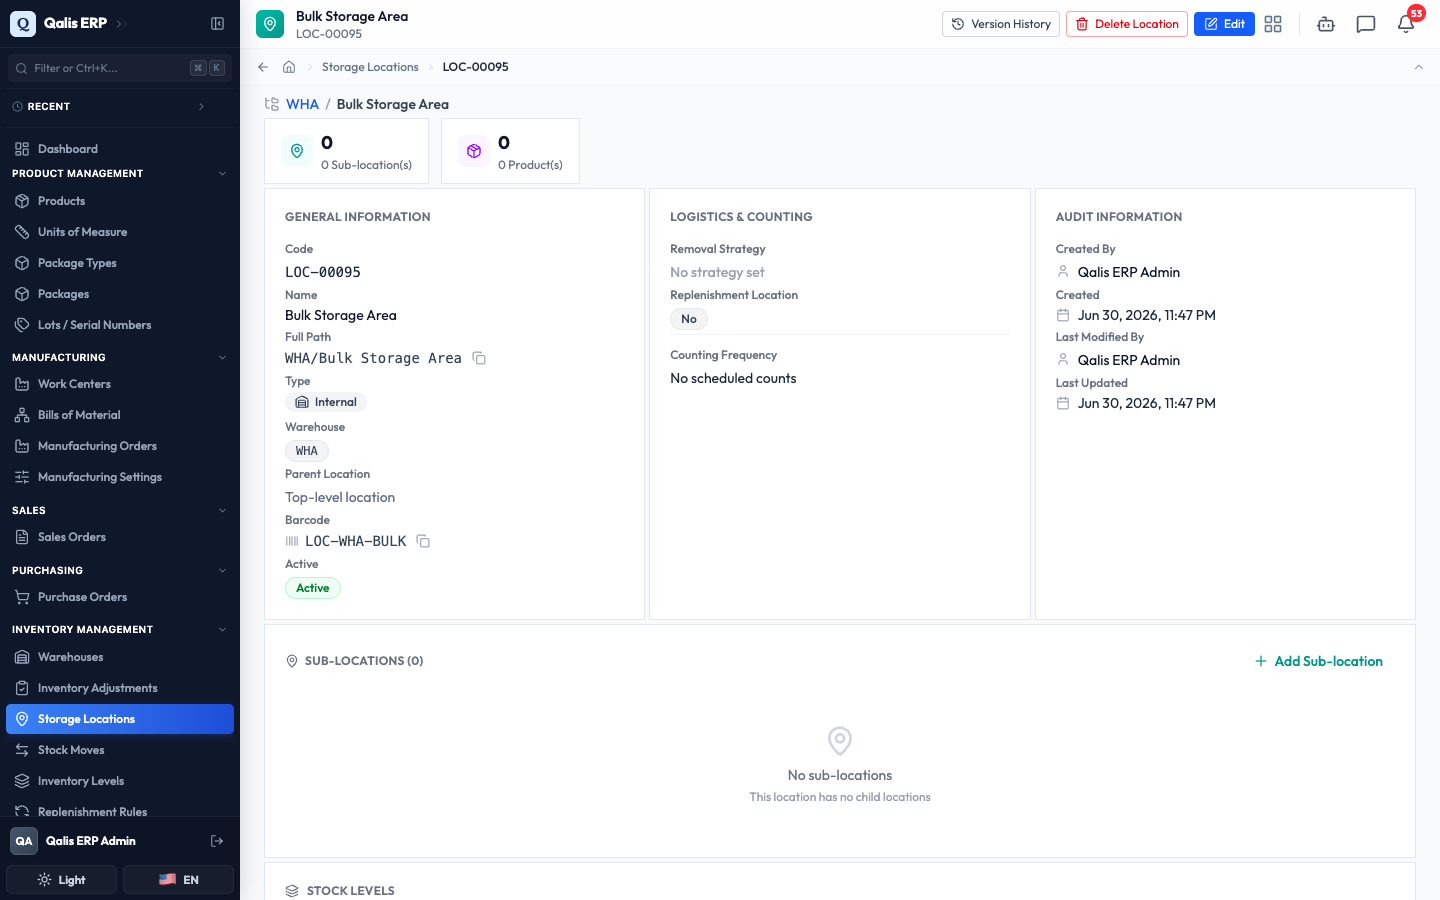
The location's Code and Full Path are both generated for you. You never type them, and the full path keeps itself up to date if you rename anything above it.
Open and read a location's details
The detail page gathers everything about one location in a single place.
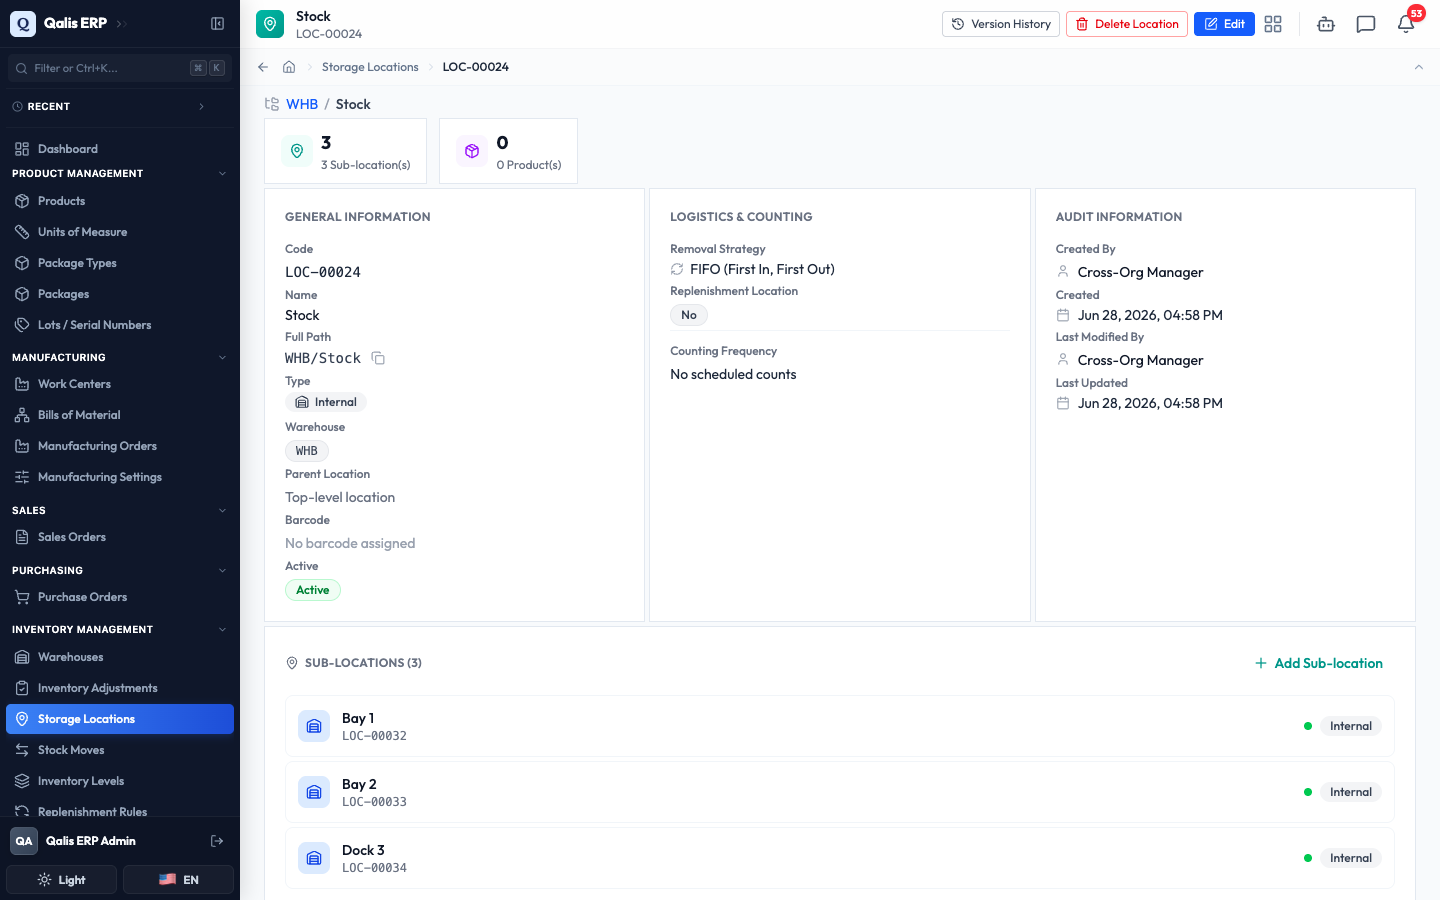
- Open a location by clicking its Code or Name in the list, or by clicking it in the tree. At the very top you will see its name and code, a hierarchy line (for example
WHB / Stock), and three buttons: Version History, Delete Location, and Edit. Just below, two counters show how many Sub-locations and Products it holds.
-
Three cards break down the details. General Information shows the code, name, full path (with a copy button), type, warehouse, parent, barcode, and whether it is active. Logistics & Counting shows the removal strategy, replenishment setting, and counting schedule. Audit Information tells you who created and last changed the location, and when.
-
Scroll down for the Sub-locations card, which lists the locations nested directly inside this one, and the Stock Levels section, which shows what stock is sitting here. A Comments panel at the bottom lets you and your colleagues leave notes about the location.
Build a hierarchy with sub-locations
Nesting locations is how you turn a flat list into a map of your warehouse. The quickest way is to add a child straight from its parent.
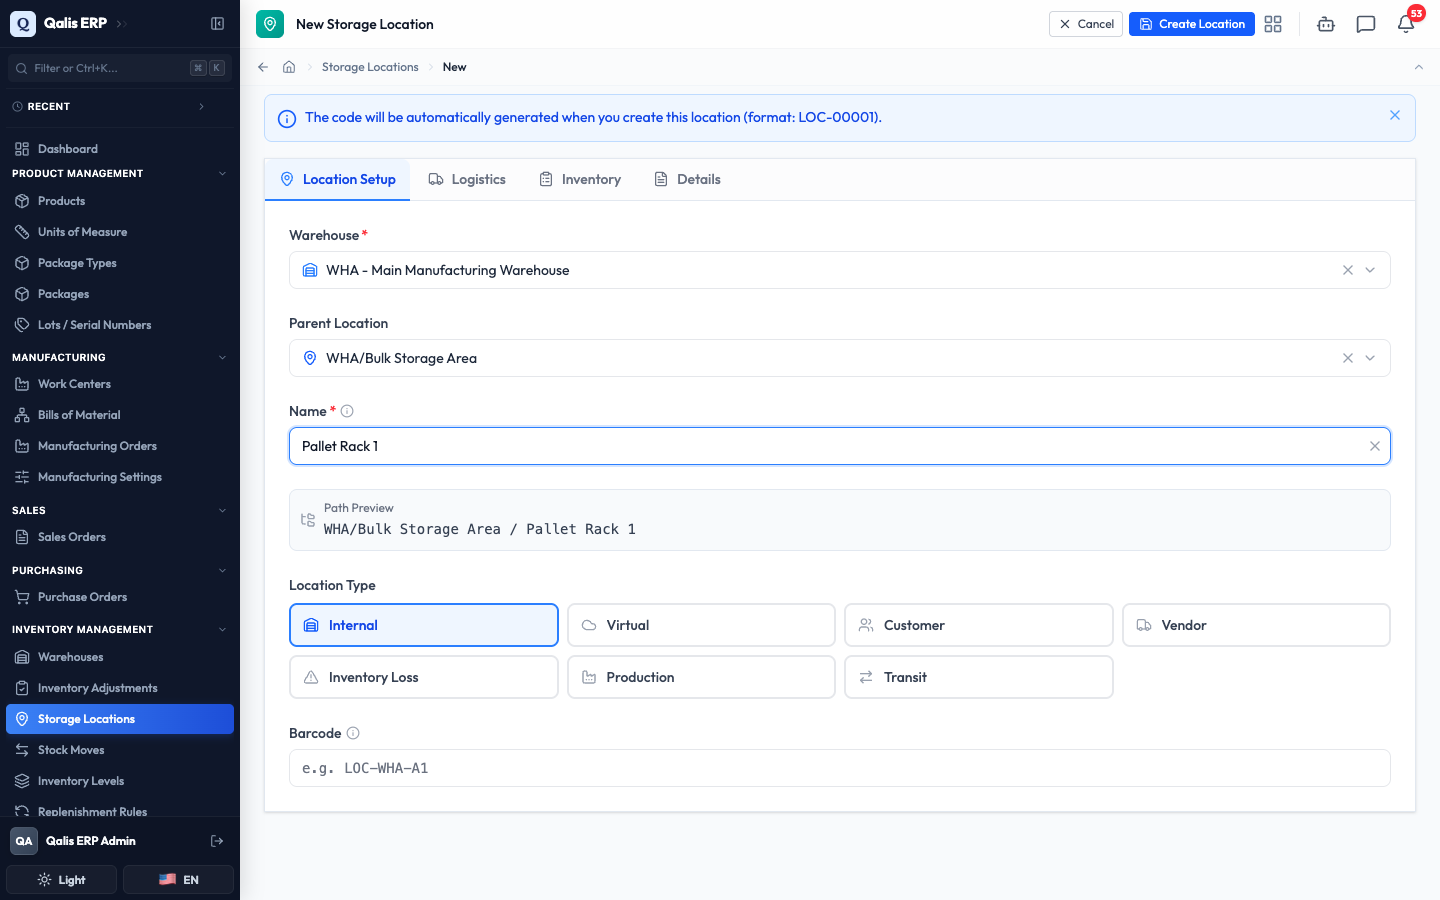
- On any location's detail page, click Add Sub-location (top right of the Sub-locations card). The new location form opens with the Warehouse and Parent Location already filled in for you.
-
Enter the Name for the child, for example
Pallet Rack 1. The Path Preview shows the full nested path, such asWHA/Bulk Storage Area / Pallet Rack 1. Pick a type and click Create Location. -
The new location is saved inside its parent. Open the parent again and you will see the child listed under Sub-locations, with the counter at the top now updated.
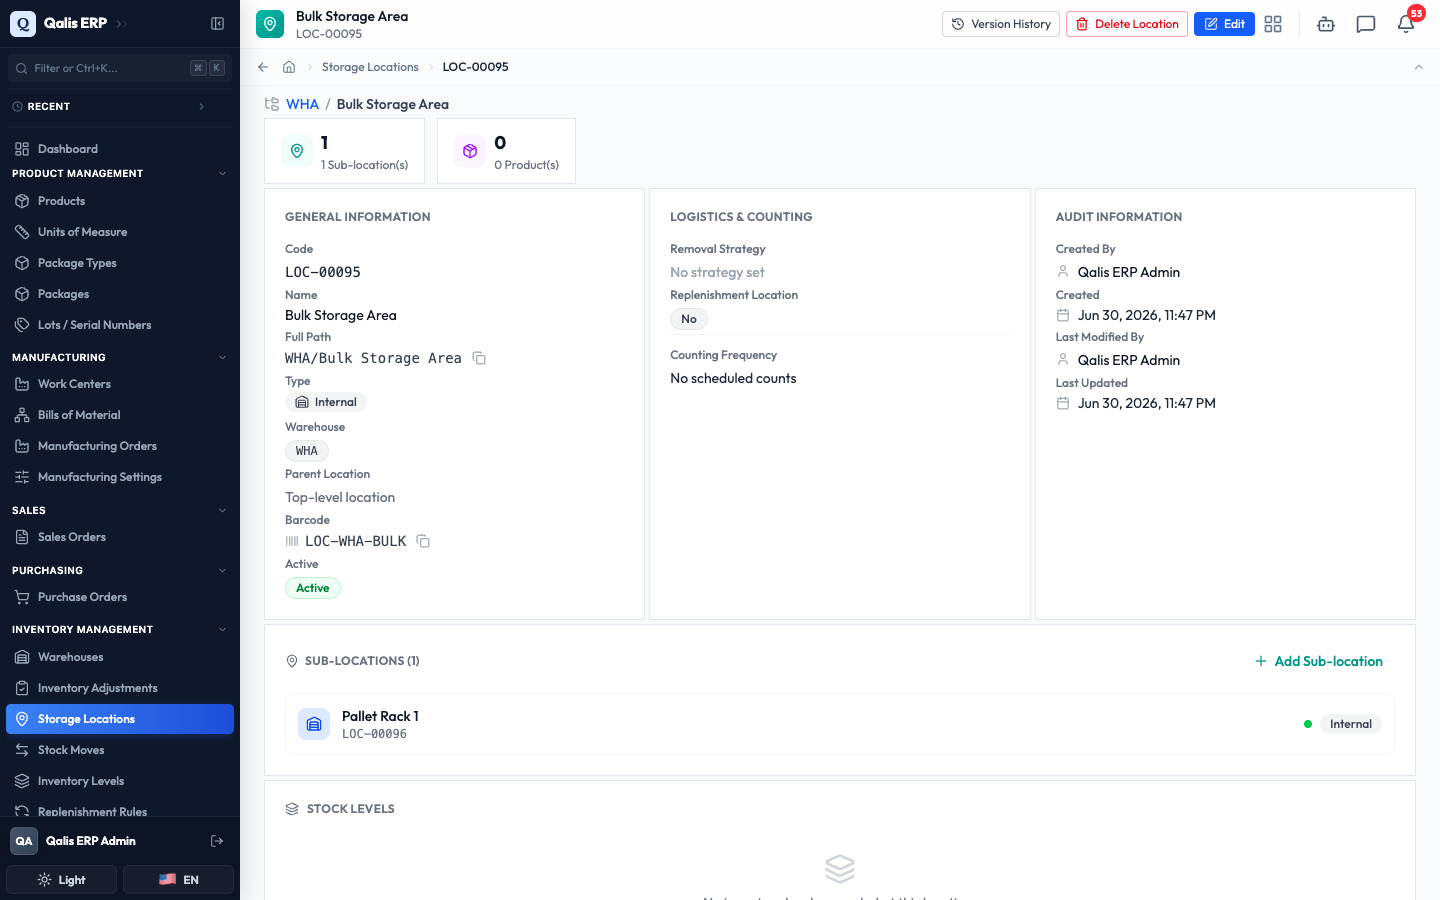
You can nest locations up to ten levels deep. A location and its parent always have to be in the same warehouse, and the system will not let you create a loop (a location cannot end up inside itself).
Edit a location
Open a location whenever its details change, for example to set how stock is picked from it or to retire it.
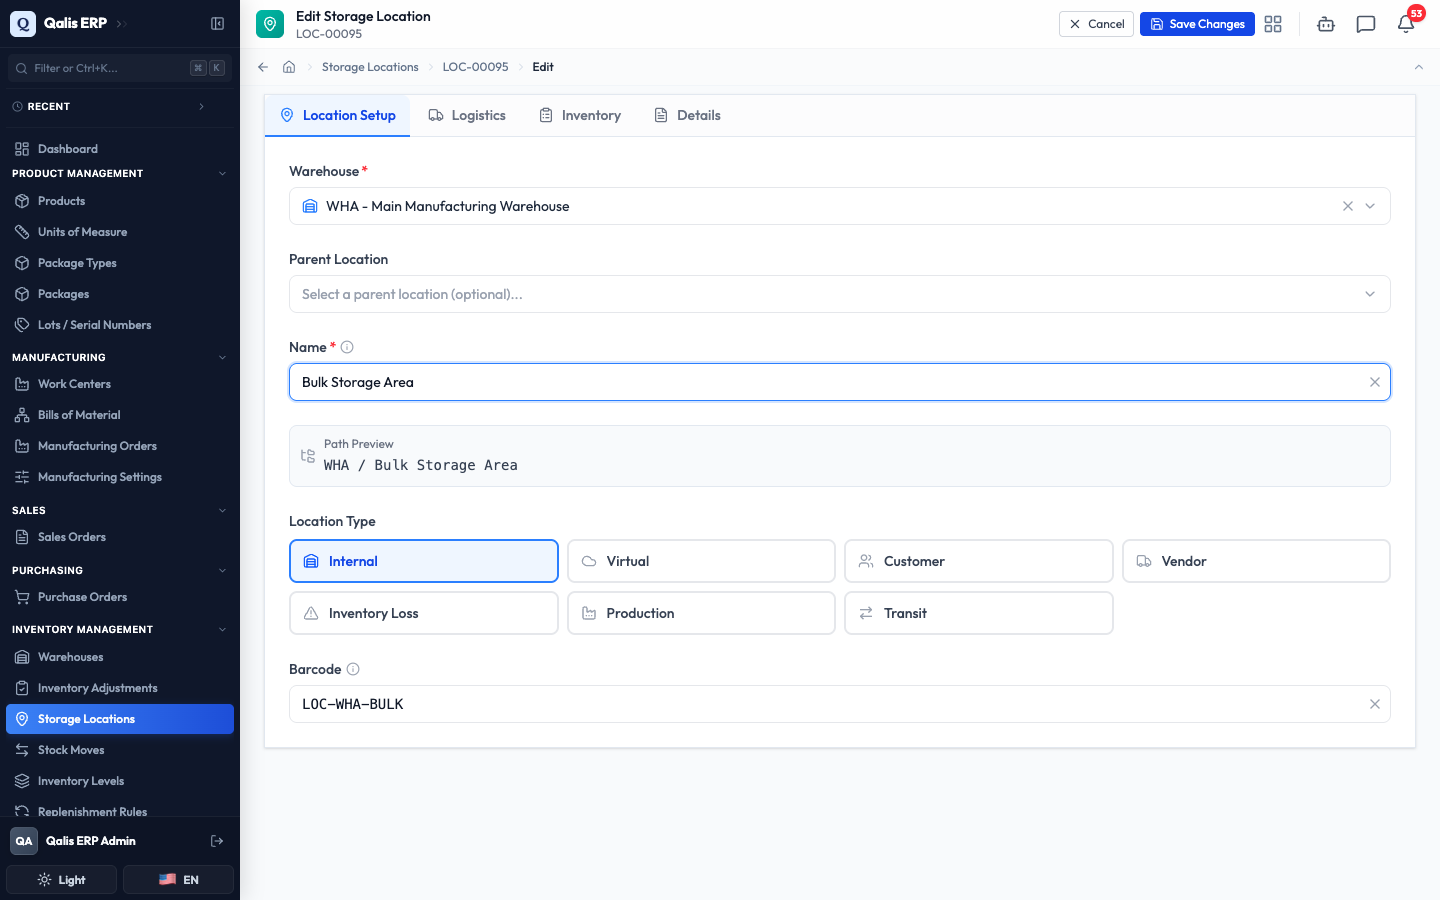
- Open the location and click Edit. The form opens with everything already filled in, across the same four tabs you saw when creating it.
-
Make your change. In this example, the Logistics tab is used to set the Removal Strategy to FIFO (First In, First Out). When you are done, click Save Changes.
-
Qualis saves your edits and returns you to the detail page, where the change is shown and the Last Updated time is refreshed.
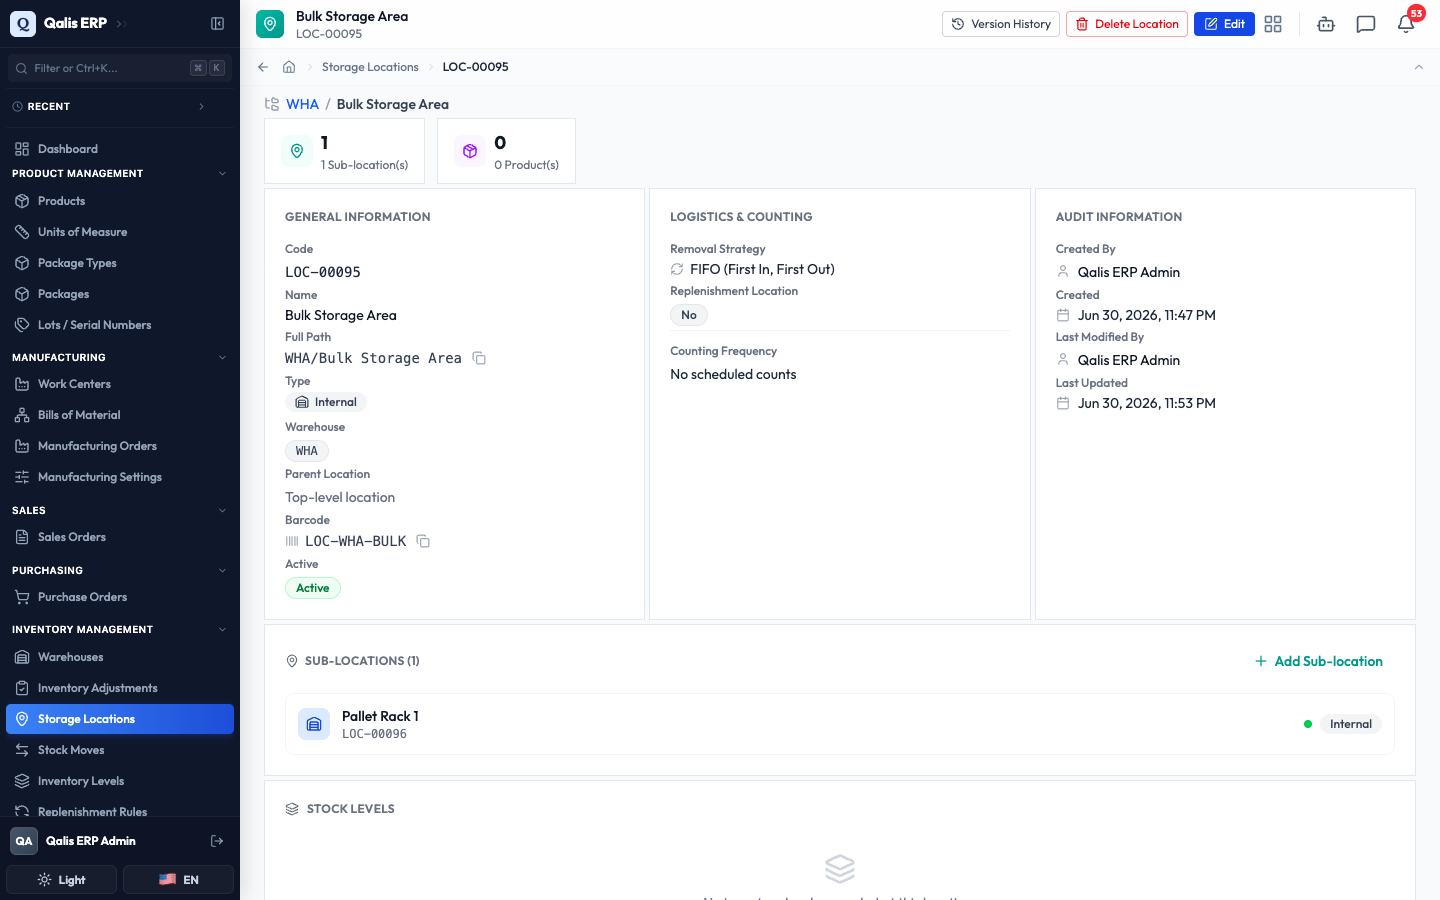
Renaming a location (or any location above it) automatically updates the full path of everything below it, so the tree always stays correct. You cannot move a location to a different warehouse once it has sub-locations of its own.
Good to know
A few terms and rules you will meet on these screens, in plain words:
- Location type: what a location is used for. Internal is ordinary warehouse storage. Production is a spot on the factory floor or for work in progress. Virtual is a non-physical location used for stock bookkeeping. Customer is stock held at a customer's site, and Vendor is vendor-managed stock at a supplier. Inventory Loss is for write-offs and scrap, and Transit is for goods moving between warehouses.
- Removal strategy: the rule for which stock to pick first from a location. FIFO takes the oldest stock first, LIFO the newest first, FEFO the stock closest to expiry first. Closest Location and Least Packages optimize for distance or for emptying part-used spots.
- Full path: the chain of names from the warehouse down to the location, like
WHA/Stock/Zone A. It is built for you and never typed. - System locations: a few special locations the system manages on its own (for example the Inventory Adjustment location). They cannot be edited or deleted.
- Active or inactive: an inactive location cannot be used in new operations. When you want to retire a spot, turn it off rather than deleting it, so its history stays intact.
- Deleting: deleting a location moves it to the Trash, where you can restore it later. You cannot delete a location that still has sub-locations, that holds stock, or that is referenced by other records (such as a purchase order or a work center). Reassign or clear those first, and the location can then be deleted.