Organizations
How organizations isolate your data, members, and installed modules, plus how to create one, switch between them, and set them up.
Last updated on June 26, 2026
An organization is the boundary around everything you do in Qualis. Your records, your members, your teams, and your installed modules all live inside one organization and never leak into another. This guide shows you how to create an organization, tell which one you are working in, switch between several, and tune its branding and settings.
What an organization contains
Think of an organization as your own private workspace. Inside it you find:
- Data. Every record you create (products, orders, inspections, and so on) belongs to the organization you made it in.
- Members. People you invite belong to the organization and are granted access through permissions and teams.
- Modules. The set of apps enabled from the marketplace is per organization, so two organizations can run completely different setups.
- Settings. Base currency, branding, and the look and feel of the app are all configured per organization.
If you only ever belong to one organization, you can mostly forget this boundary exists. Everything you see and do is simply inside that one workspace.
Create your organization
This is how a brand new workspace comes to life. You only do it once, when you first sign up.
- Go to the sign-in page and click Create your organization at the bottom, or open the /register page directly. You do not need an account yet, this page is open to everyone.
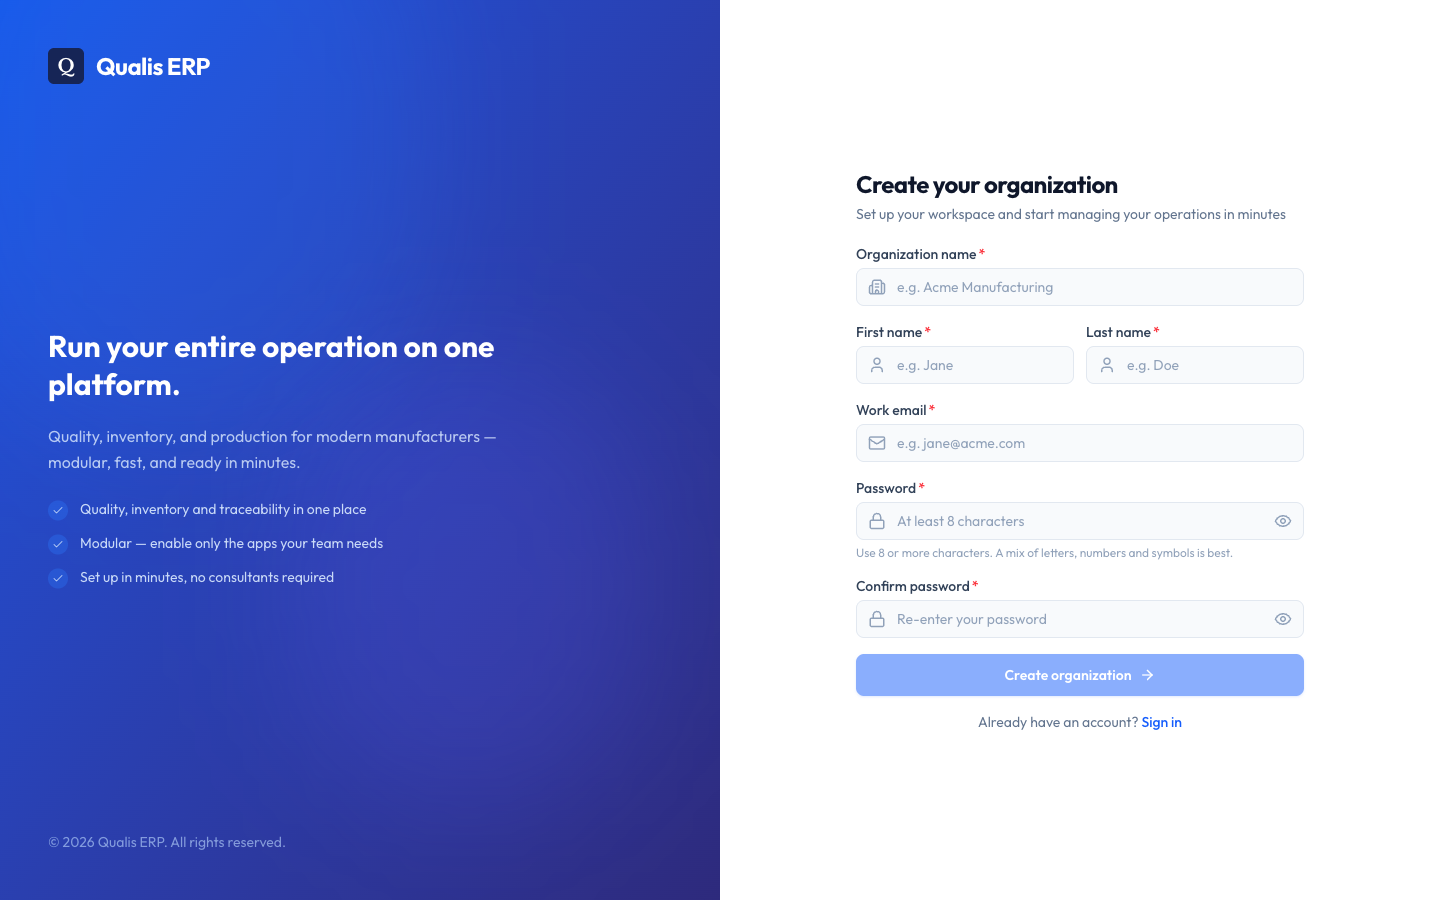
- Fill in the form on the right:
- Organization name, the name of your company or workspace (for example "Acme Manufacturing").
- First name and Last name, so we know who you are.
- Work email, the address you will sign in with.
- Password, at least 8 characters, then retype it in Confirm password.
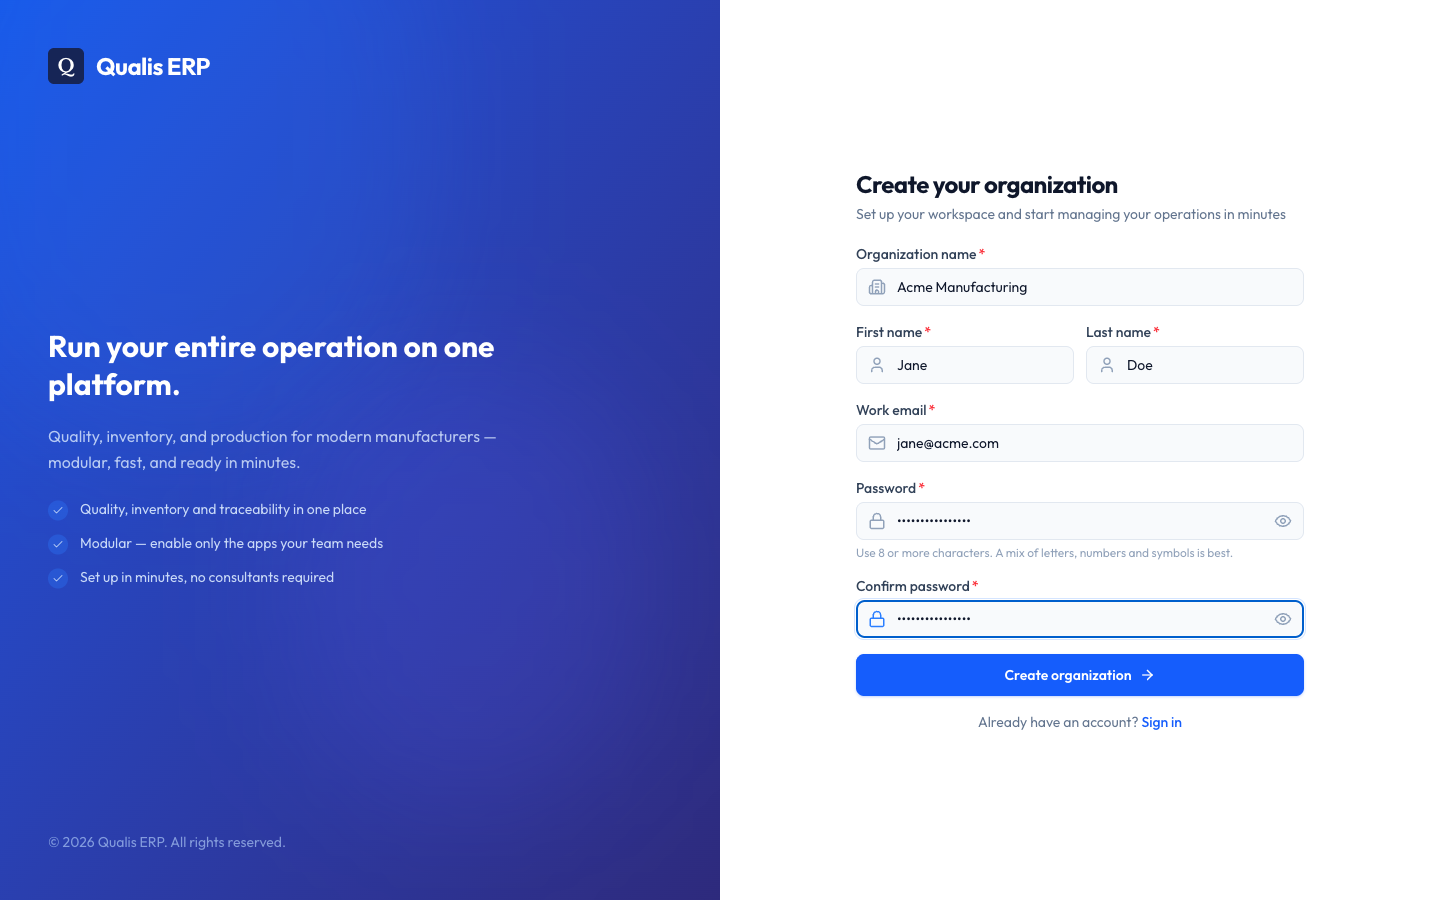
- Click Create organization. The button stays greyed out until every required field is valid, so if it will not turn blue, check for a field marked in red.
What happens next. We send a verification link to your work email. Open that email and click the link to activate your organization. Once verified, you are signed in automatically and taken straight to your new dashboard, ready to use. If the email does not arrive, use the Resend email button on the confirmation screen.
Your new organization starts with a sensible default setup and some starter data, so the app is usable from the very first sign-in. You can invite the rest of your team and install more modules whenever you are ready.
See which organization you are working in
Before you create or change anything, it is worth a quick glance to confirm you are in the right place.
If you belong to more than one organization, the top bar shows the active one, with a small building icon and the organization's name. In the screenshot below, the workspace is Qualis ERP.
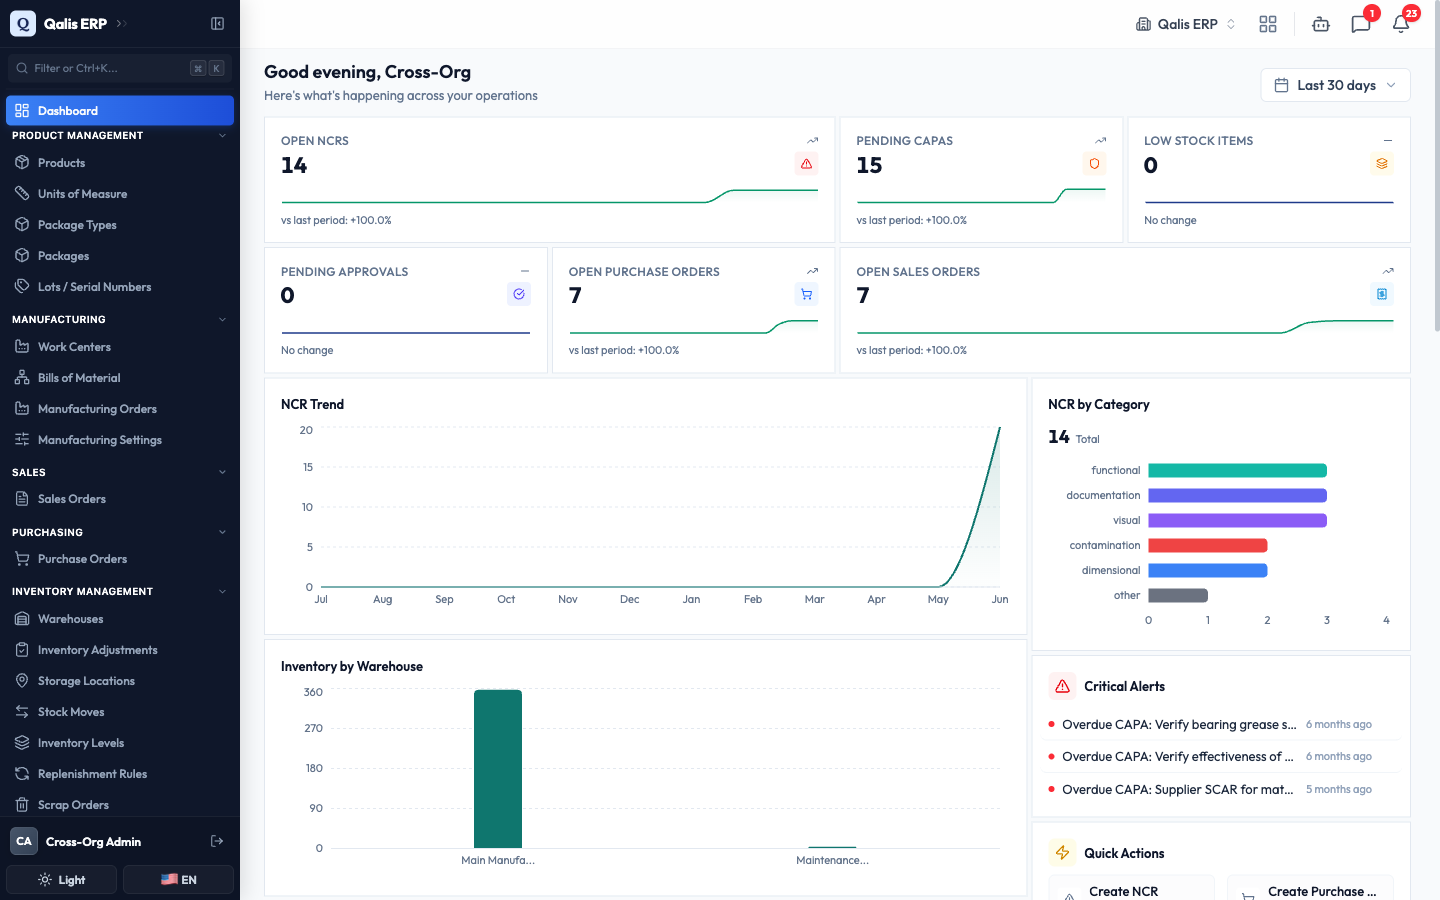
If you belong to just one organization, this indicator does not appear, because there is nothing to choose between. Everything you see is simply that one organization.
Switch between organizations
If you work in more than one organization, you can move between them at any time. Switching changes everything below the top bar to match the organization you move into.
The first time you sign in to an account that belongs to several organizations, you are asked to choose one before the dashboard opens.
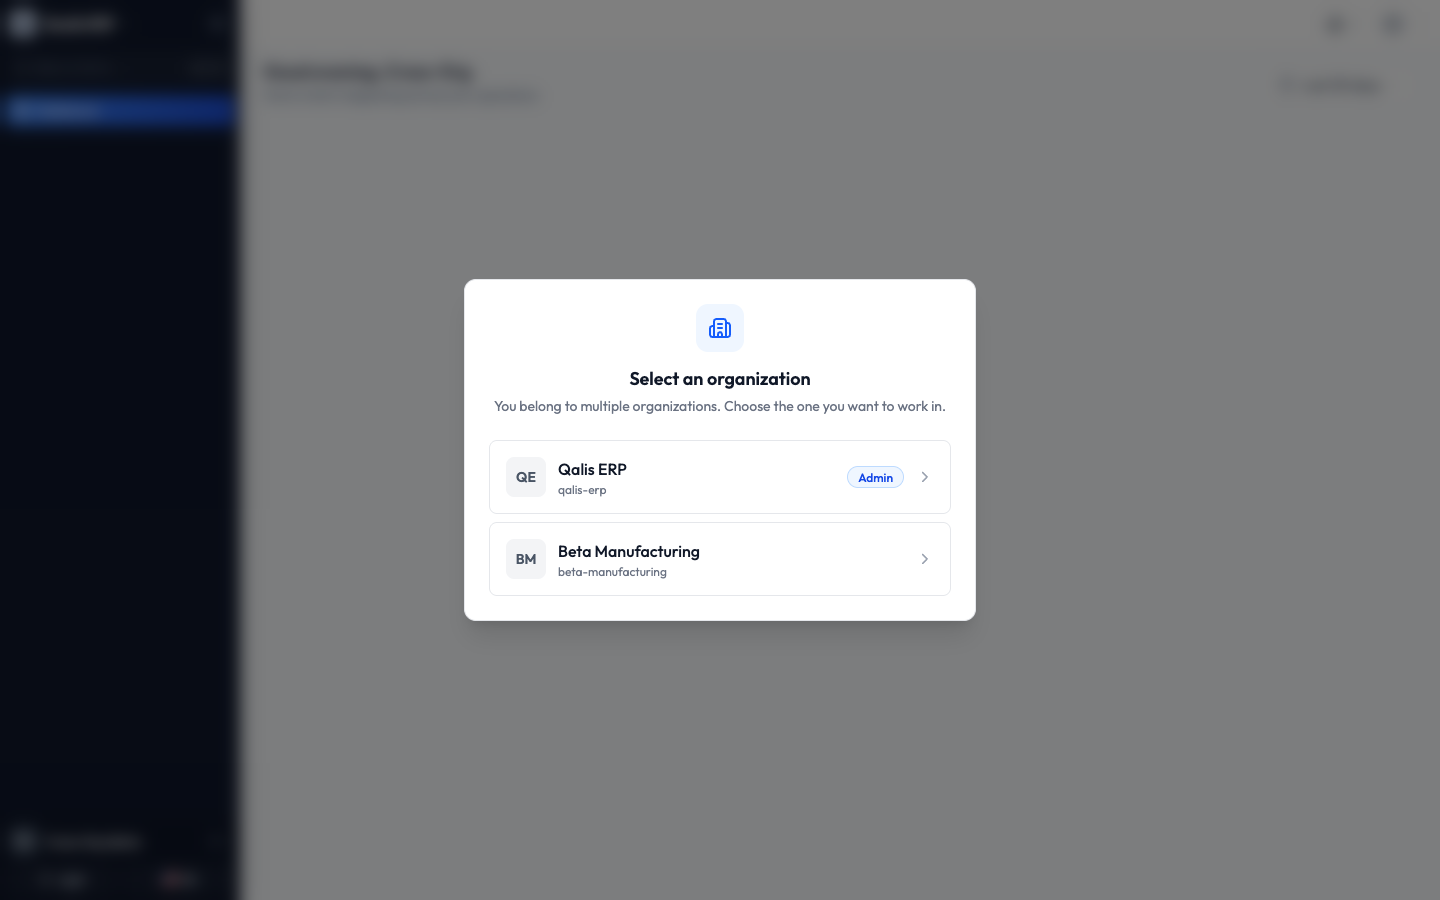
Pick the workspace you want to start in. A blue Admin badge marks any organization where you can do everything.
To switch later, click the organization name in the top bar. A short menu lists every organization you belong to. A tick marks the one you are in now, and the Admin badge shows where you are an administrator.
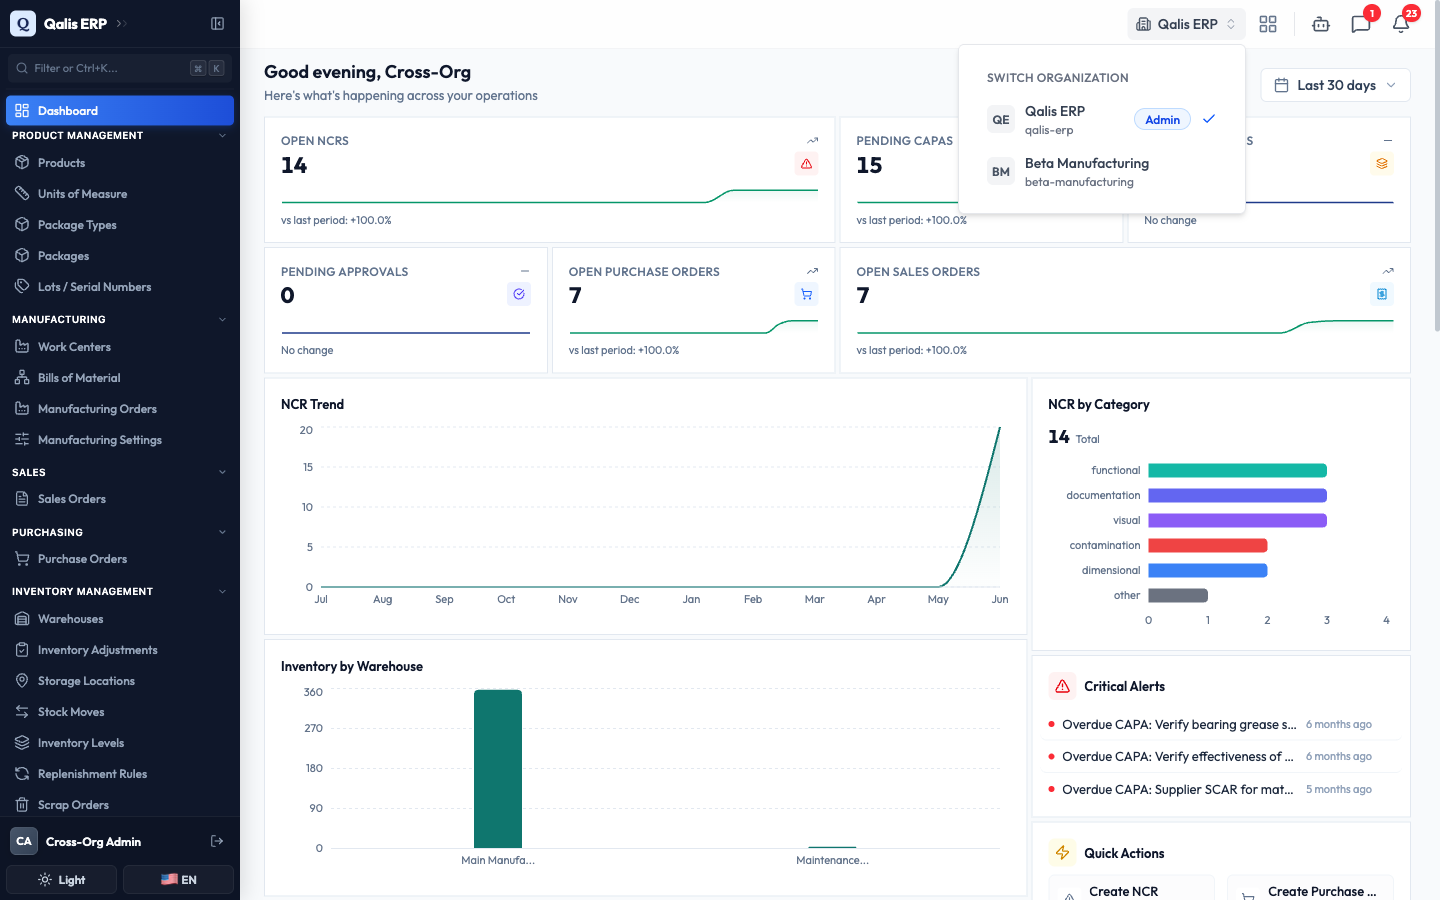
Click the organization you want to move into. The whole app reloads into it: the branding, the sidebar menu, the data, and the modules you can see all change to match. In the screenshot below, switching to Beta Manufacturing shows a completely different, shorter sidebar, because that organization has a different set of modules installed.
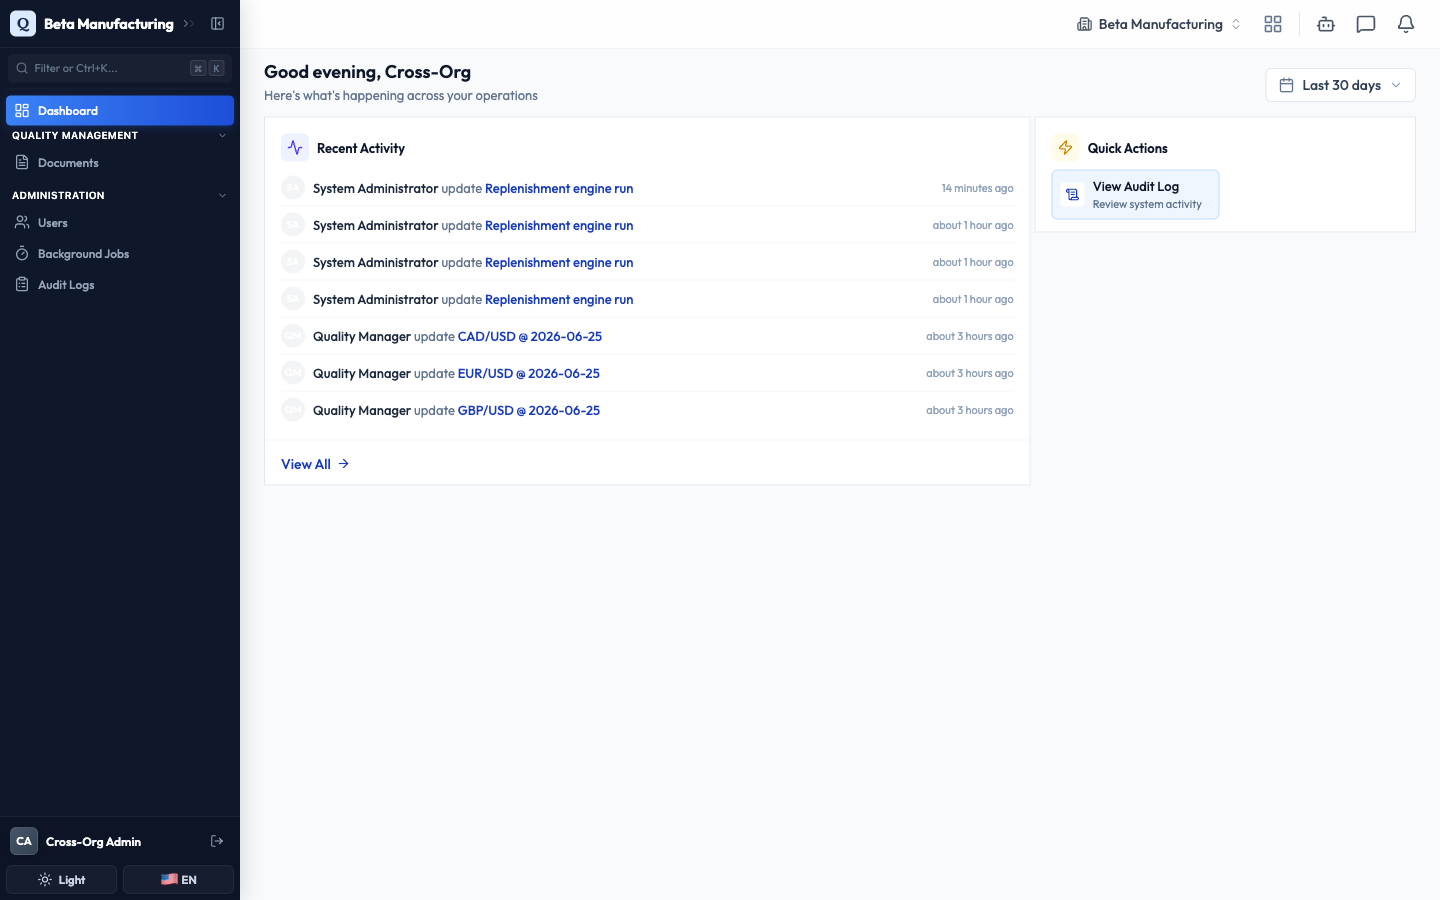
Switching never mixes your data. You are simply looking at a different workspace. Switch back the same way, by clicking the name in the top bar and choosing the other organization.
Customize your organization
You can give your organization its own currency, name, and look. These settings apply to everyone in the organization.
- Open the sidebar, scroll to the Administration group, and click Organization Settings. You can also find it by pressing Ctrl+K (or Cmd+K) and searching for "Organization Settings".
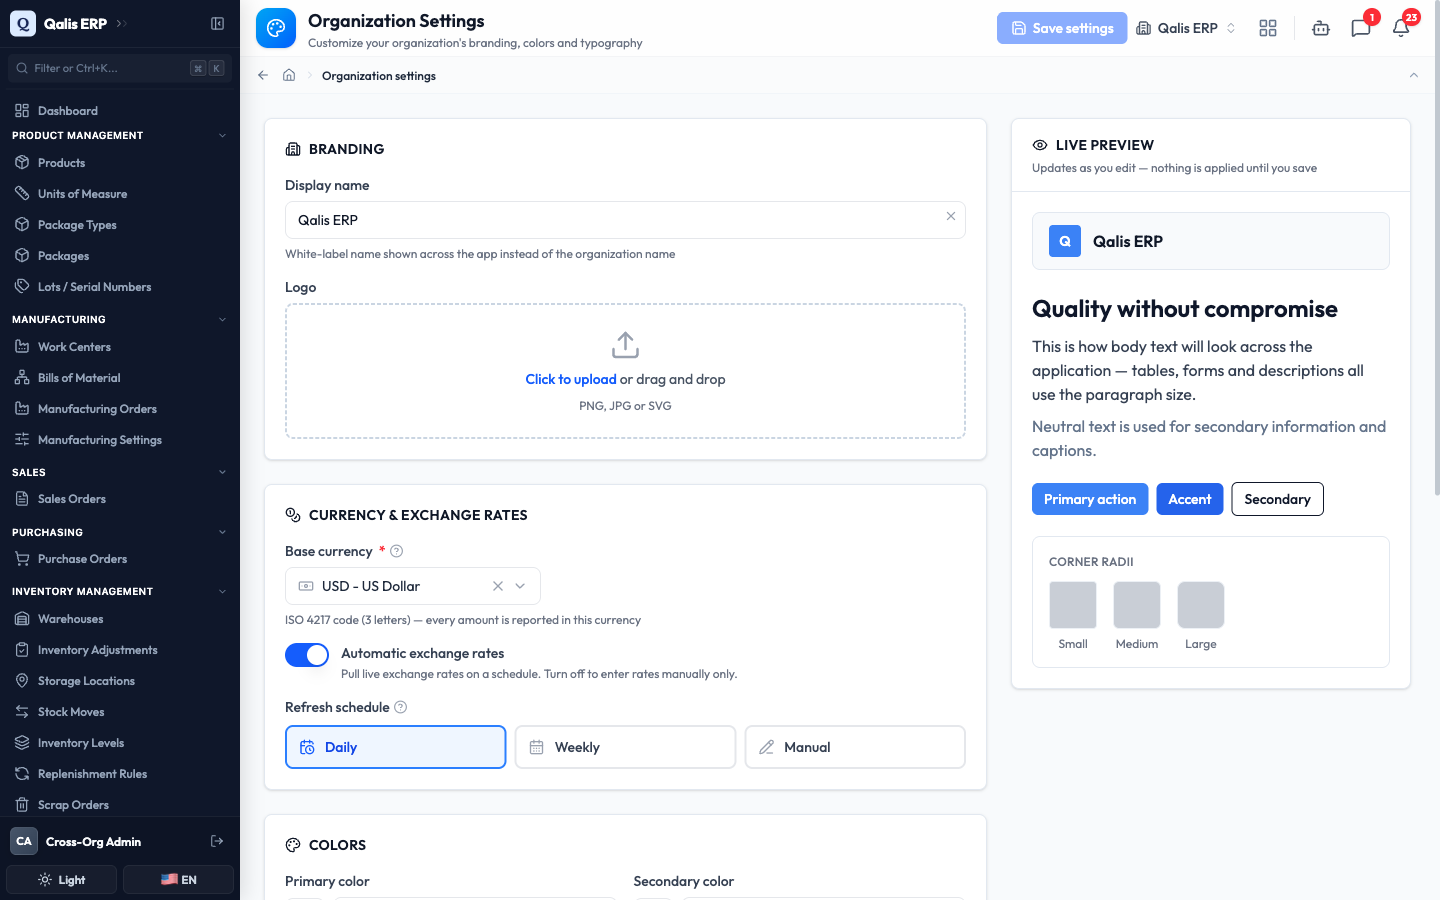
- Set up the parts you care about:
- Branding. Set a Display name to show a white-label name across the app instead of the organization name, and upload a Logo (drag and drop a PNG, JPG, or SVG).
- Currency & exchange rates. Choose your Base currency, the single currency every amount is reported in. Turn Automatic exchange rates on to pull live rates on a schedule, and pick how often with Refresh schedule (Daily, Weekly, or Manual).
- Colors, Typography, and Corners. Tune the primary, secondary, accent, and neutral colors, the font and text sizes, and how rounded the corners are.
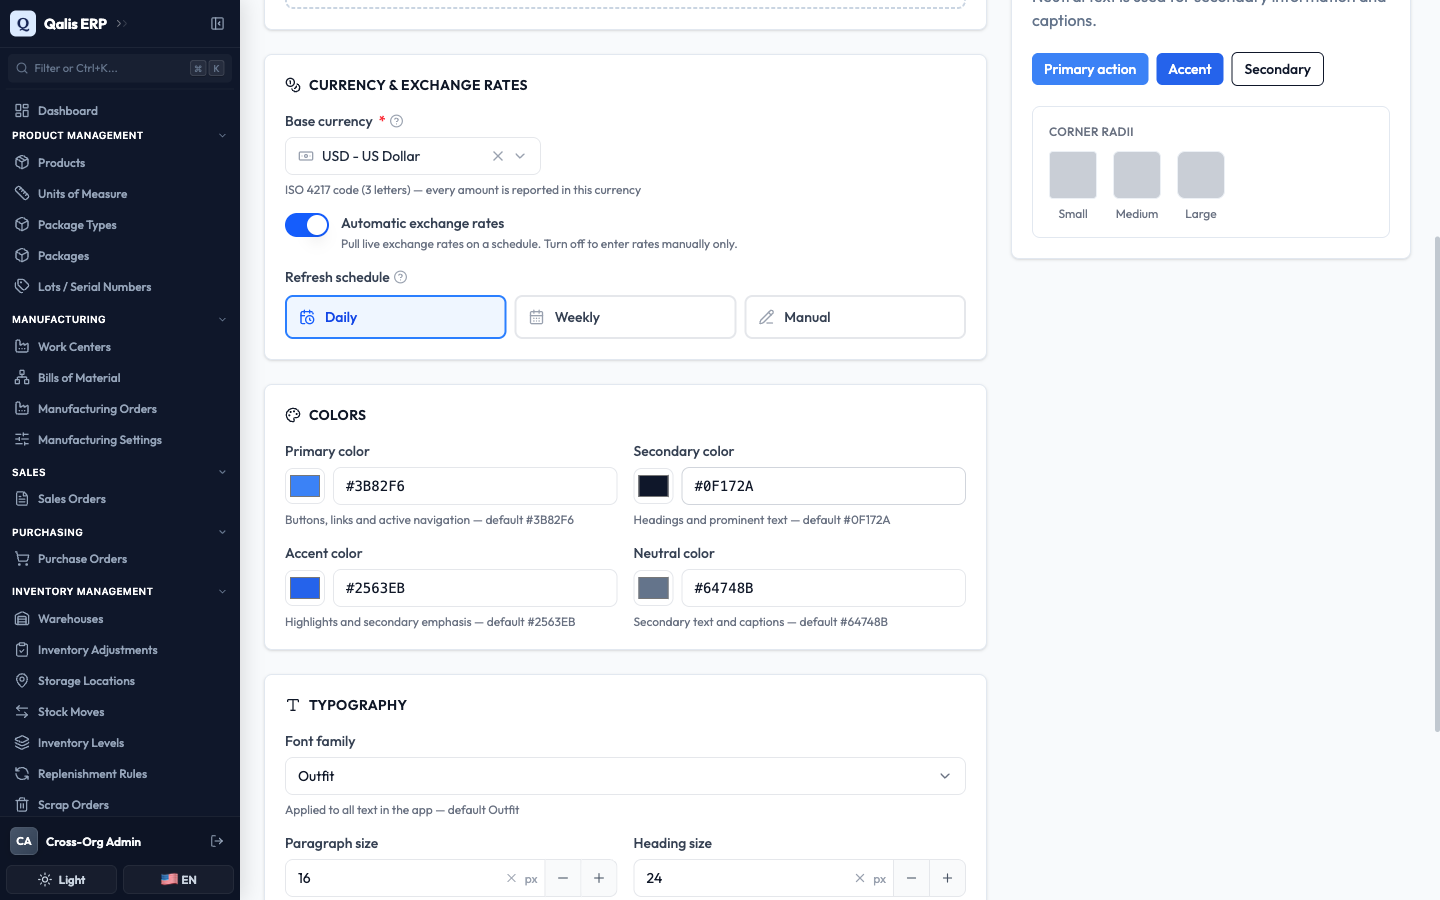
- Watch the Live preview panel on the right. It updates as you type, so you can see how your changes look before you commit to them. Nothing is applied until you save.
- Click Save settings at the top. A confirmation appears and the new theme is applied across the app right away.
Choose your base currency carefully. Once your organization creates its first purchase order, sales order, NRC, or scrap order, the base currency is locked and can no longer be changed.
Only an organization administrator or platform staff can change these settings. If the Save settings button is greyed out for you, you have view-only access, and you can ask an administrator to make the change.
Inviting members
People you invite belong to the organization and start with no access until you grant it. You invite teammates by email from the Users page in the Administration group, then give them exactly the access they need, either directly or by adding them to a team.
Access is always additive. A member's real access is the permissions assigned to them directly plus the permissions of every team they belong to. See Teams and Permissions for the full walkthrough.
How your data stays separate
Isolation is enforced deep in the system, not just hidden in the interface. Even when two organizations share the same underlying storage, every query is automatically limited to the active organization, so one organization can never read another's records. This is why switching to Beta Manufacturing above showed only that organization's modules and activity, with nothing carried over from Qualis ERP.
Good to know
- Organization: your private workspace. All your data, members, modules, and settings live inside it.
- Active organization: the one you are currently working in, shown in the top bar when you belong to more than one.
- Slug: the short, lowercase id of an organization (for example "acme-manufacturing"), shown under its name in the switcher.
- Base currency: the single currency every amount in the organization is reported in. It is locked once you create your first money document.
- Display name: an optional white-label name shown across the app in place of the organization name.
- Org admin: a member who holds every permission in the organization, now and for any module added later.
- Platform staff: Qualis operators who can work across organizations, for example to help with setup or support.